
eCalendar

User Manual
Wifi Digital Calendar for Family Schedules
Cautions and Precautions
For indoor use only.
To avoid risk of fire or electric shock, do not expose the unit to moisture or condensation.
To avoid overheating, do not block the ventilation holes on the back of the Digital Calendar.
Keep the Digital Calendar out of direct sunlight.
Do not dismantle the Digital Calendar. There is a risk of electric shock and there are no user-serviceable parts inside. Dismantling the Digital Calendar will void your warranty.
Cleaning the LCD Screen
Treat the screen carefully. Because the screen of the Digital Calendar is made of glass and it would be broken or scratched easily.
If fingerprints or dust accumulate on the LCD screen, we recommend using a soft, non-abrasive cloth such as a camera lens cloth to clean the LCD screen.
Moisten the cleaning cloth with the cleaning solution and apply the cloth to the screen.
WARNING:
To reduce the risk of electric shock, do not expose the unit to rain or excessive moisture.
This device is intended for private use and not suitable for commercial use!
Introduction
Congratulations on your eCalendar purchase! We are excited to help you lighten the mental load of keeping track of everyone's busy schedules so you can get back to enjoying what matters most to your family. We are always looking to improving and evolve our product, new features will be downloaded automatically to your device or mobile app, and you'll be notified through emails, push notifications, and in-app messages.
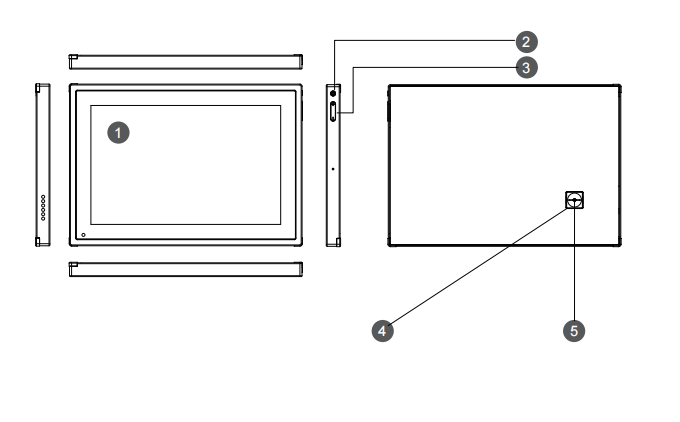
10.1" Digital Calendar Overview
1. Digital Calendar
2. Power On/Off Button
3. Volume up and down
4. Bracket
5. DC IN
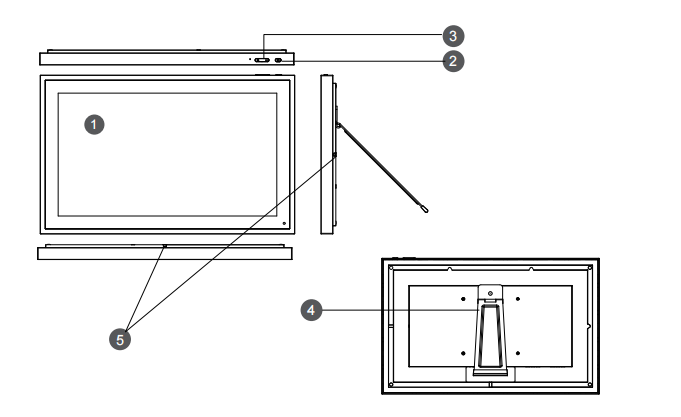
15.6" Digital Calendar Overview
1. Digital Calendar
2. Power On/Off Button
3. Volume up and down
4. Bracket
5. DC IN
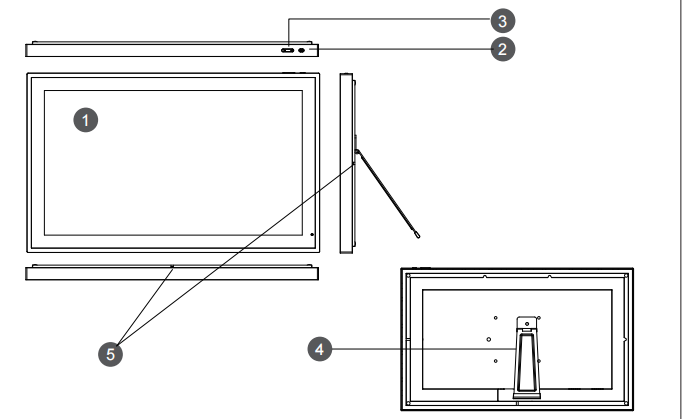
21.5" Digital Calendar Overview
1. Digital Calendar
2. Power On/Off Button
3. Volume up and down
4. Bracket
5. DC IN
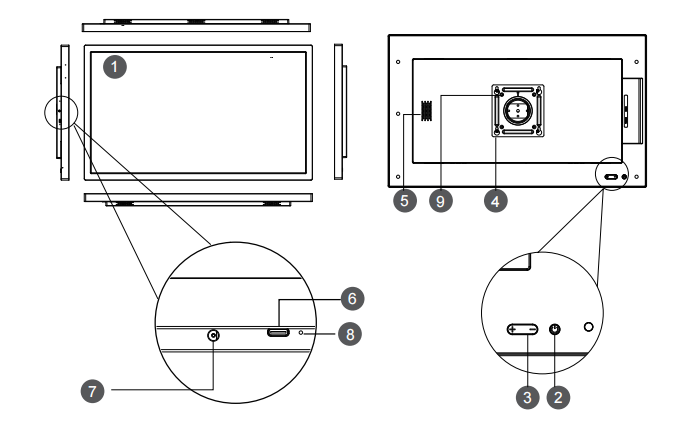
24" Digital Calendar Overview
1. Digital Calendar
2. Power On/Off Button
3. Volume up and down
4. Rotate Bracket
5. Speaker
6. TYPE-C
7. DC IN
8. Upgrade Hole
9. Vesa Hole
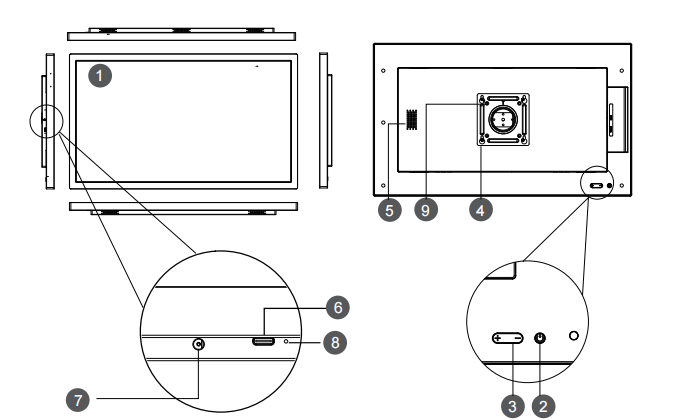
27" Digital Calendar Overview
1. Digital Calendar
2. Power On/Off Button
3. Volume up and down
4. Rotate Bracket
5. Speaker
6. TYPE-C
7. DC IN
8. Upgrade Hole
9. Vesa Hole
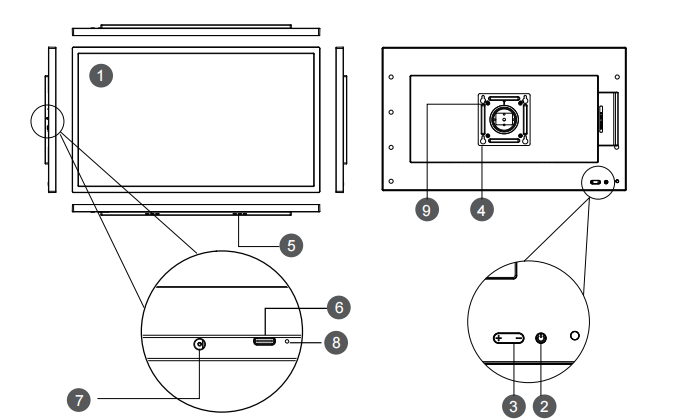
32" Digital Calendar Overview
1. Digital Calendar
2. Power On/Off Button
3. Volume up and down
4. Rotate Bracket
5. Speaker
6. TYPE-C
7. DC IN
8. Upgrade Hole
9. Vesa Hole
2. Getting Started
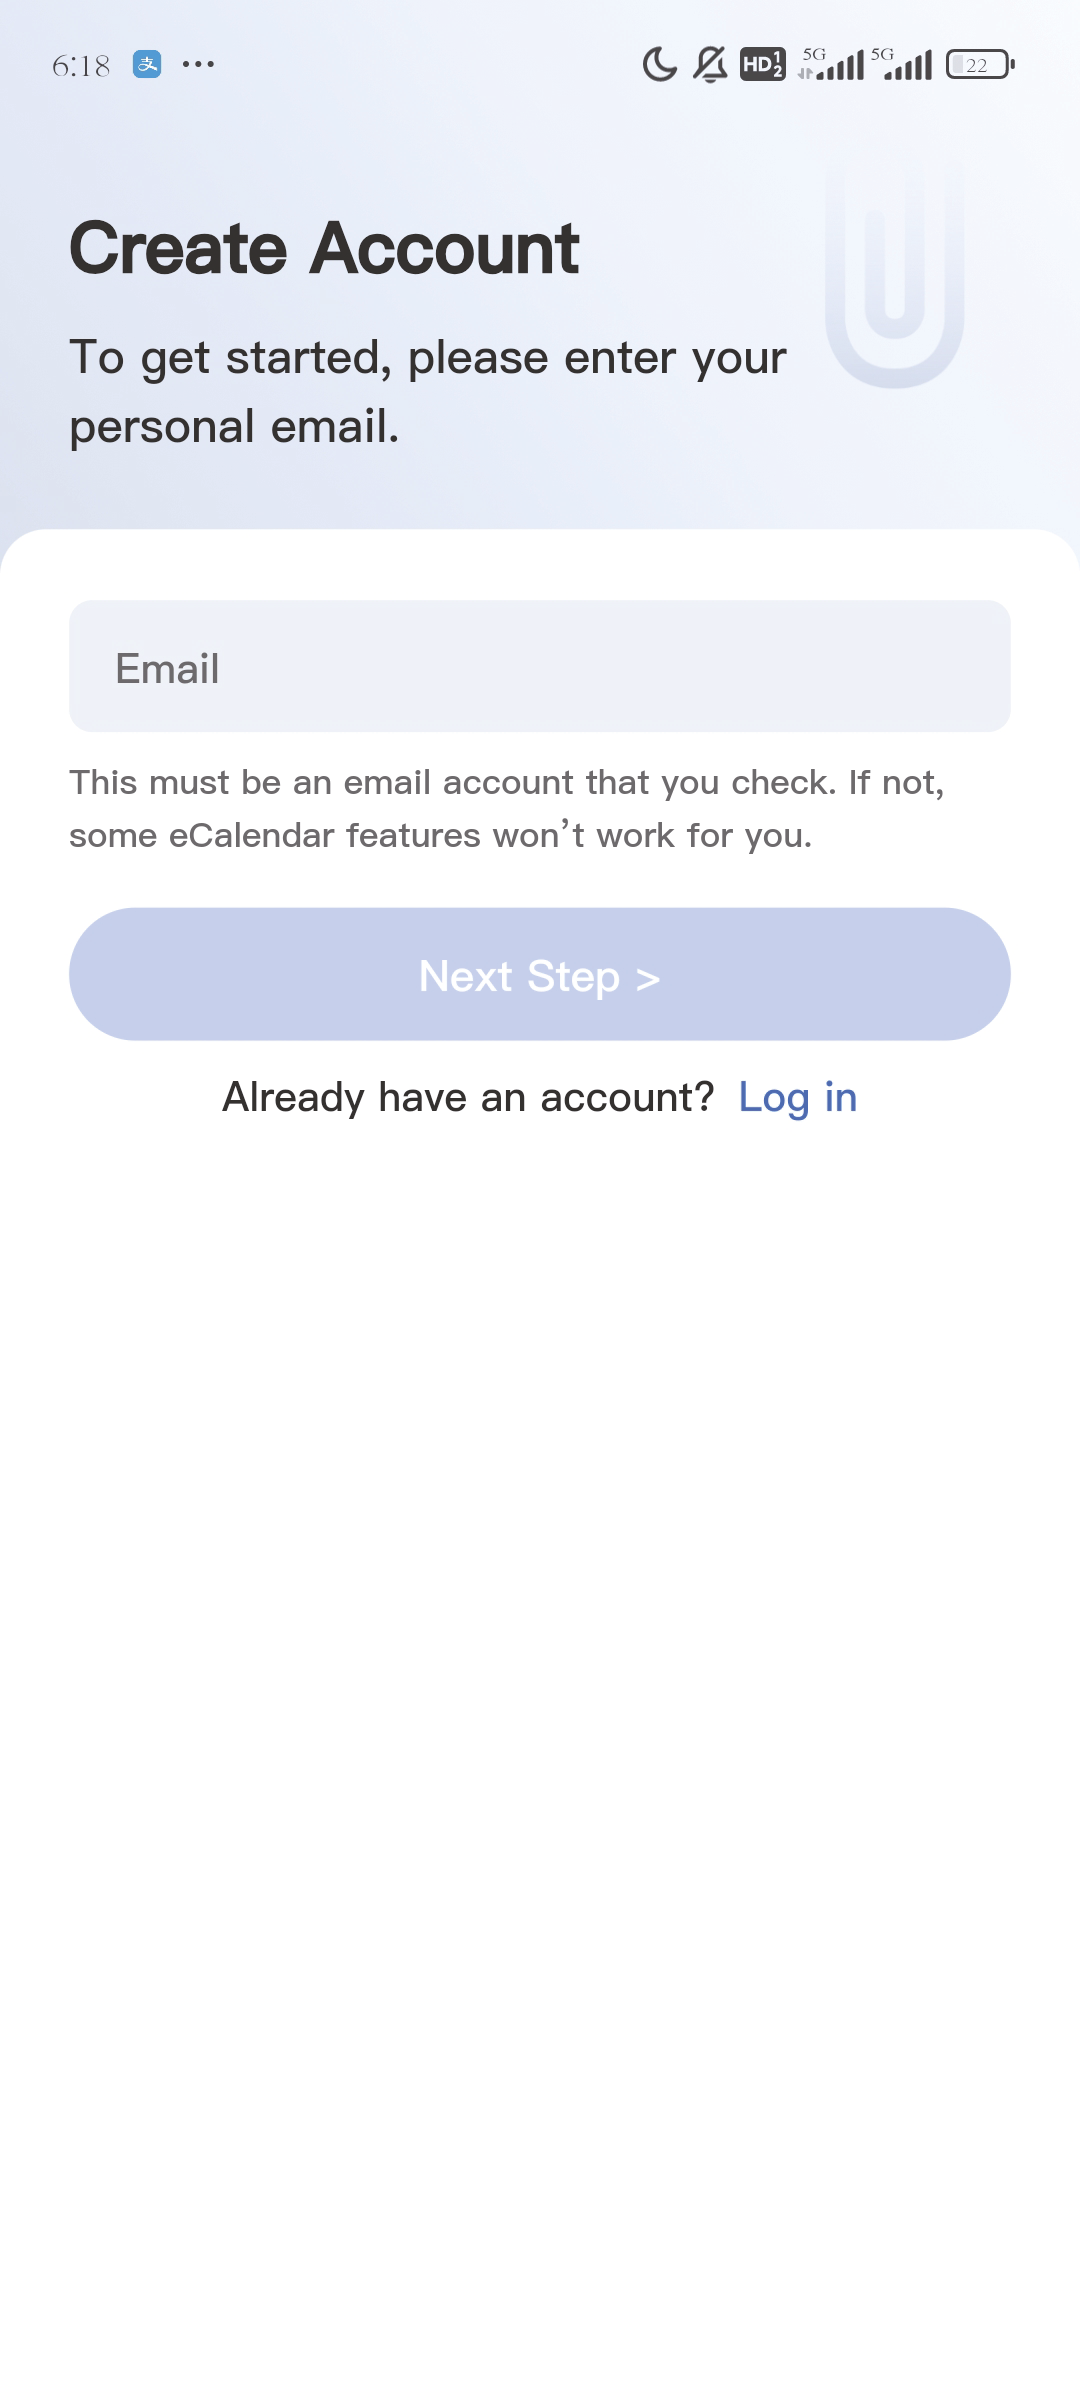
2.1.1 Get the App and Create Account
You'll need the free eCalendar app to use the features of your eCalendar to their full potential. Download the app on Google Play or APP Store and get started.

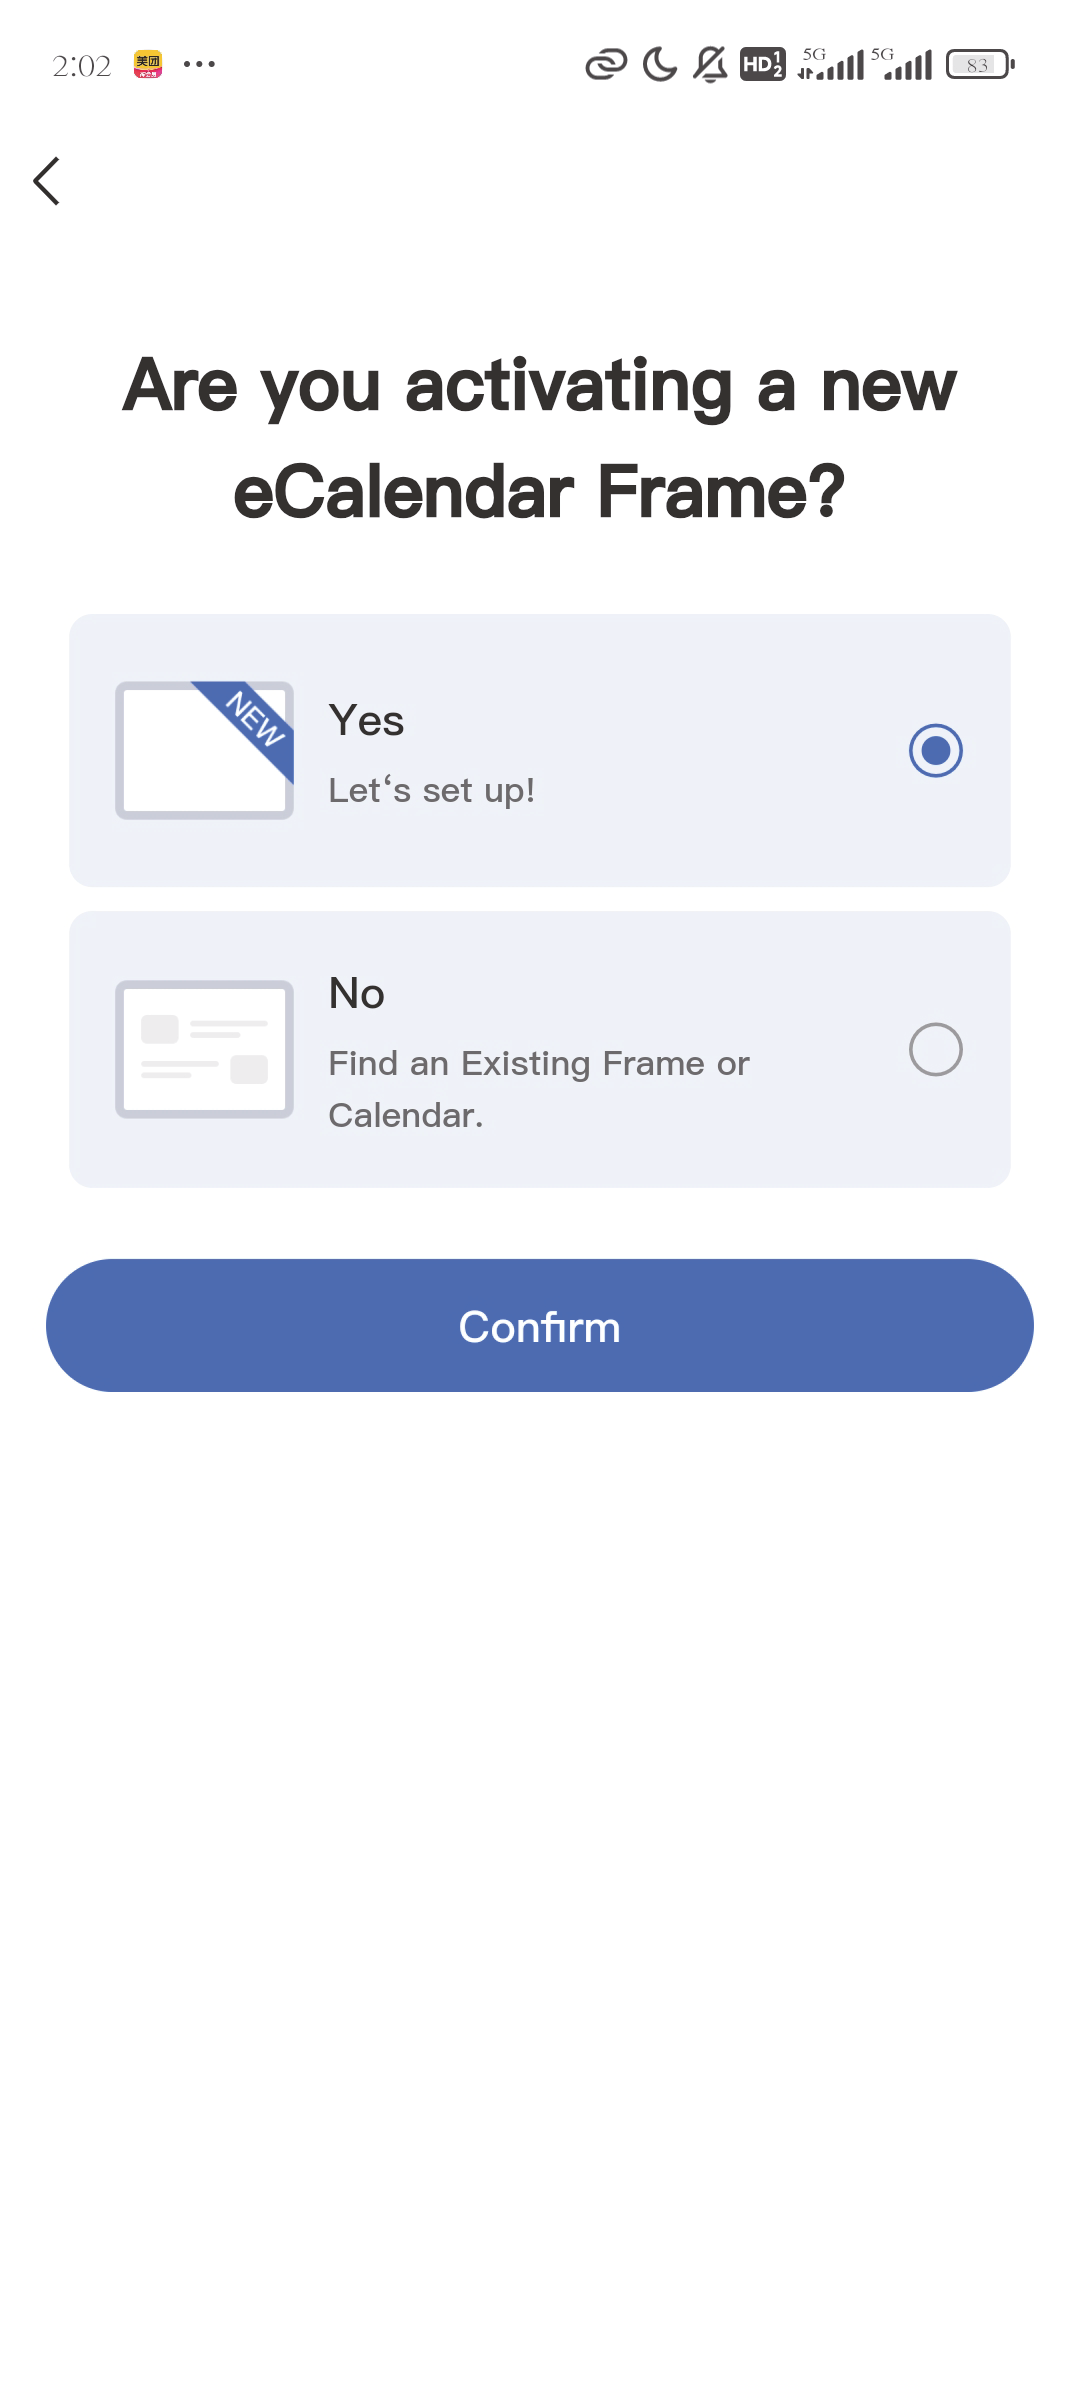
2.1.2 Initial Setup on Device
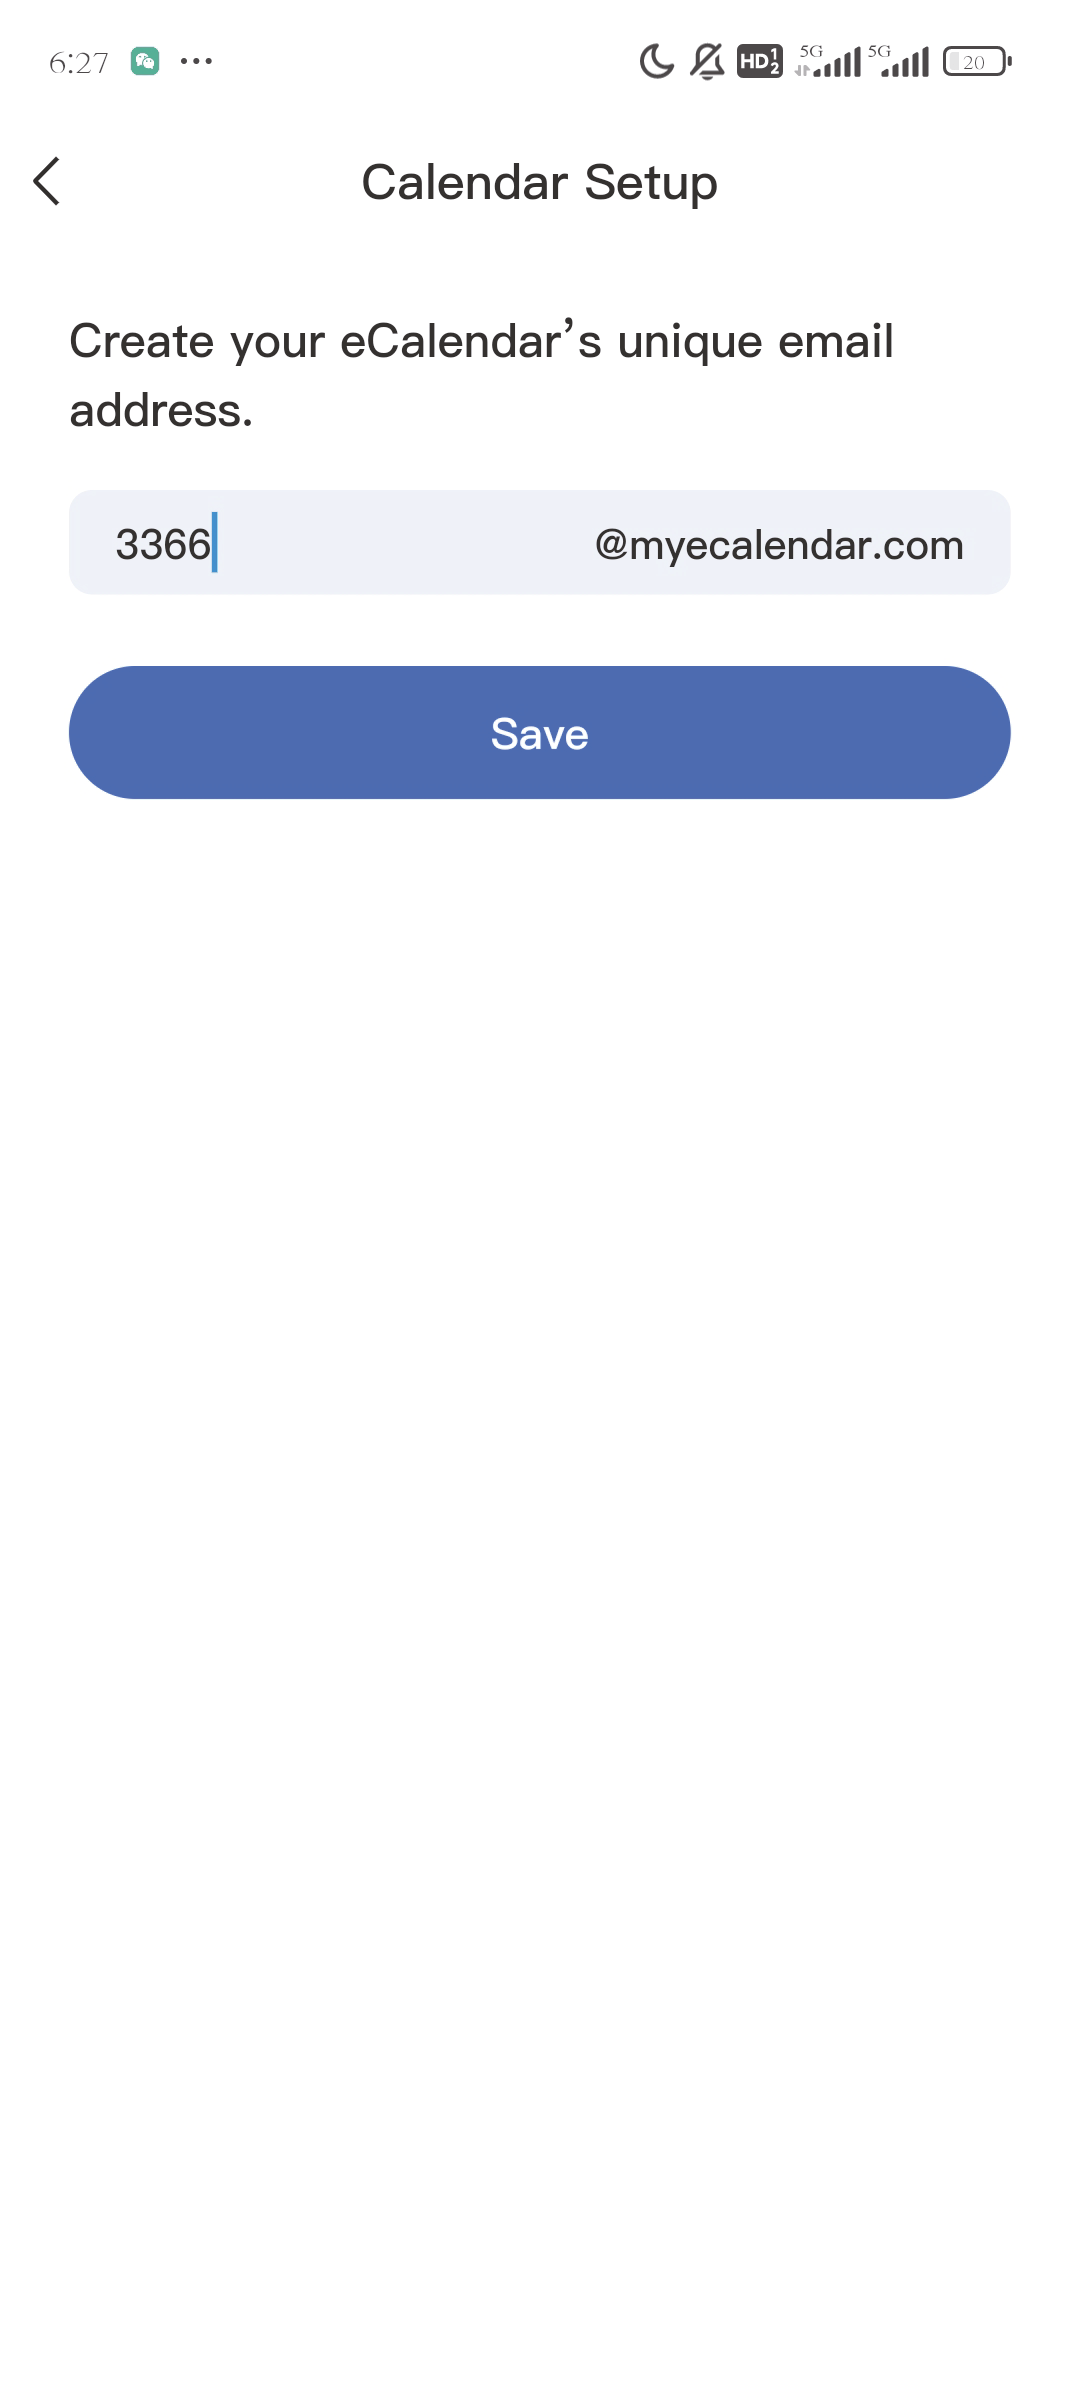
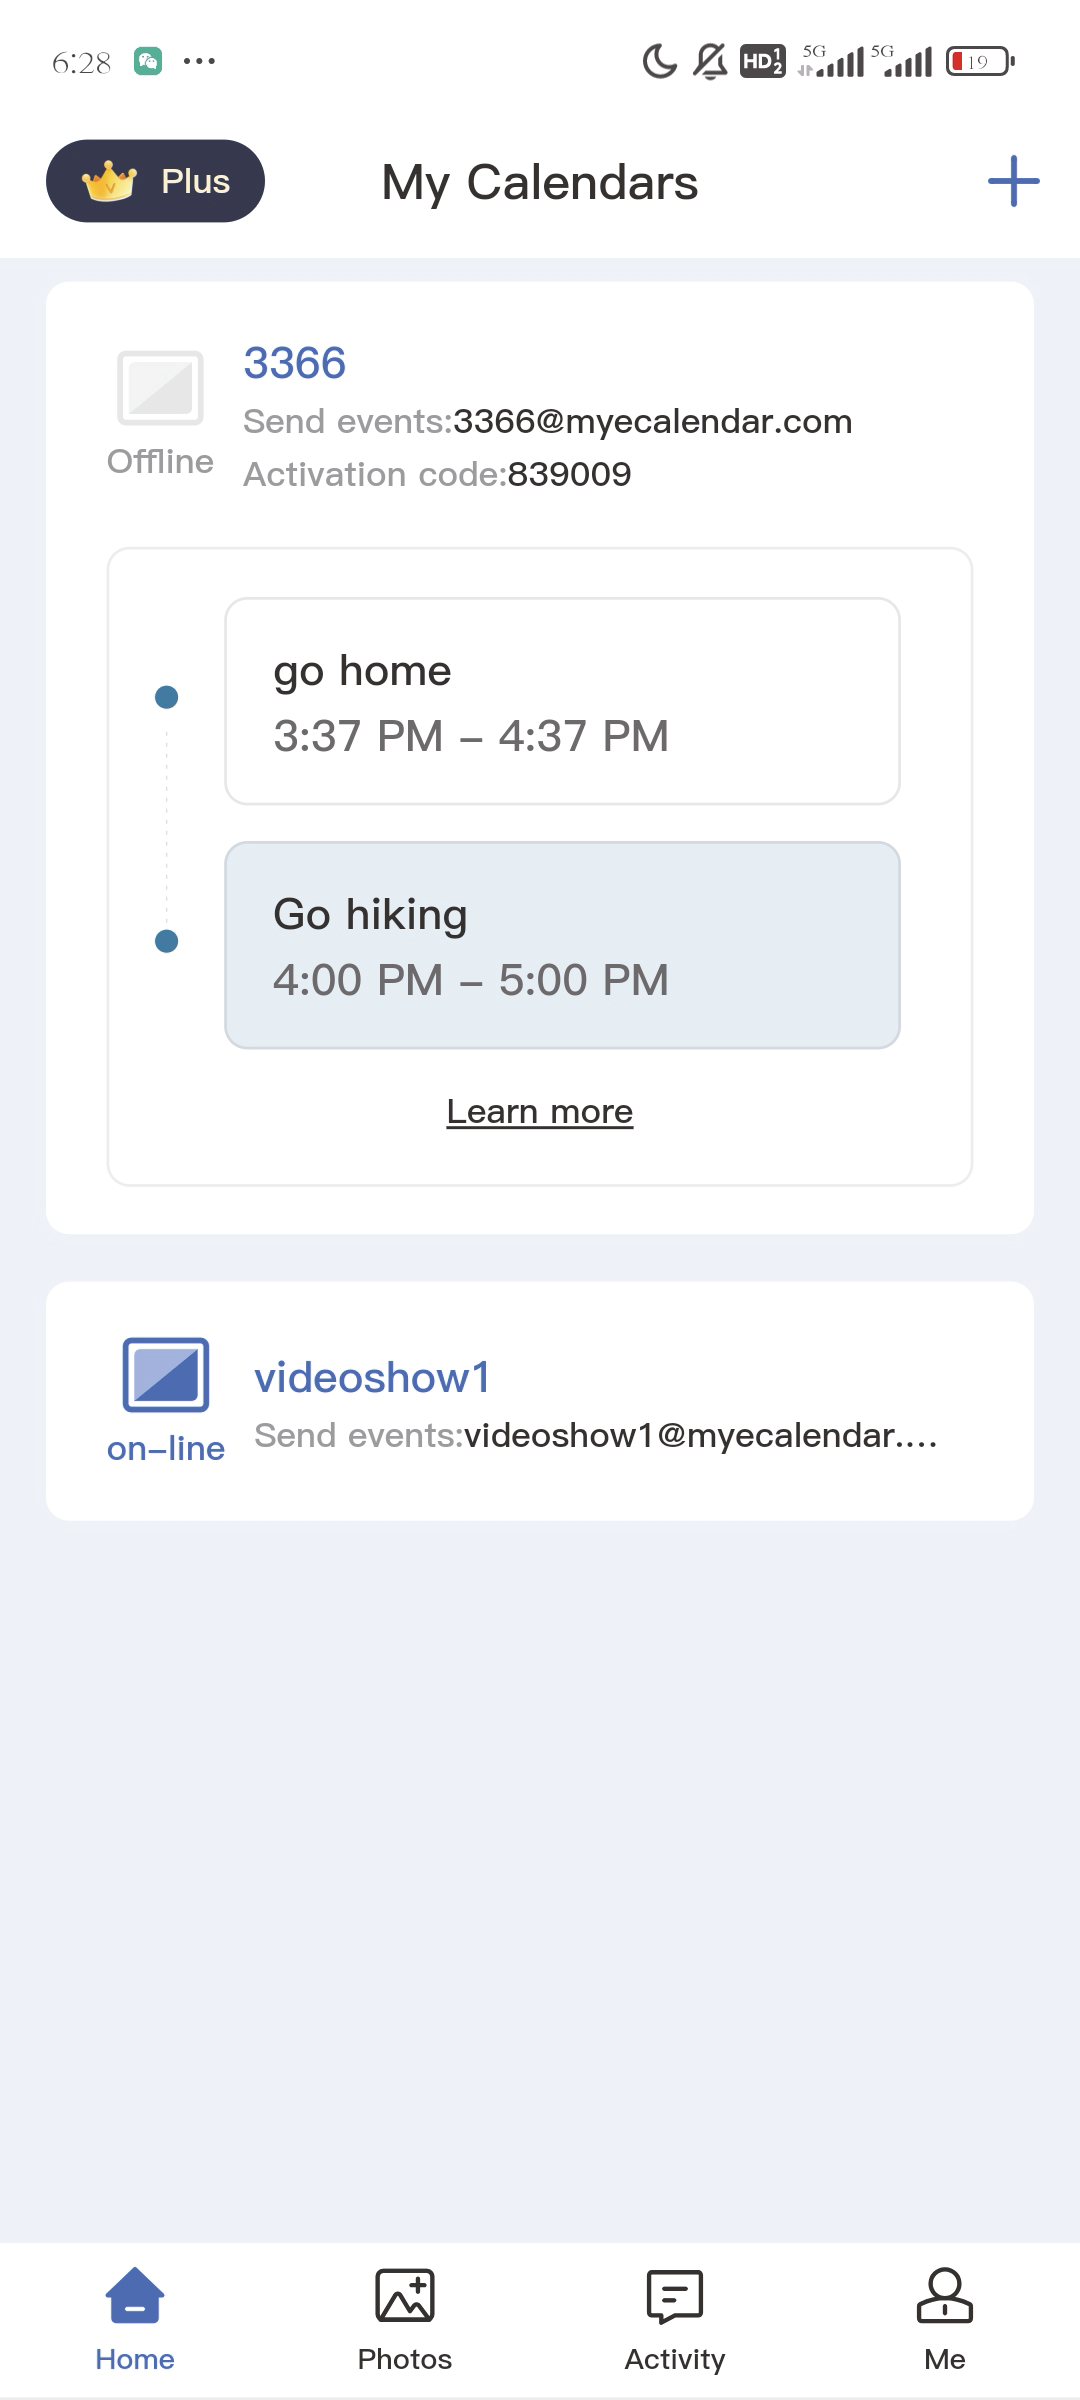
Turn on your eCalendar, select (your preferred) language, connect to wifi and choose the time zone and city, then enter your 6-digit activation code to get started. (PS:The weather function is activated only after you select the city)

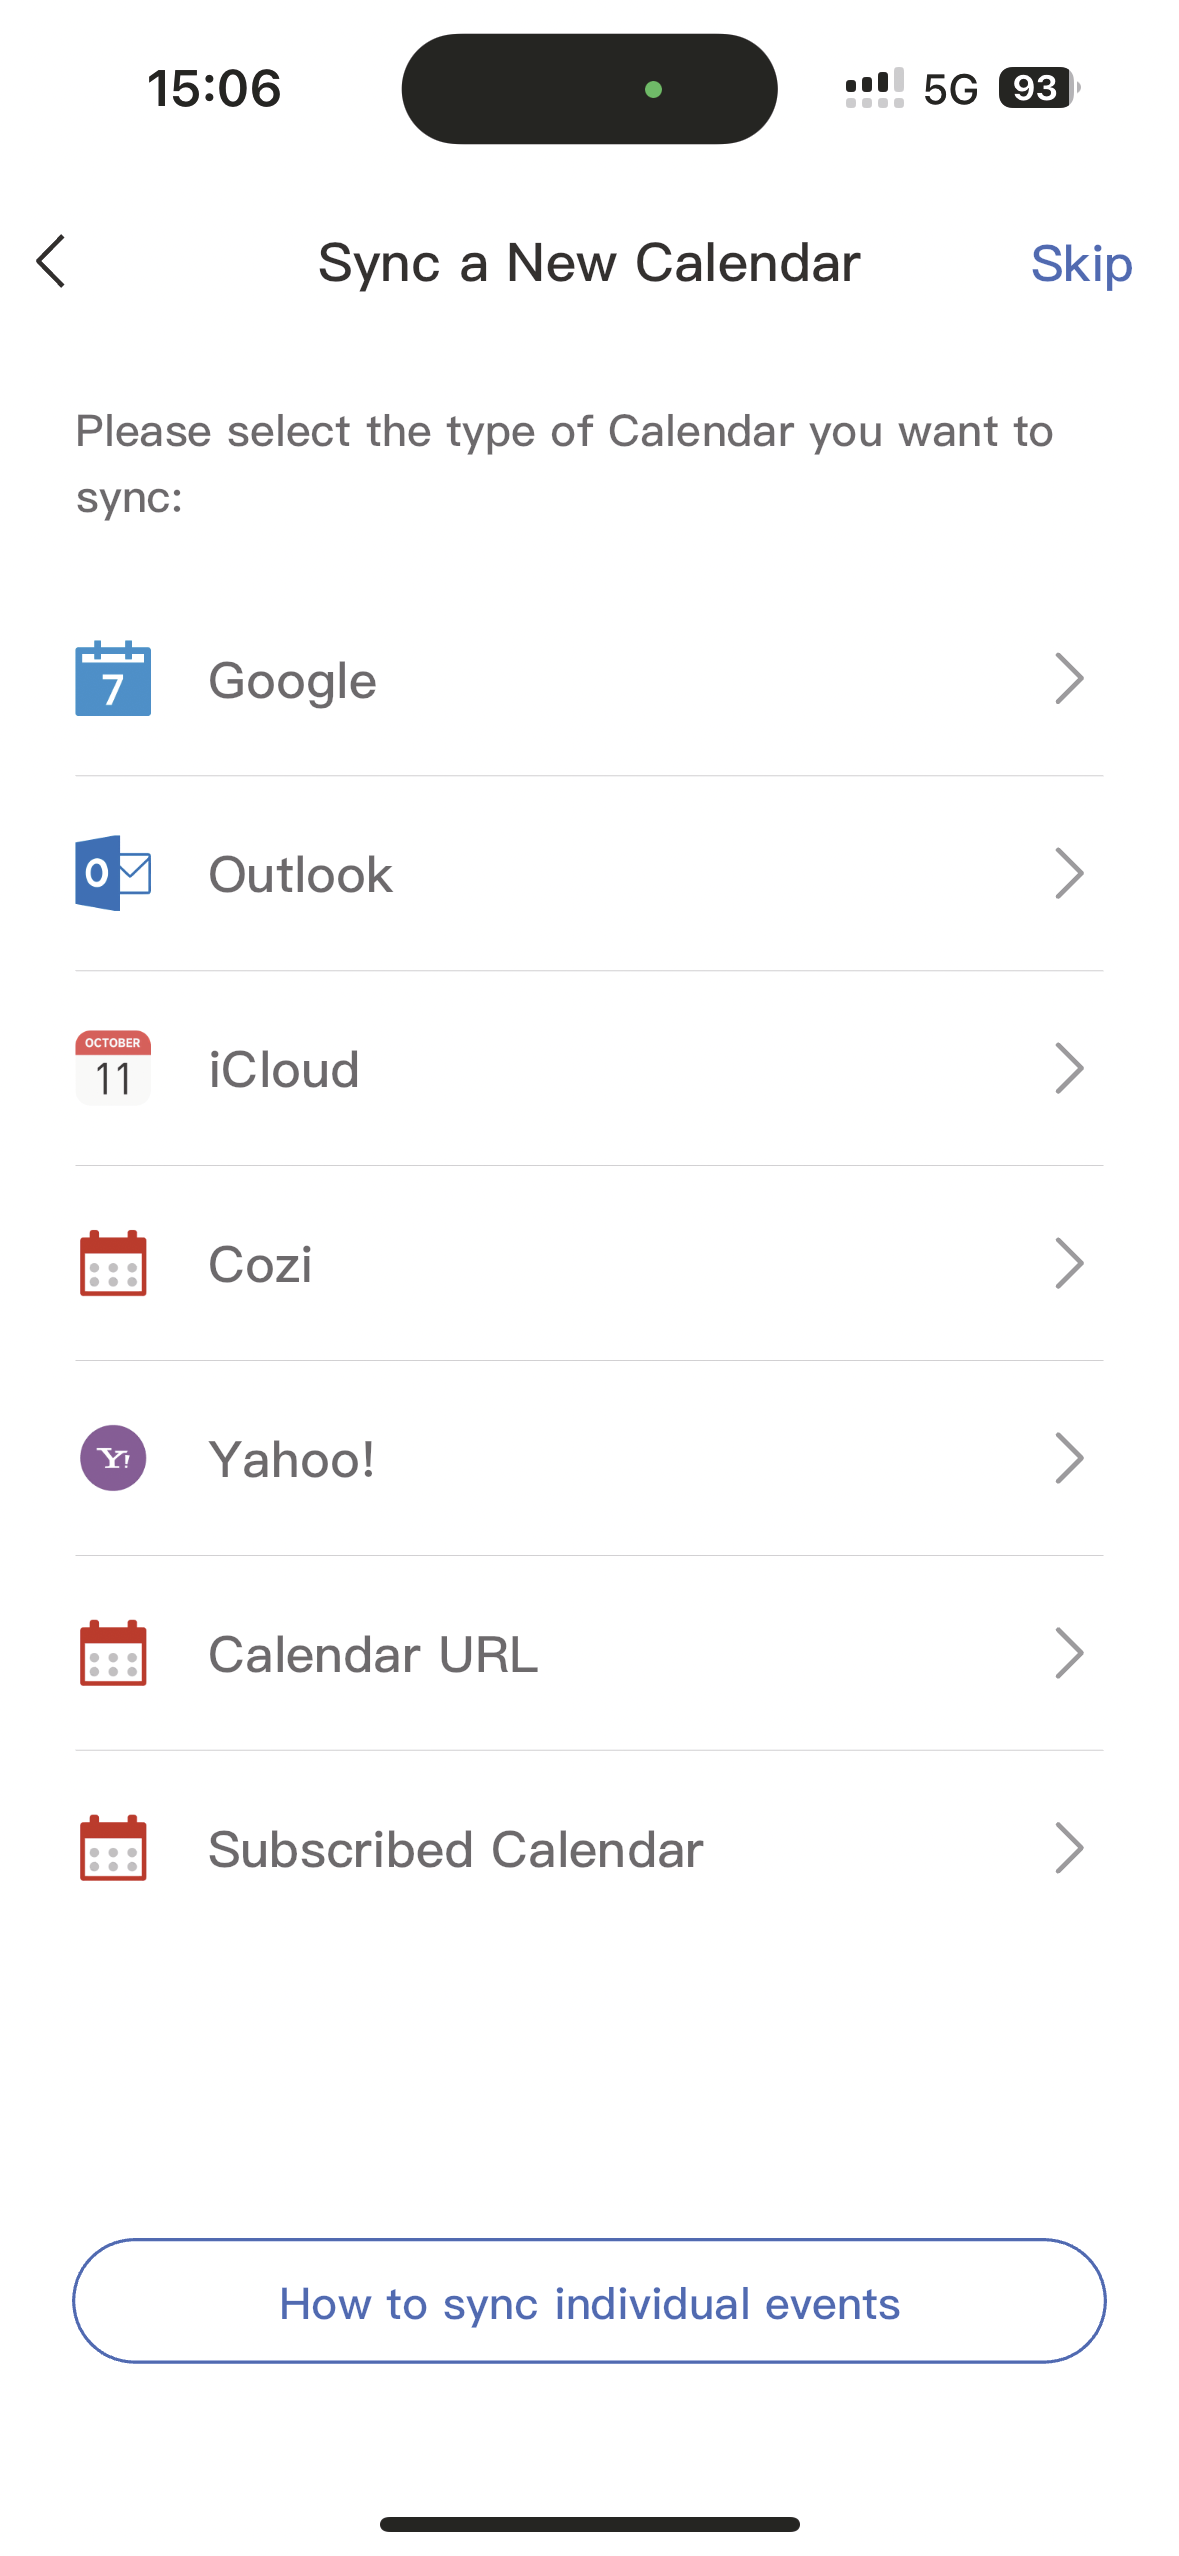
2.2 Syncing a New Calendar
Syncing can only be done through the app. When you sync a source calendar, (such as Google, iCloud, Outlook) with eCalendar any changes on your source calendar will automatically show up on the digital calendar.
- Open Sync on the home screen.
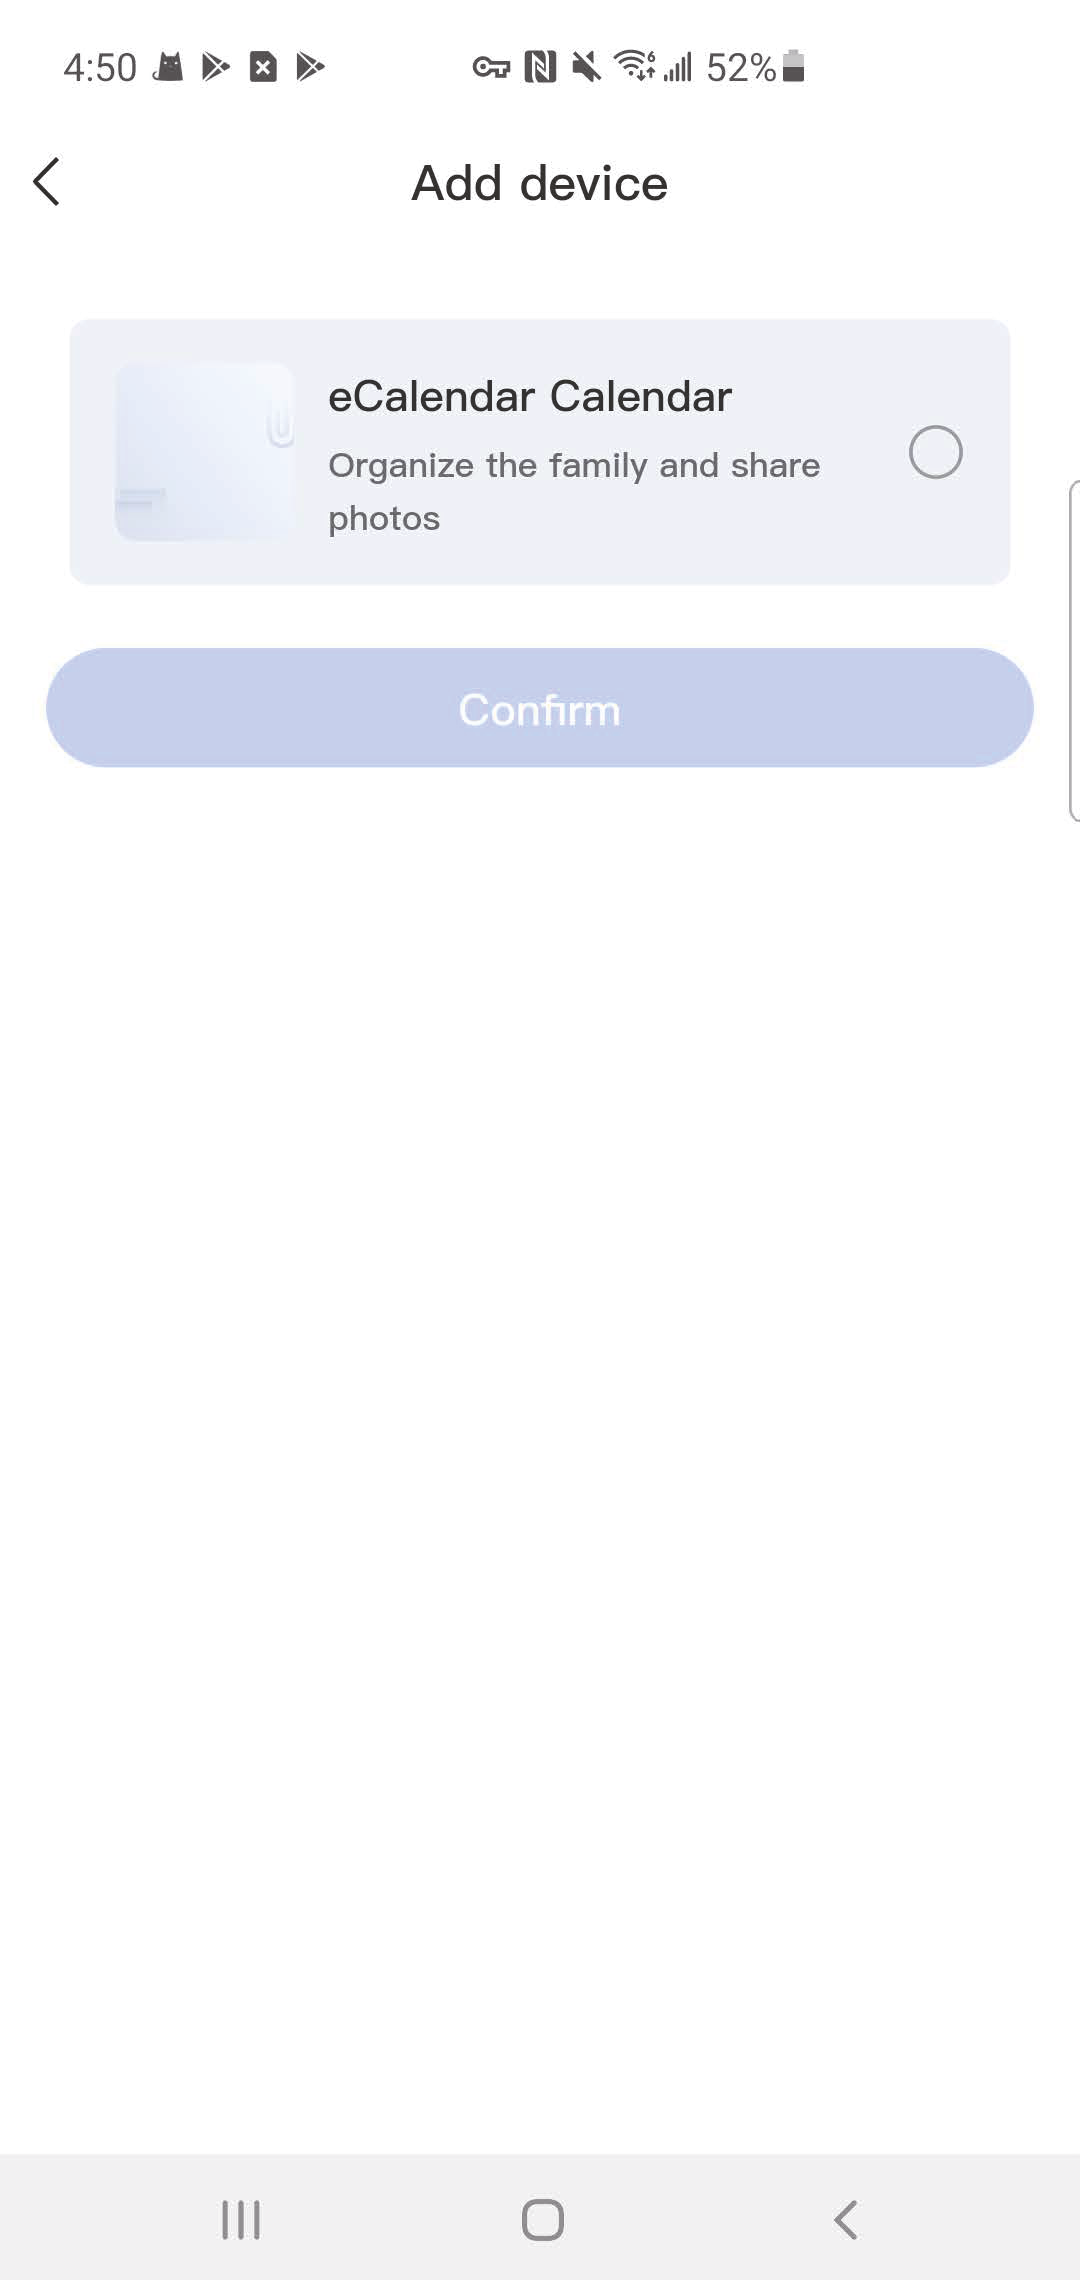
- Select "Sync a New Calendar".
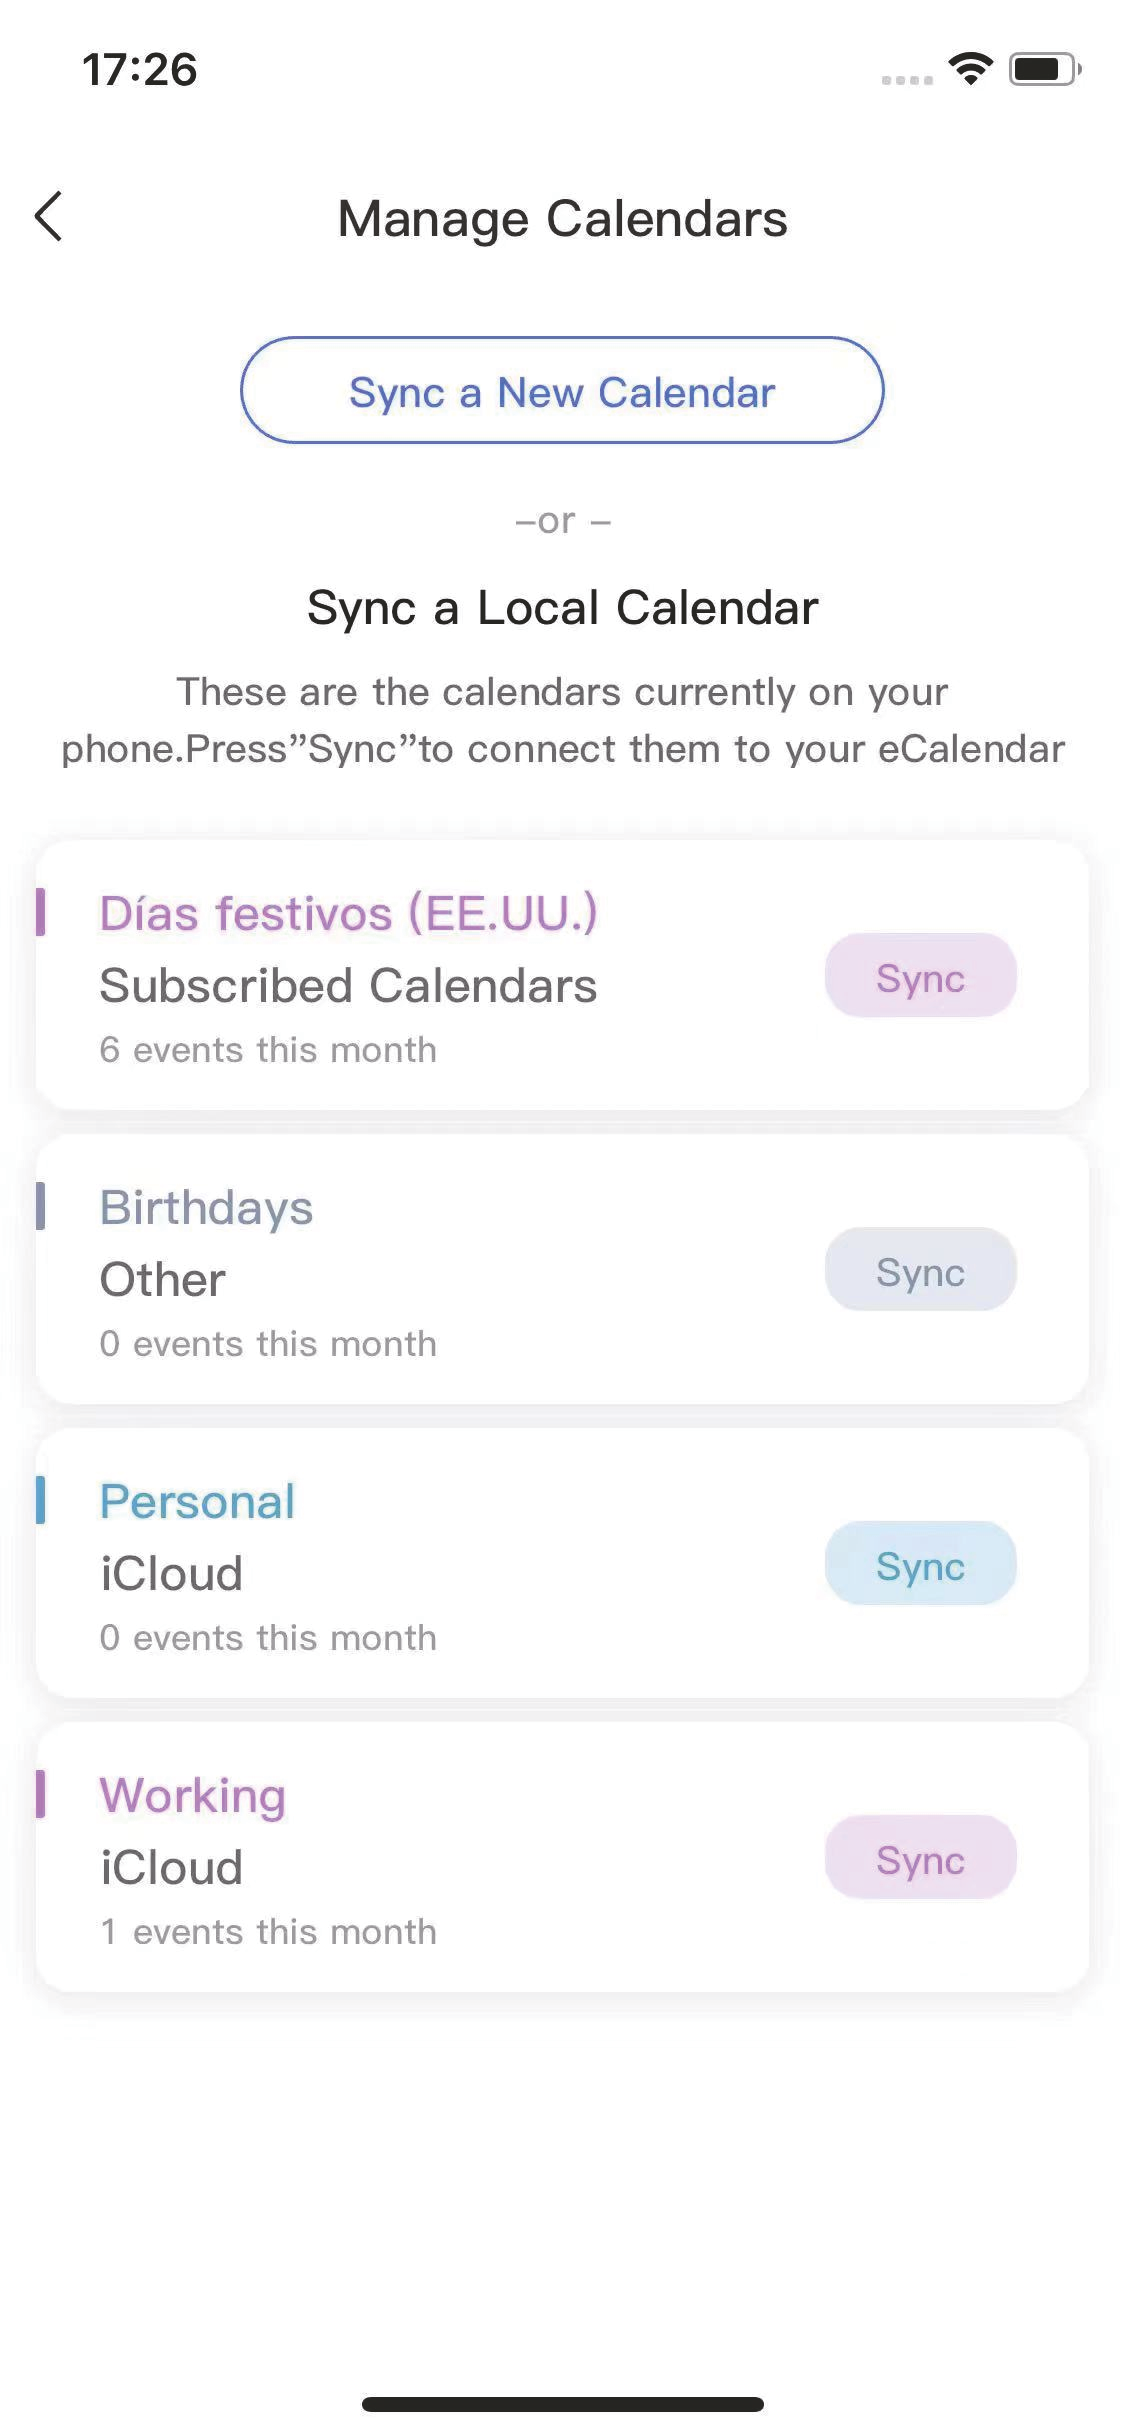
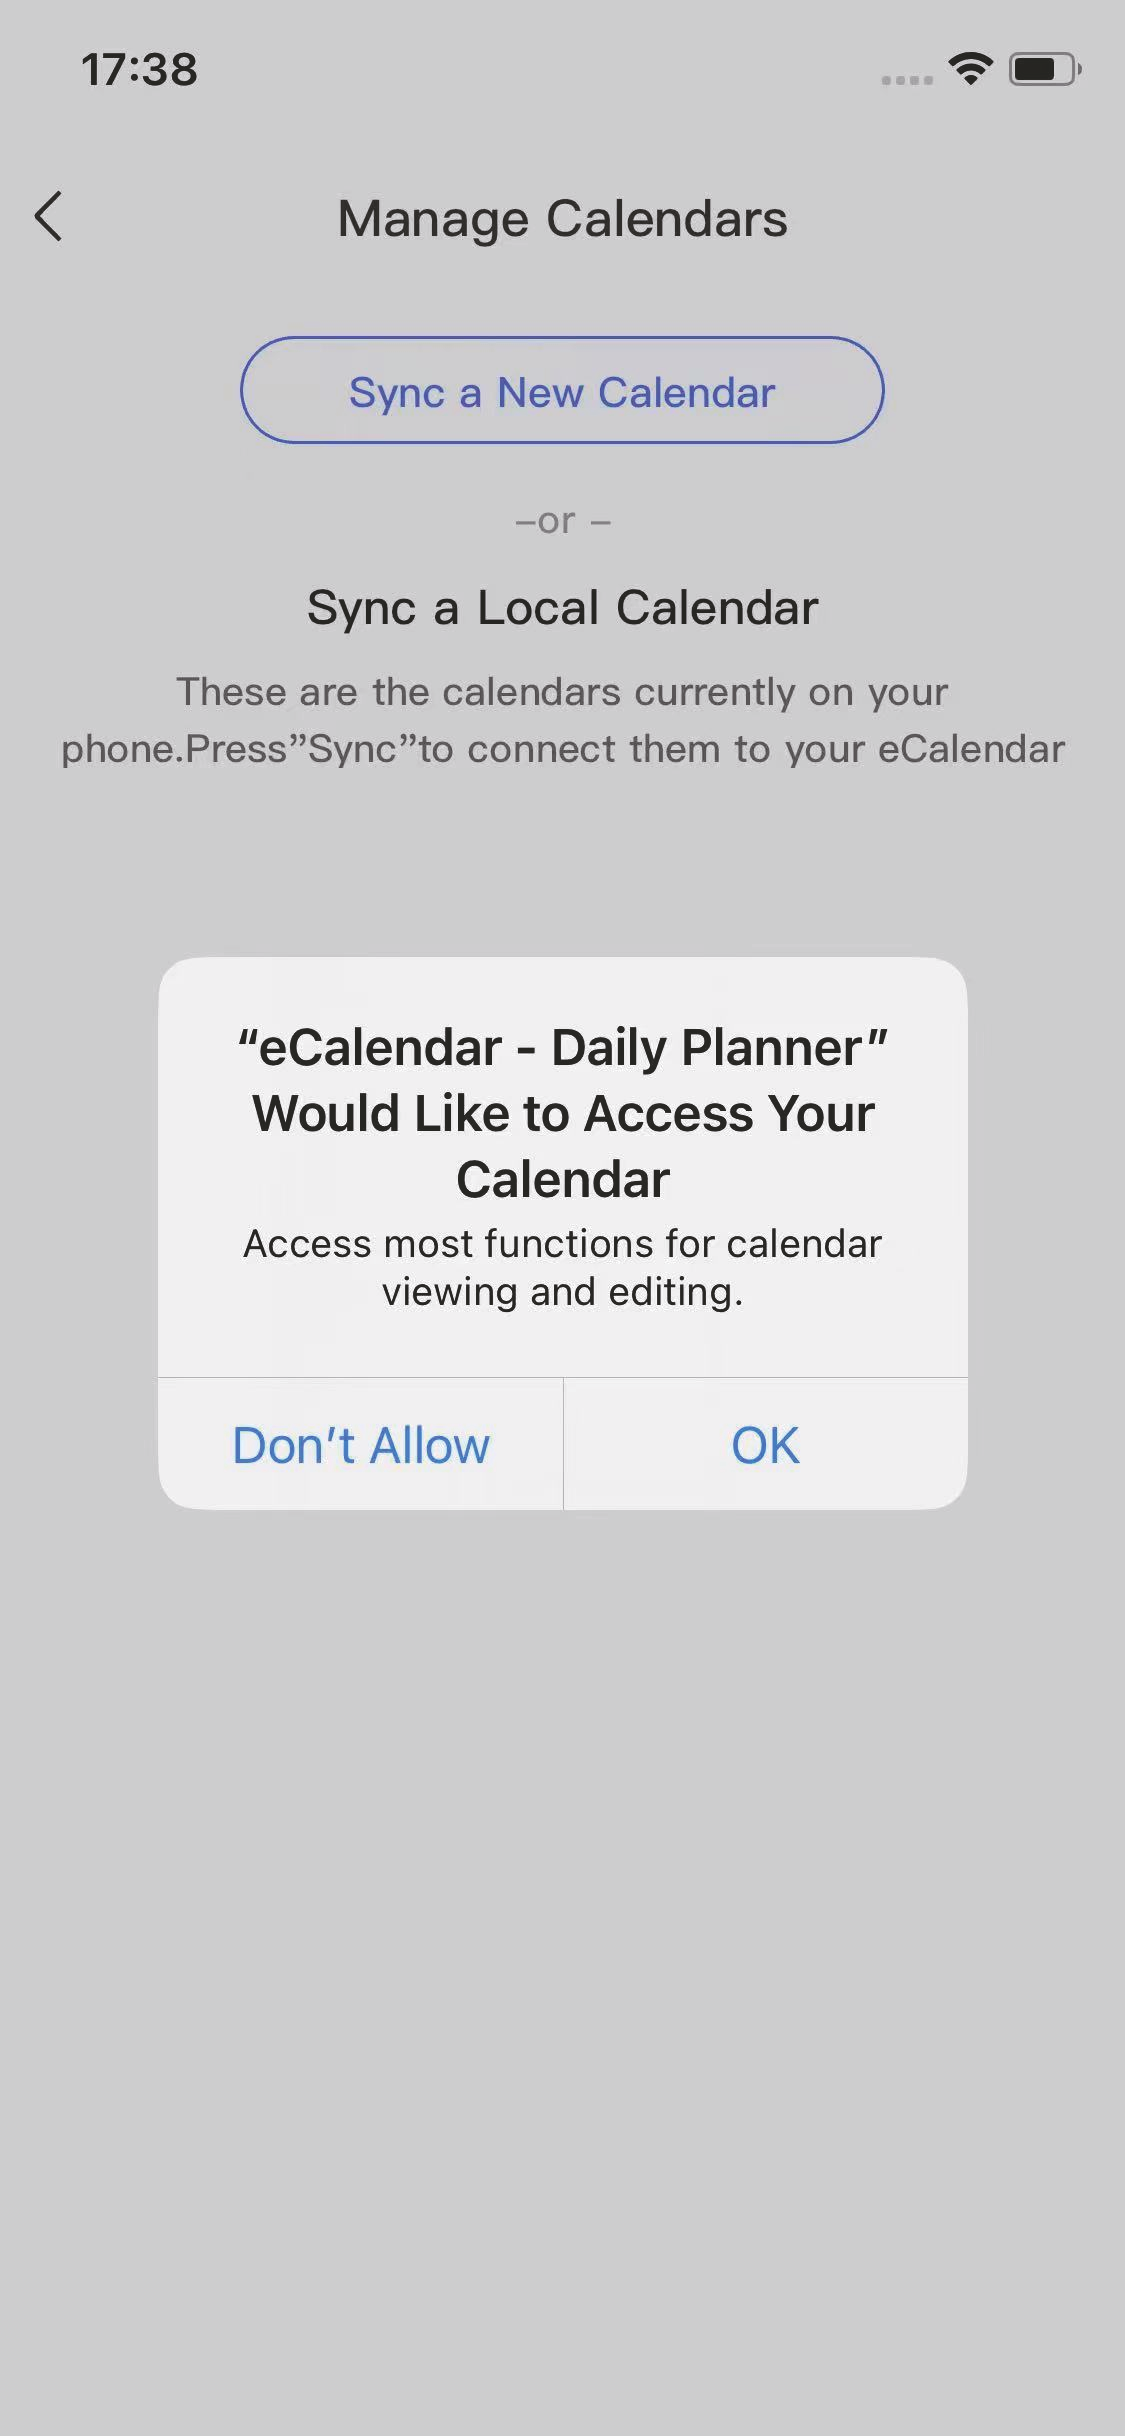
2.2.1 Syncing a Local Calendar on Your Phone
- Please first have access to a local calendar on your iPhone, not available on Android phones
- Choose a local calendar and press Sync to start the syncing process.

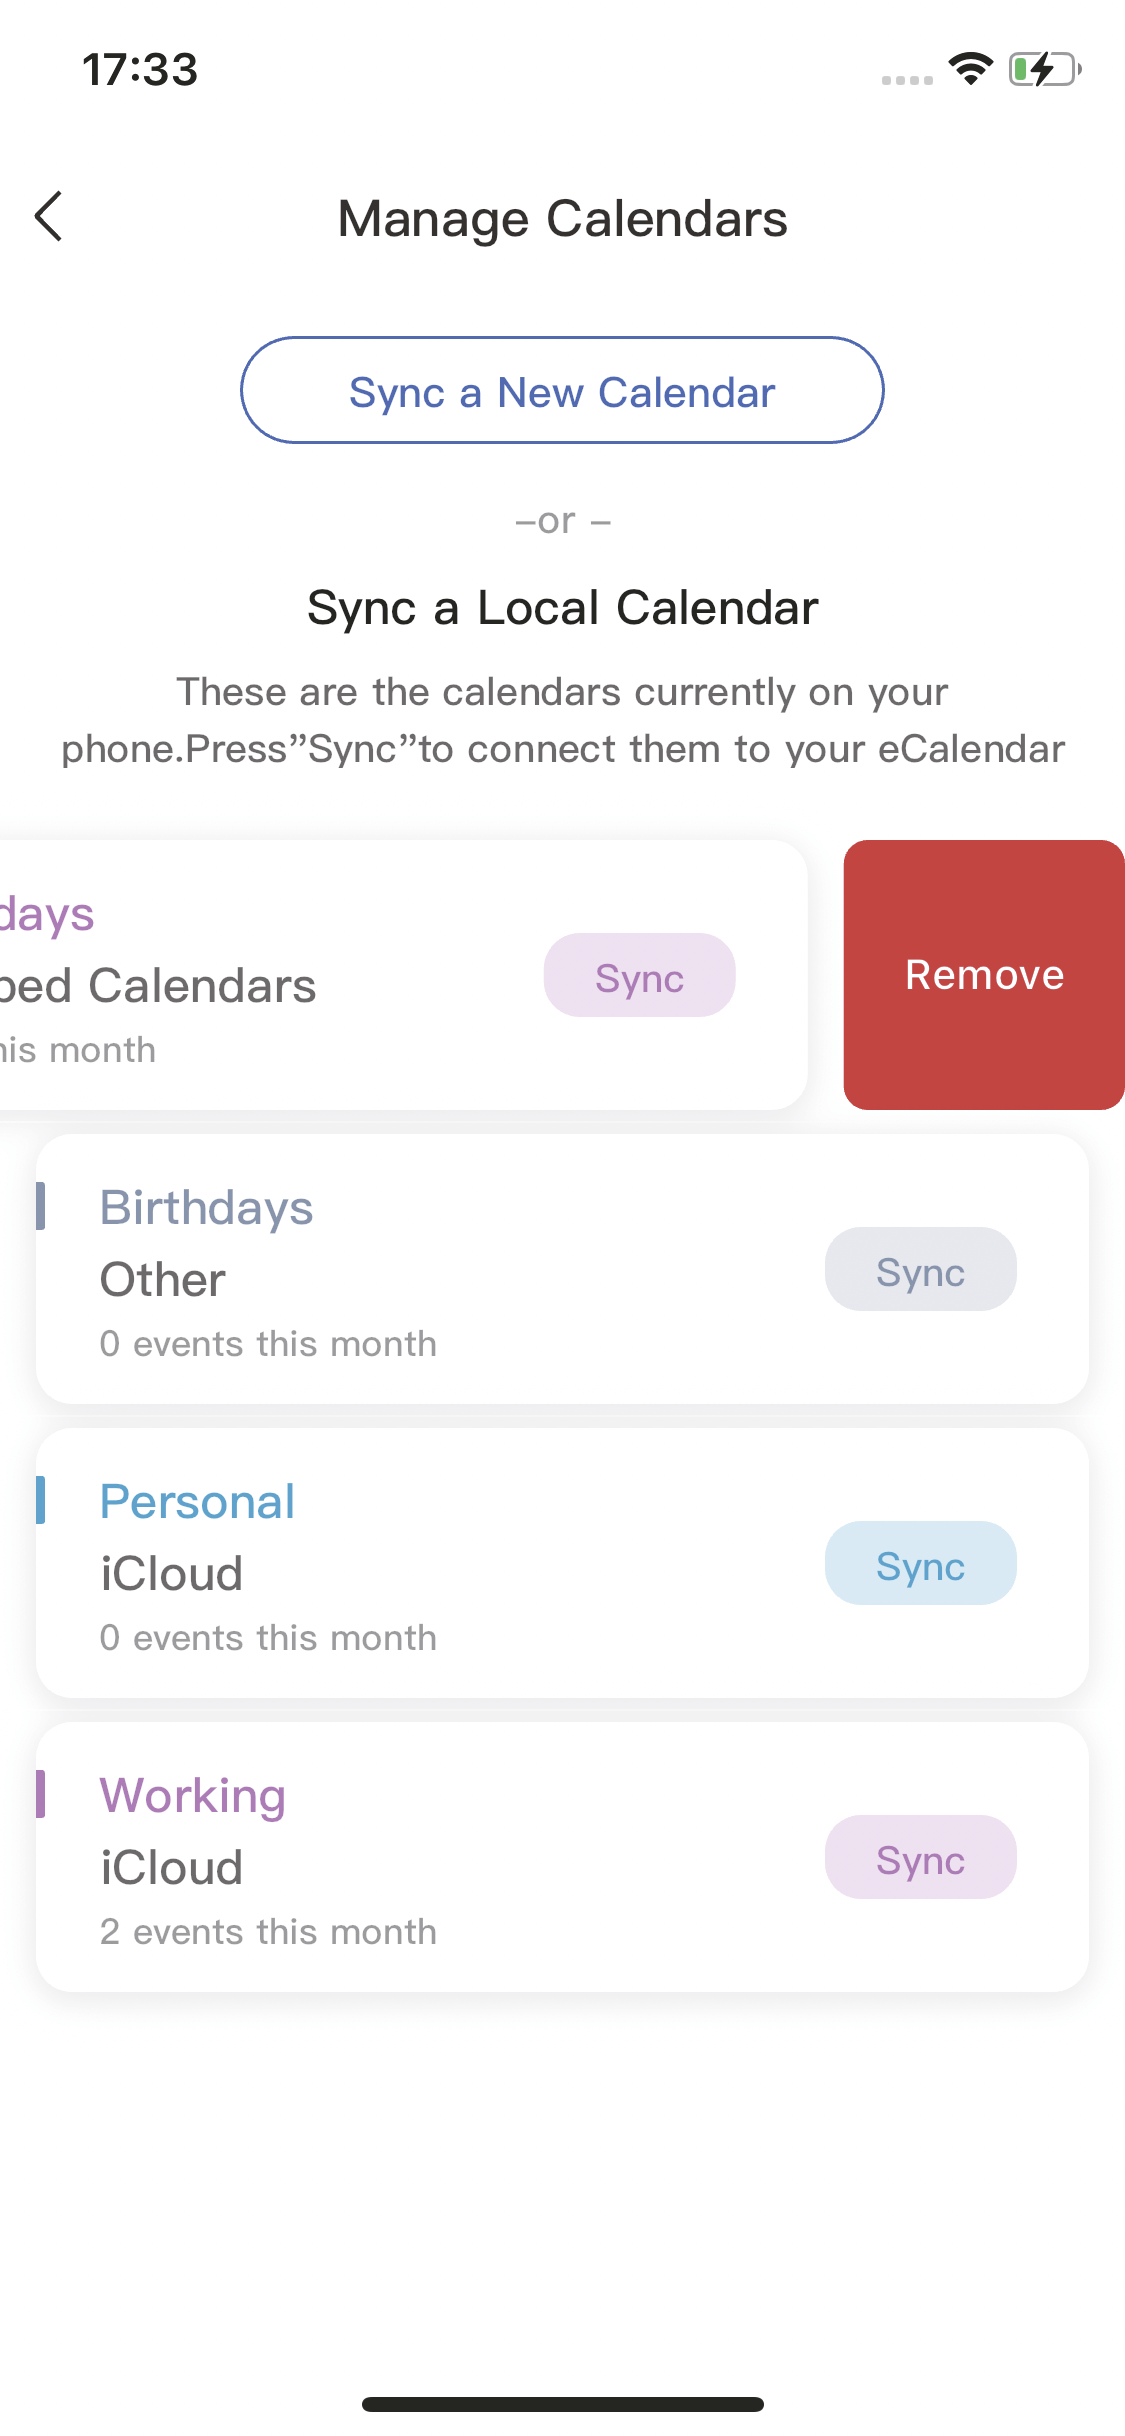
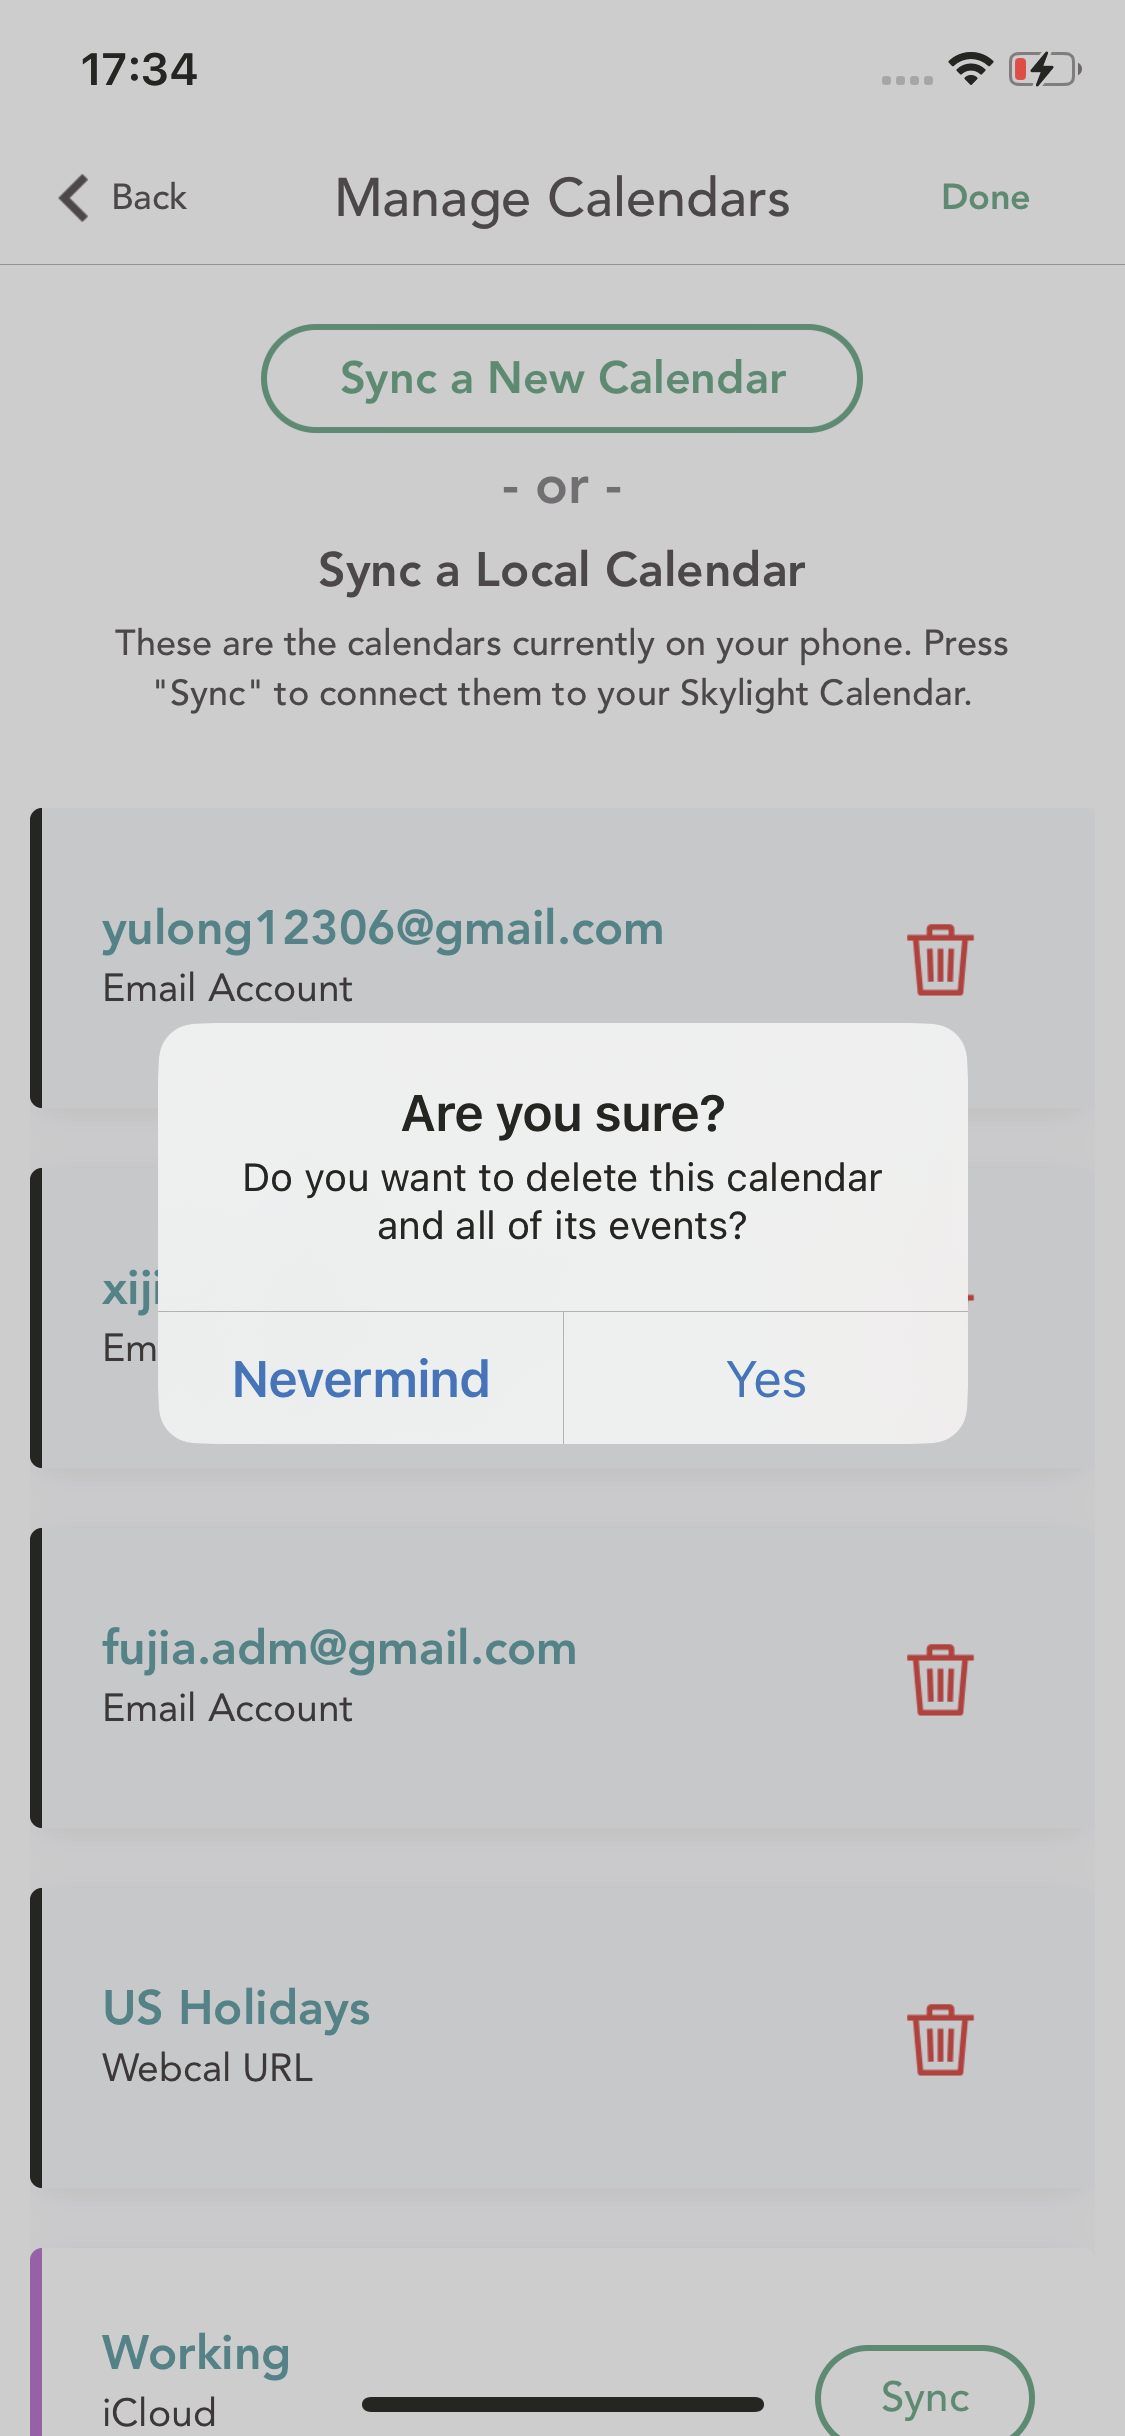
2.2.2 Deleting a Synced Calendar
- Press Edit in the top right of the Manage Calendars screen
- Press the trash icon next to the calendar you want to delete
- Press Yes.
The Category associated with your synced calendar will still remain after you remove your synced calendar. You will need to delete the Category separately.
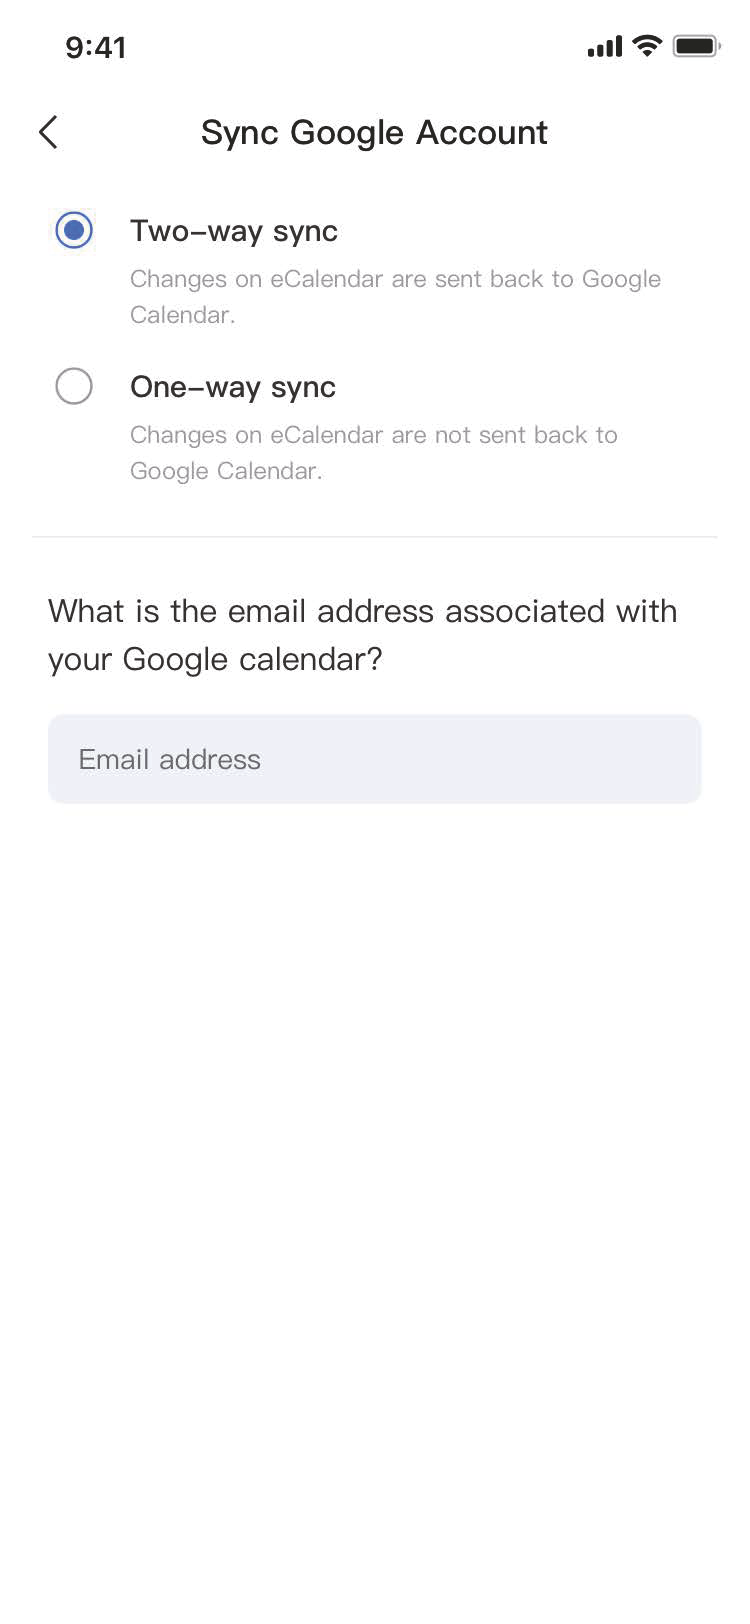
2.2.3 Syncing Google Calendar
If you’re syncing a work calendar that uses Google Workspace, select Google.
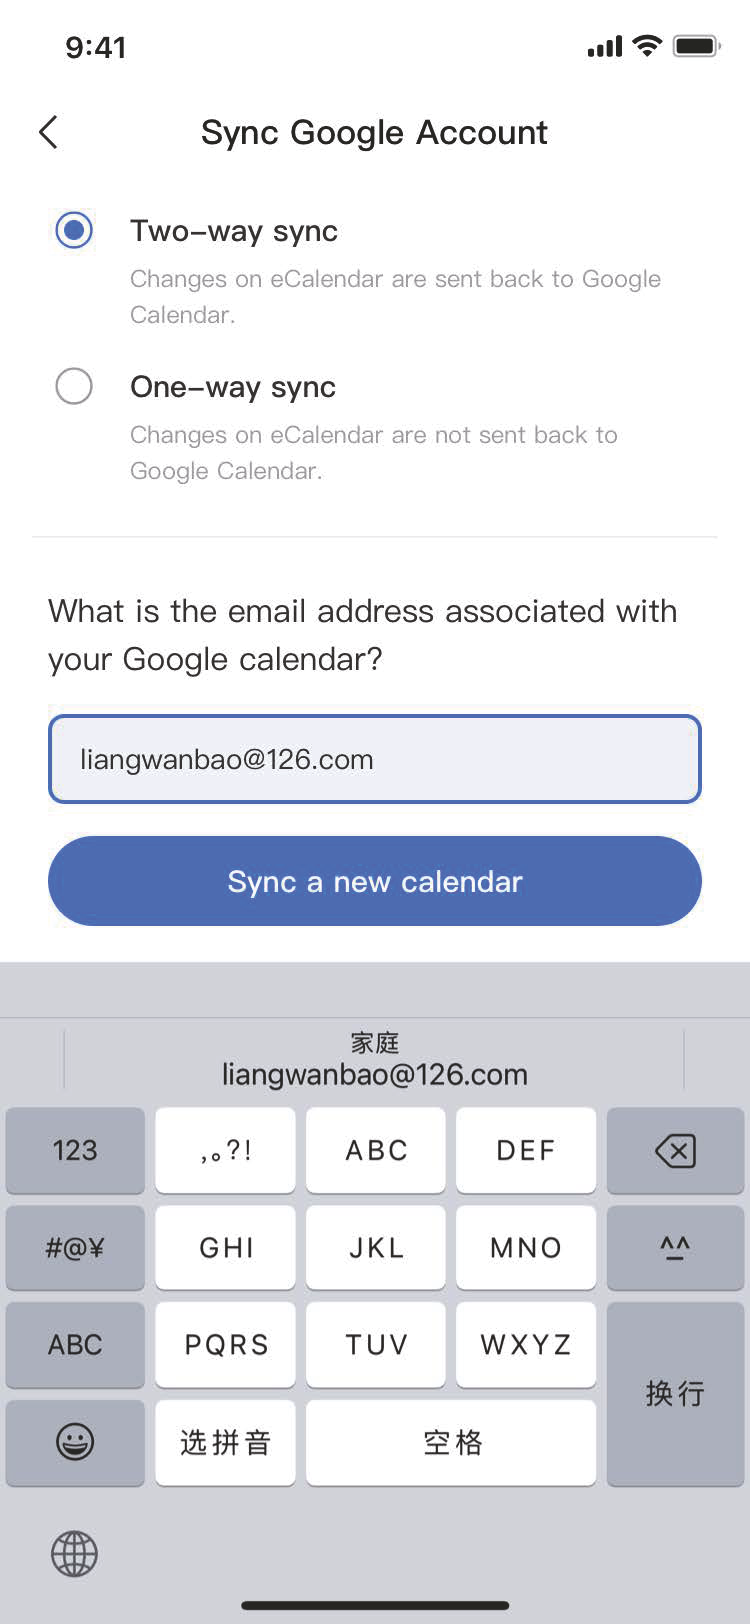
1. Choose two-ways sync or one-way sync as you need.
2. Enter your Google Calendar email address and press Sync a new calendar.
3. Choose the account you want to sync.
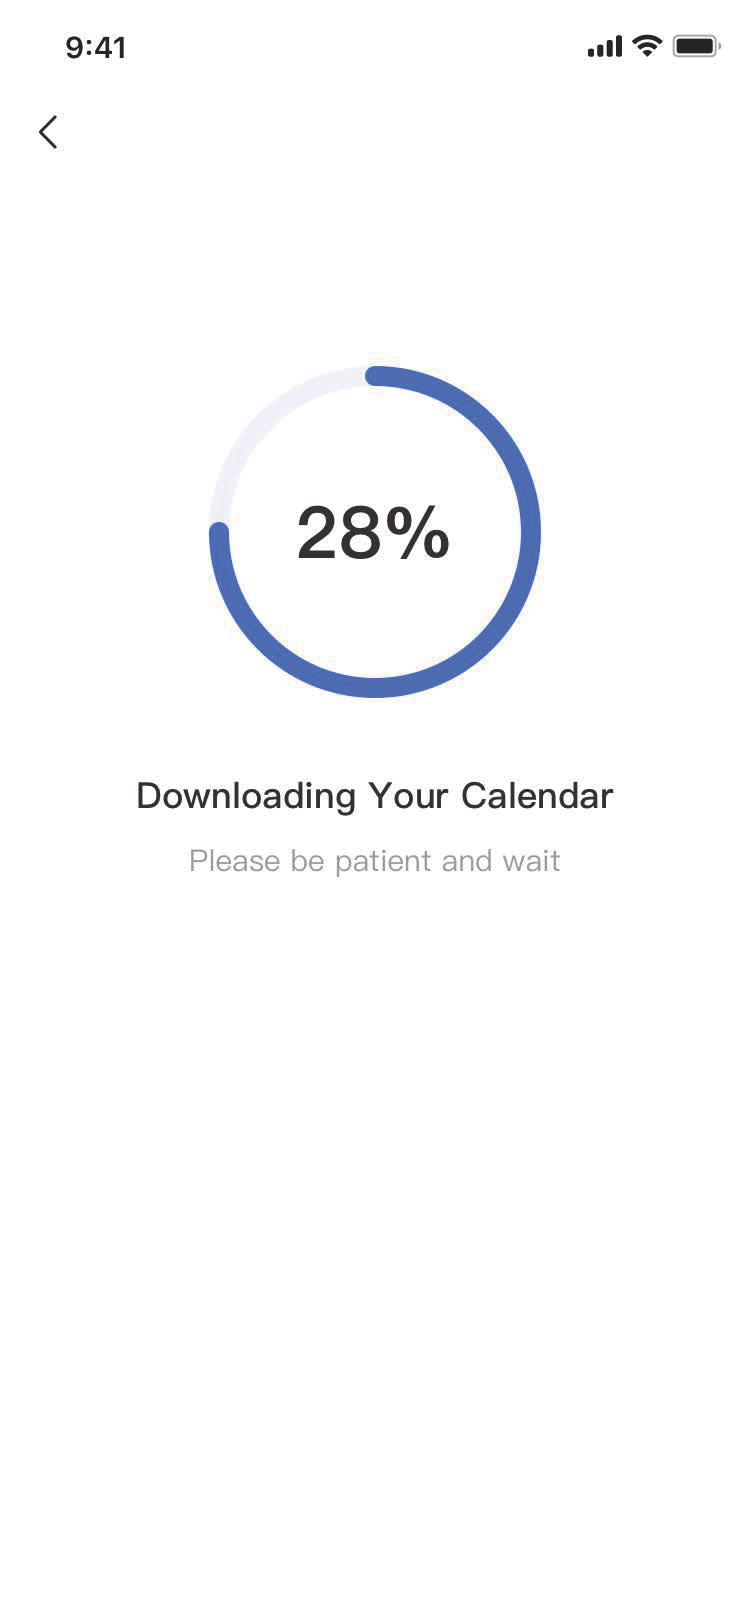
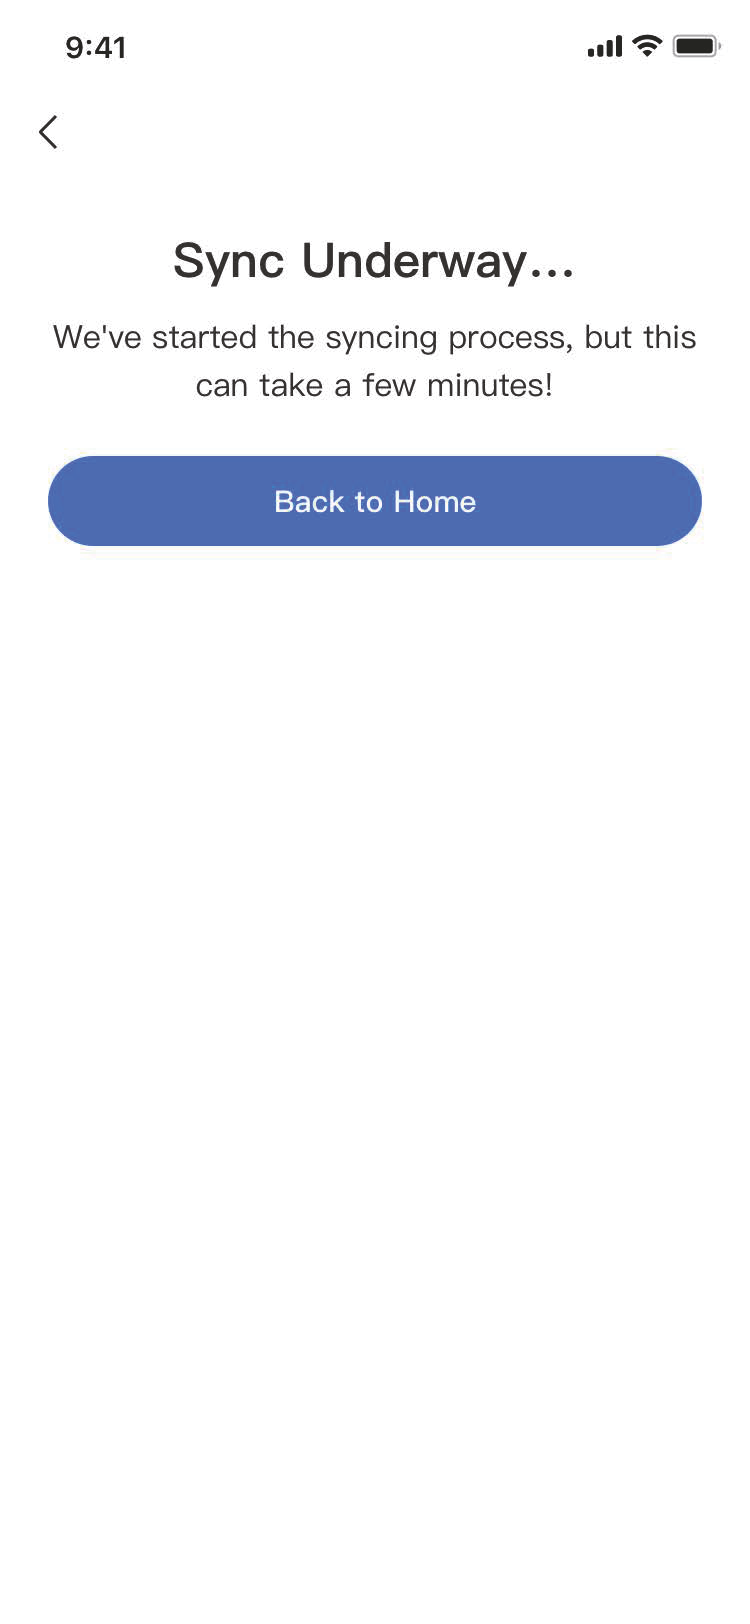
4. Wait for your calendars to download.
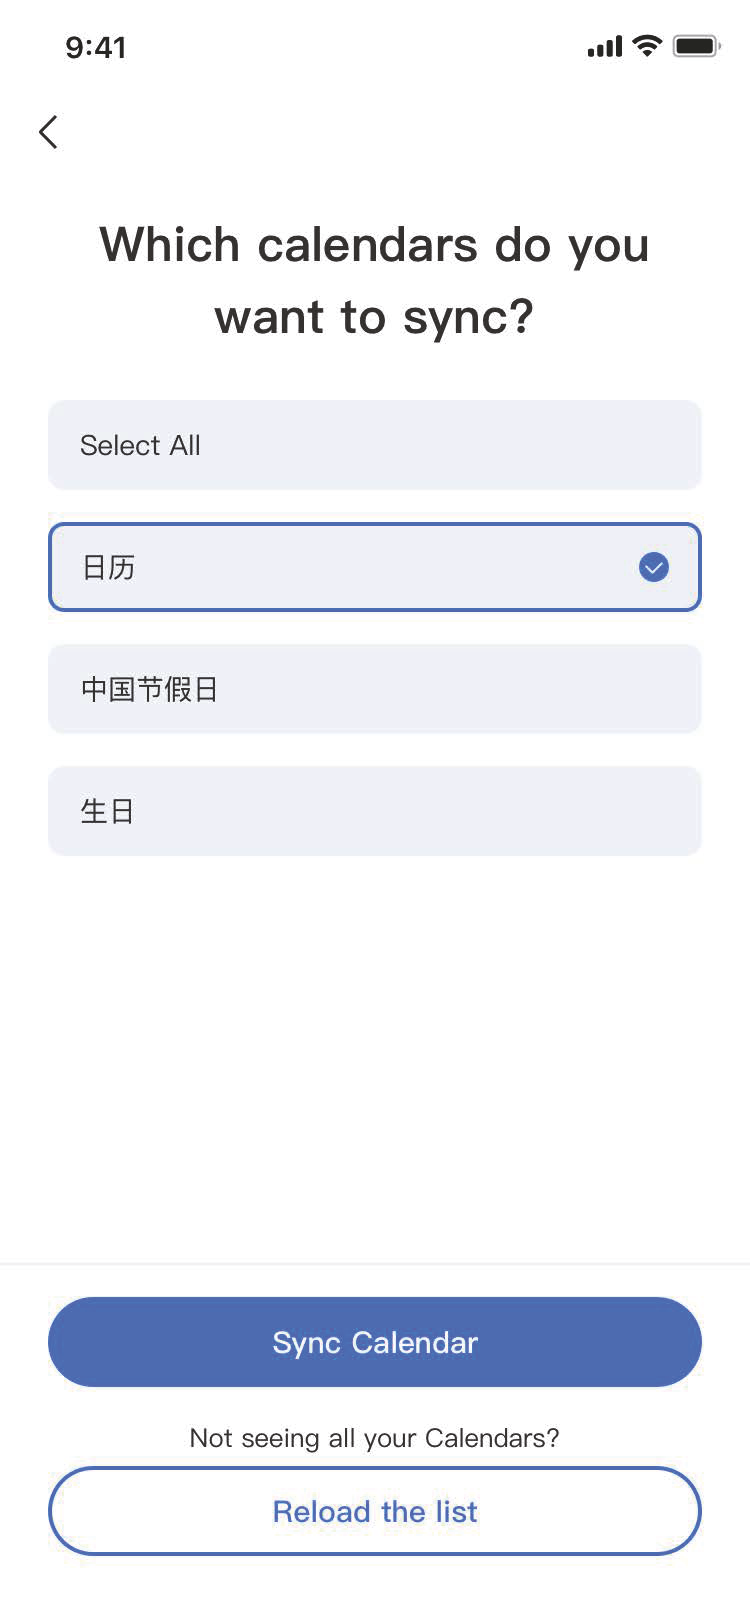
5. Choose the calendars you want to sync and press Sync Calendar.
6. Tap “See Events” to complete process.

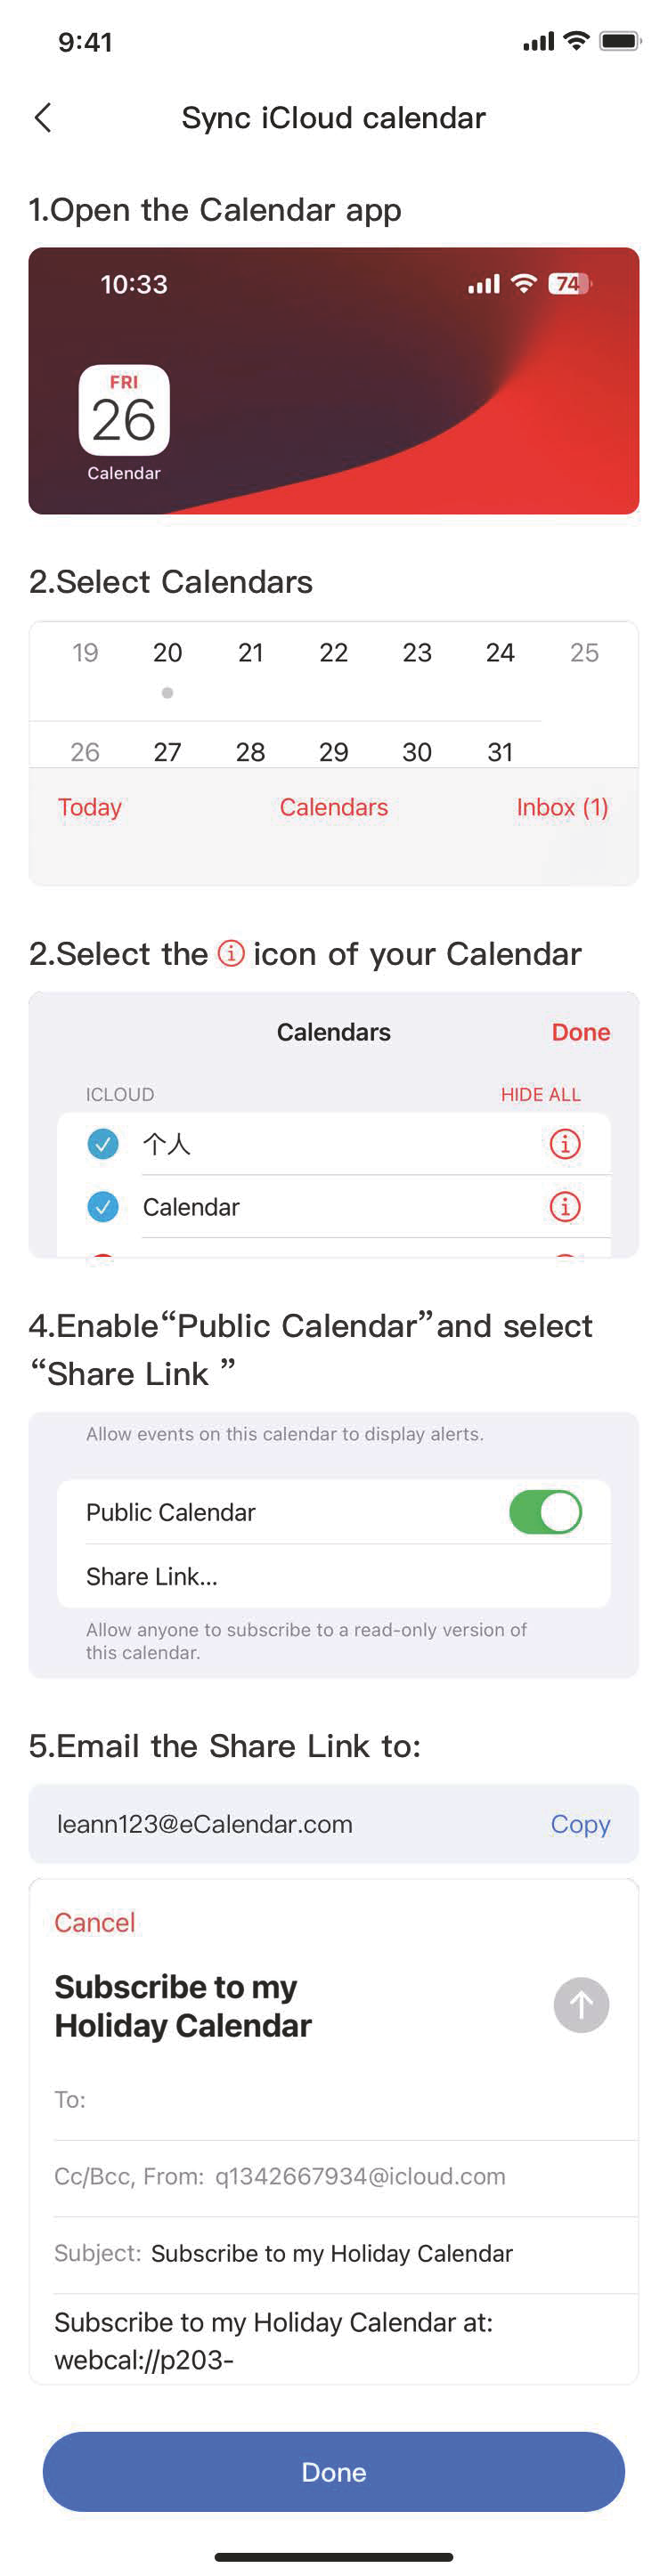
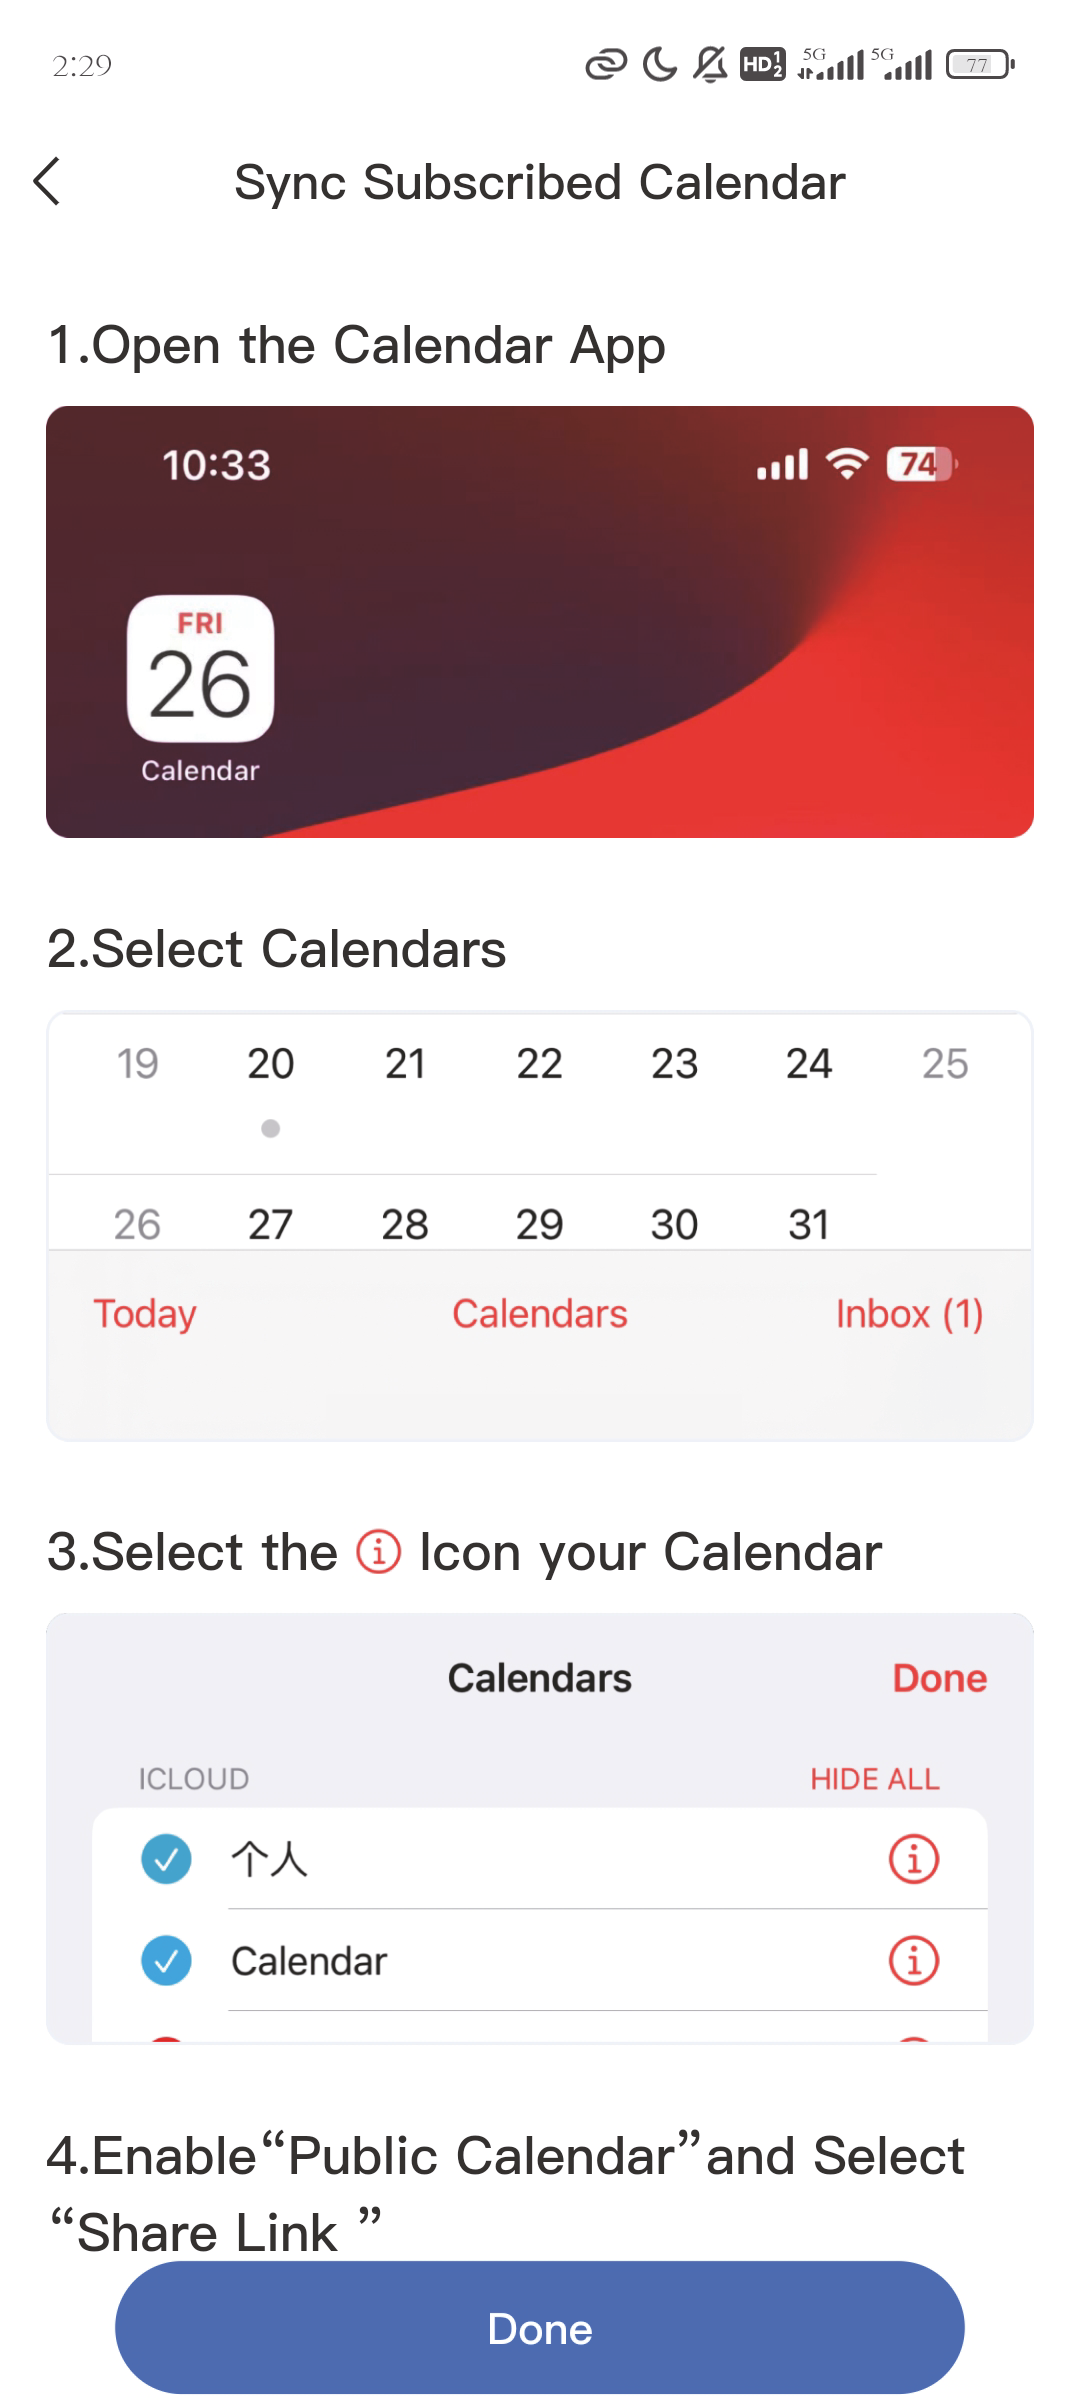
2.2.3 Syncing iCloud Calendar
1. Open the Calendar app.
2. Select Calendars at the bottom.
3. Select the [image_24.png] icon next to the calendar you want to sync.
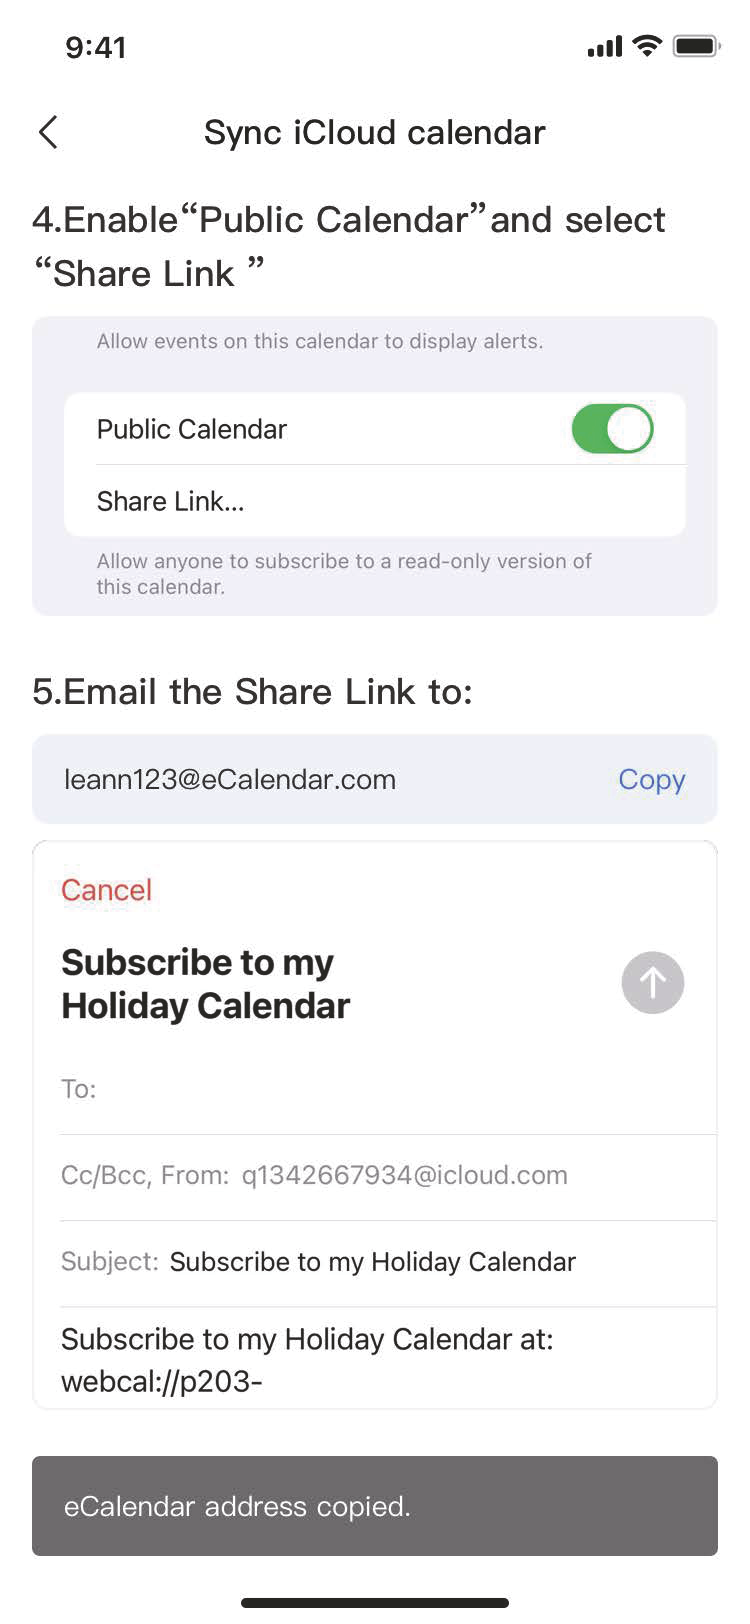
4. Enable Public Calendar and select Share Link.
5. Email the Share Link to your calendar address (e.g., leann123@myeCalendar.com)
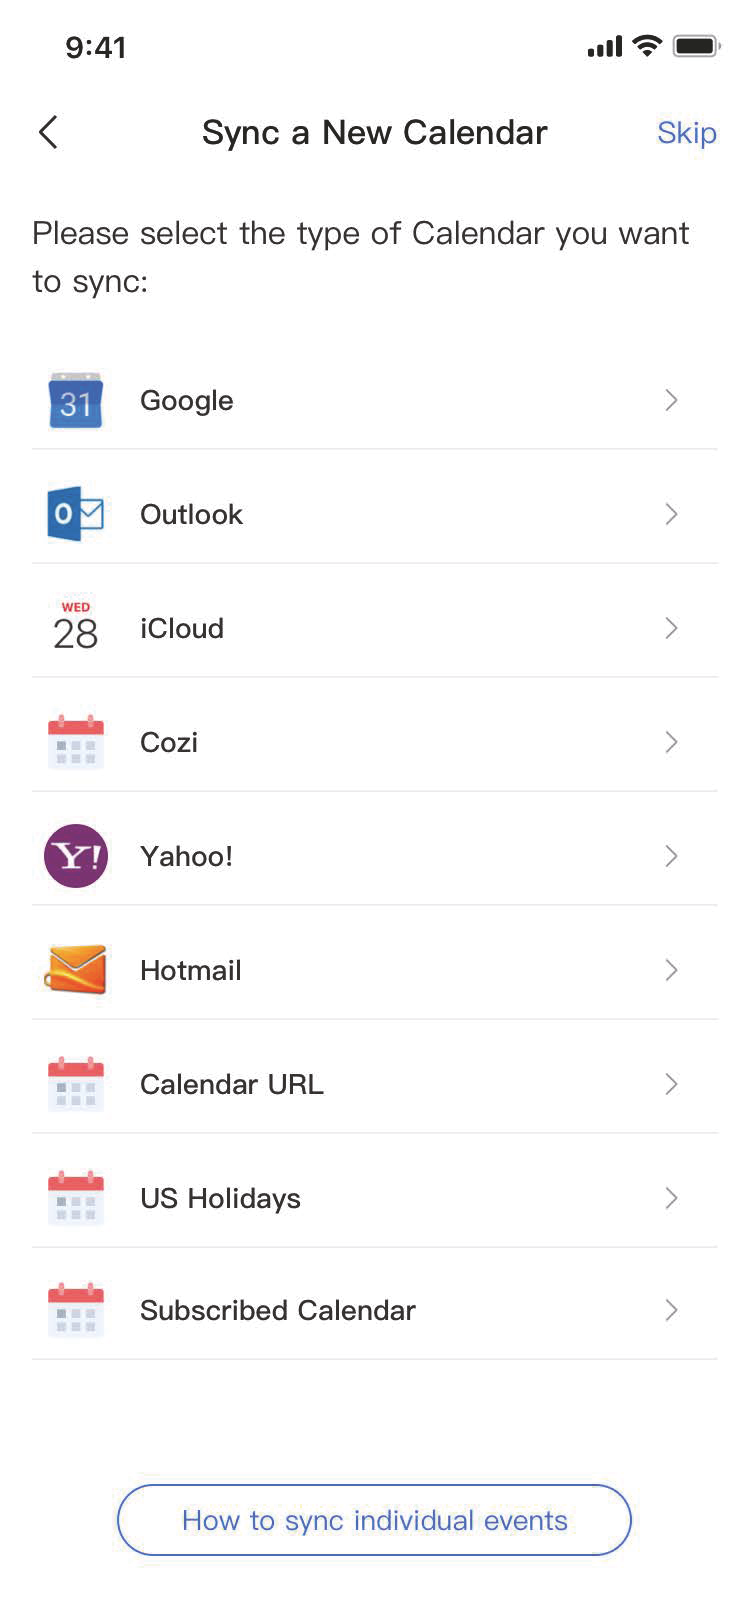
2.2.3 Syncing Google Calendar/iCloud Calendar/Yahoo! / Cozi /Calendar UCRL / Subscribed Calendar/Hotmail
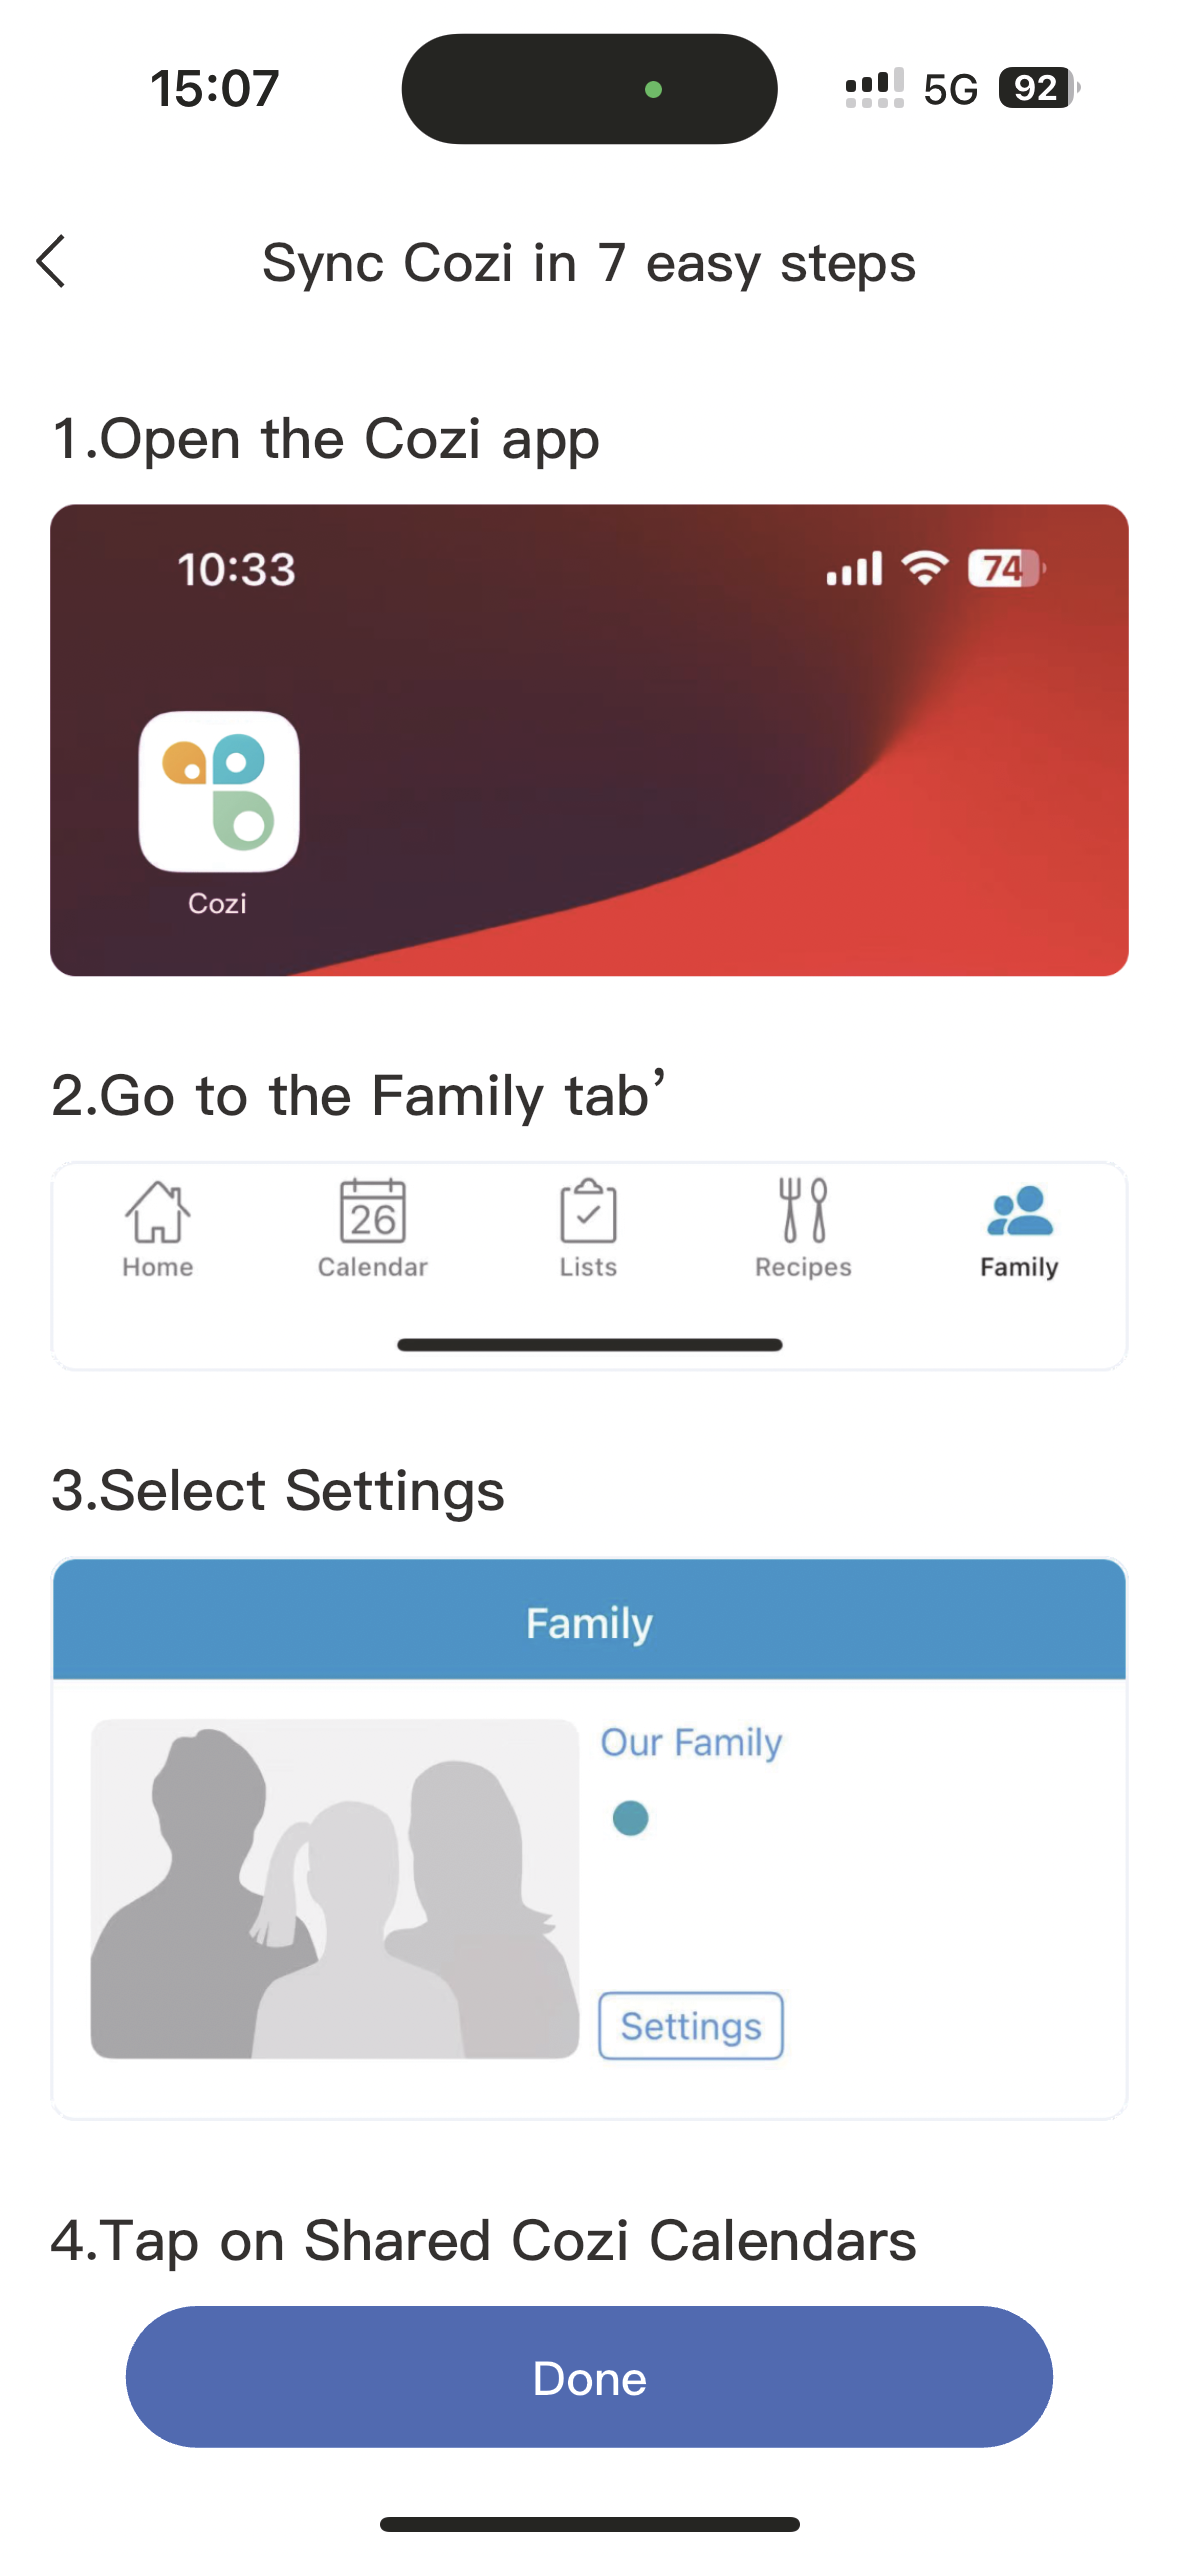
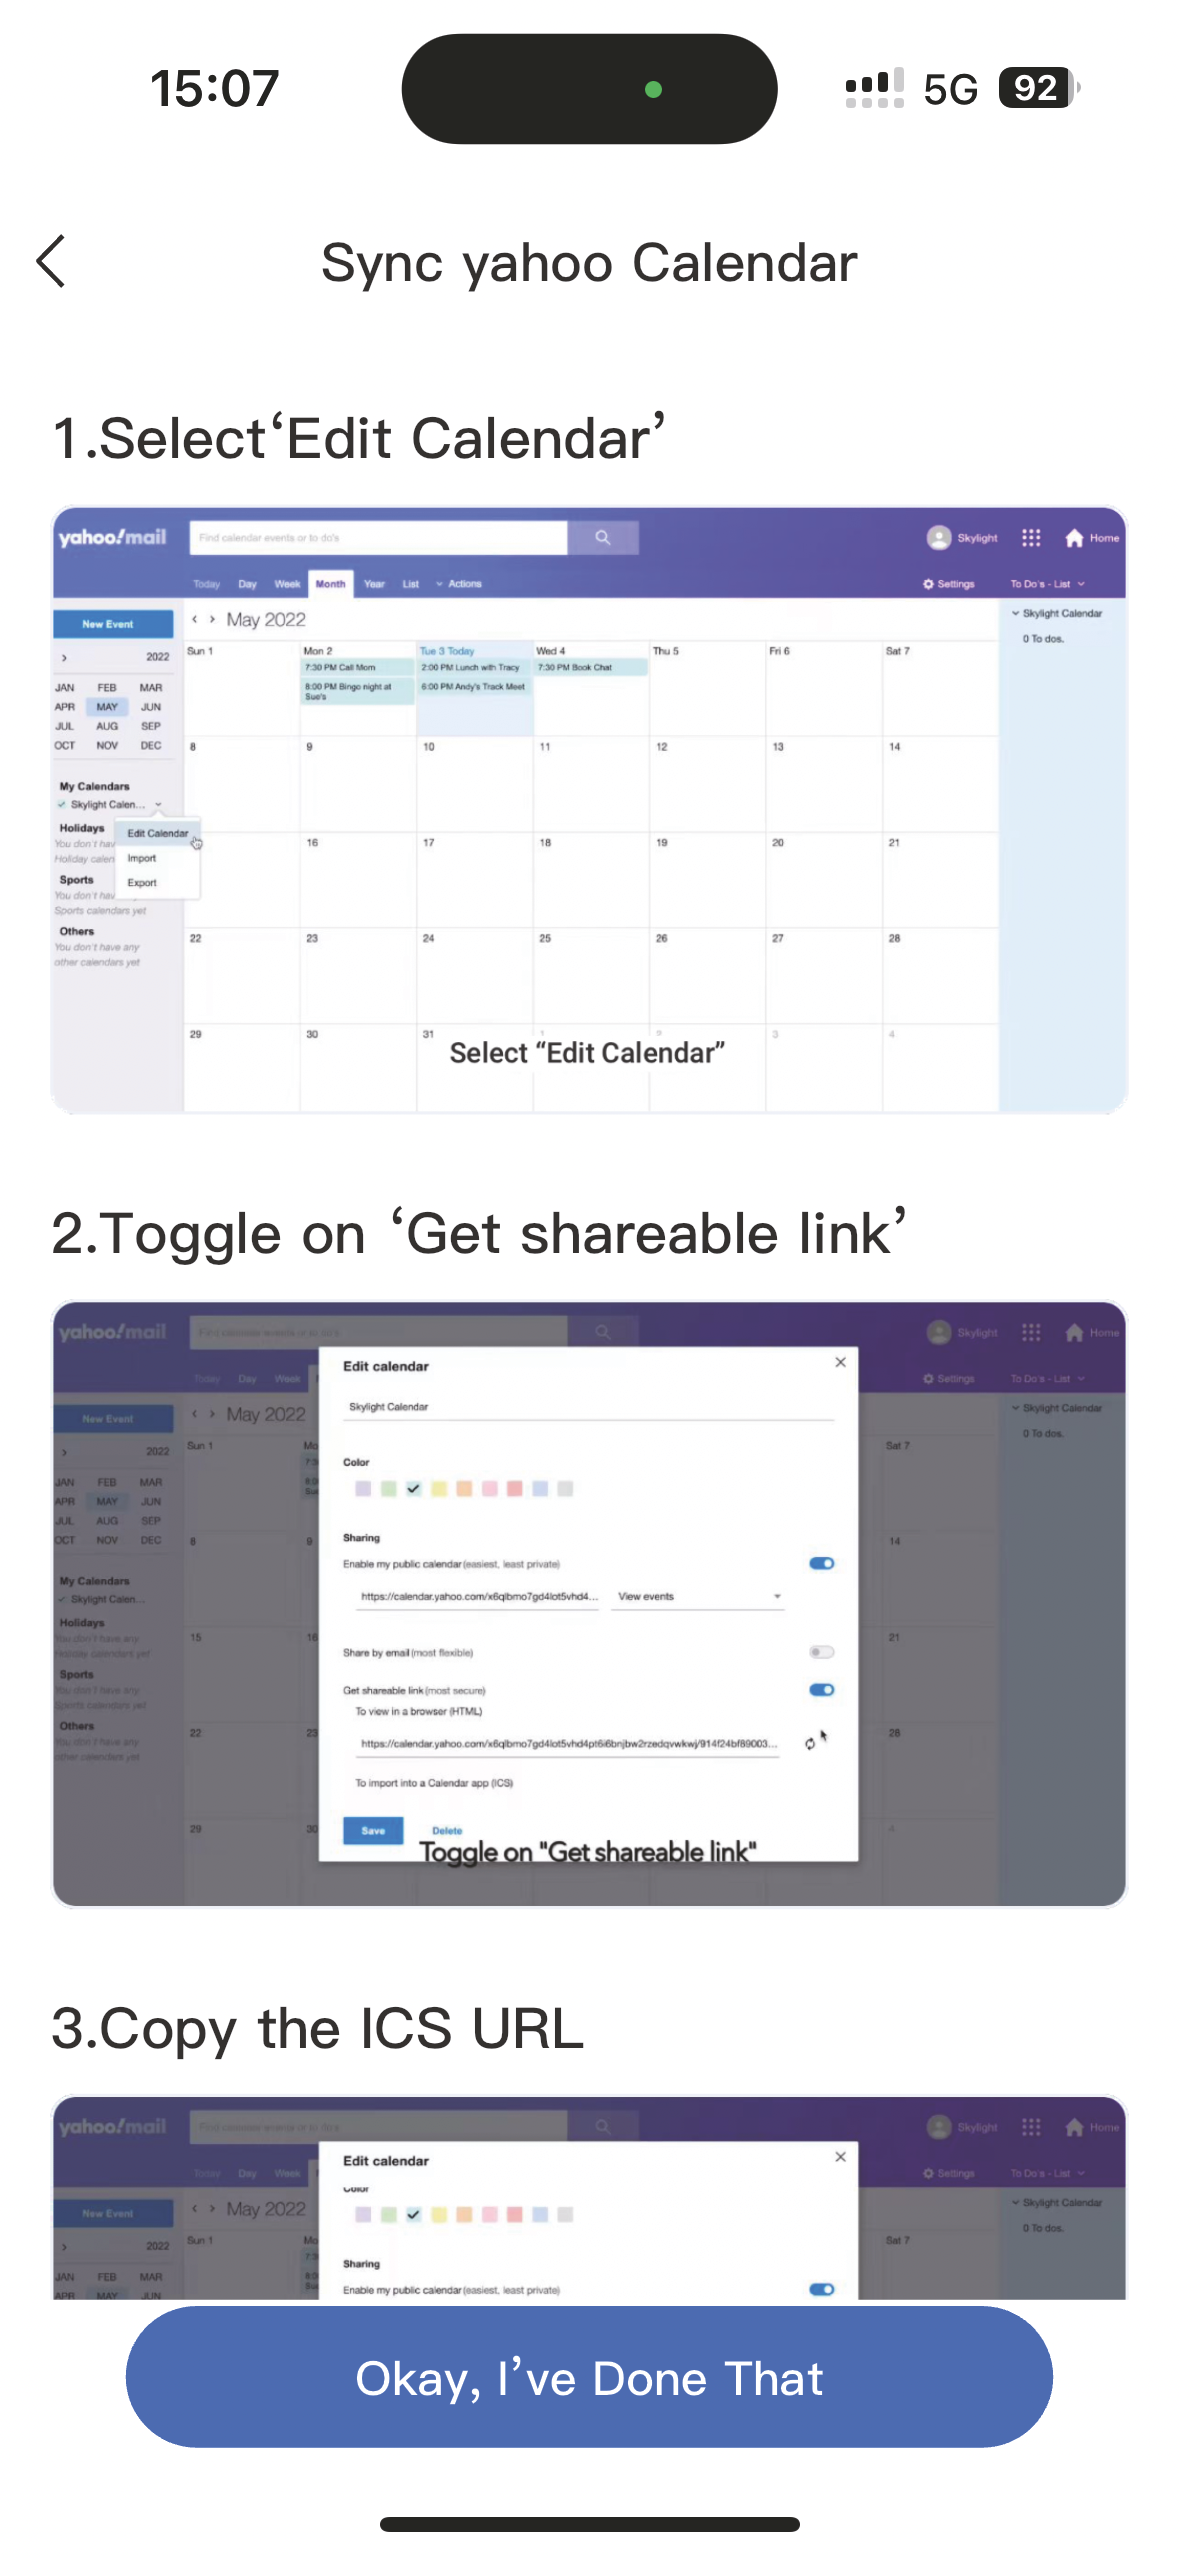
If Yahoo, Cozi, Calendar UCRL, and Subscribed calendar are to be synchronized, there will be appropriate operation steps when Subscribed Calendar is clicked to synchronize the new calendar (for details, see the corresponding detailed description in eCalendar).
We're actively working on other new calendars (Outlook synchronization will be supported soon) to make them accessible in the near future, will update description once finish.
Google Event Sync Function Instructions
Android Devices: After creating a new event in the Google Calendar app, you need to manually tap the "Refresh" button in the sidebar to sync the event to the eCalendar device.
iPhone: Events are automatically synced to the eCalendar device after creation, with no additional actions required.
Supported Event Types for Google Calendar Sync
eCalendar supports syncing events only. Tasks are not supported for synchronization at this time.
Time Required for Third-Party Calendar Sync
Google Calendar and Outlook: Syncing events to the eCalendar device takes approximately 1 minute.
iCloud, Yahoo, and Cozi: Syncing events to the eCalendar device takes between 1 and 30 minutes, with a minimum of 1 minute and a maximum of 30 minutes.
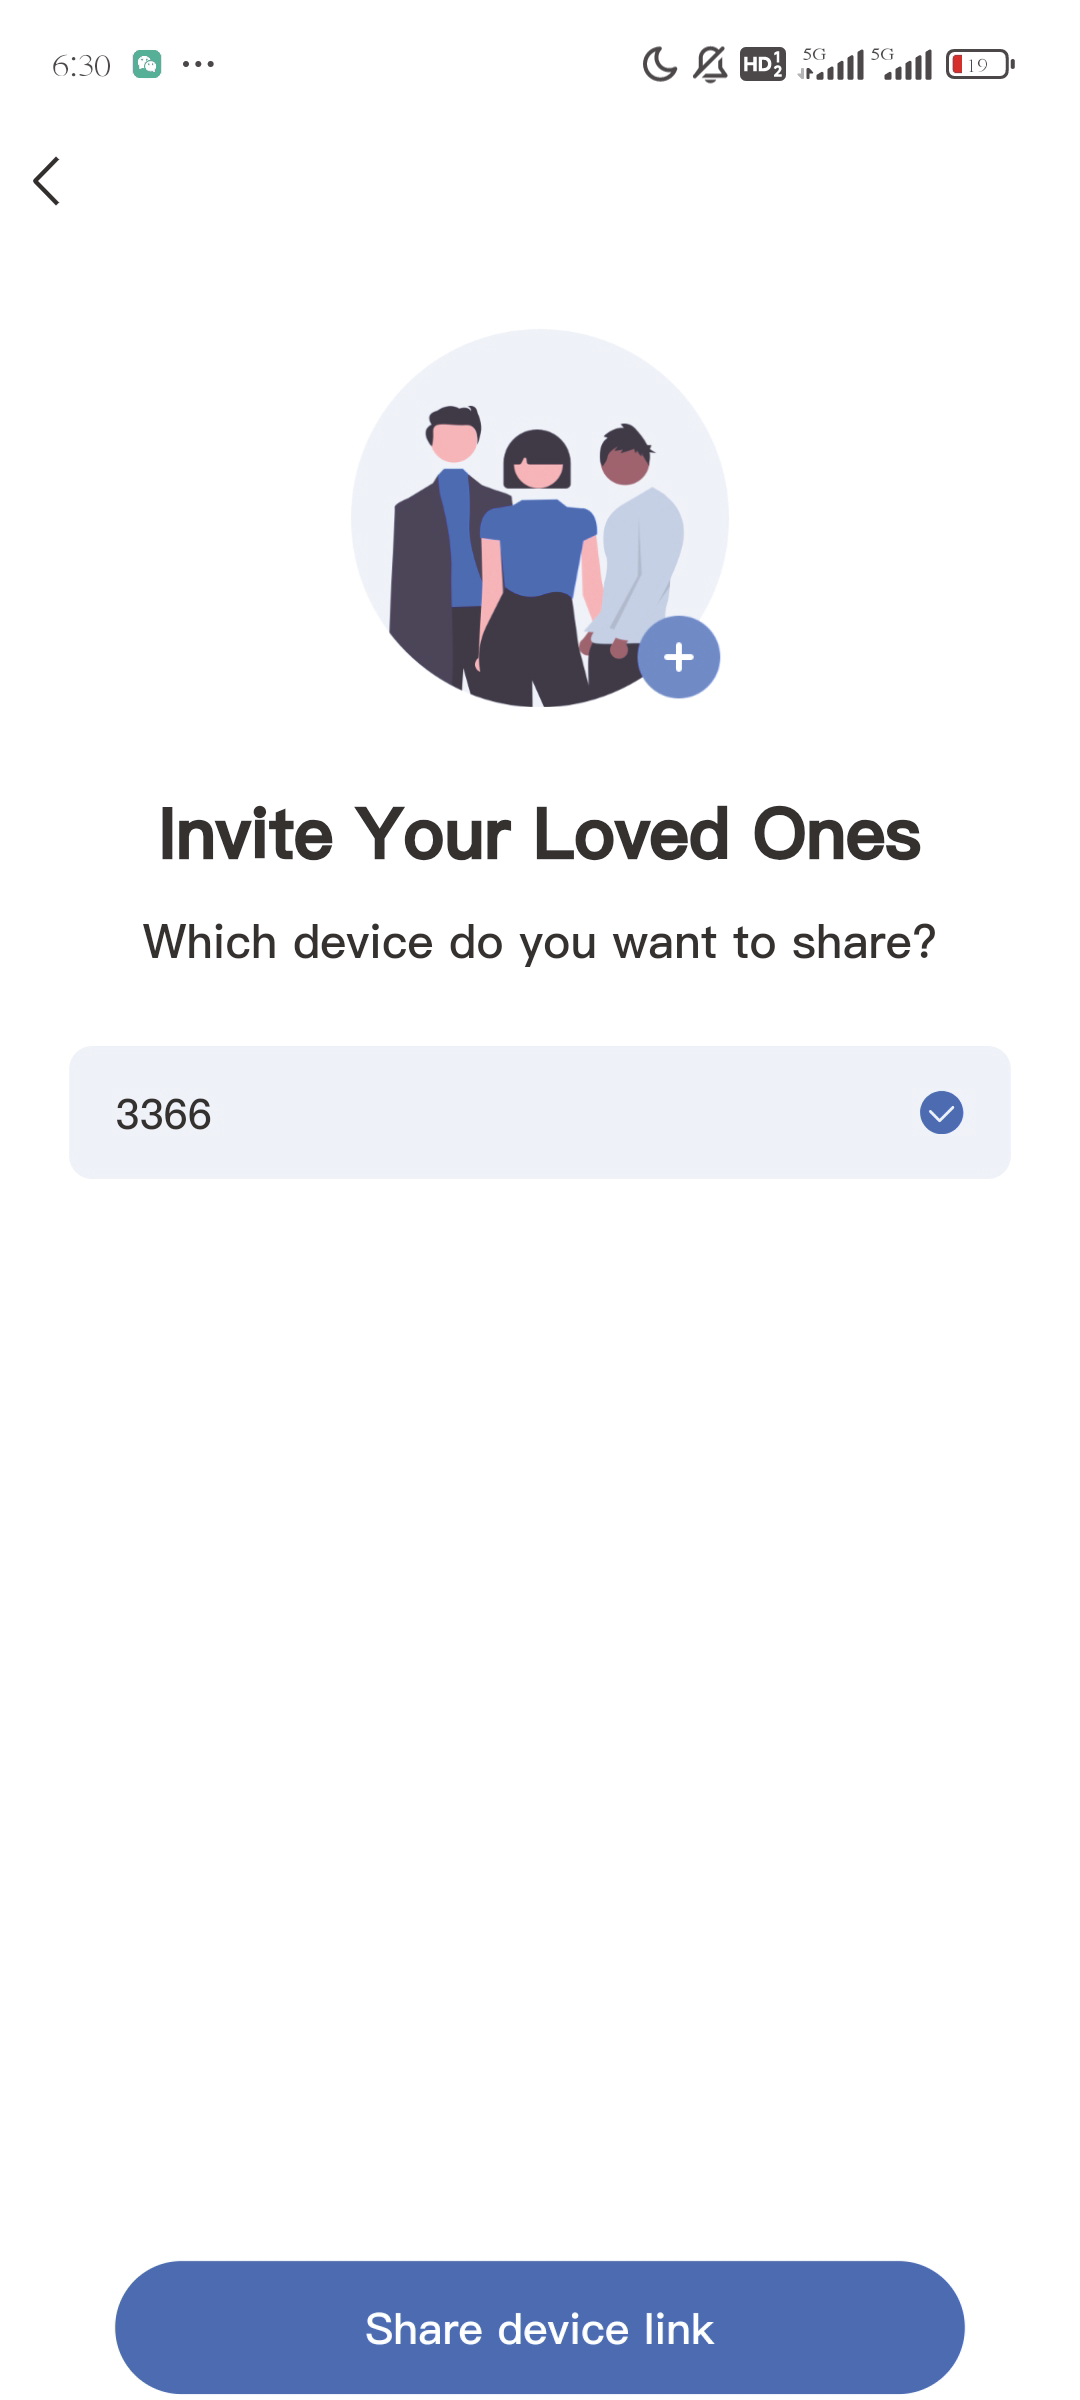
2.3 Share
Tap Share in my calendar to invite family members to share the device (by sending a link invitation)

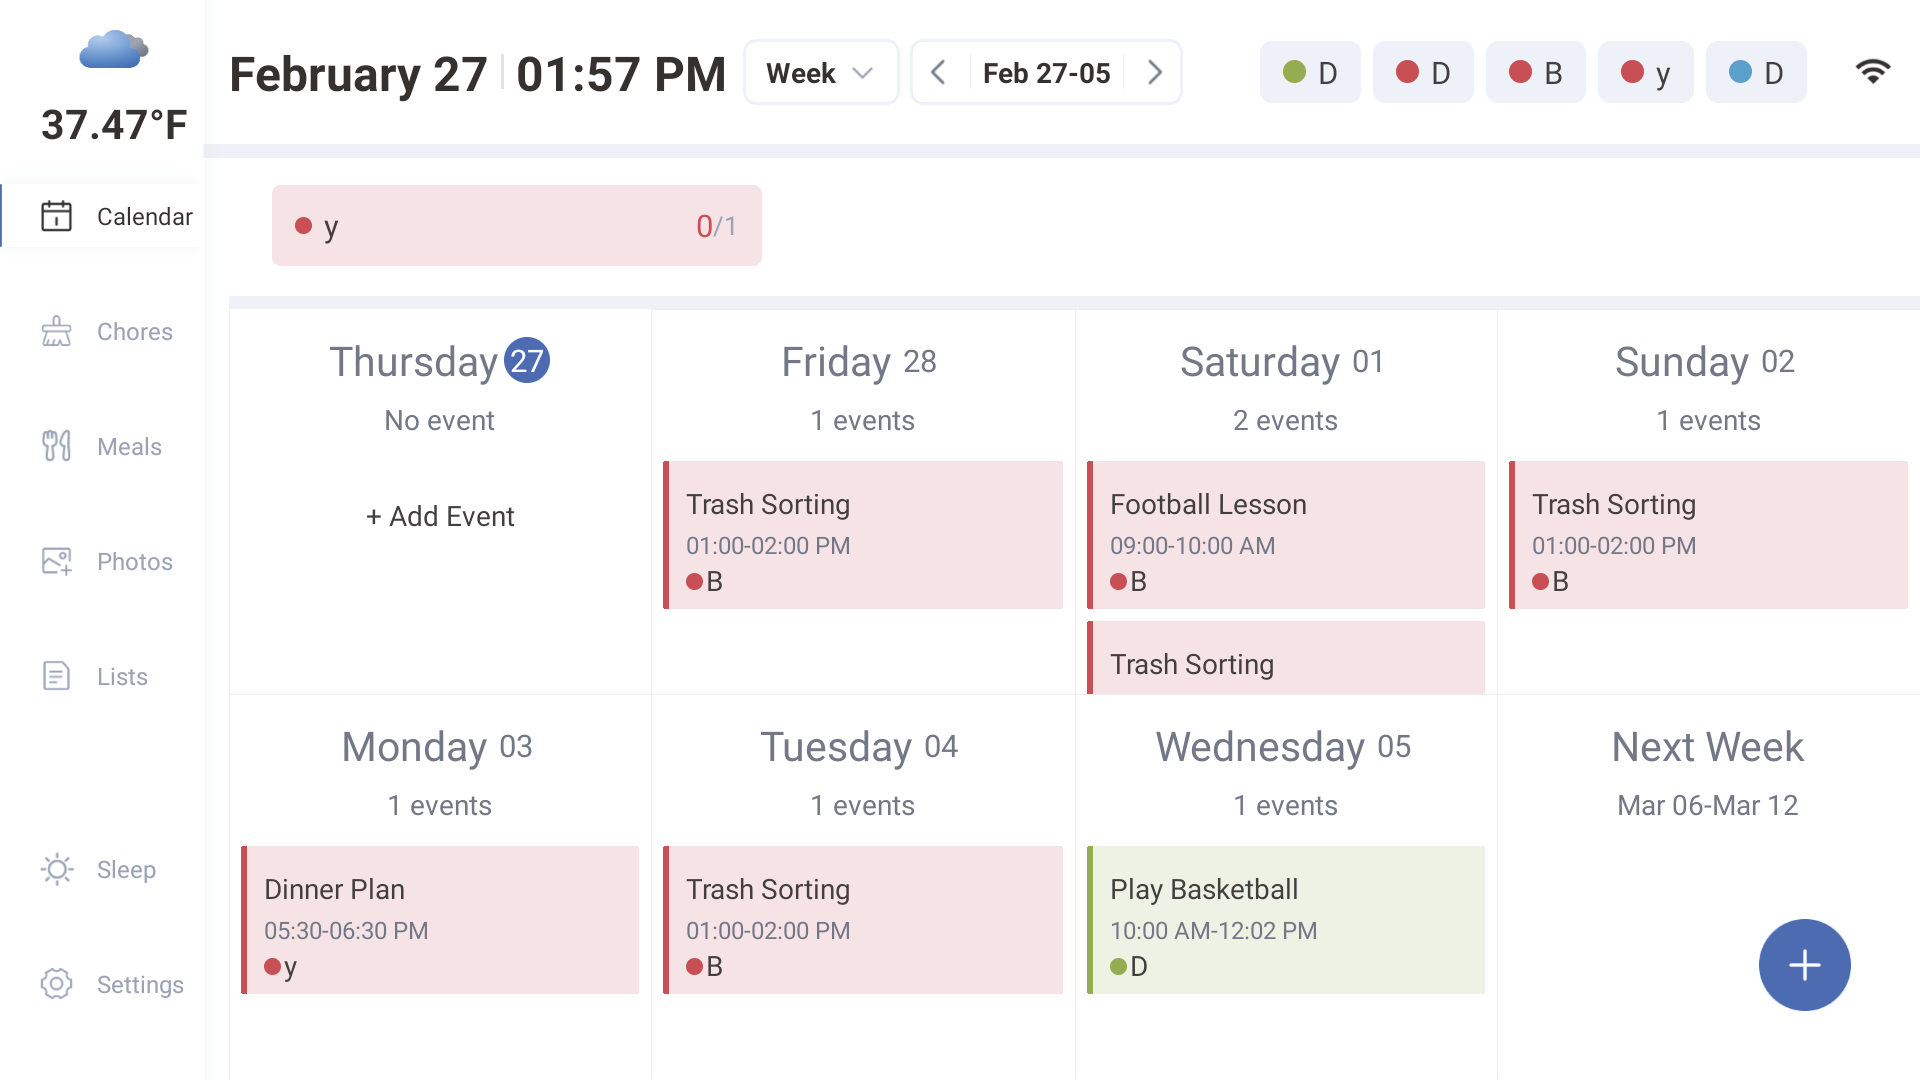
3. Operation Instruction
3.1 Events
You can view your events in different views on the app or device to suit your needs.
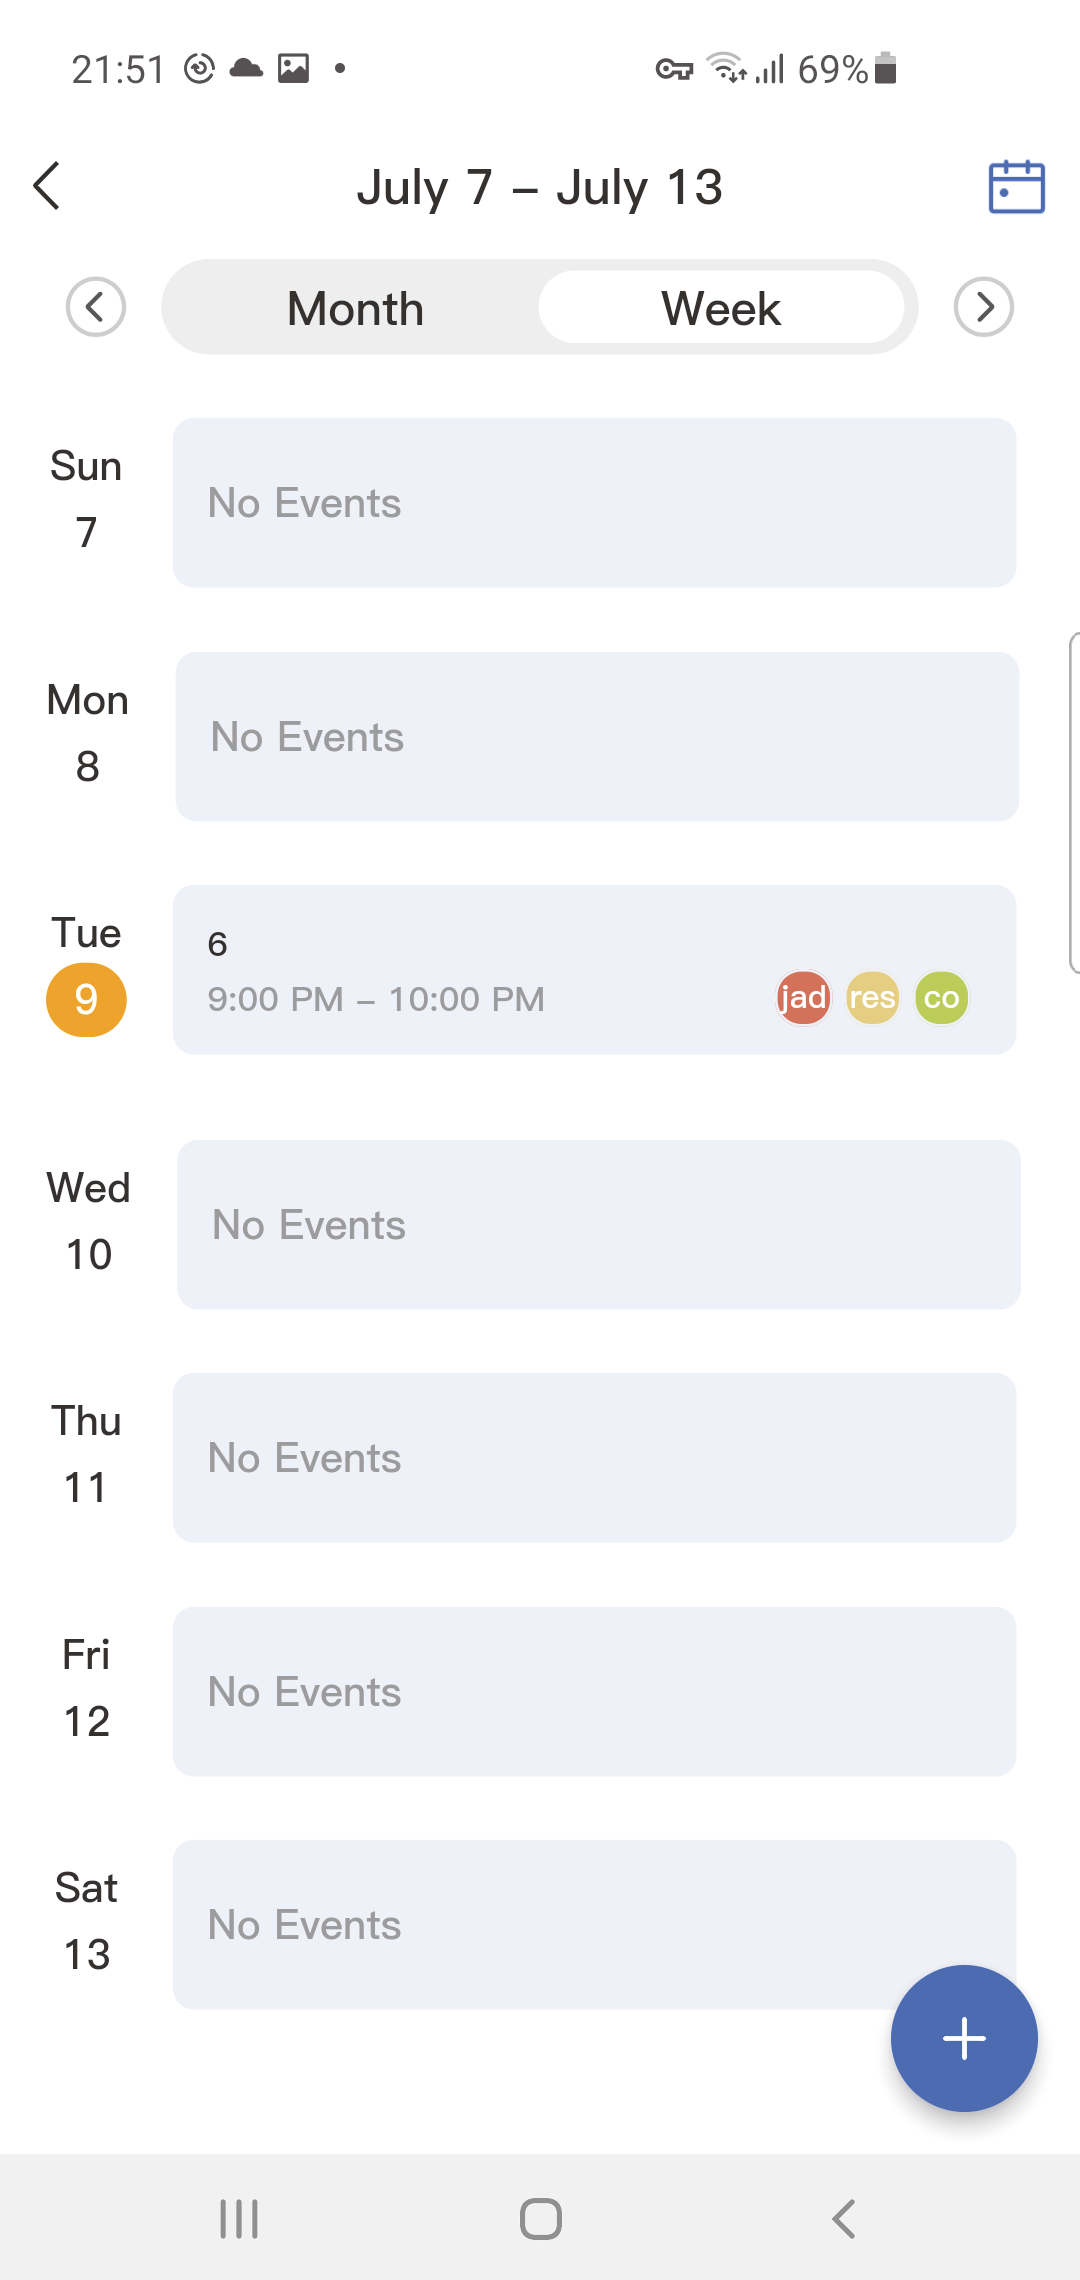
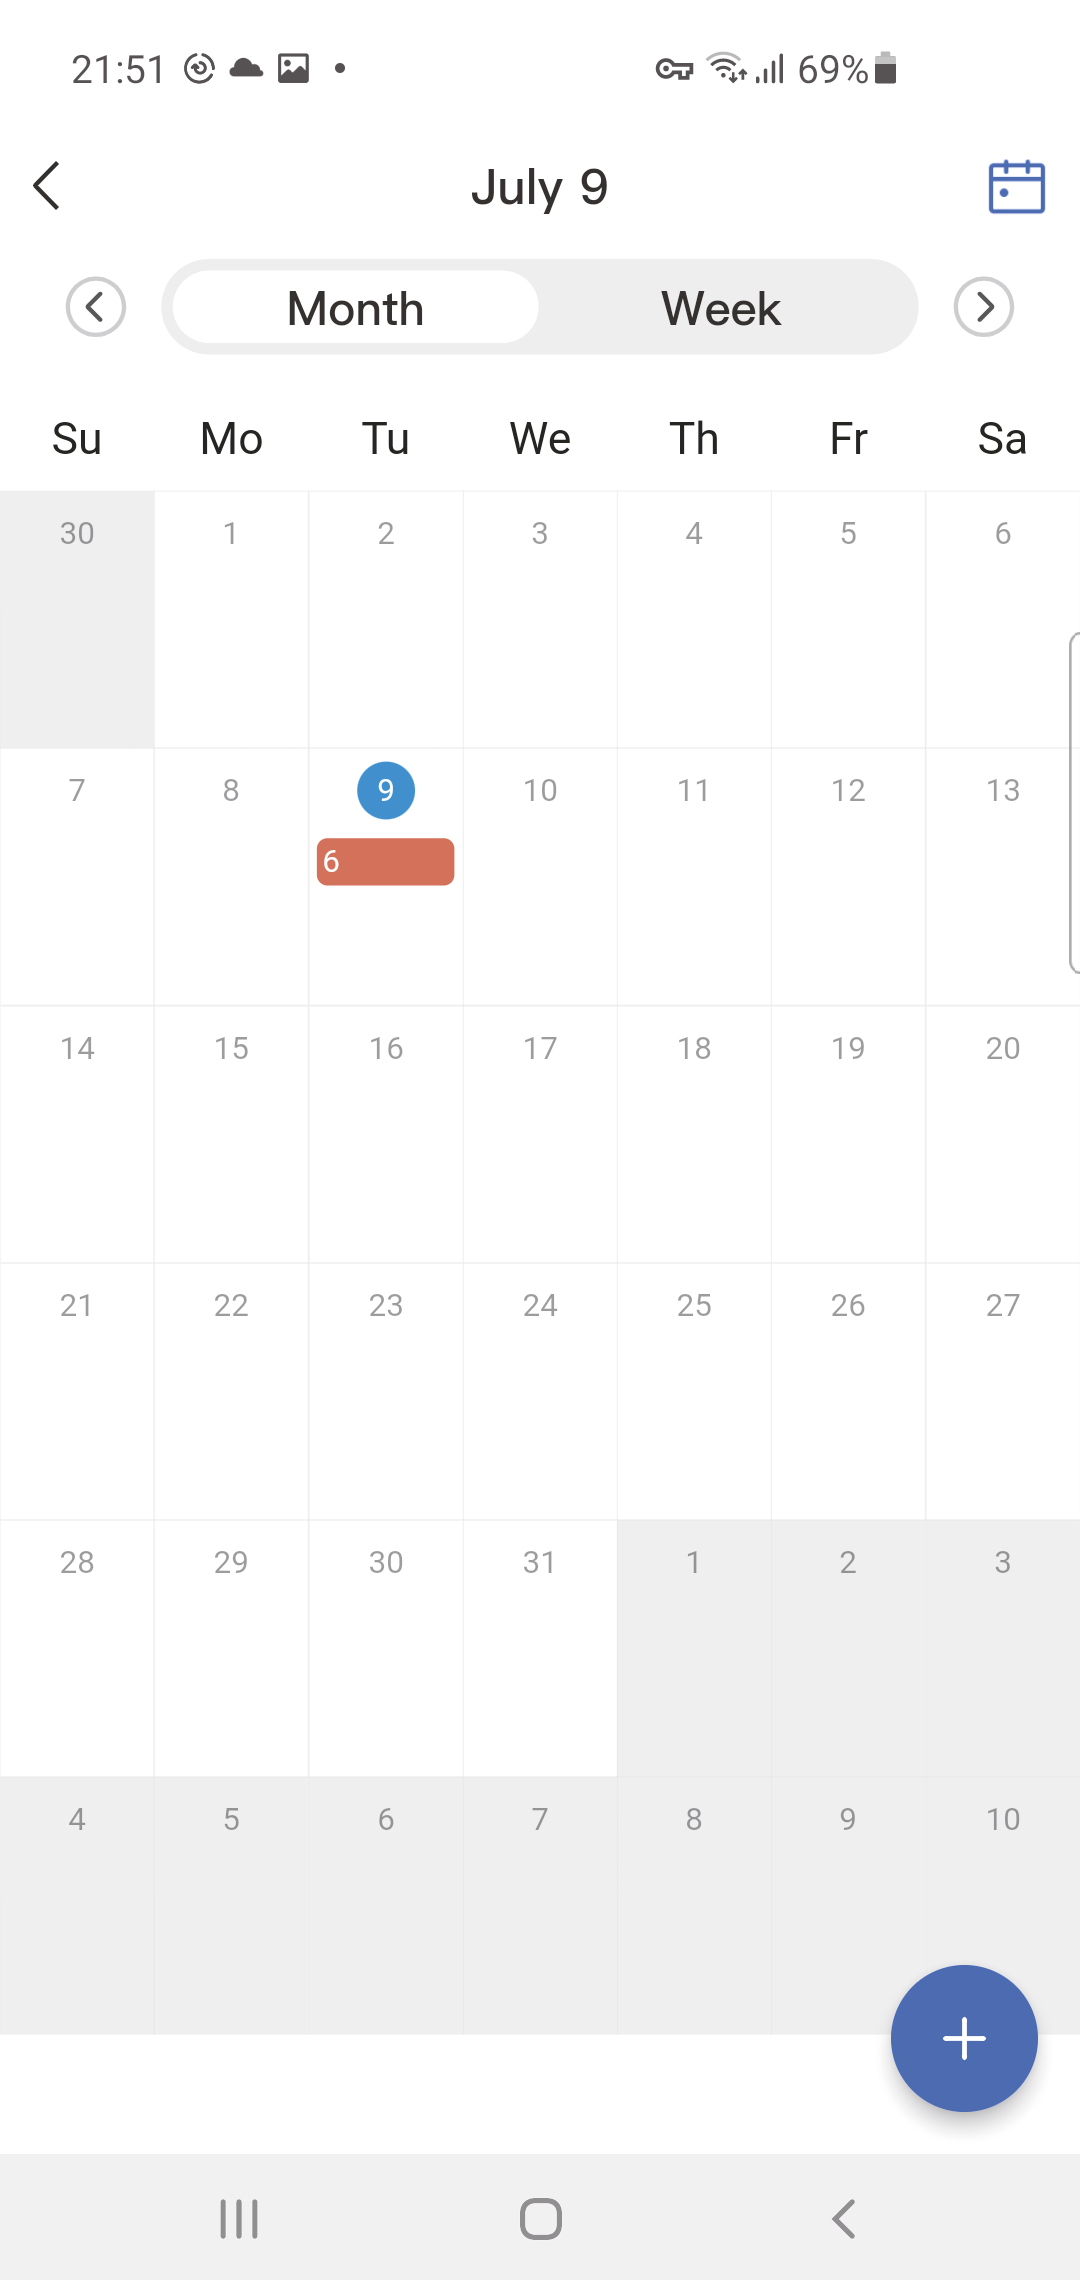
3.1.1 Viewing Events-APP
You can view your events in a Month or Week view. Tap into an event to view details. Tap  to view events today, depending on the view you're on.

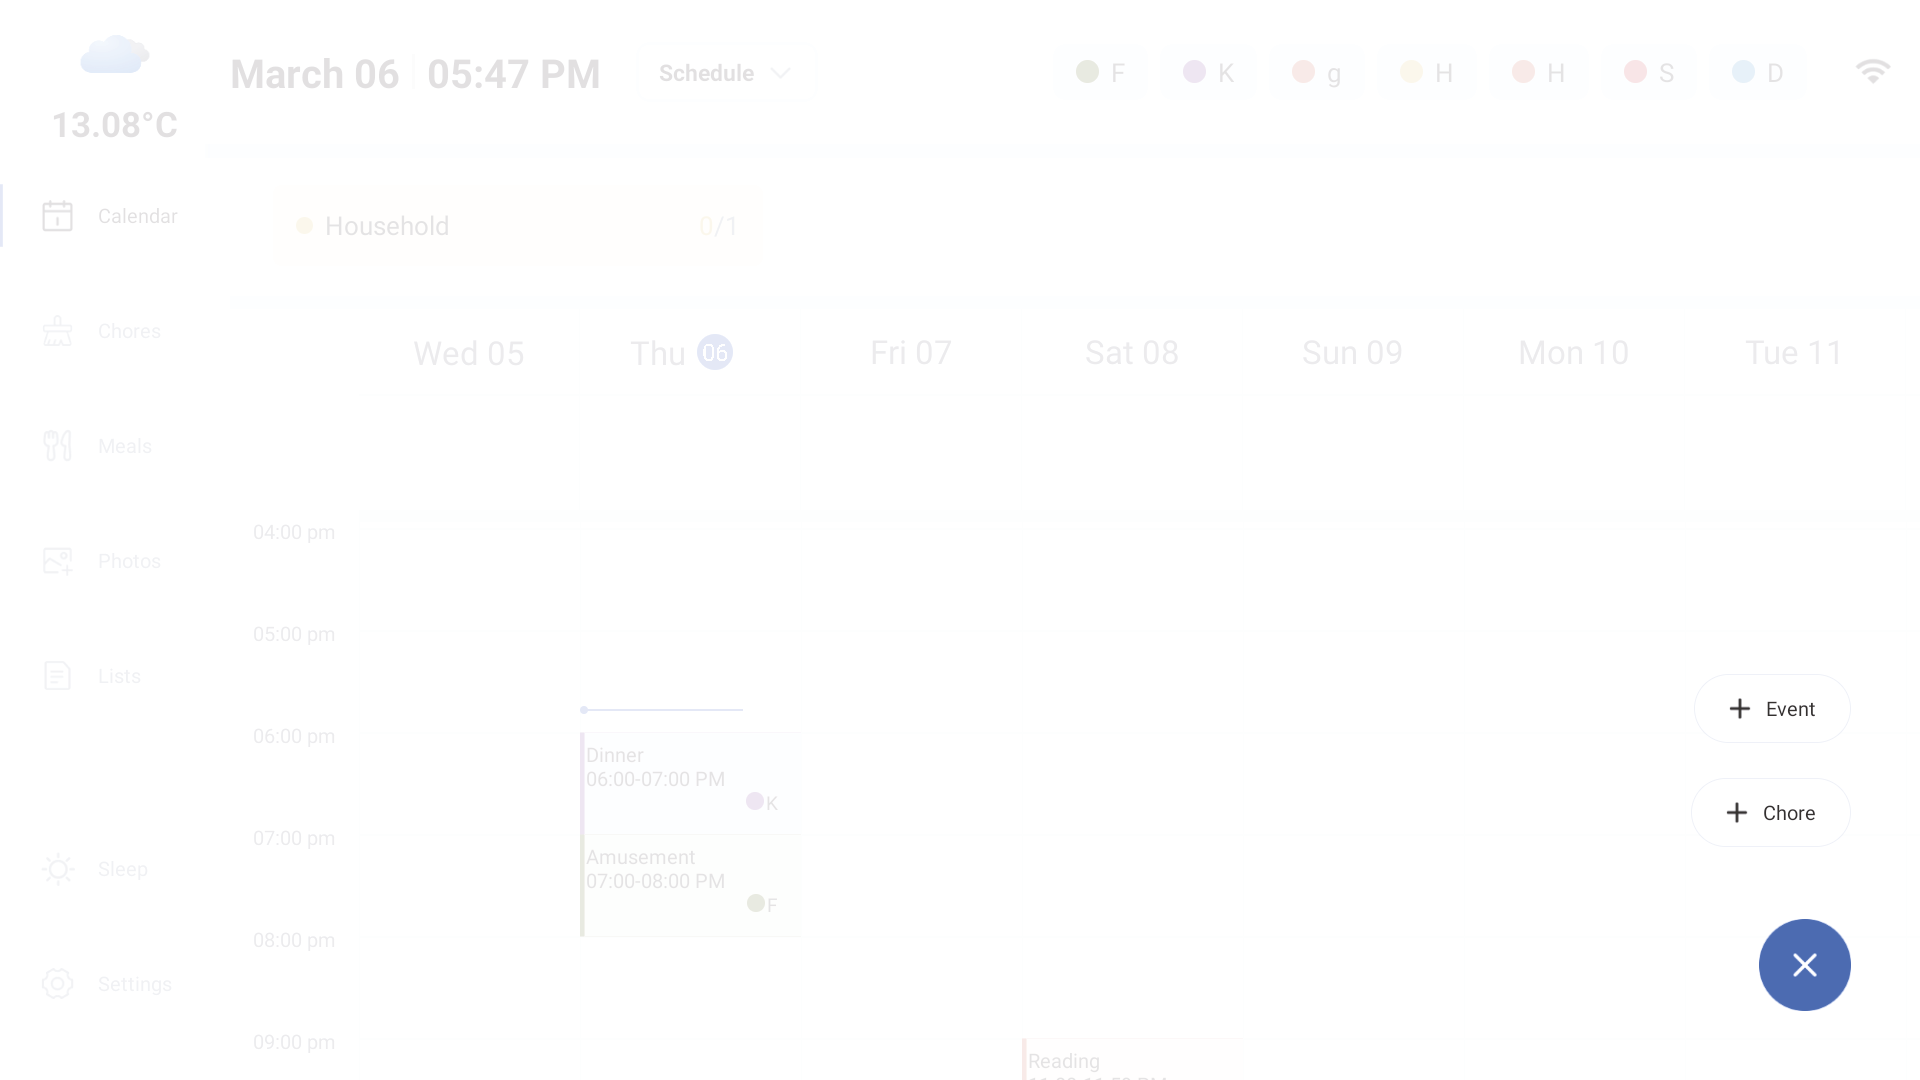
3.1.1 Viewing Events-Device
You can view your events in a Day, a Month, or Schedule view. Schedule view can be configured in Settings  to display between 1 to 7 days.
Tap on an event to view details. You can pinch and zoom to show more or fewer hours in the day.
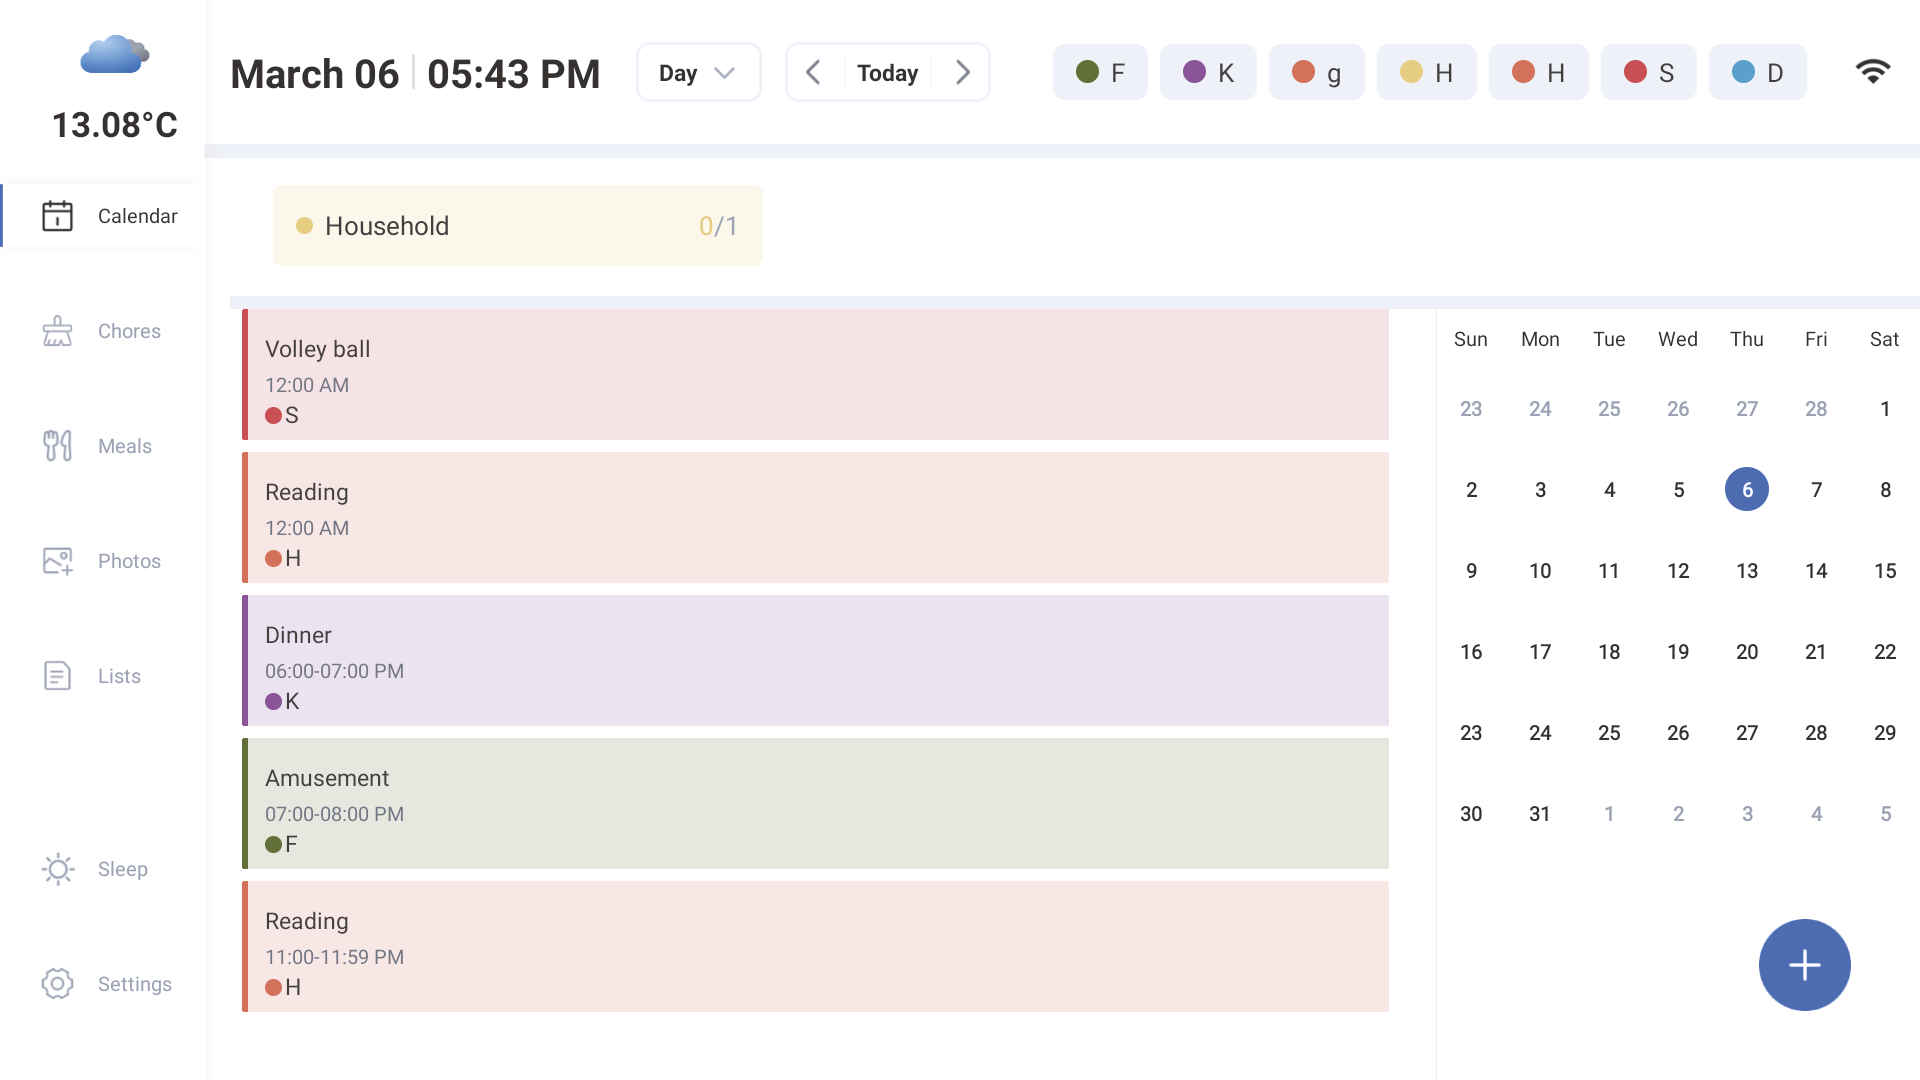
Day View
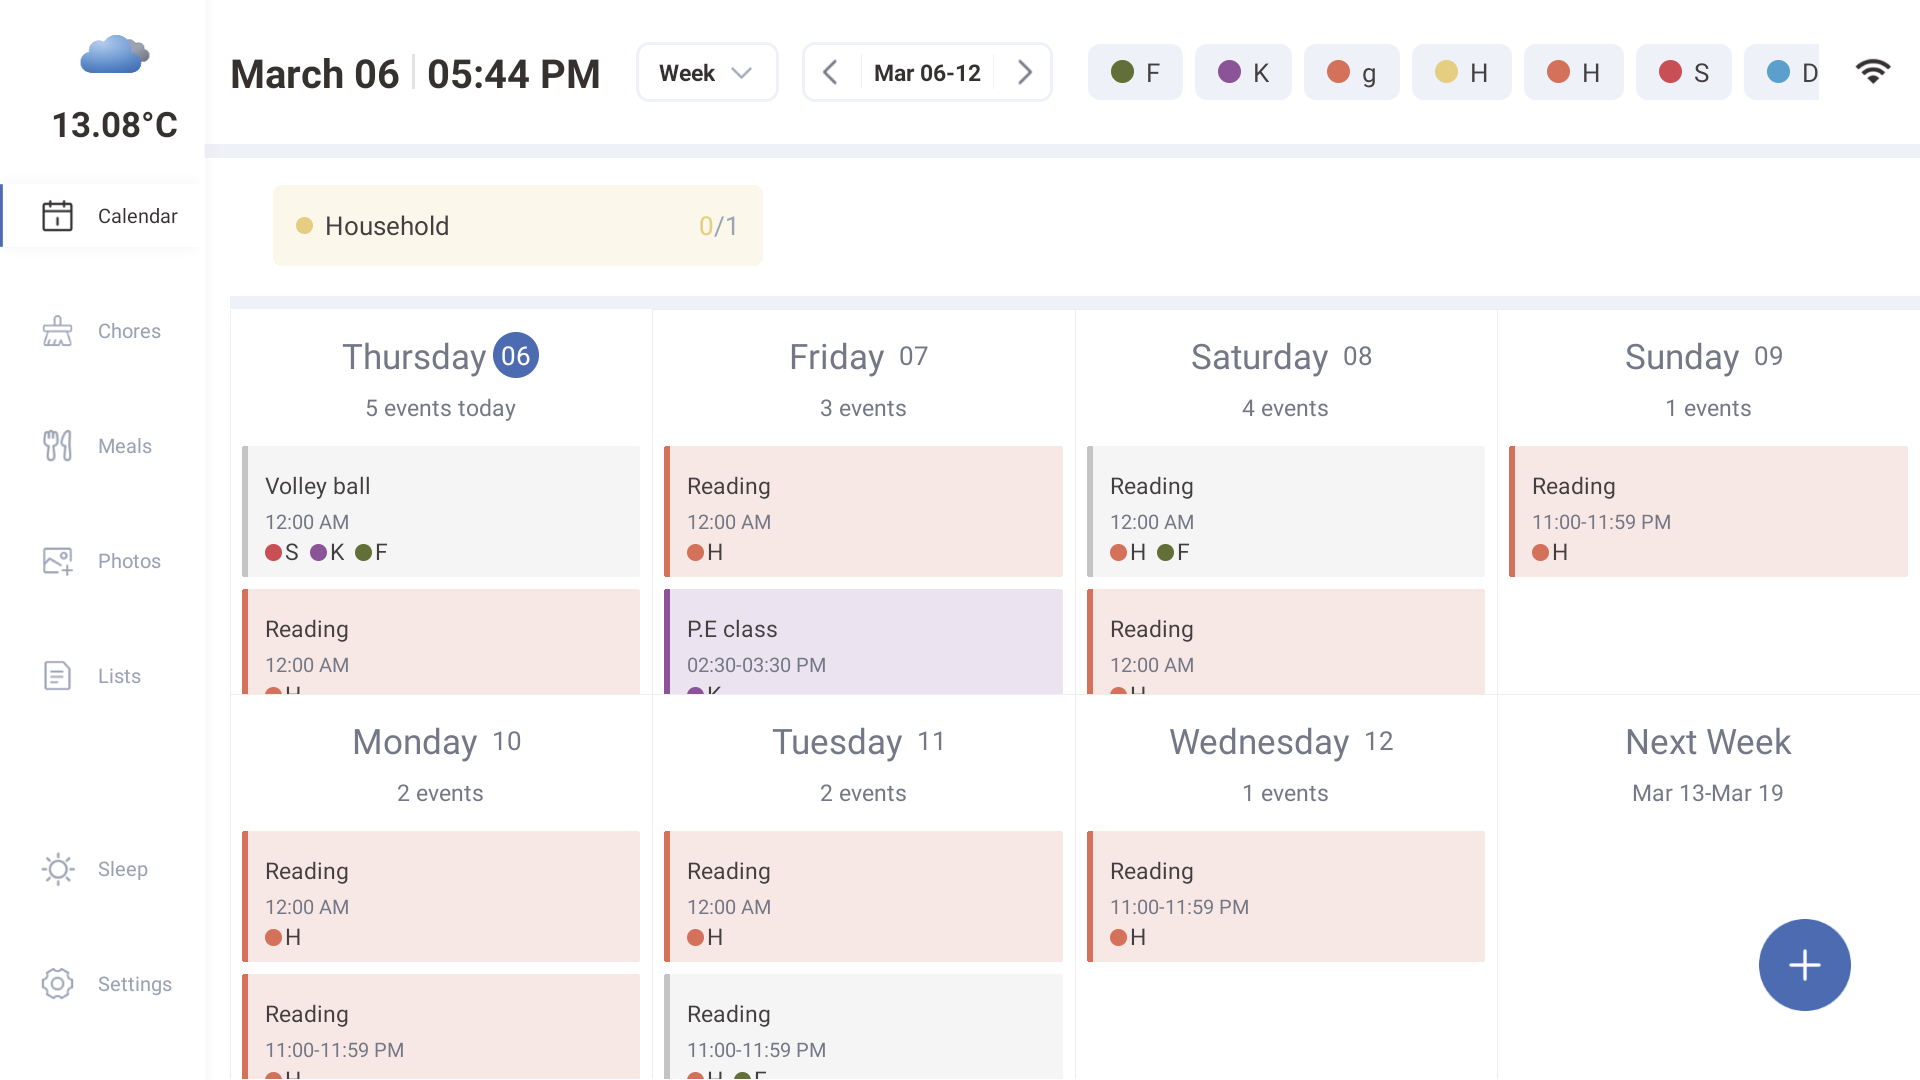
Week View

Month View
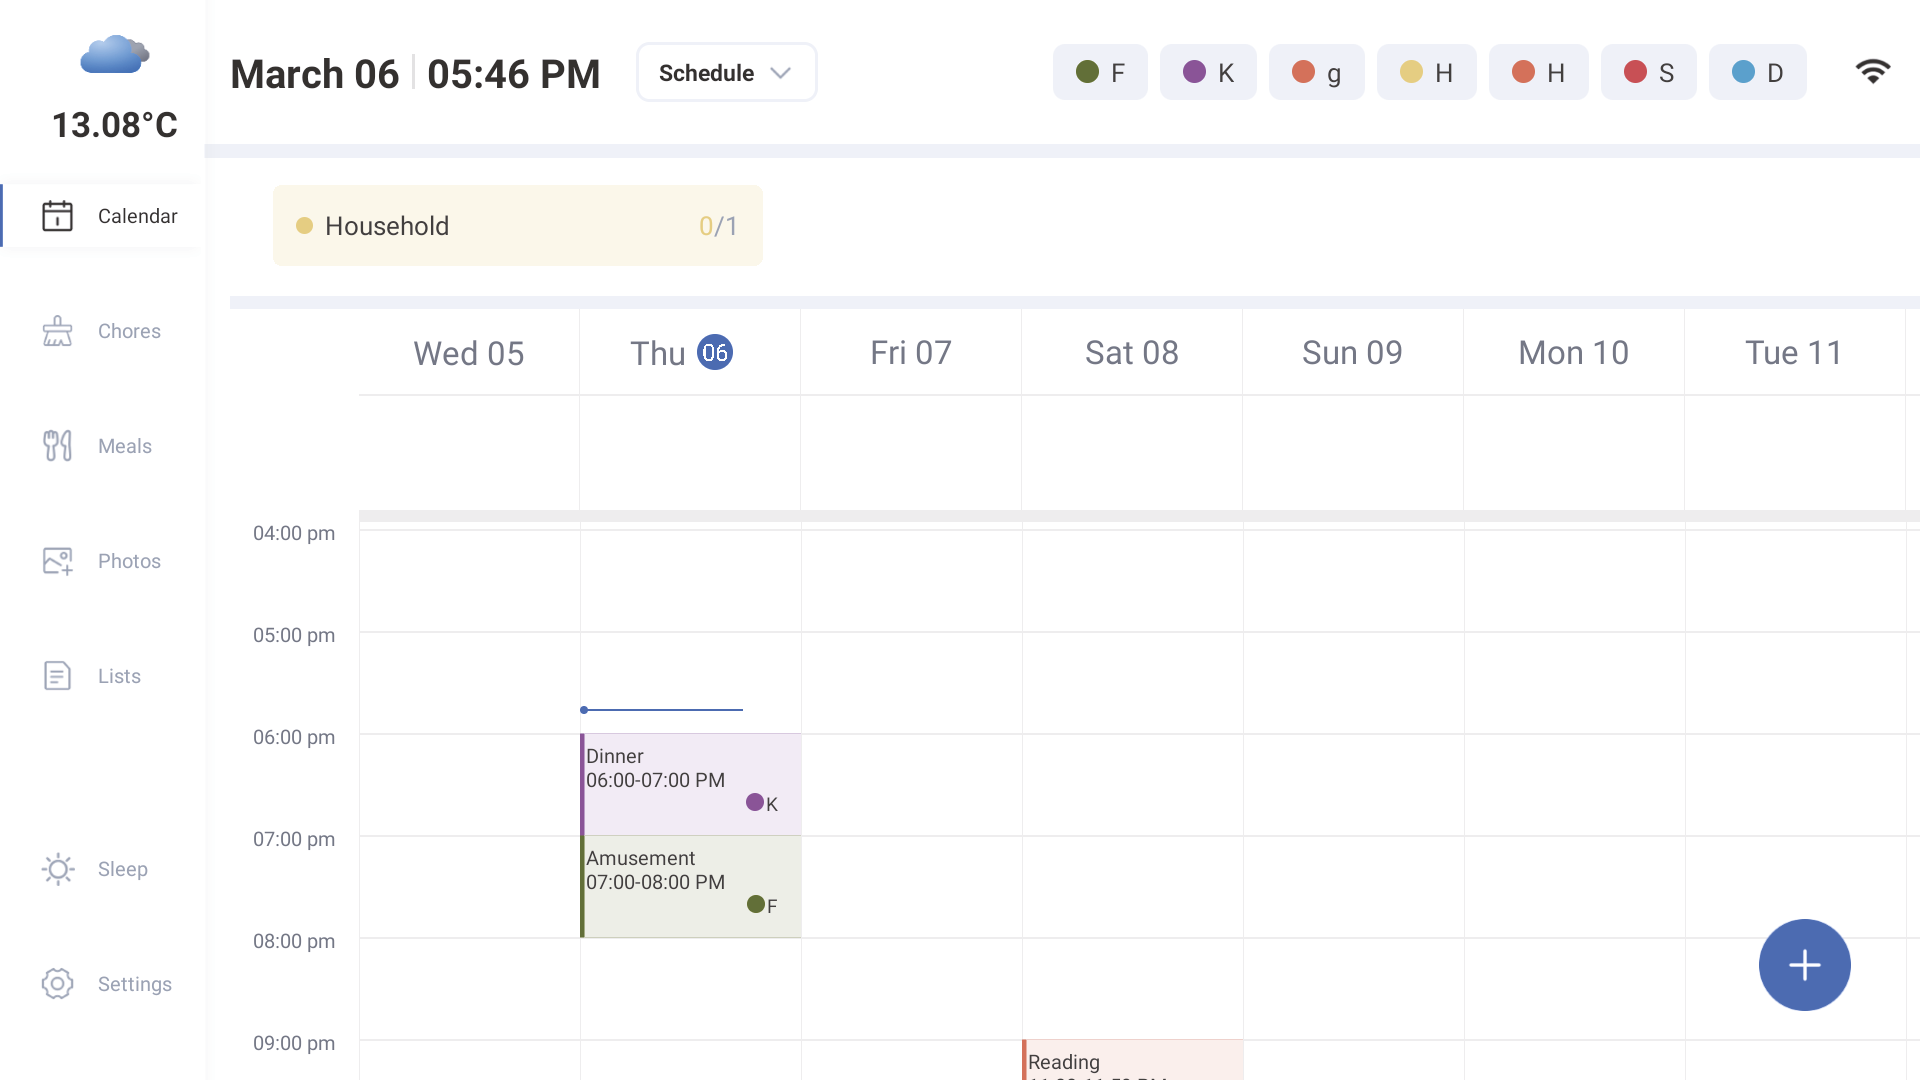
Schedule View
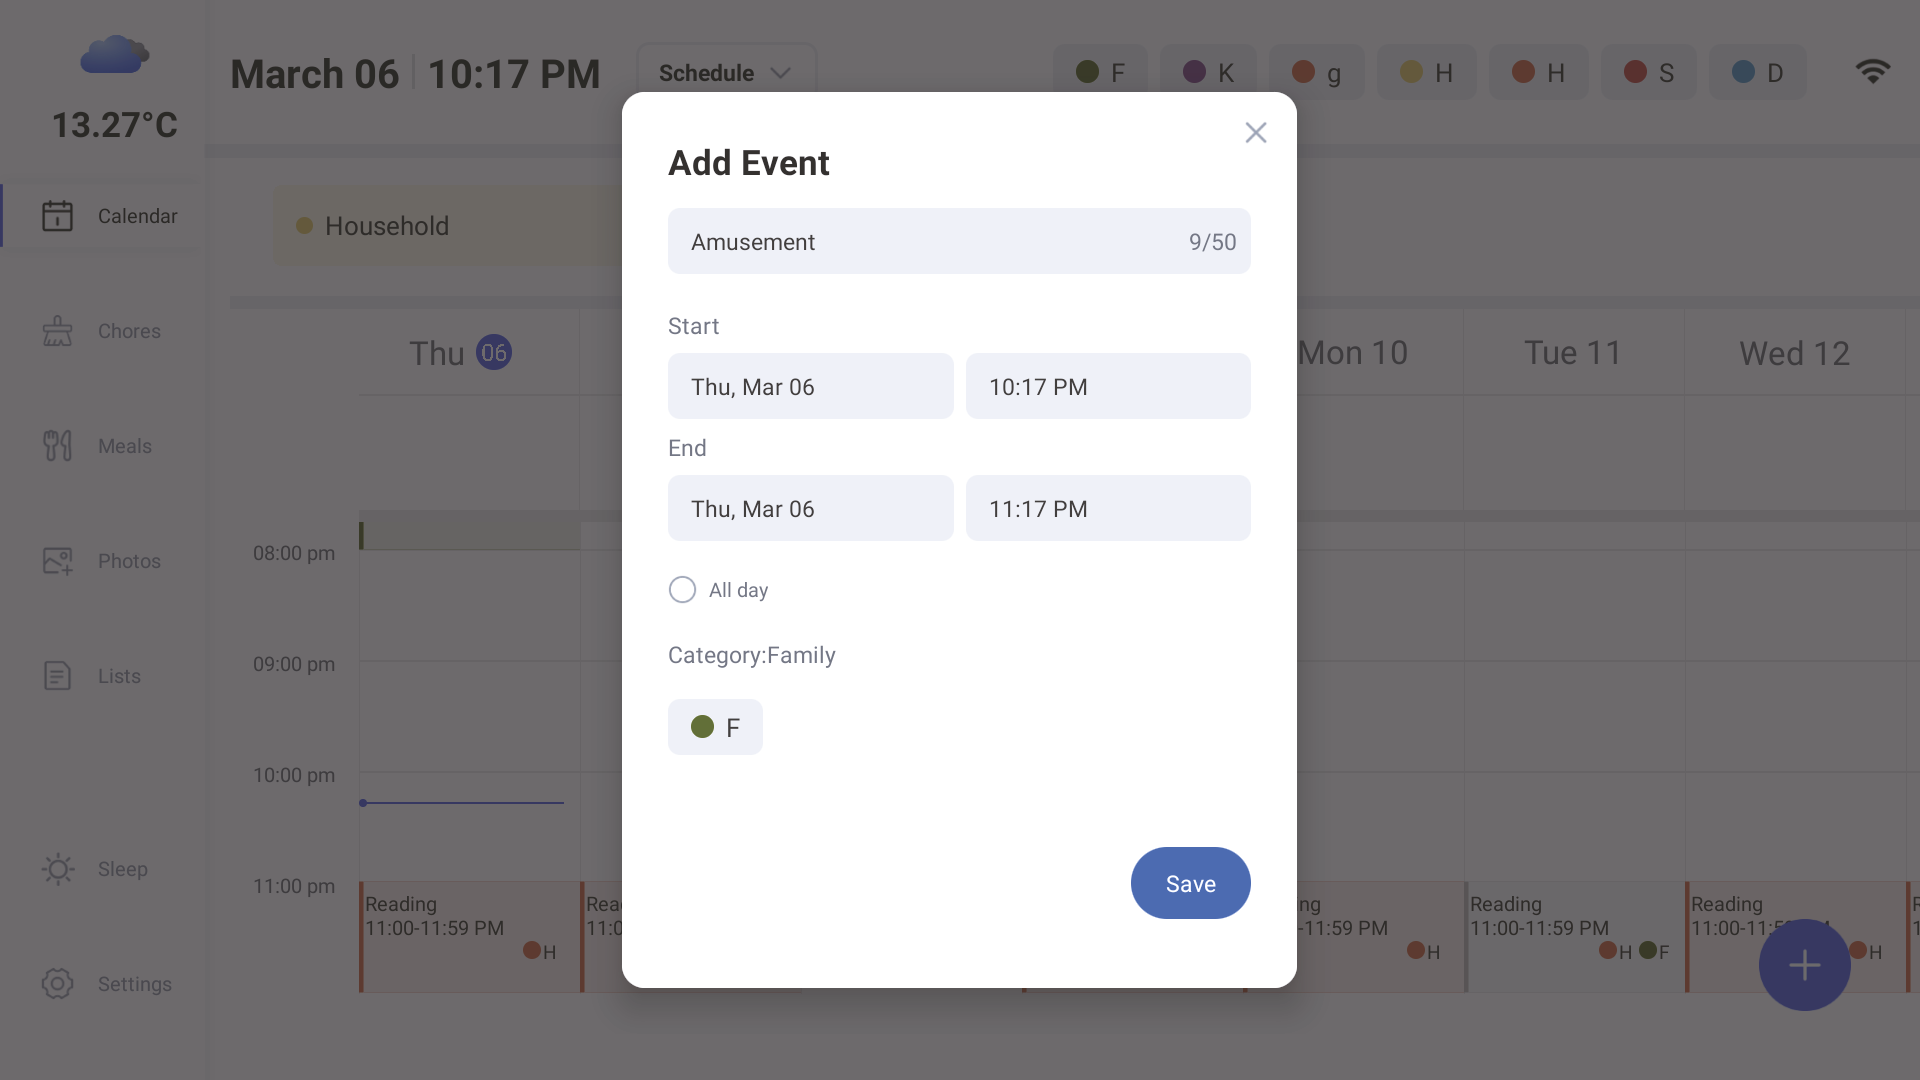
3.1.2 Creating Events
You can create events on your eCalendar from both the mobile app and the device. Events created on the device will sync to the eCalendar app and vice-versa. If you have synced a Google Calendar with two-way-sync, changes you make with eCalendar will reflect back too.
On Device:
- Press the
 in the bottom right.
 - Enter your details and press Save.
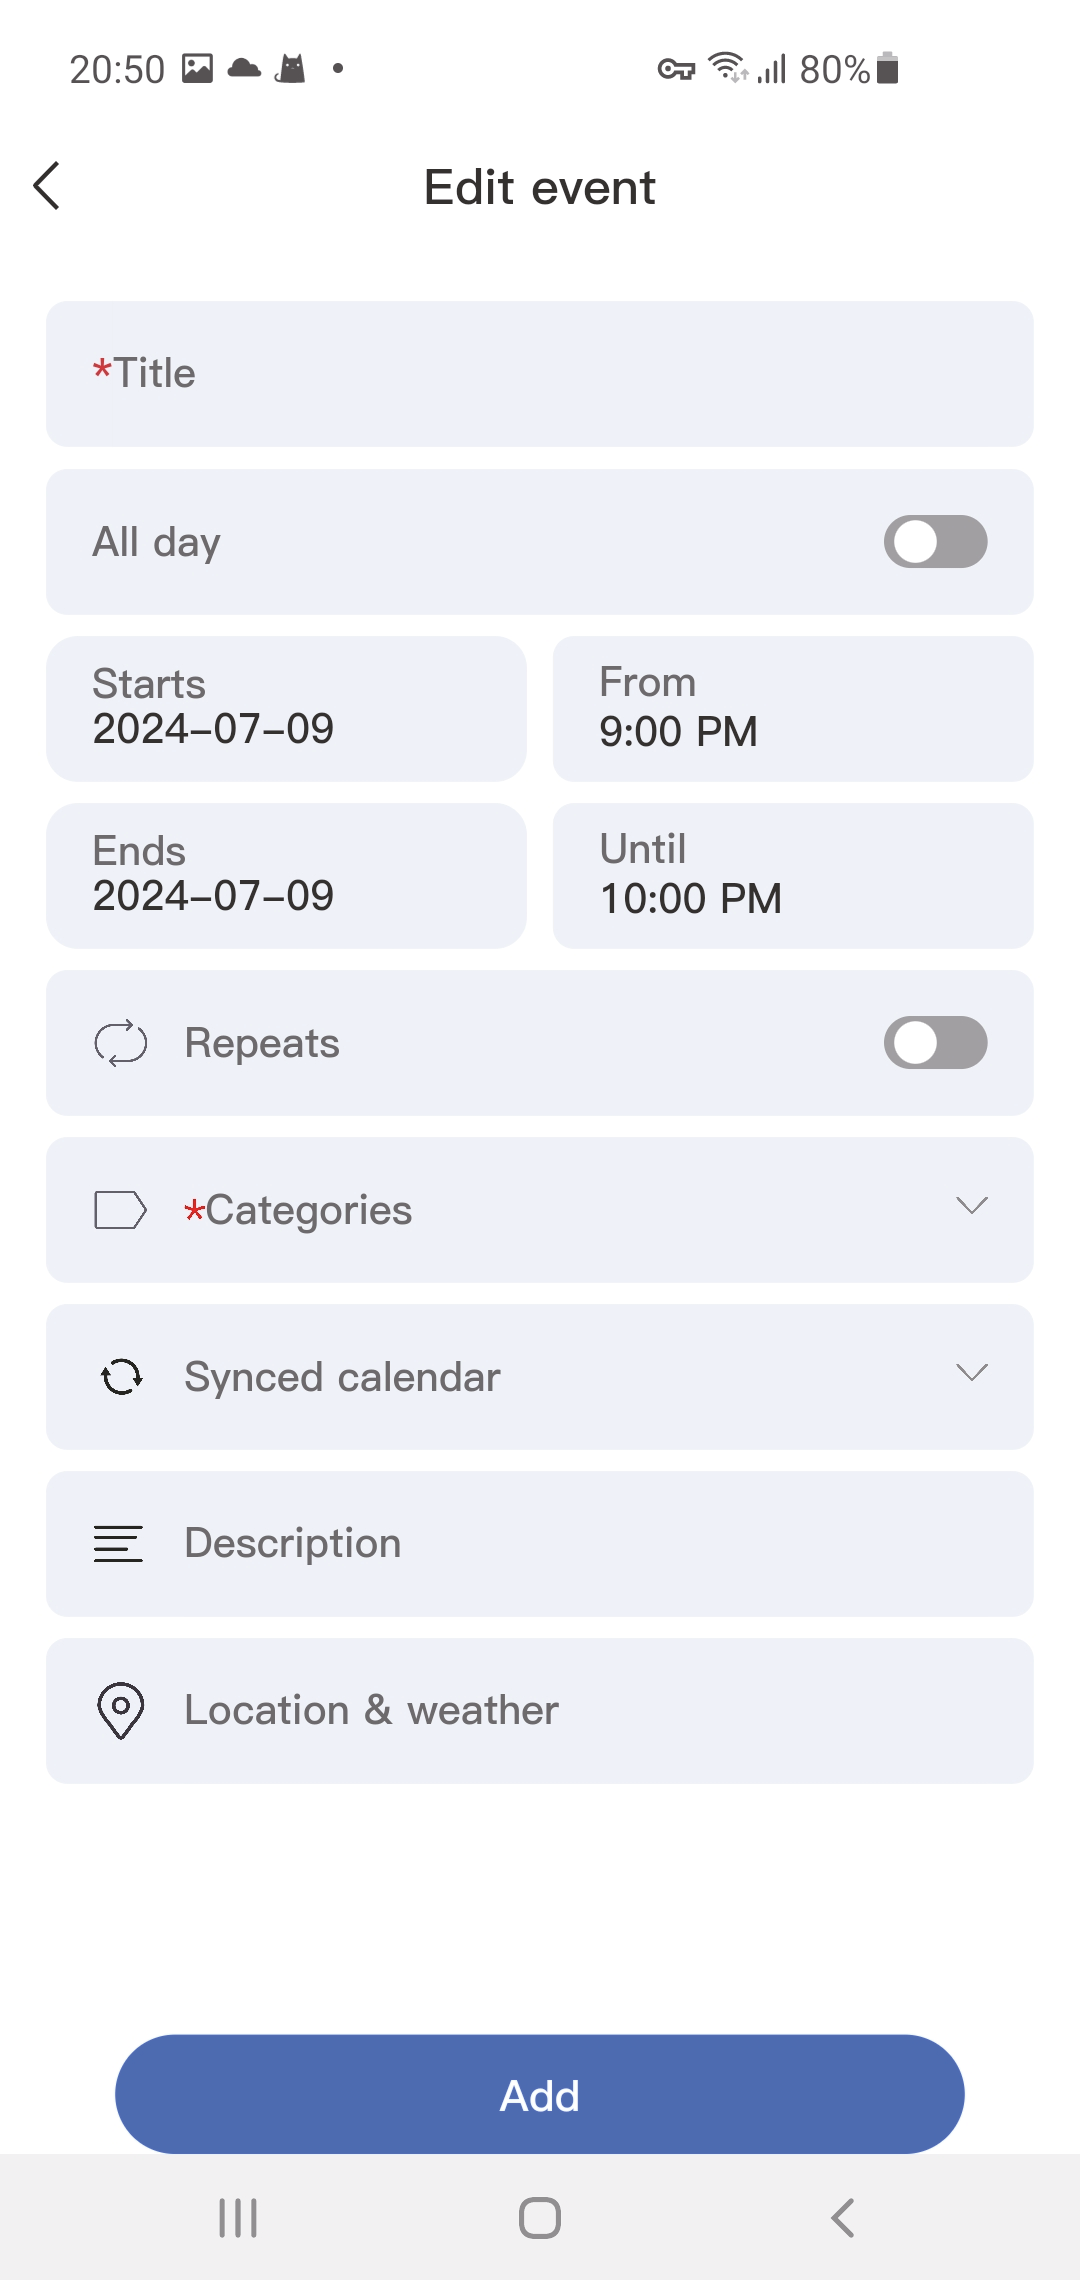
On App:
- Press the in the bottom right corner and choose Event.
- Enter your event details and press Save.
3.1.3 Recurring Events
You can create events that occur on a recurring basis. Events can recur in the following ways:
- Daily
- On certain days of the week (e.g., Tues, Thurs)
- Weekly
- Every X weeks
- Annually
Events can also repeat until a specified end date.
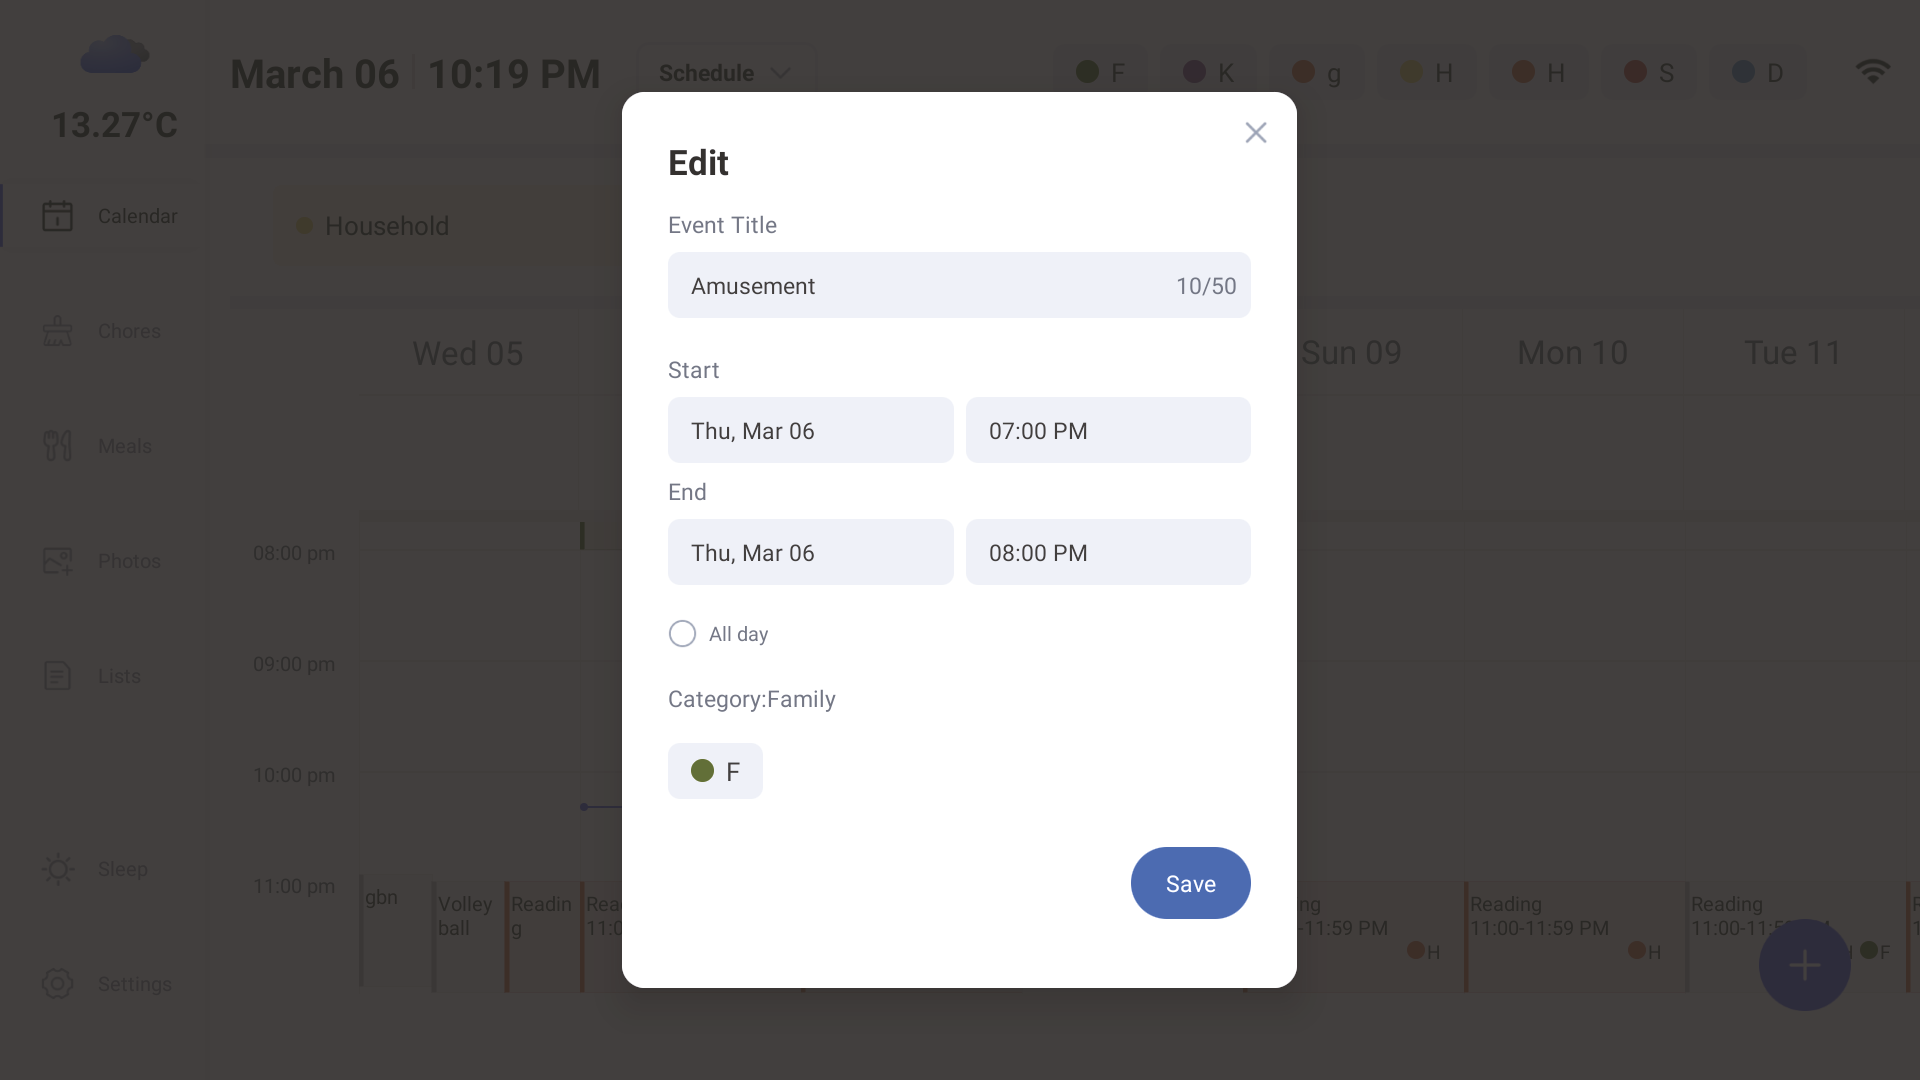
1. Open an Event’s details and press Edit.
2. Edit your event details and press Save.
3. If the event is on a 2-way synced Google Calendar, the event changes will appear on your Google Calendar. Note for editing Google events: At this time, you can only edit single instances of a recurring event. You cannot convert one-off events into recurring events or edit recurrence rules.

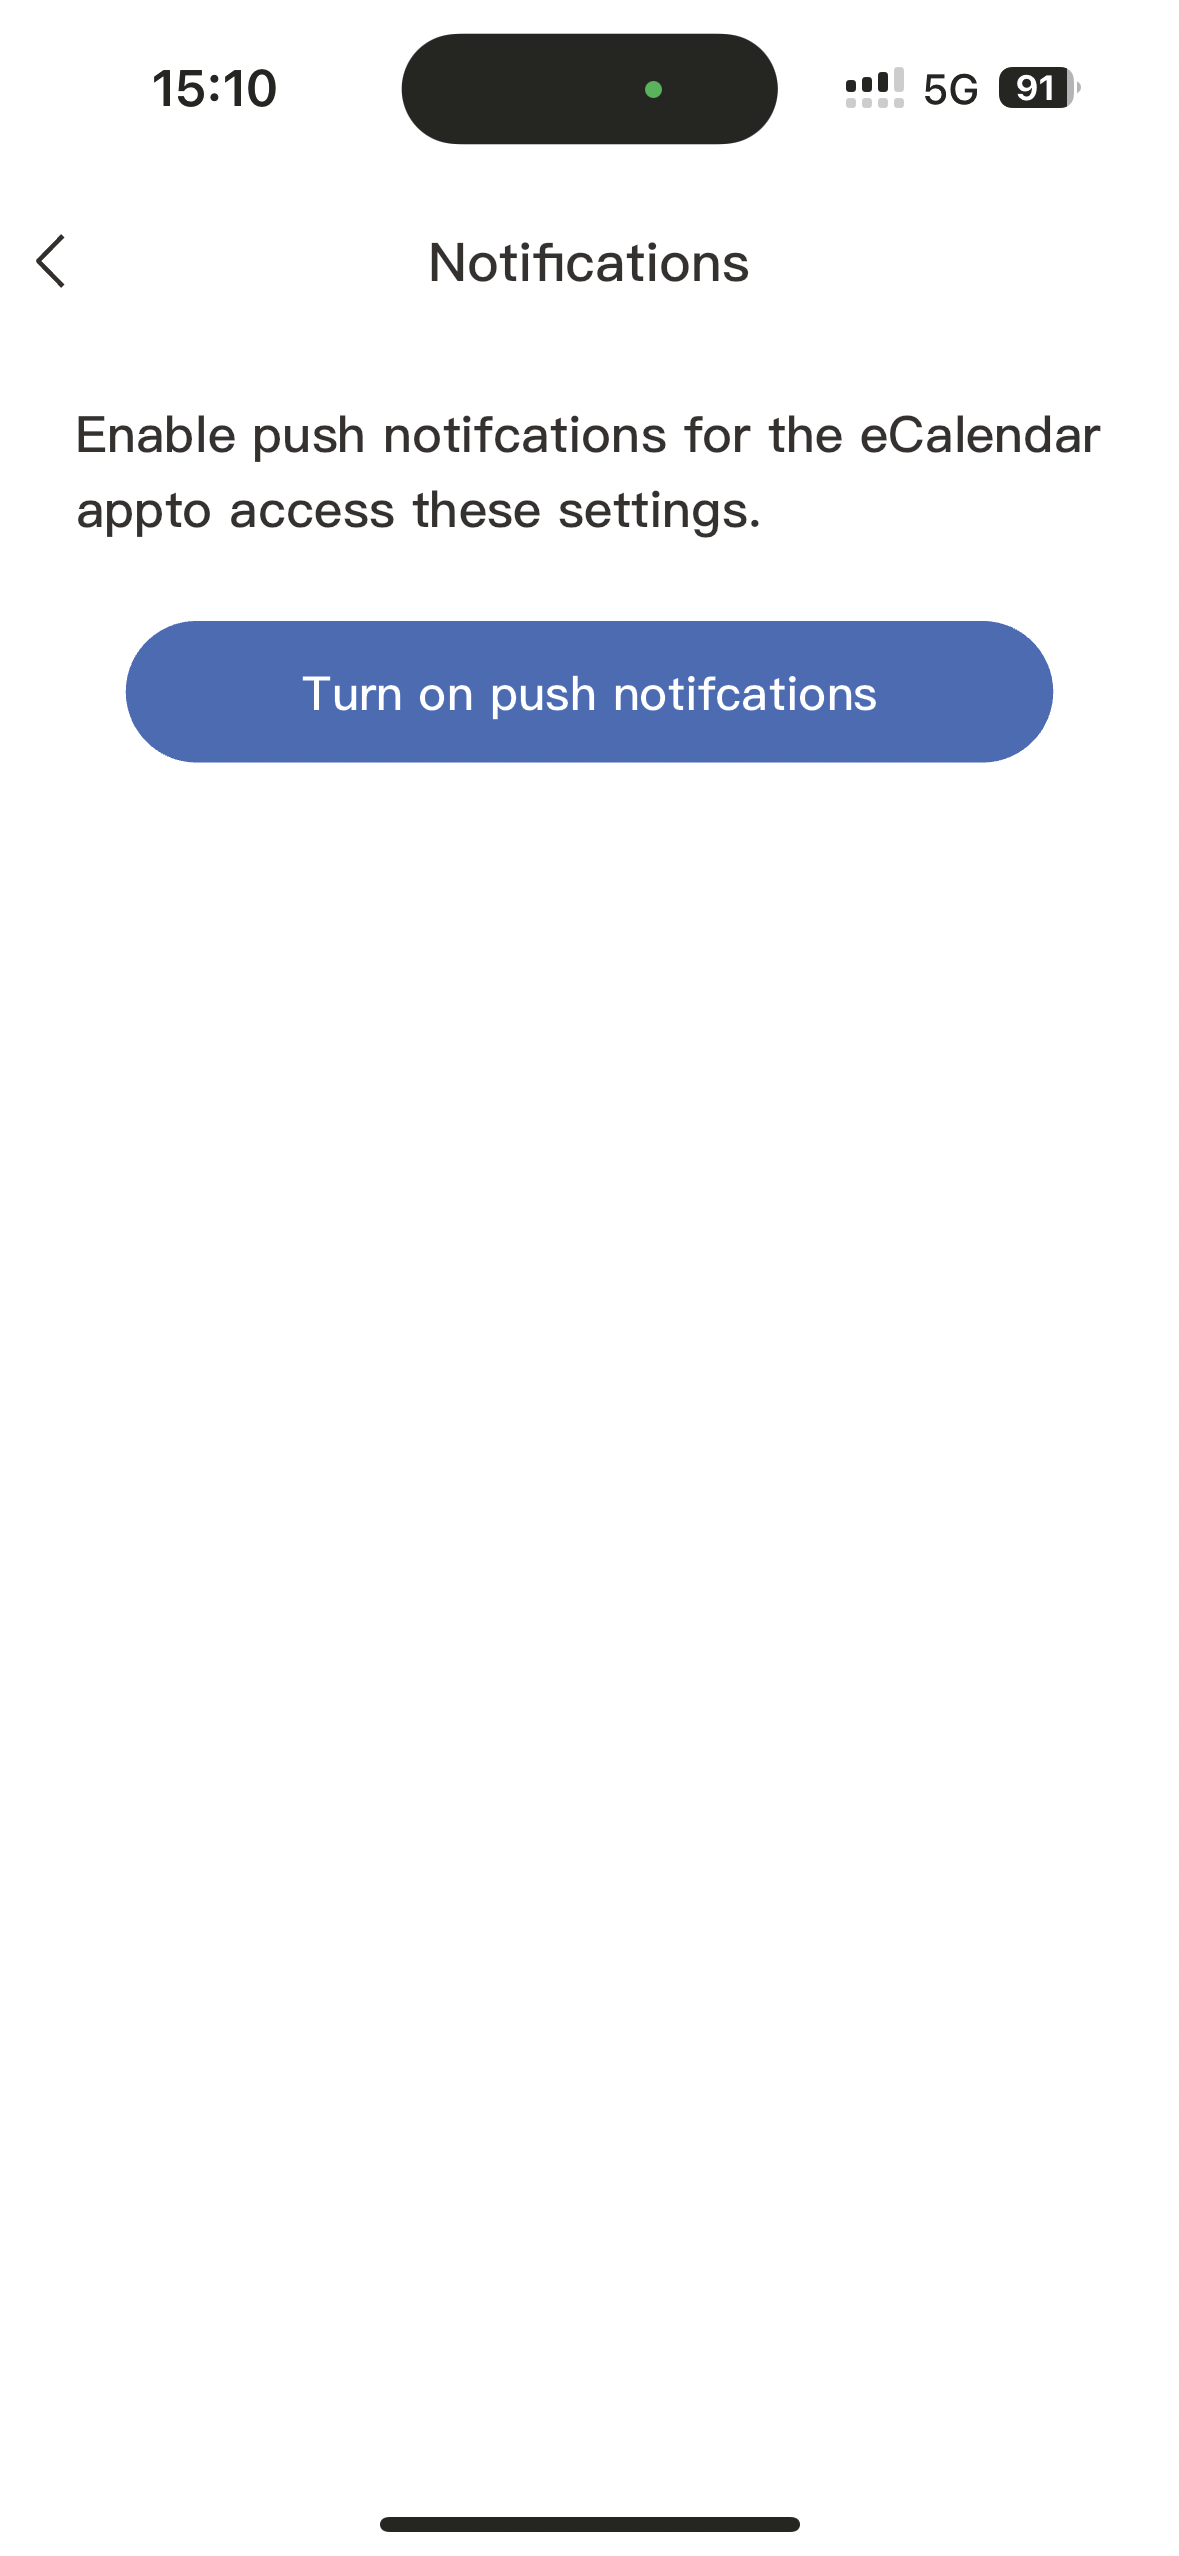
4. Once created, you can set notifications in "My Calendar - Notifications - Open Push Notifications".

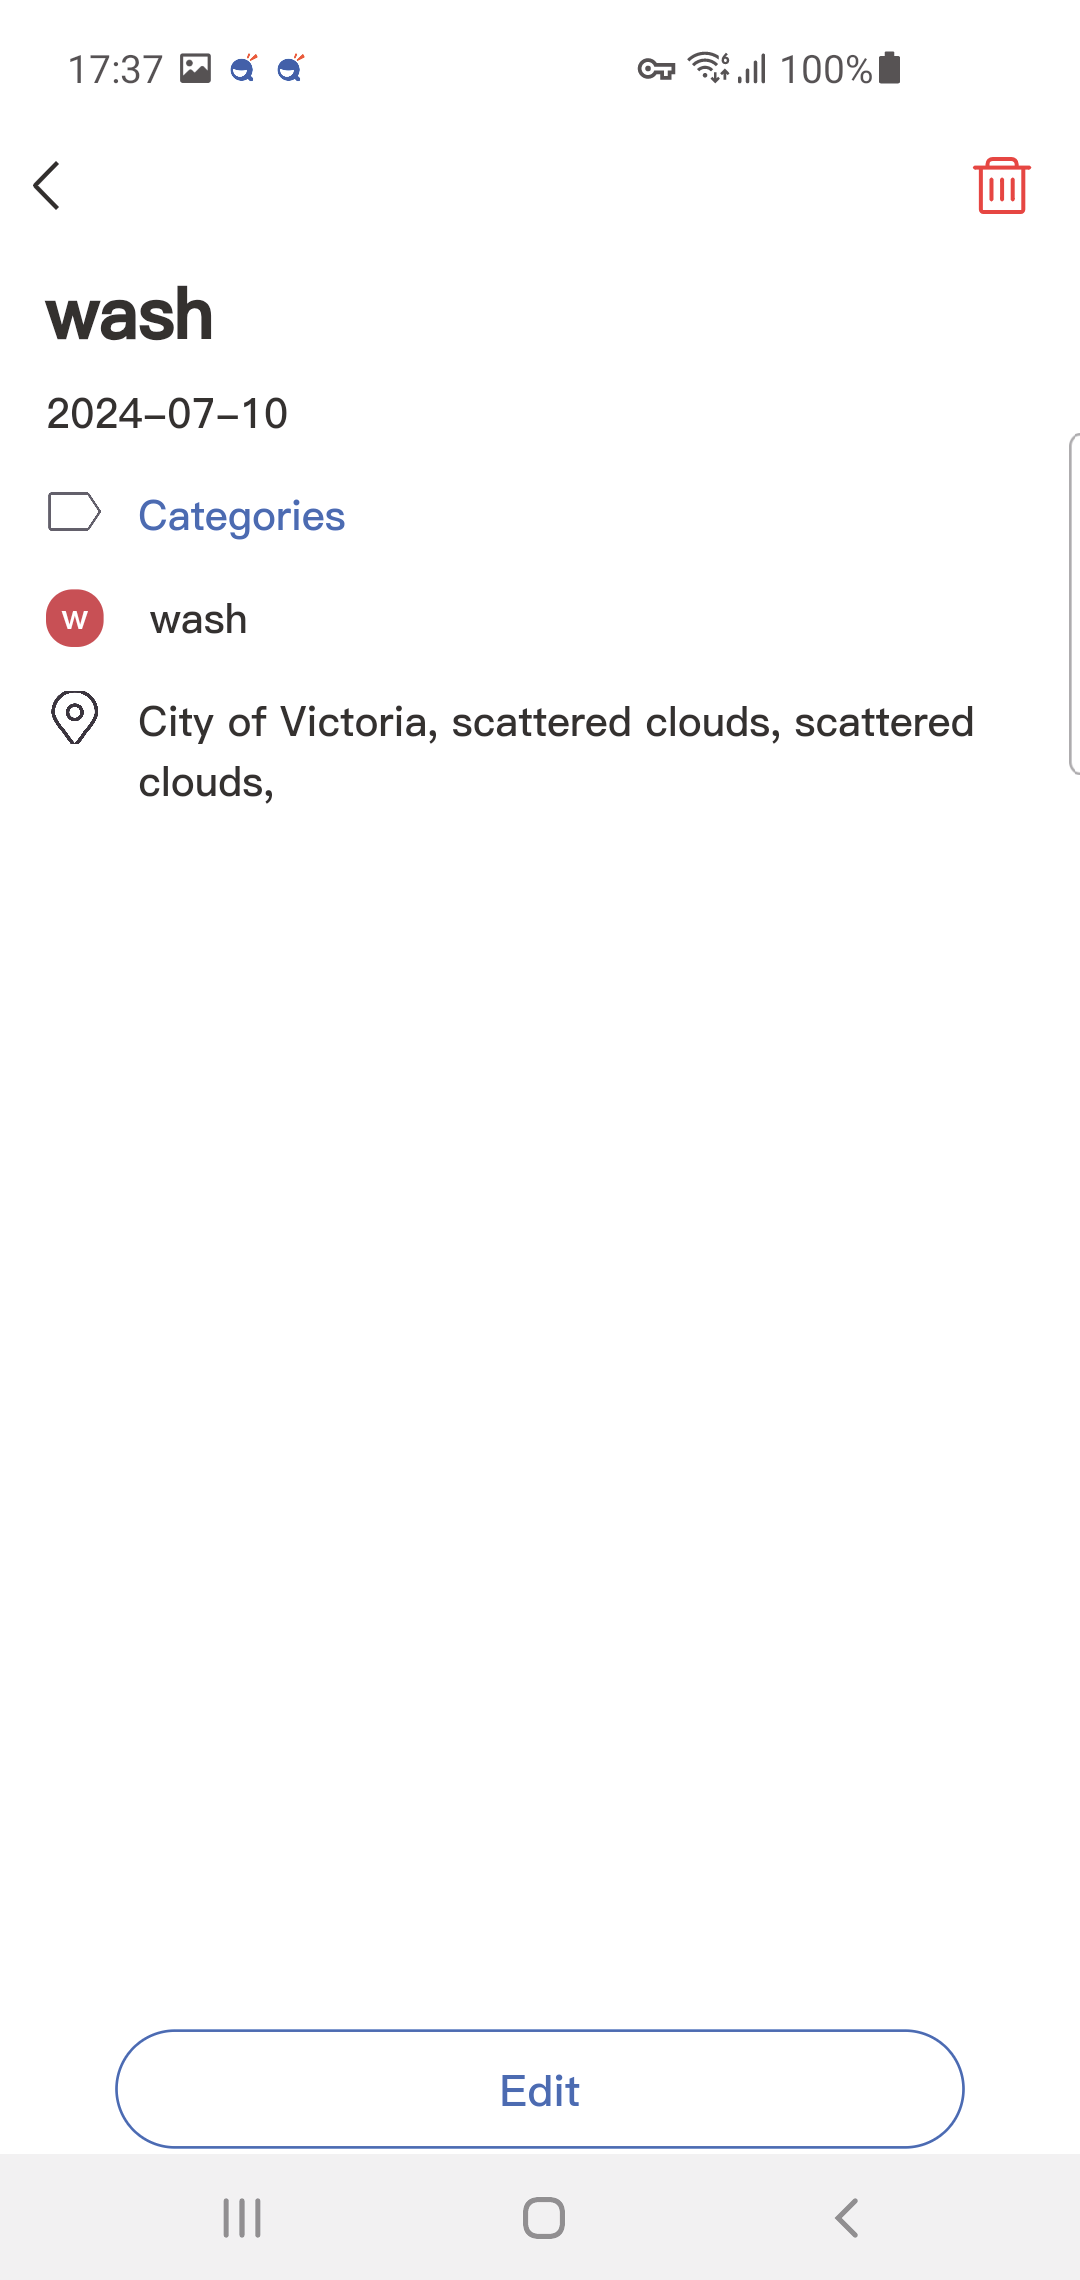
3.1.4 Editing Events
Tap an event to view details and press Edit Event.
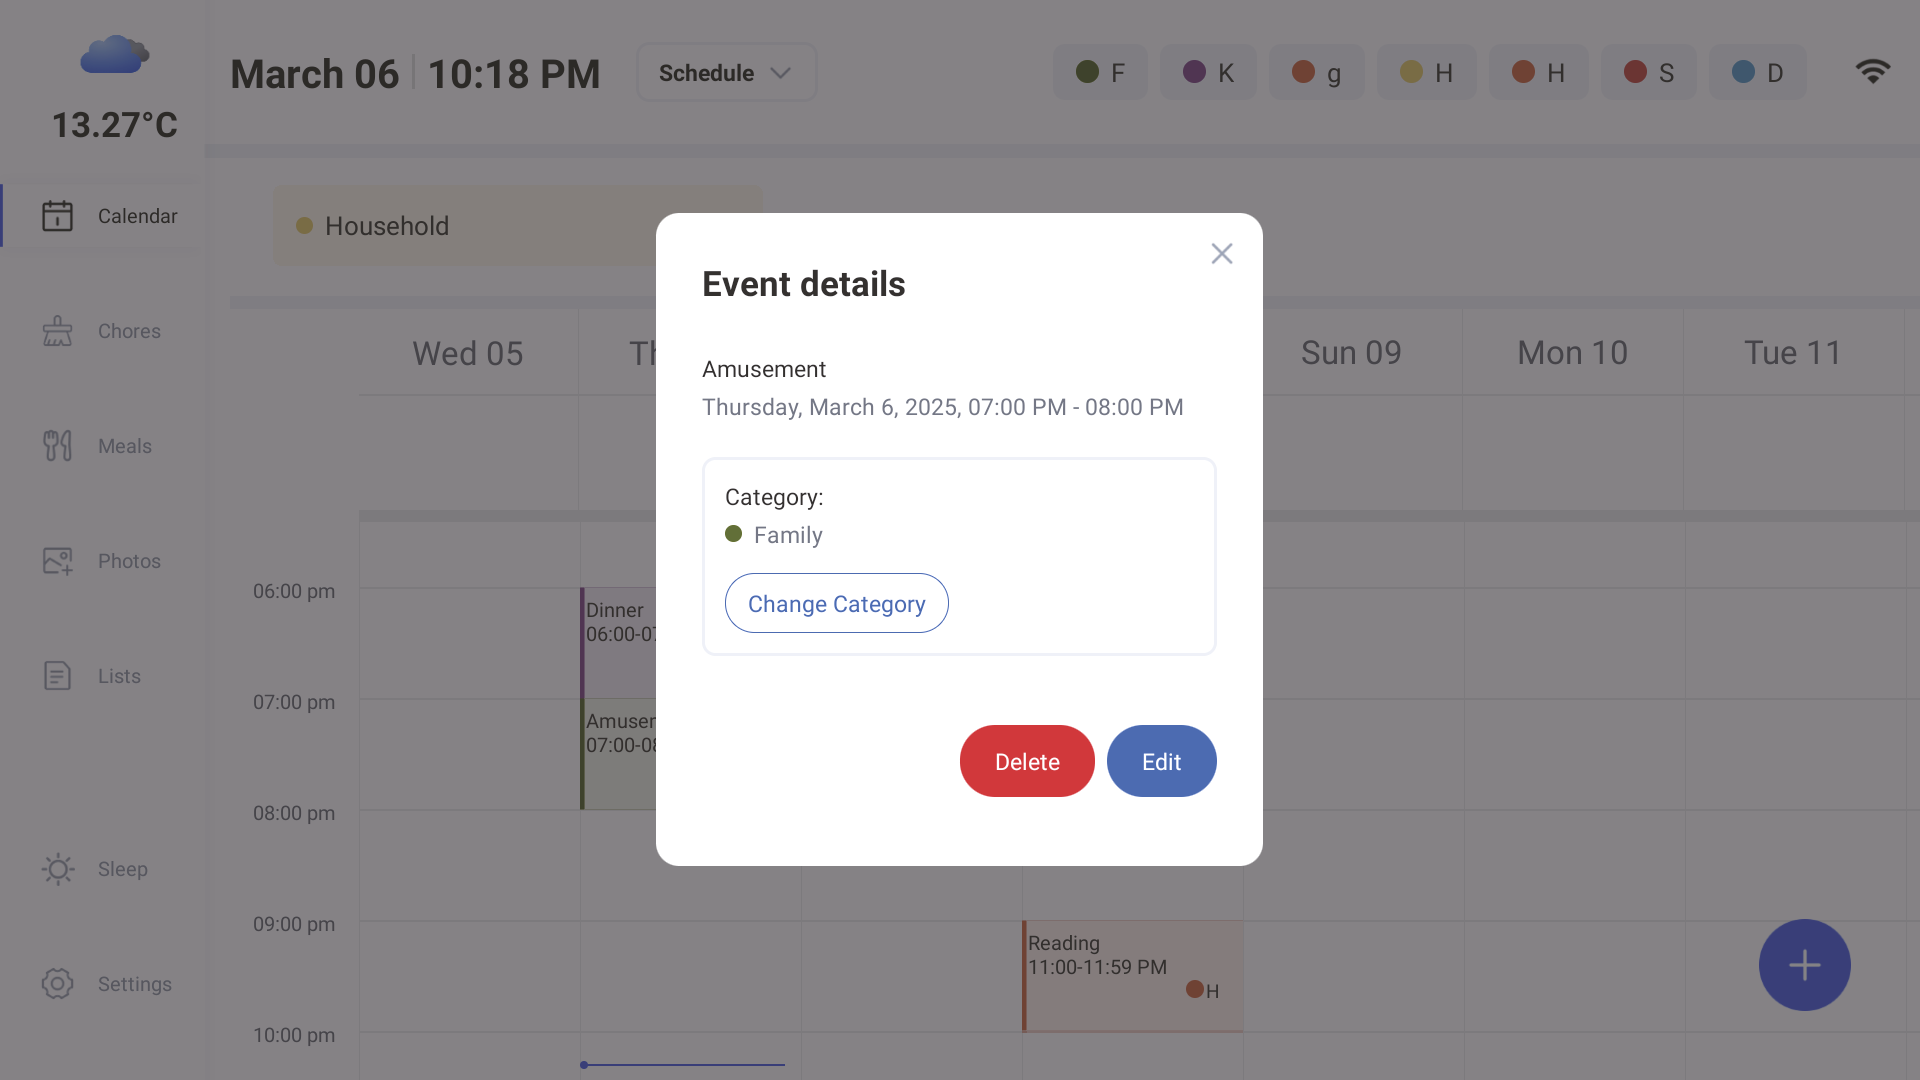
Enter your new event details and press Save.
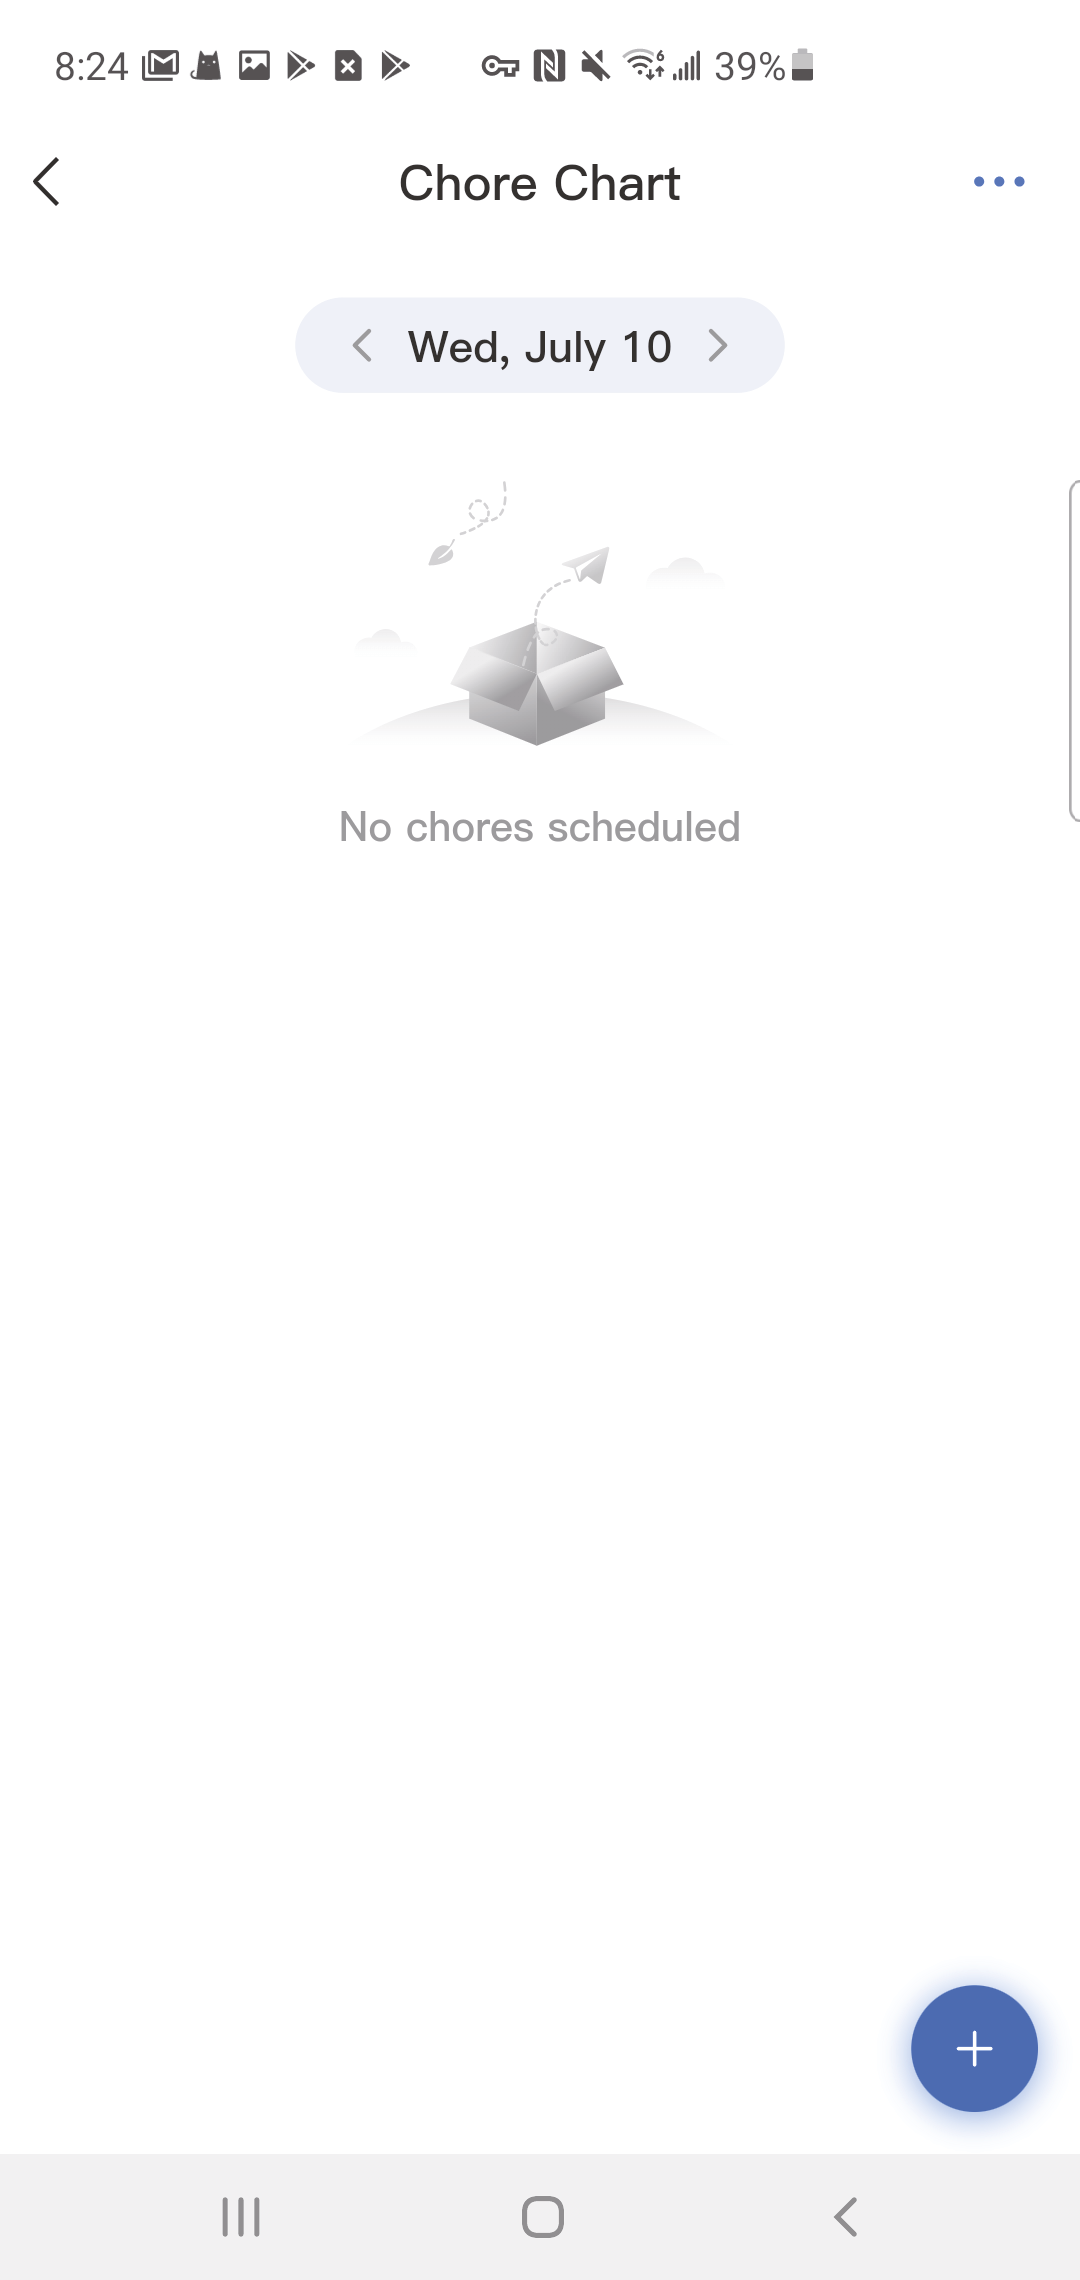
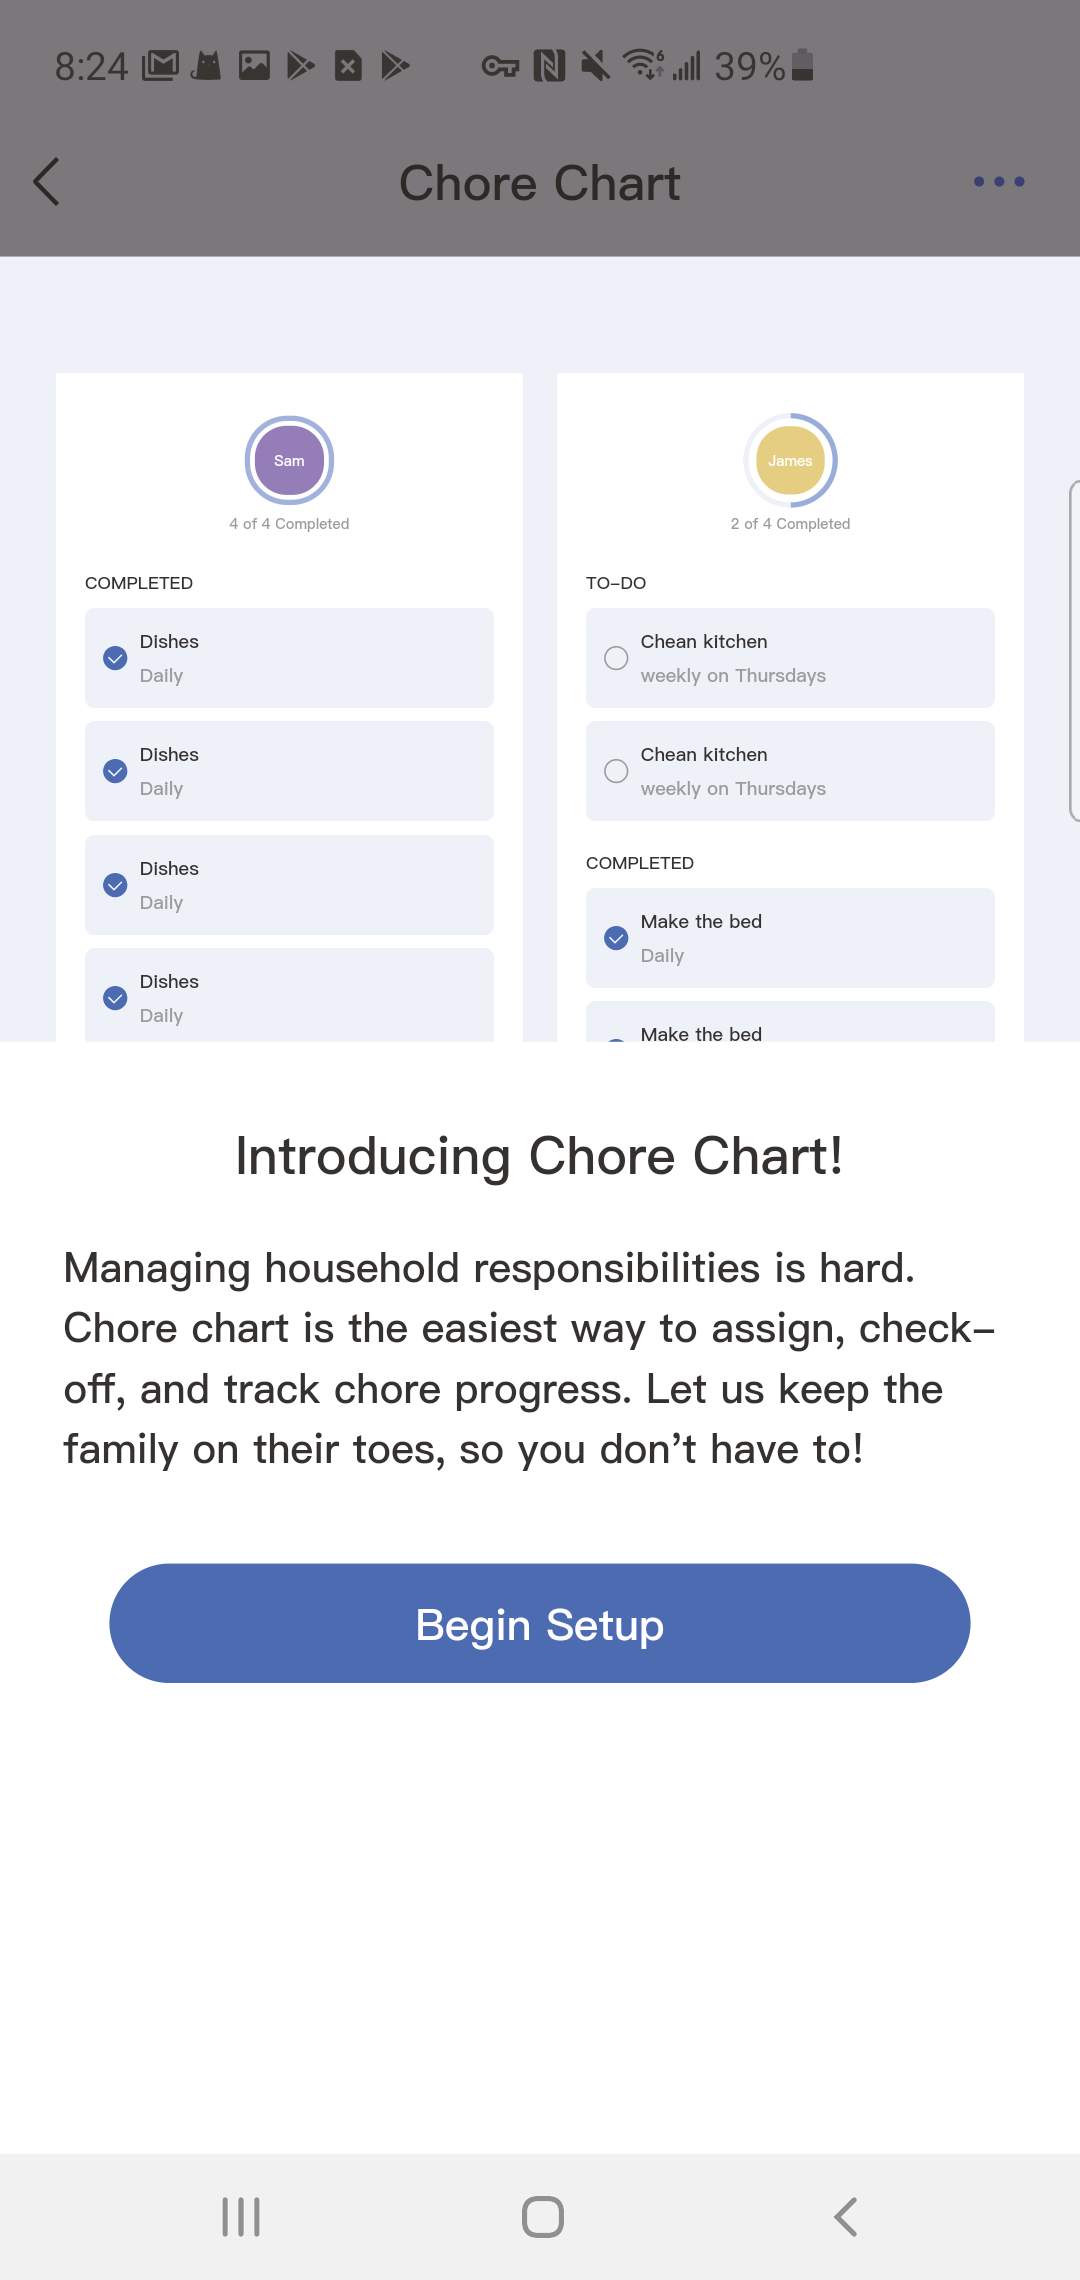
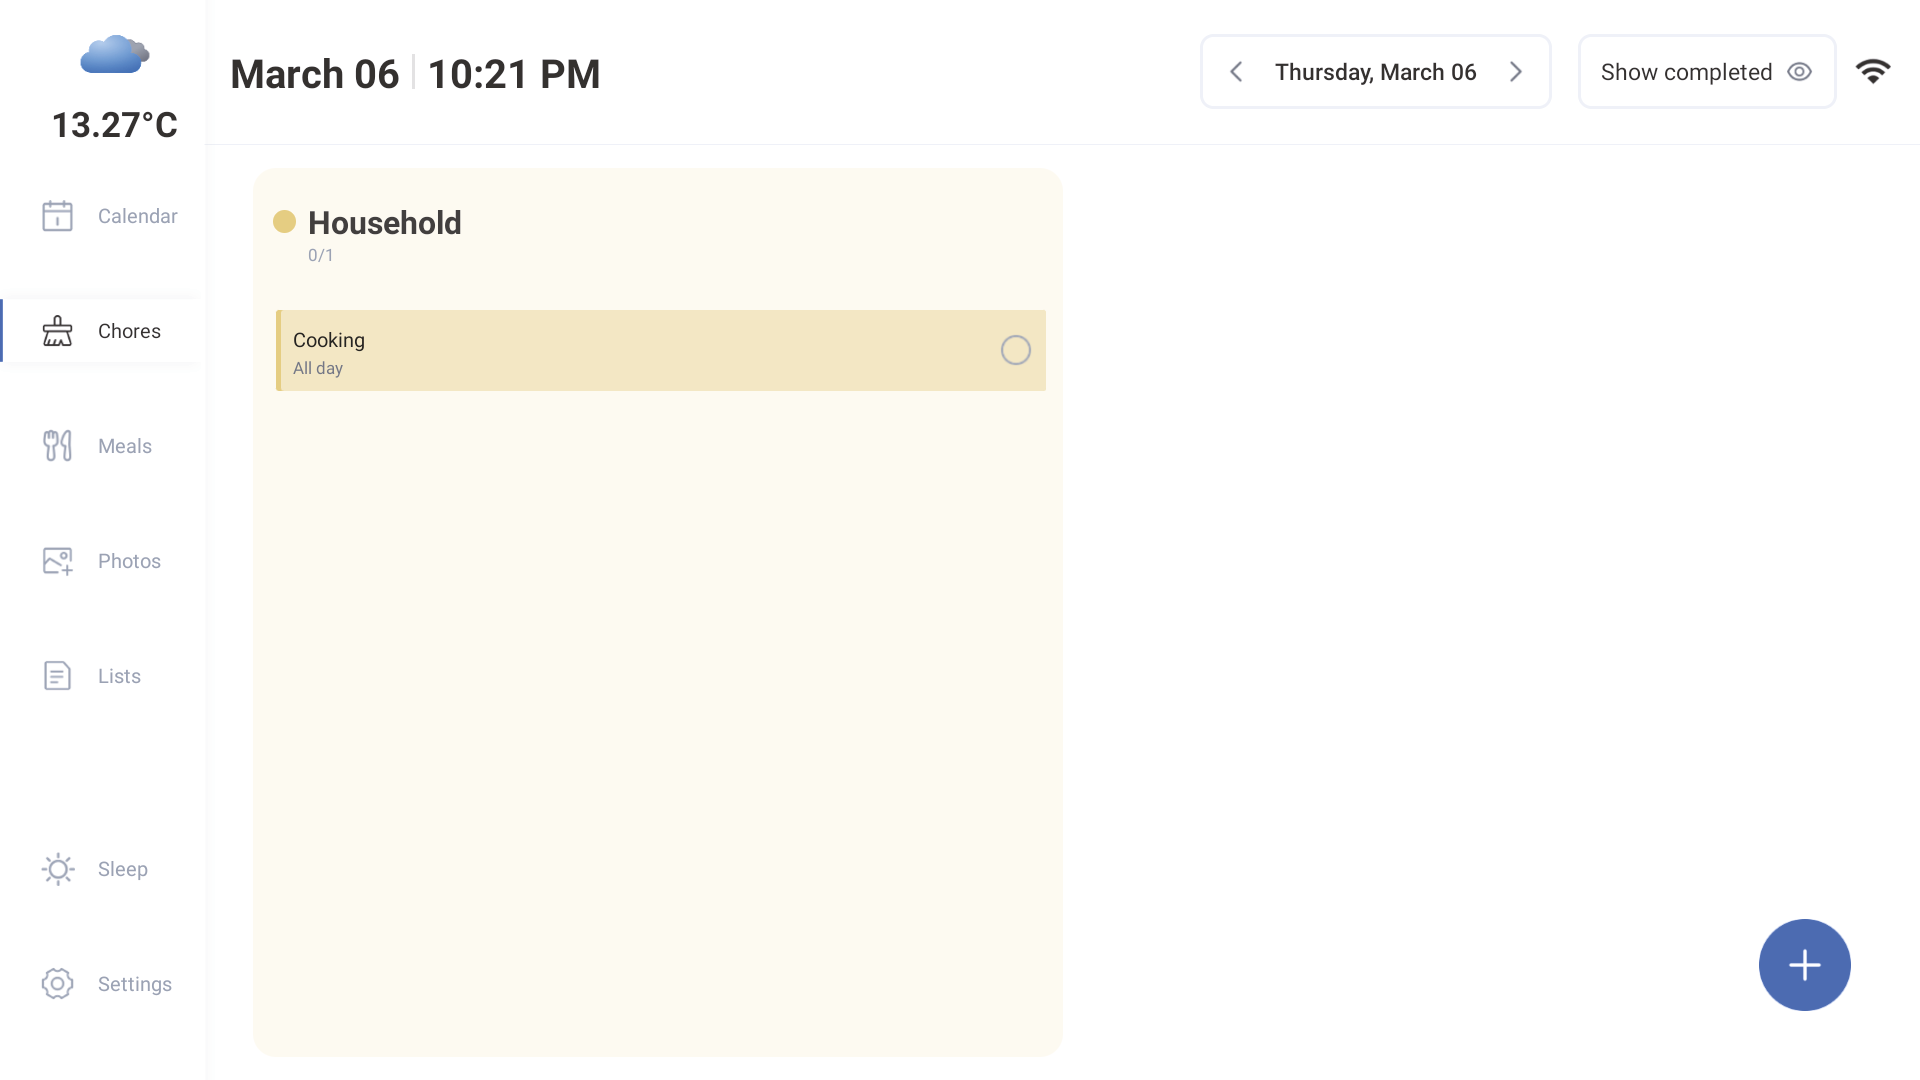
3.2 Chores
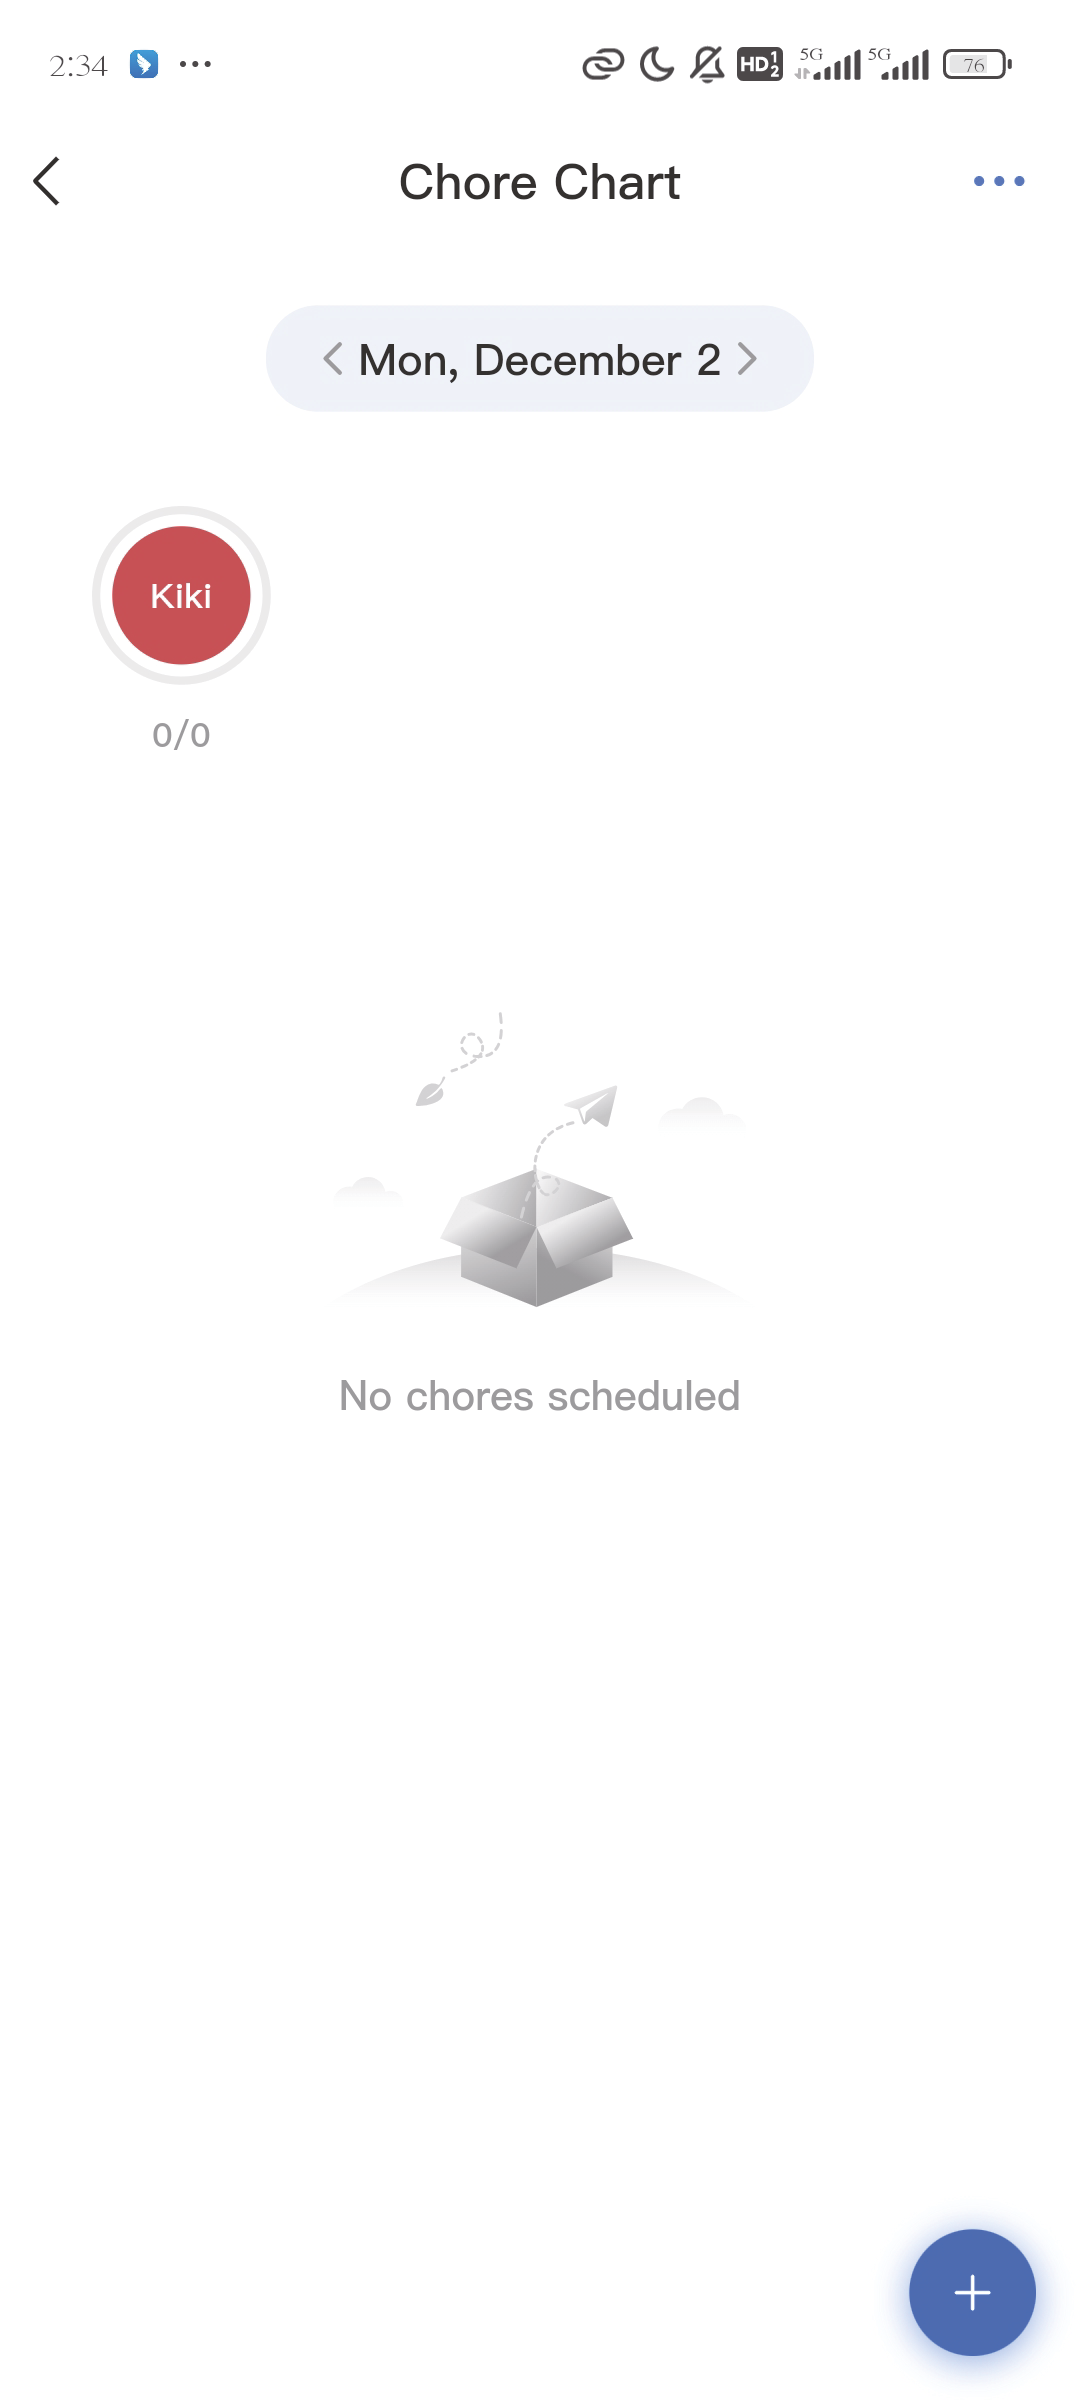
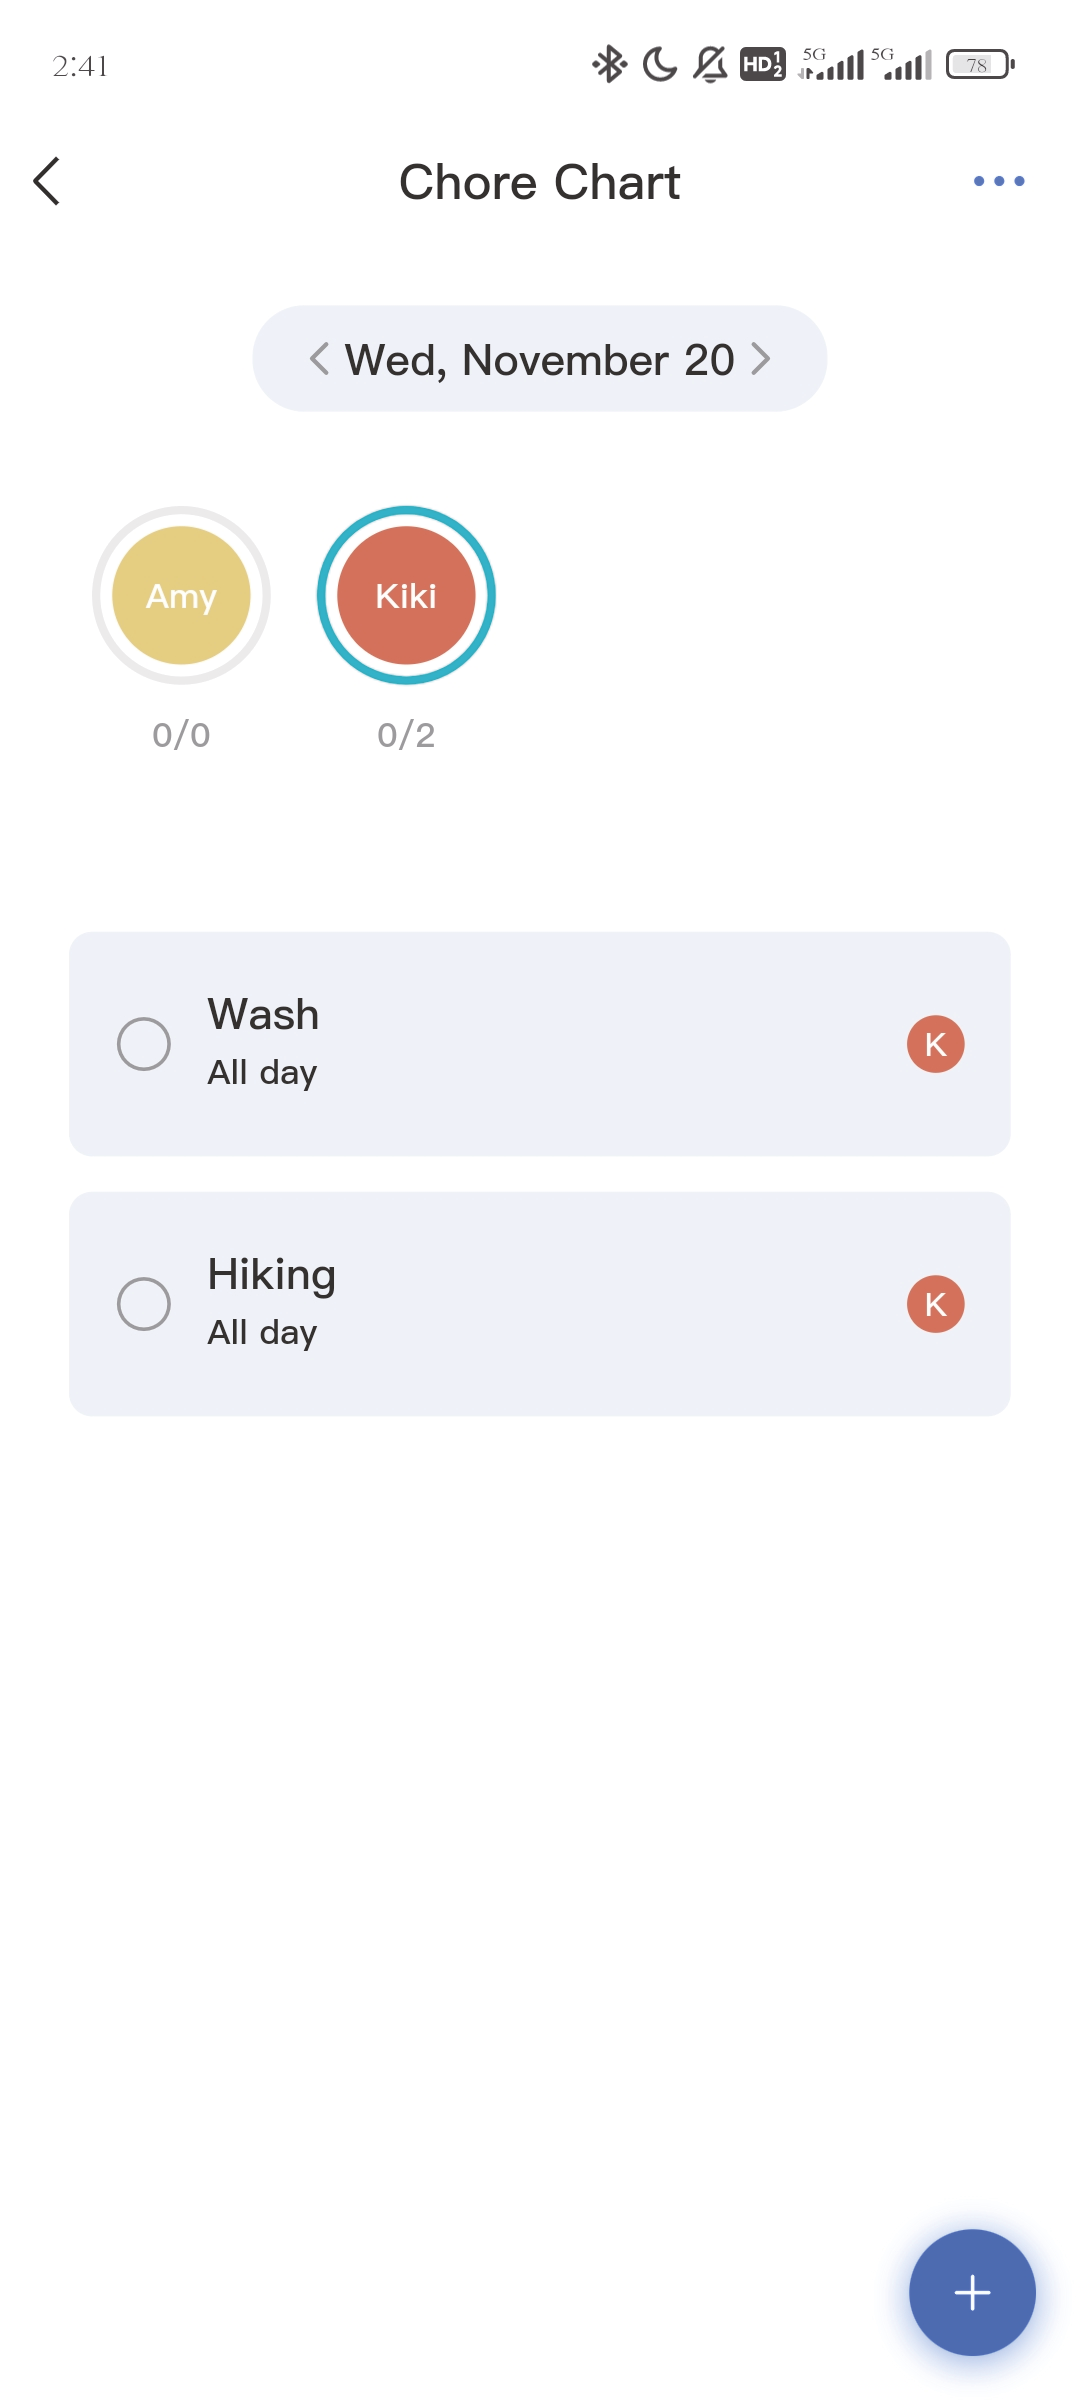
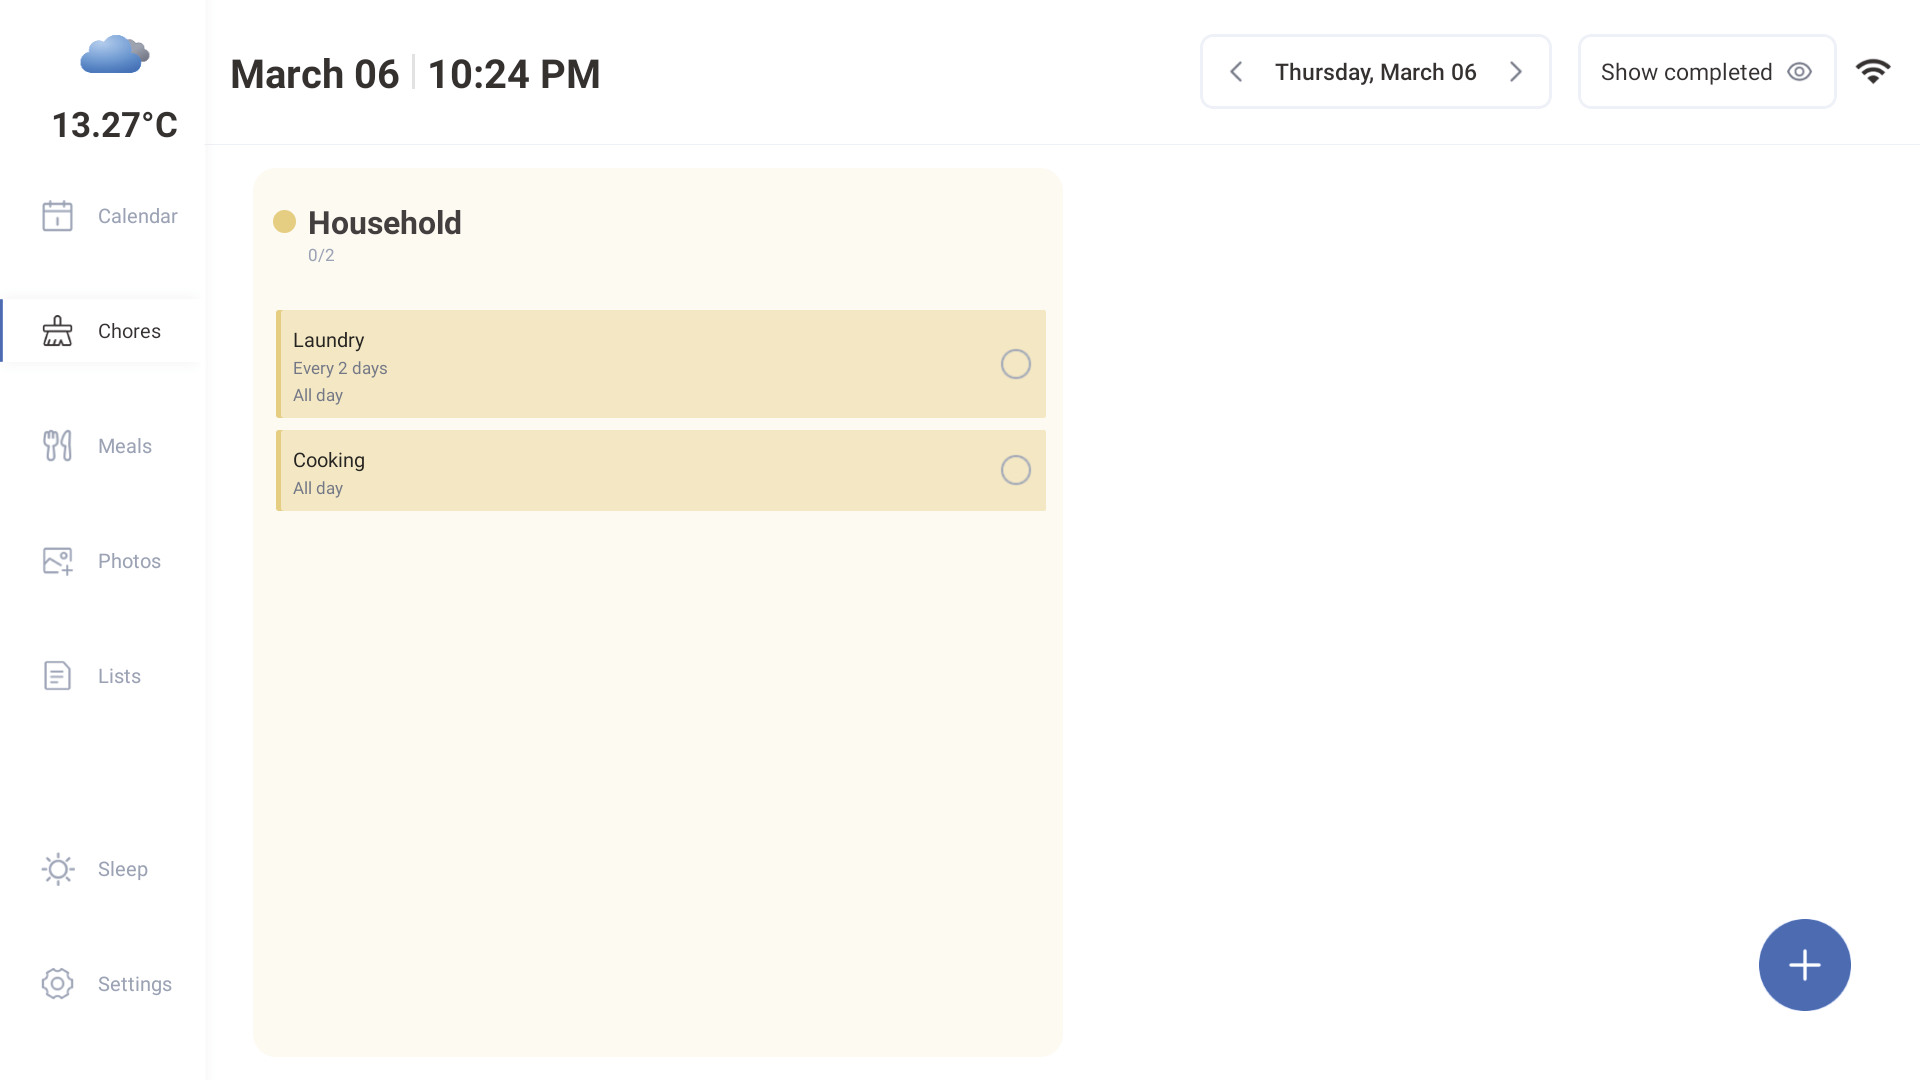
3.2.1 Chore Chart
Chores are an effective way to keep track of tasks for the entire household. Different types of chores can be created to organize the various tasks that need to be completed.
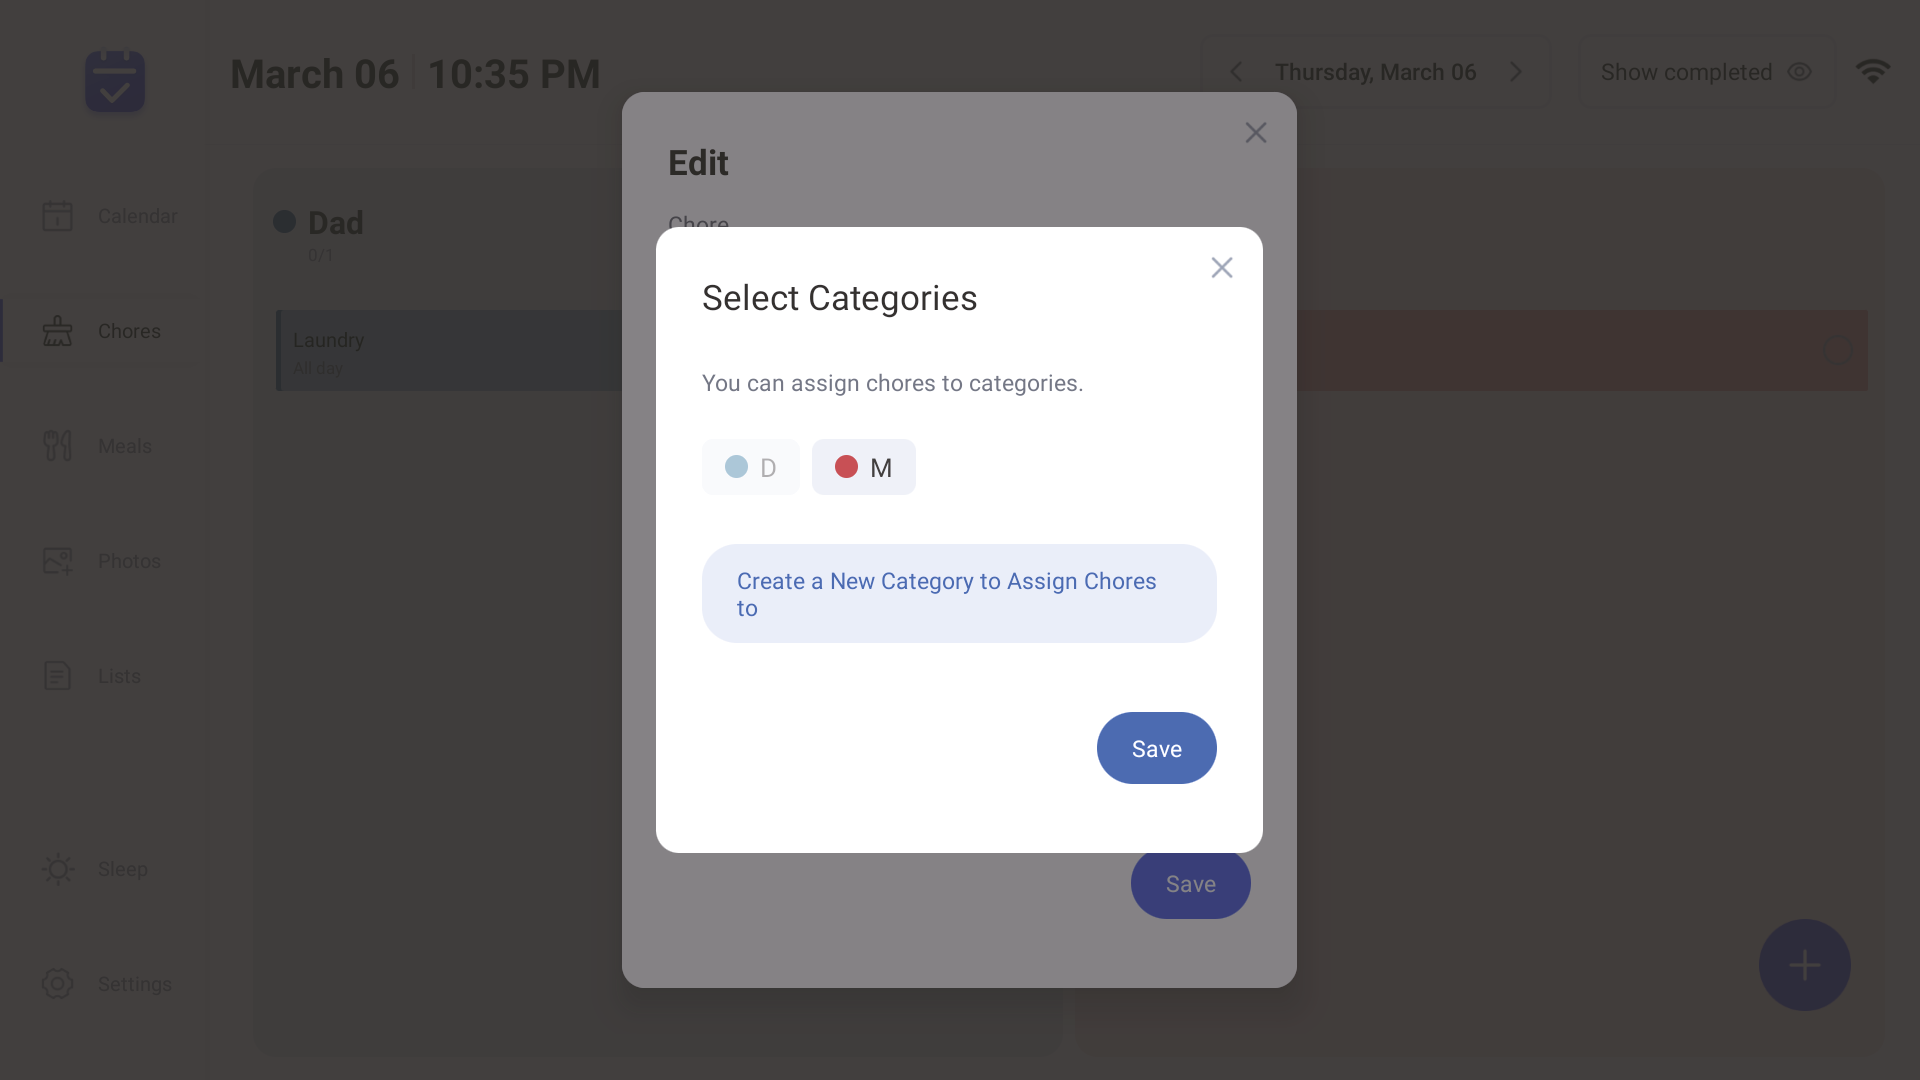
- 1.Press 'Chores'
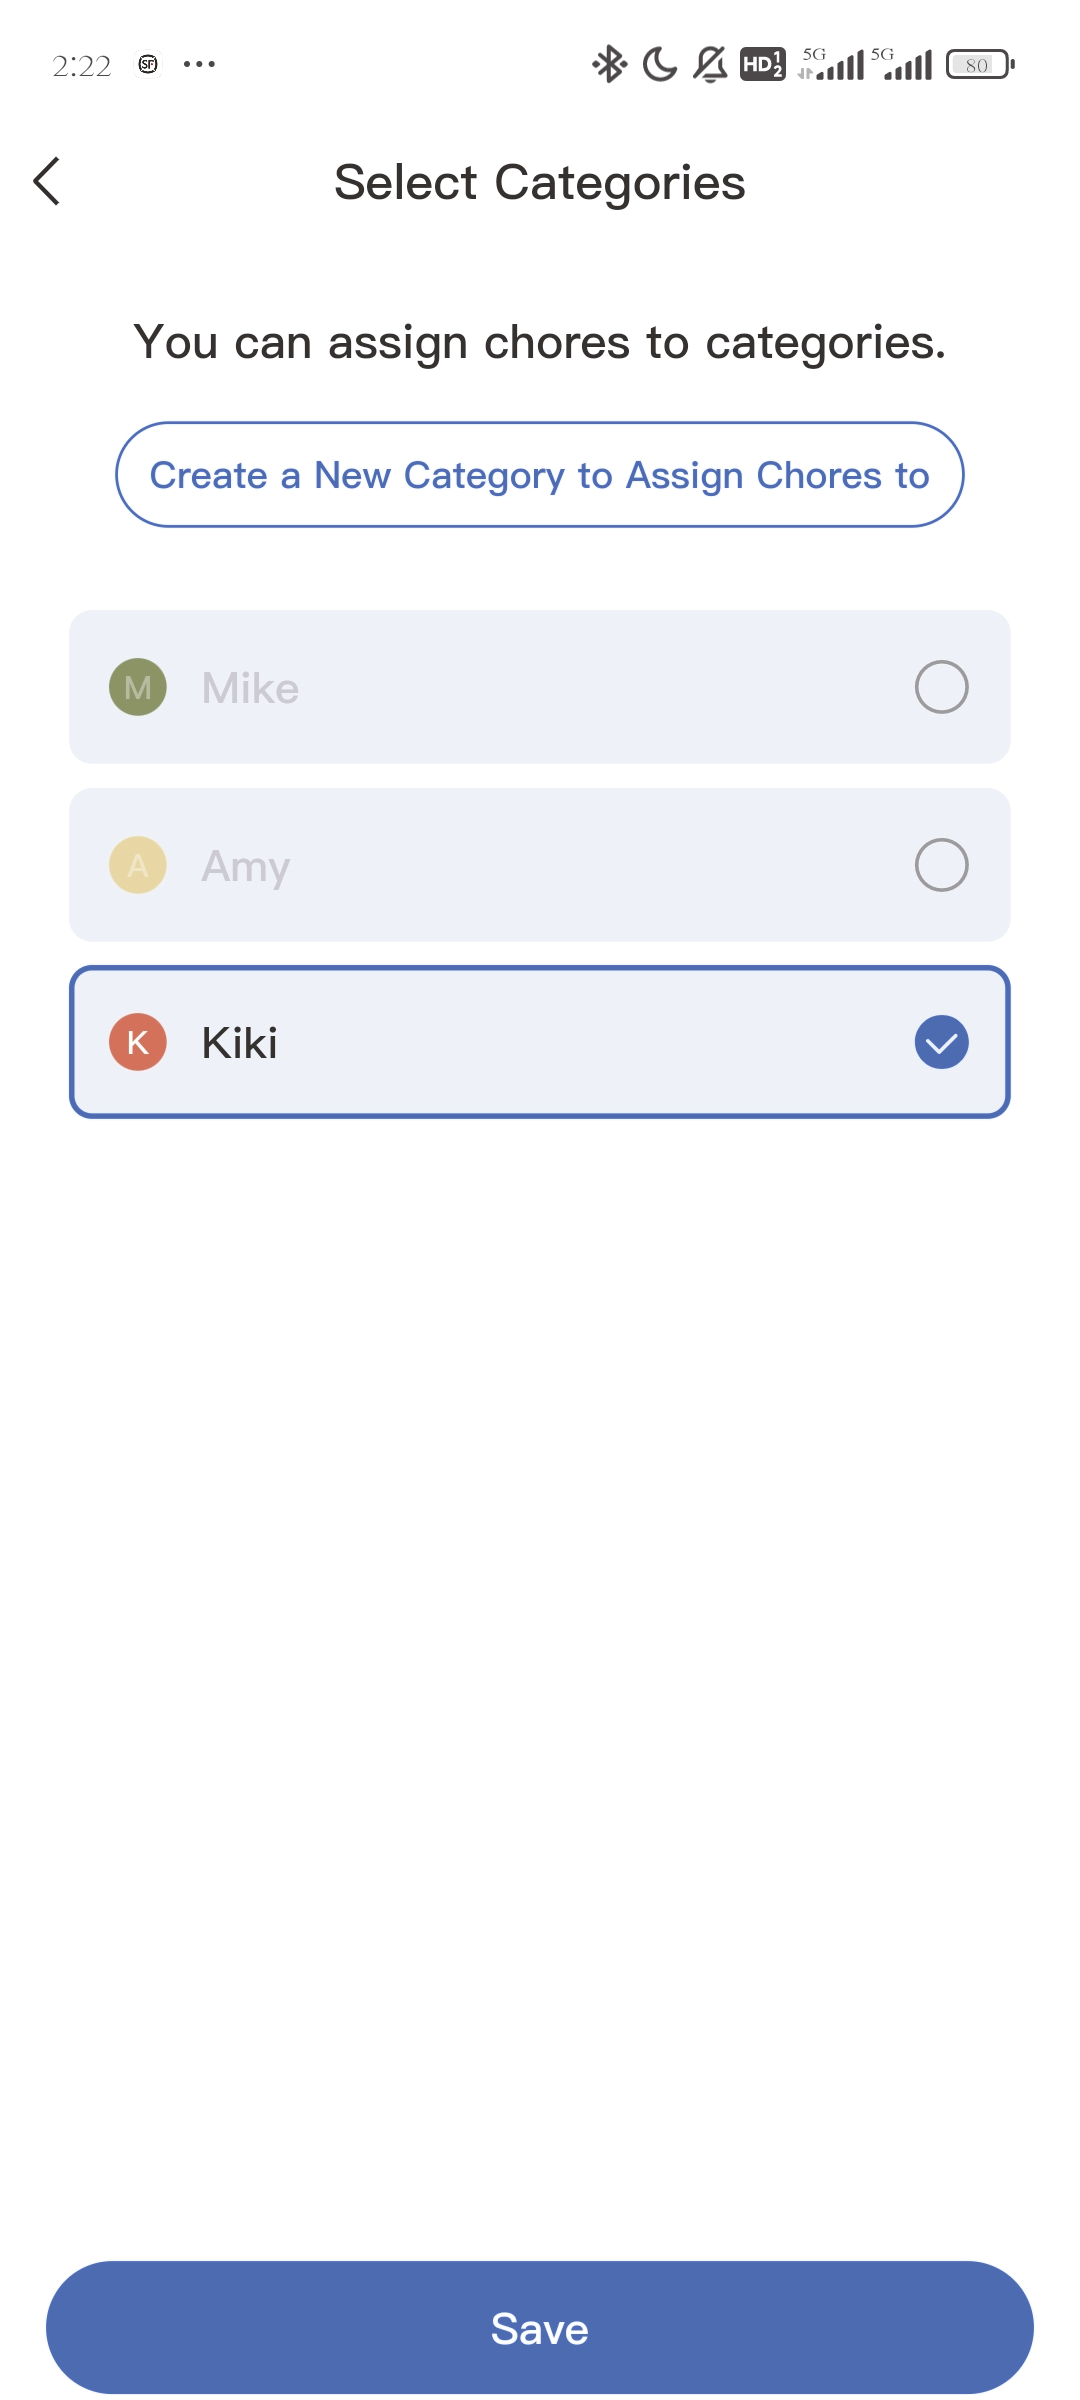
- 2.Tap to create a new category
- 3.Select a category to assign chores

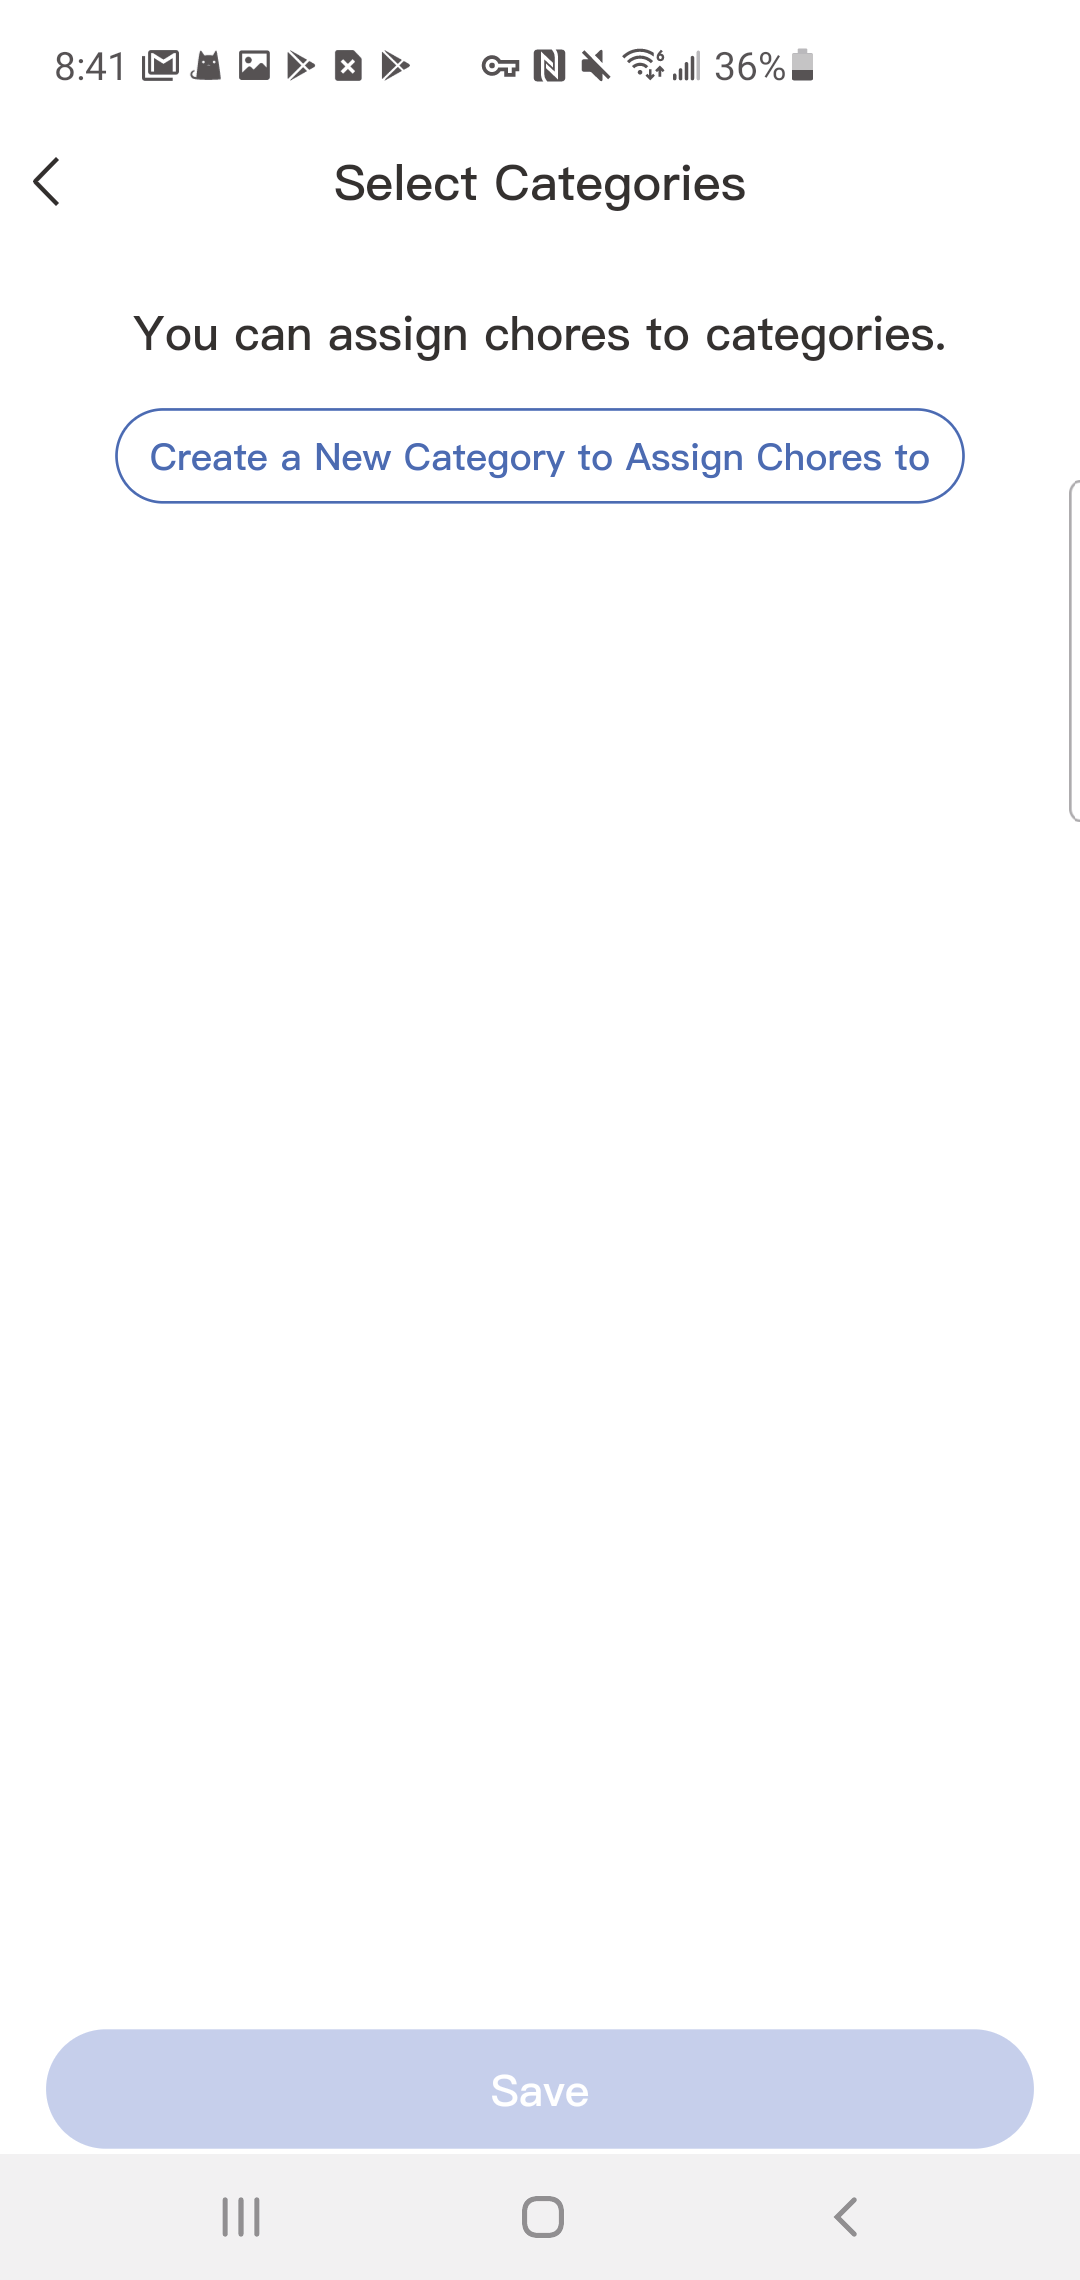
4.Click on a saved Chore to edit and delete it.
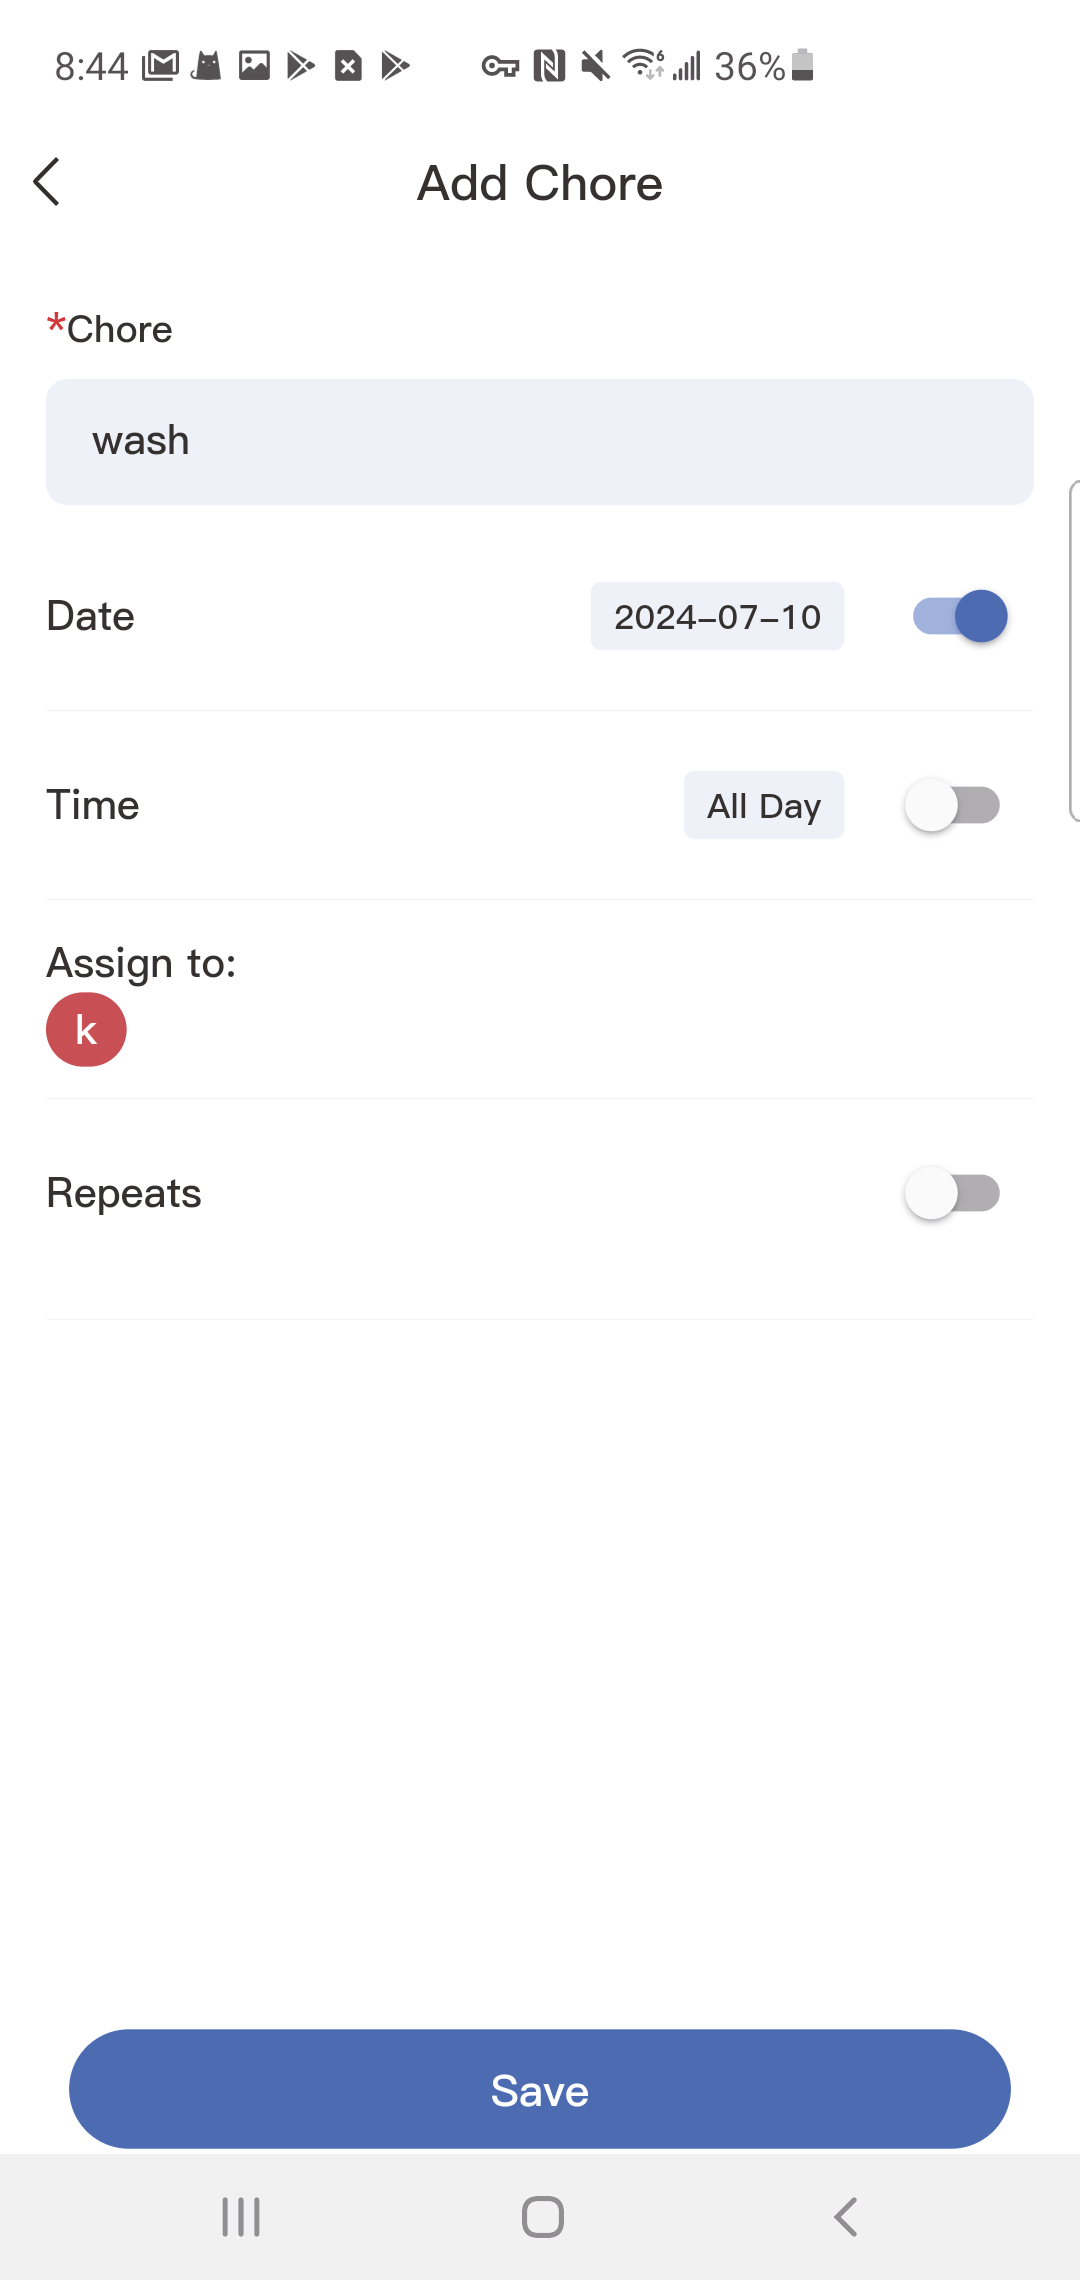
3.2.2 Create Chores
Press the in the bottom right of the Chores screen to add a new chore.
Name the chore and assign it to as many family members as you'd like. This will create a separate chore for each member.
If you'd like the chore to repeat daily, weekly, or monthly, toggle on 'Repeats'.
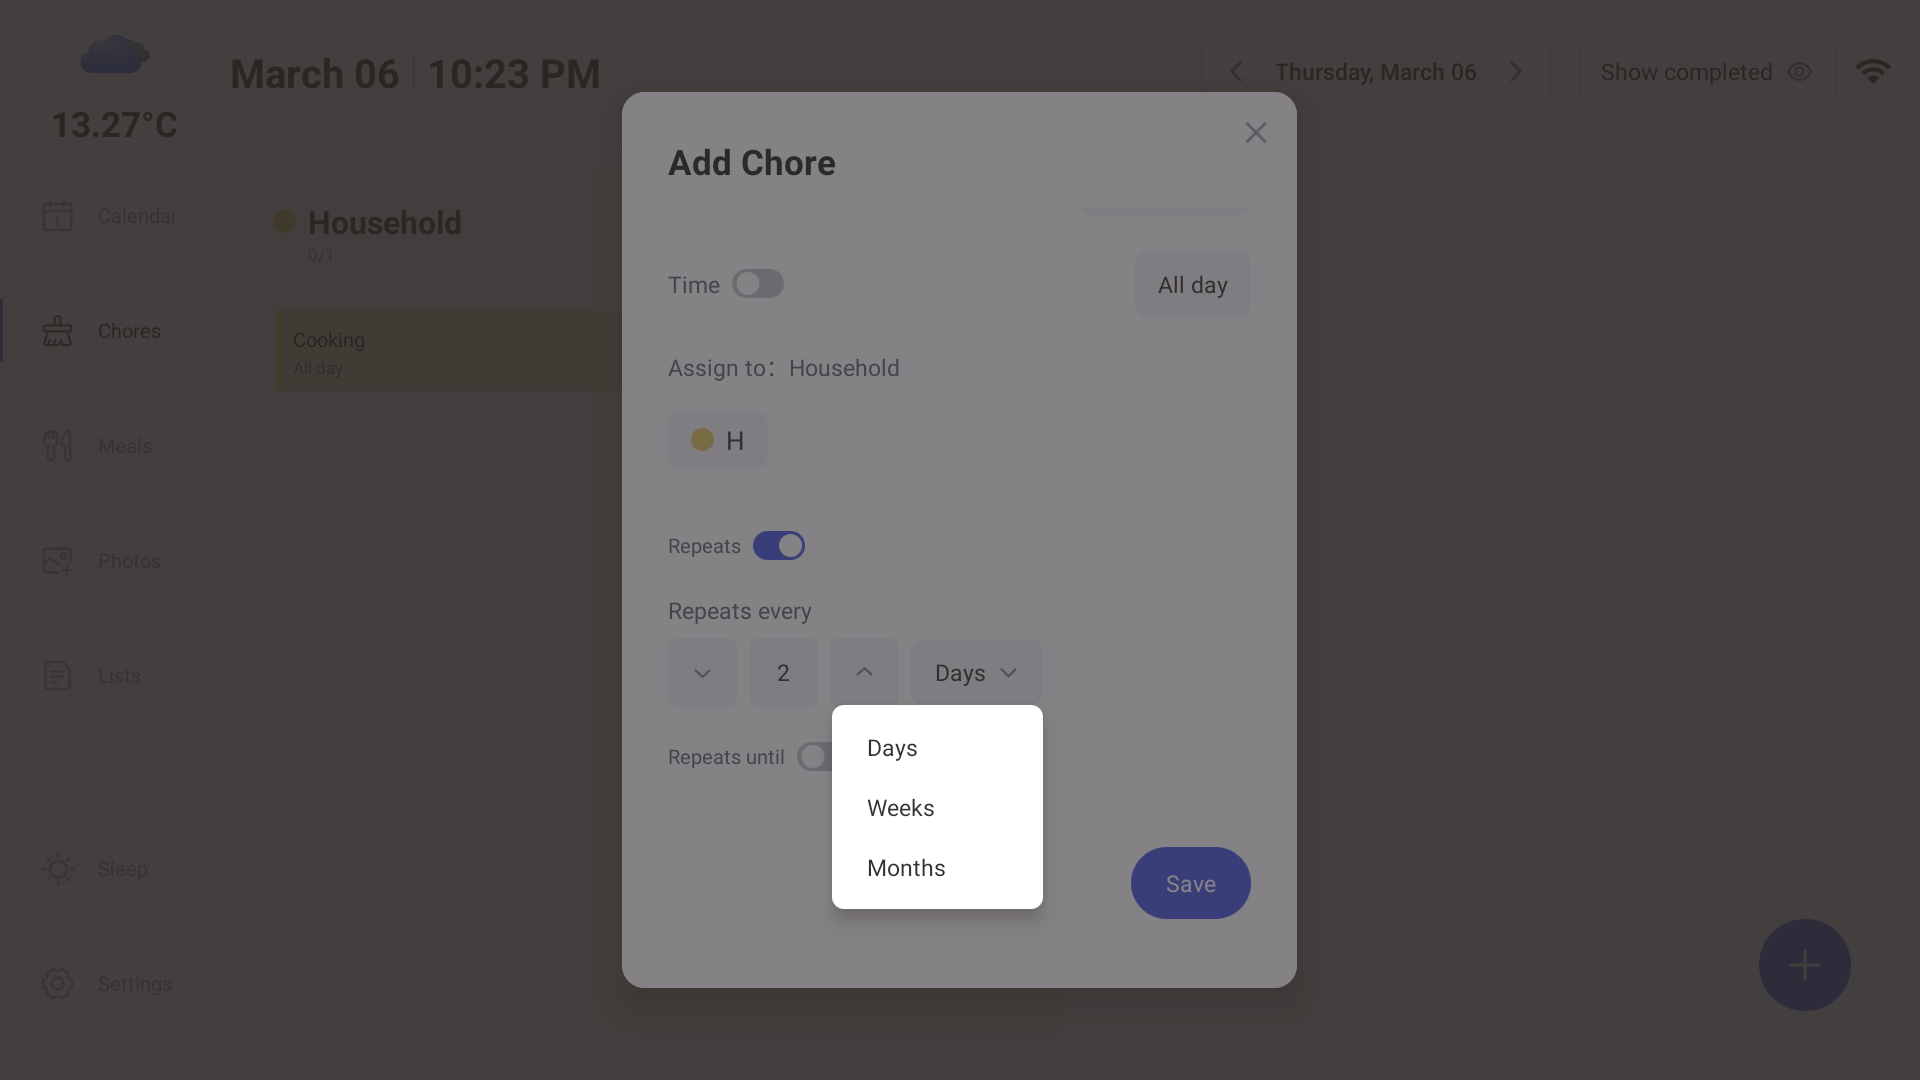
Press 'Save' to create your chores.
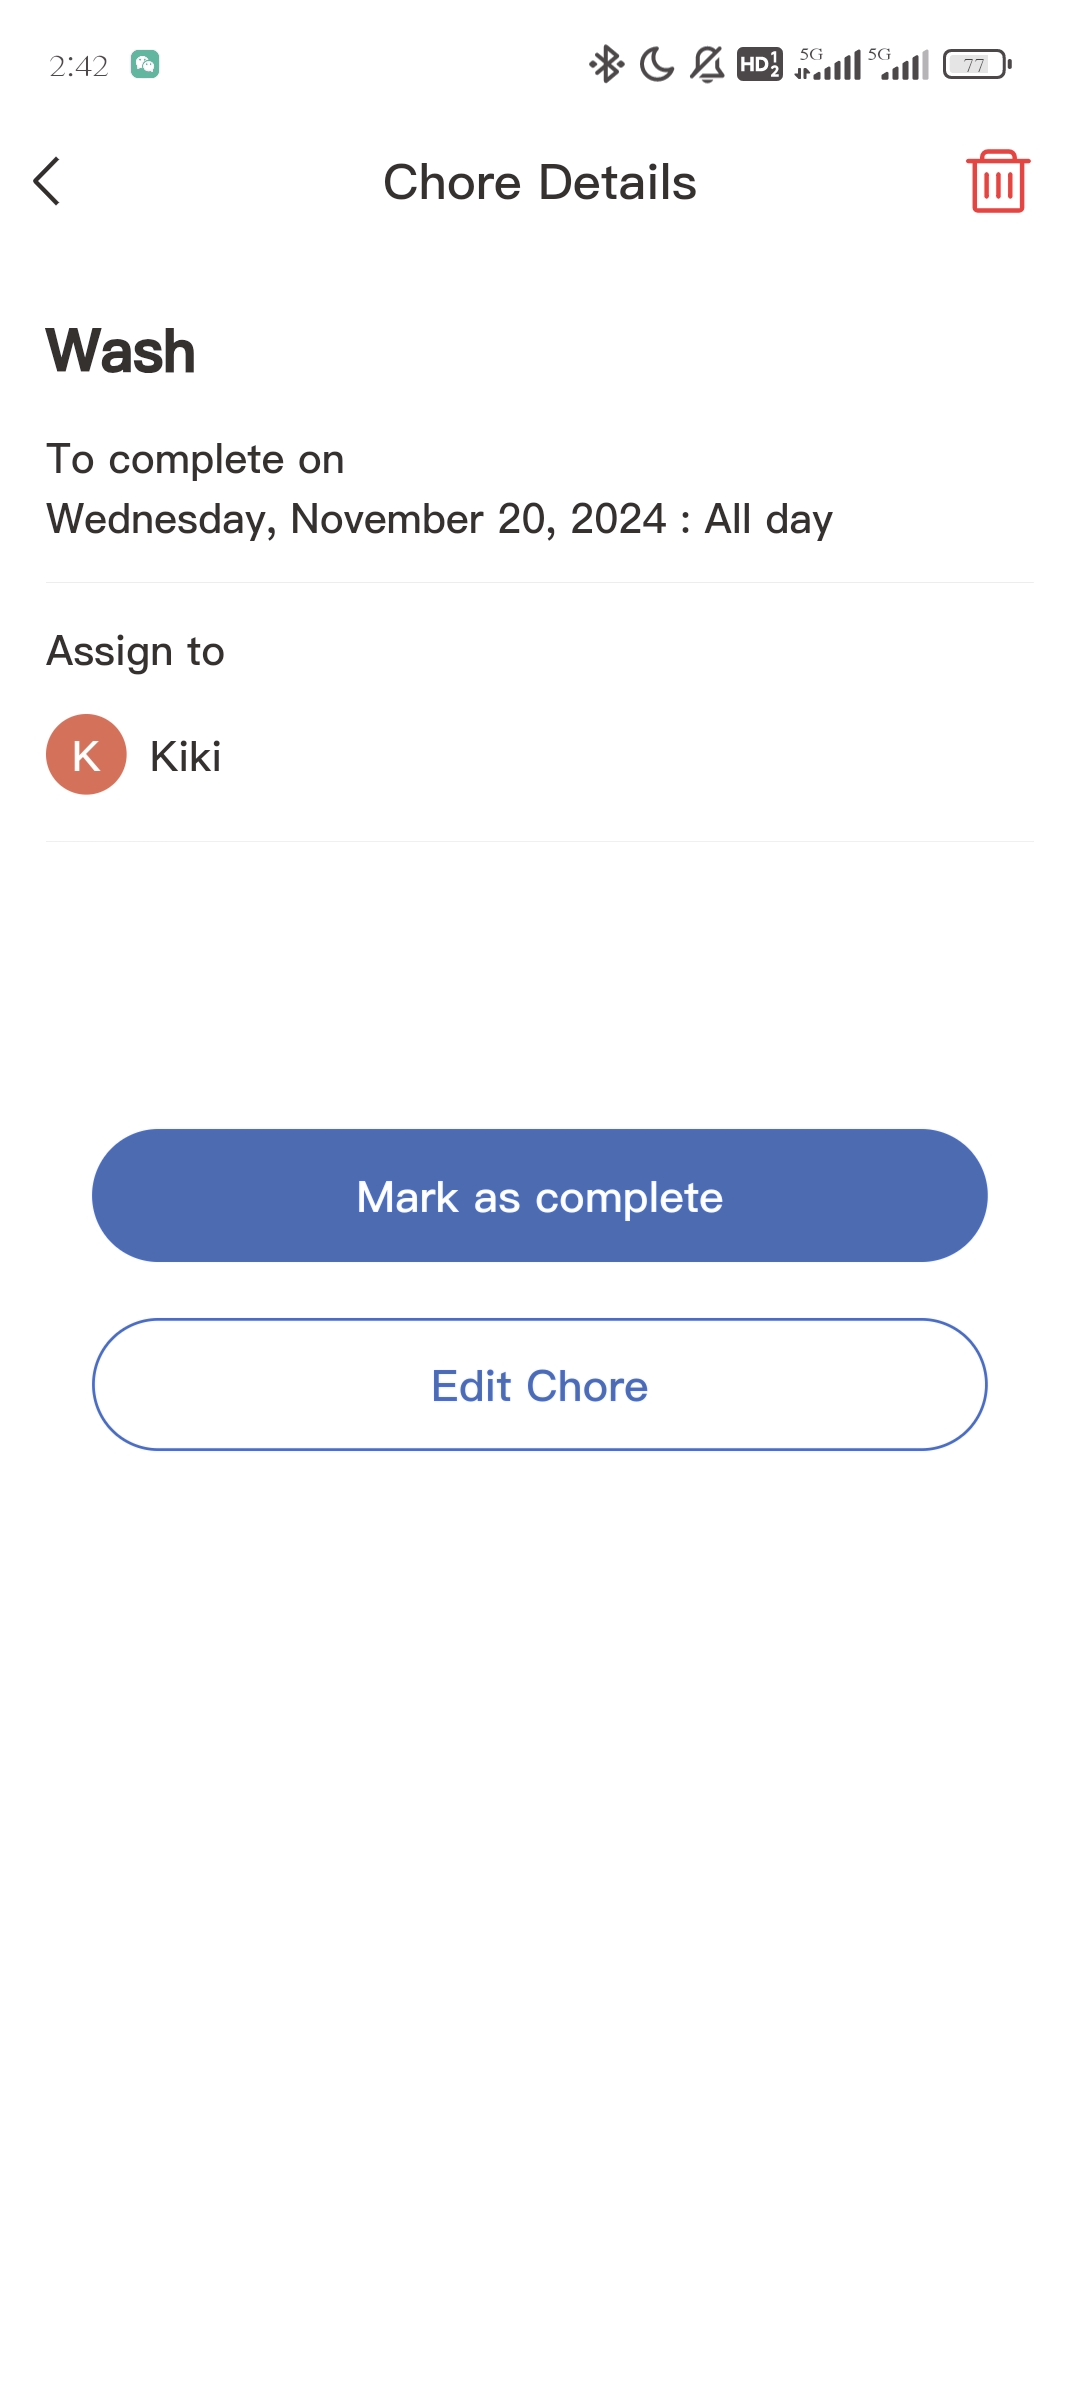
3.2.3 Edit Chores
1.Tap the chore and select "Edit Chore".
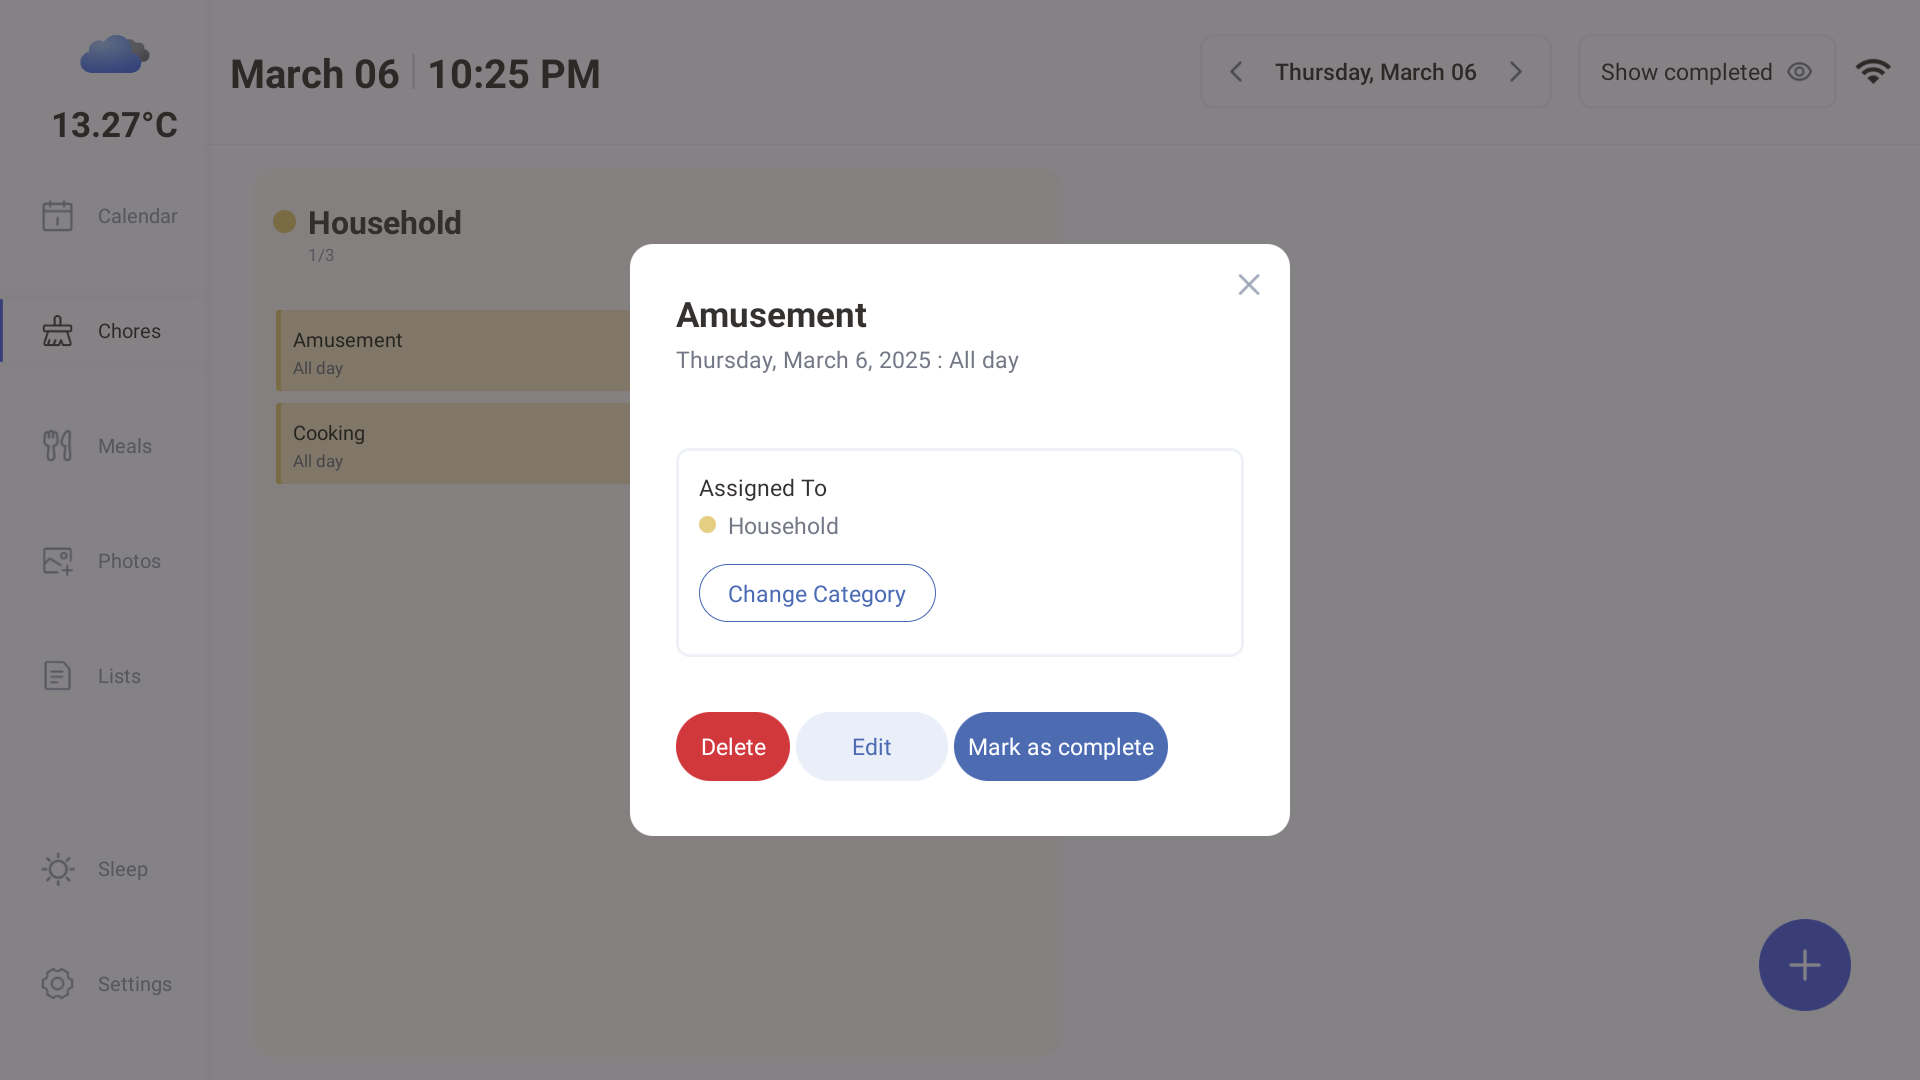
2.Update the chore details, such as the name, date, or recurrence, and press "Save".
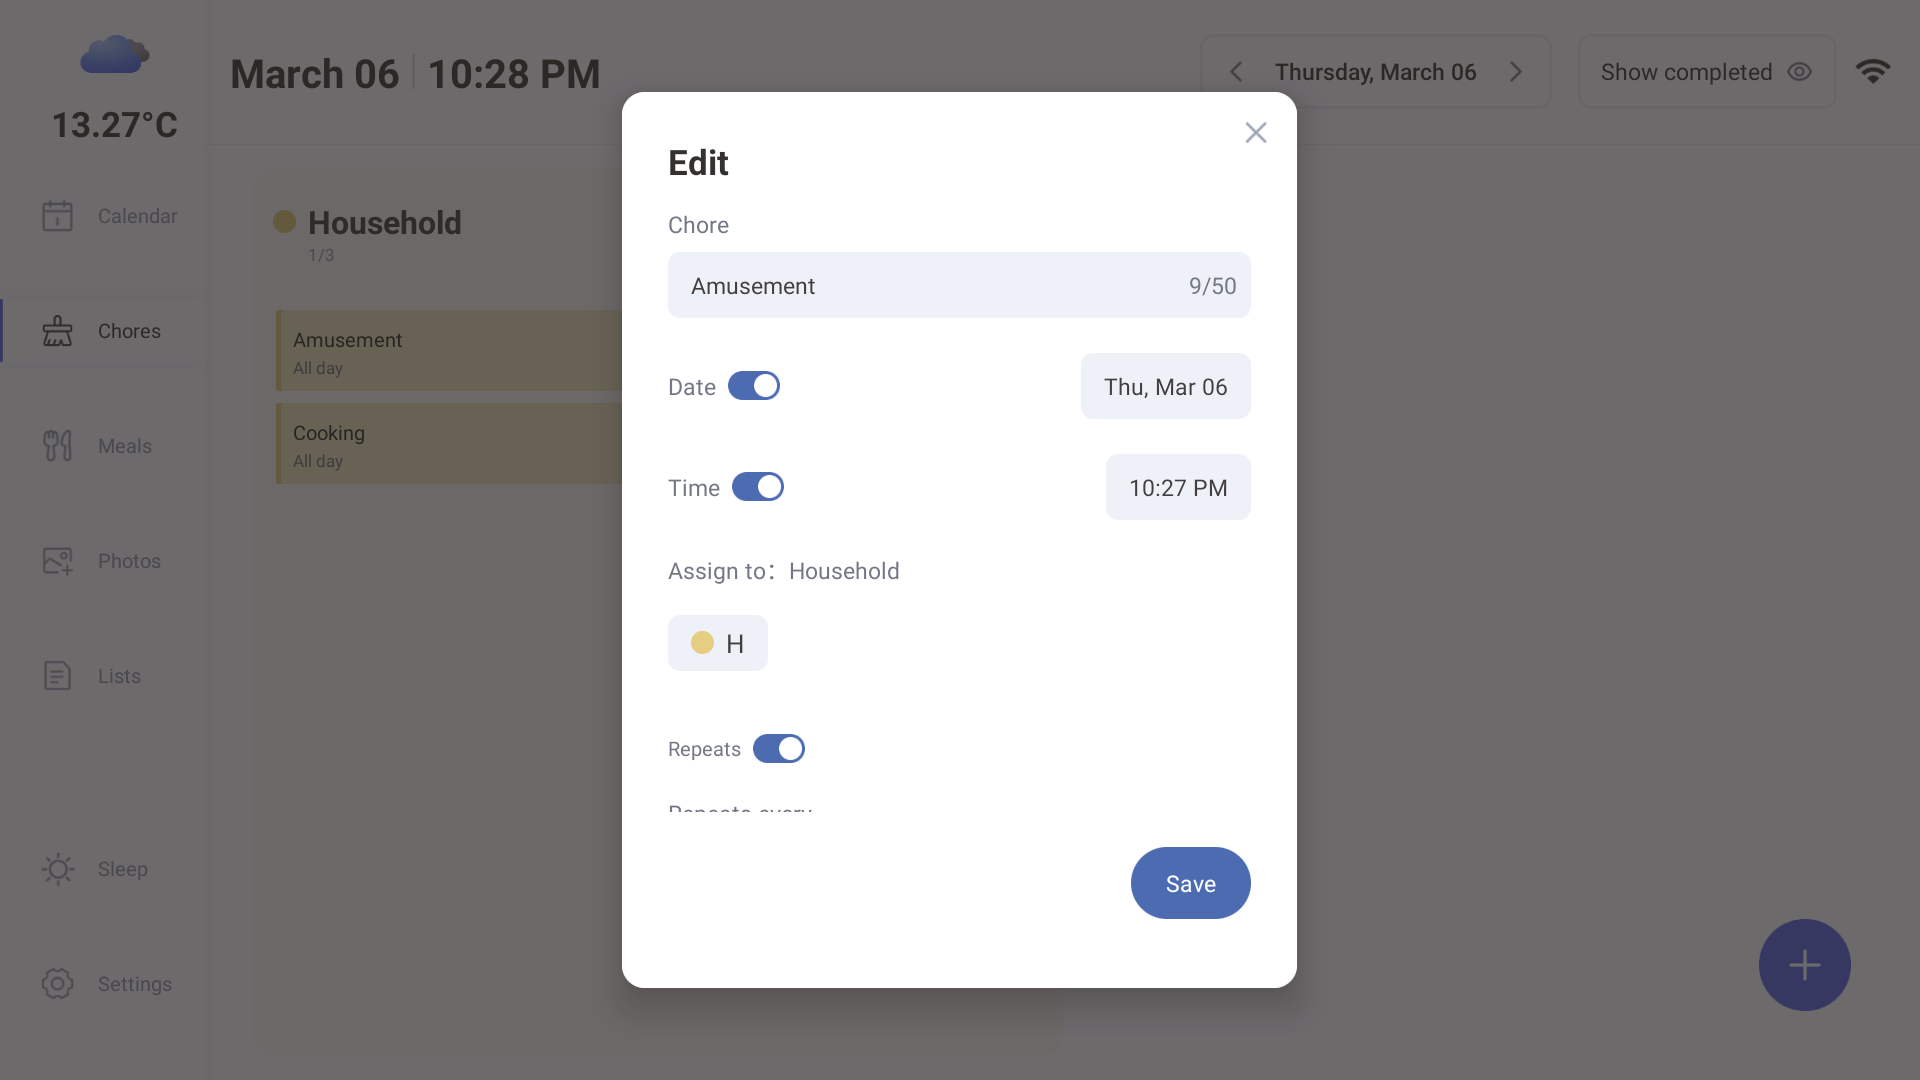
3.Tap the "Chores" tab or tap Settings -> Chores to select family members to assign chores to.
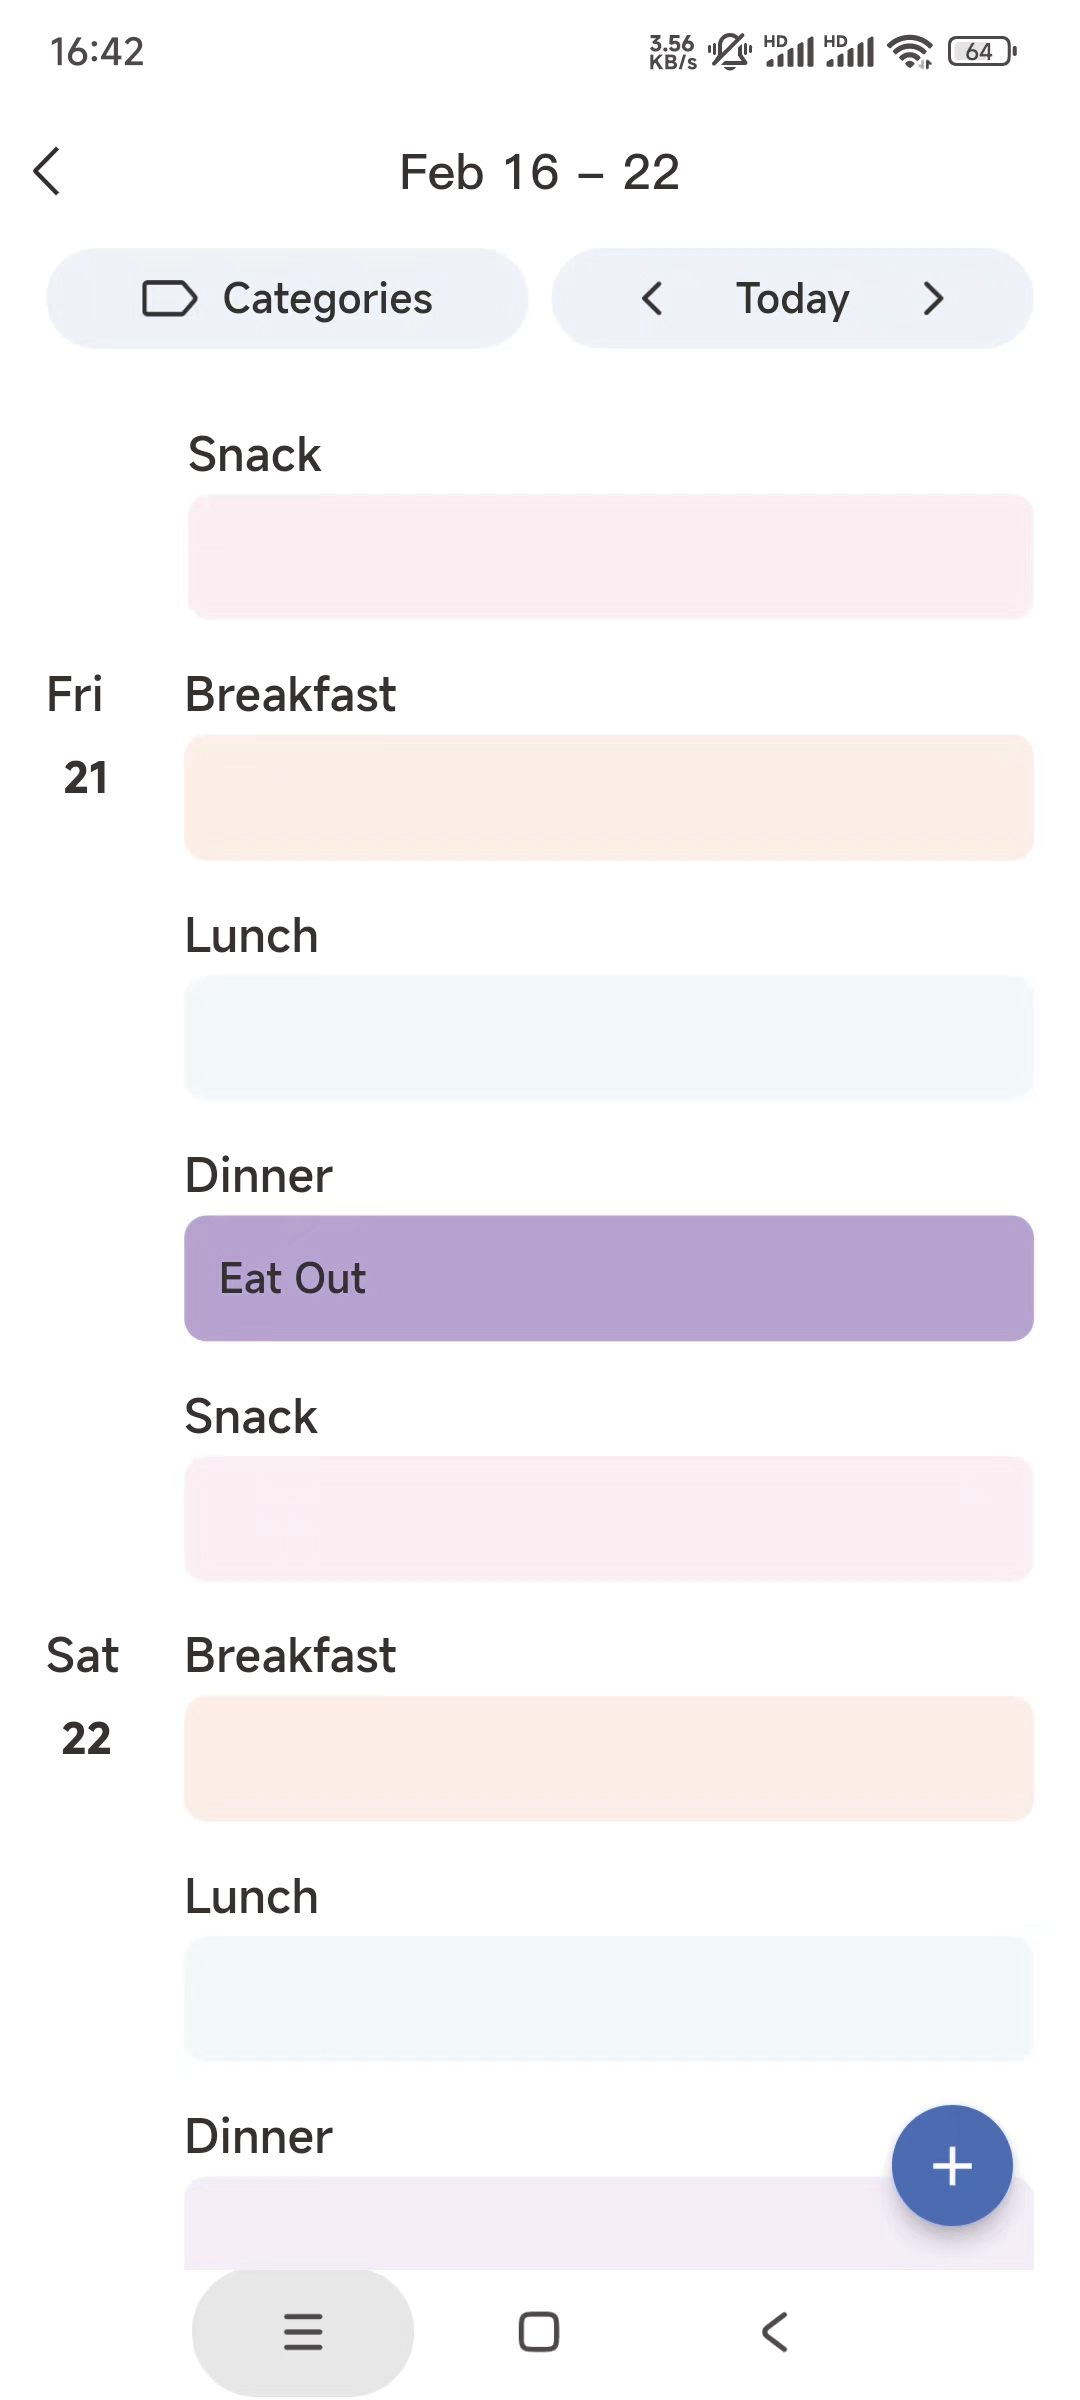
3.3 Meals
3.3.1 Create Meal plans
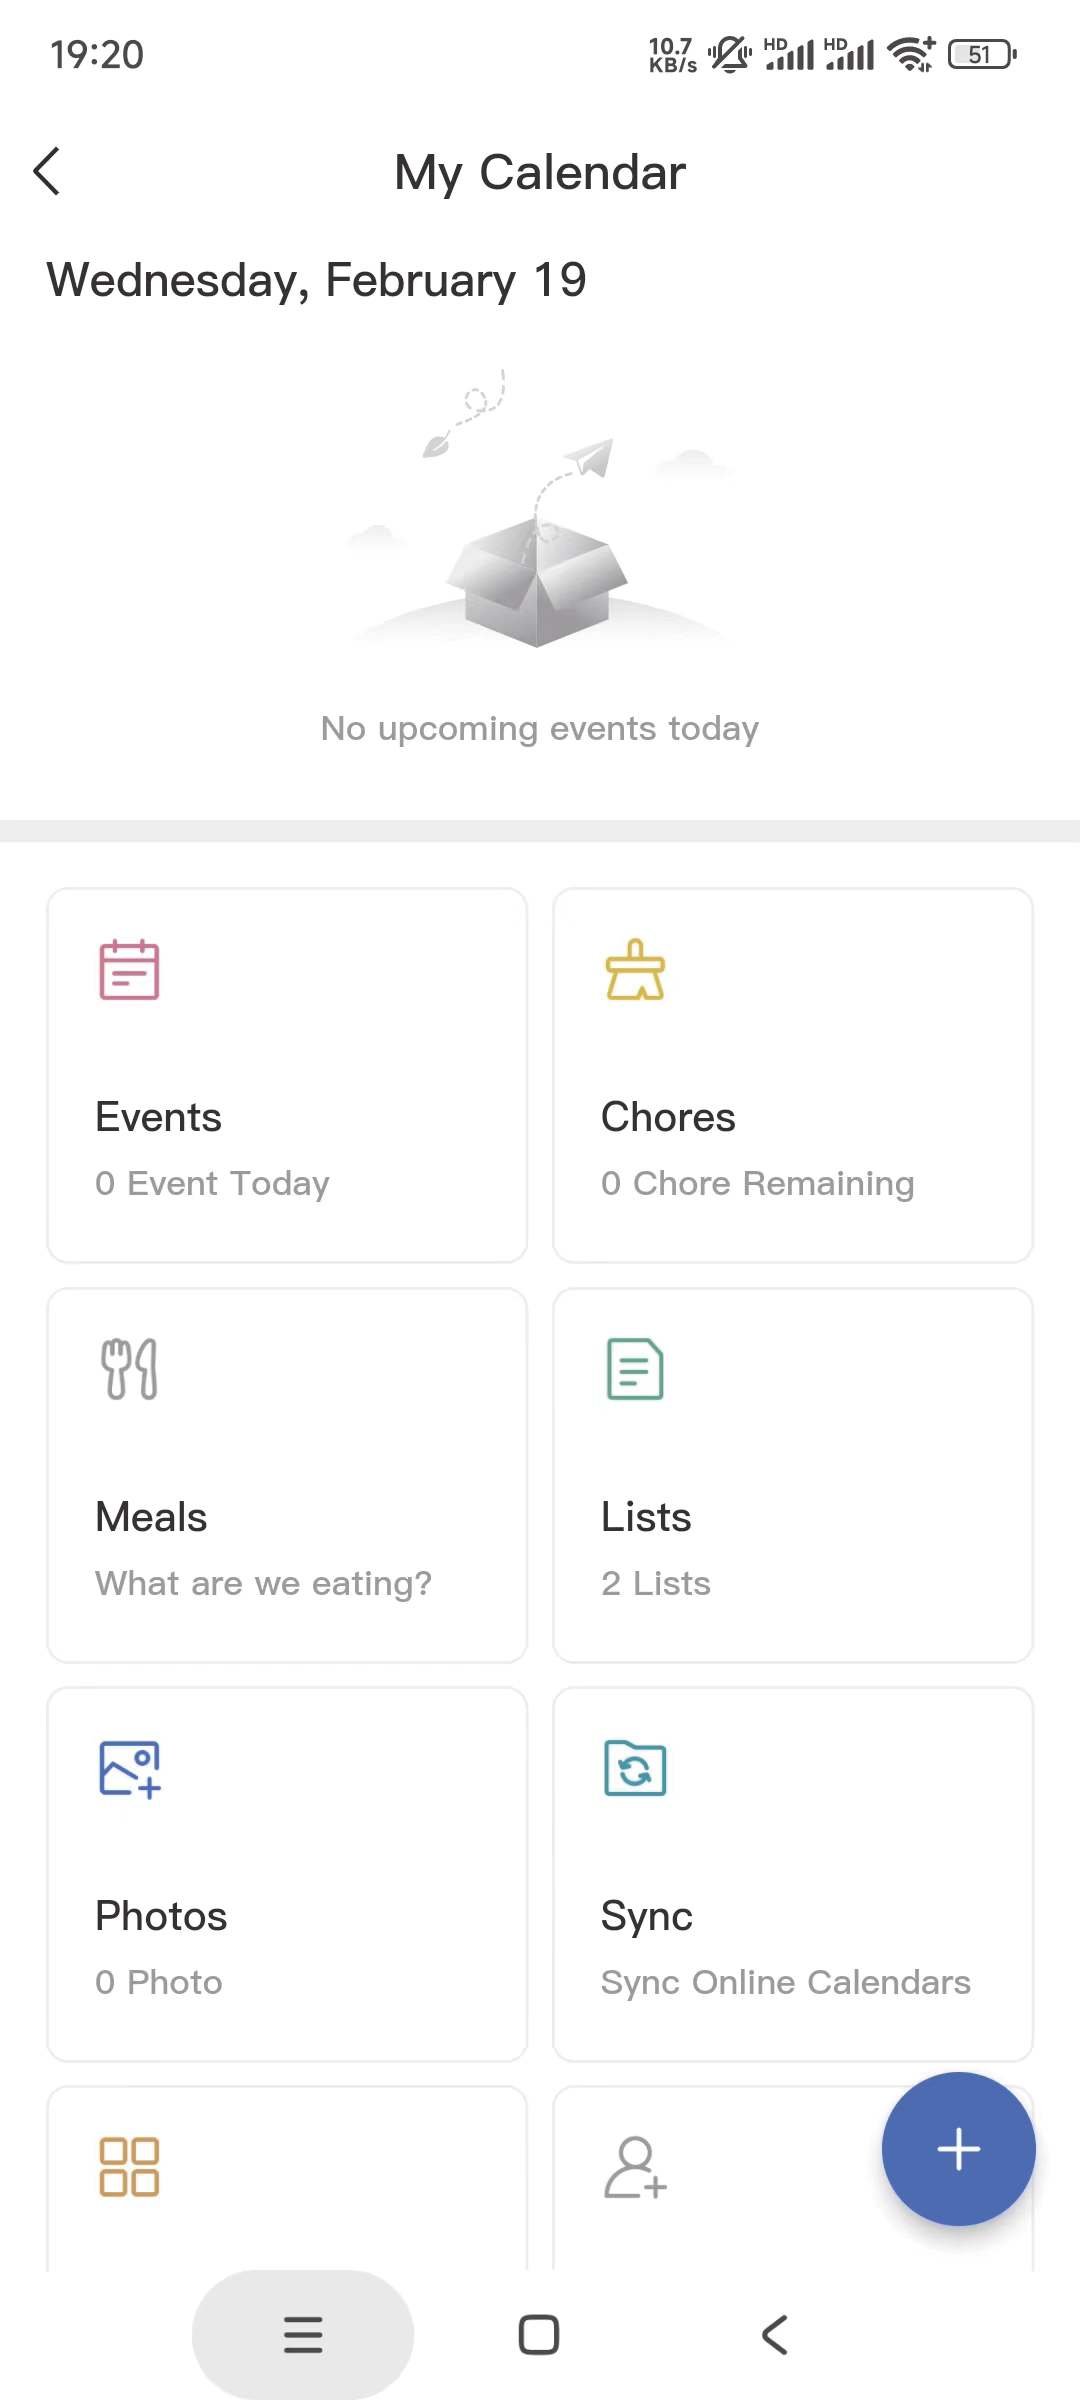
① Click "Meals"
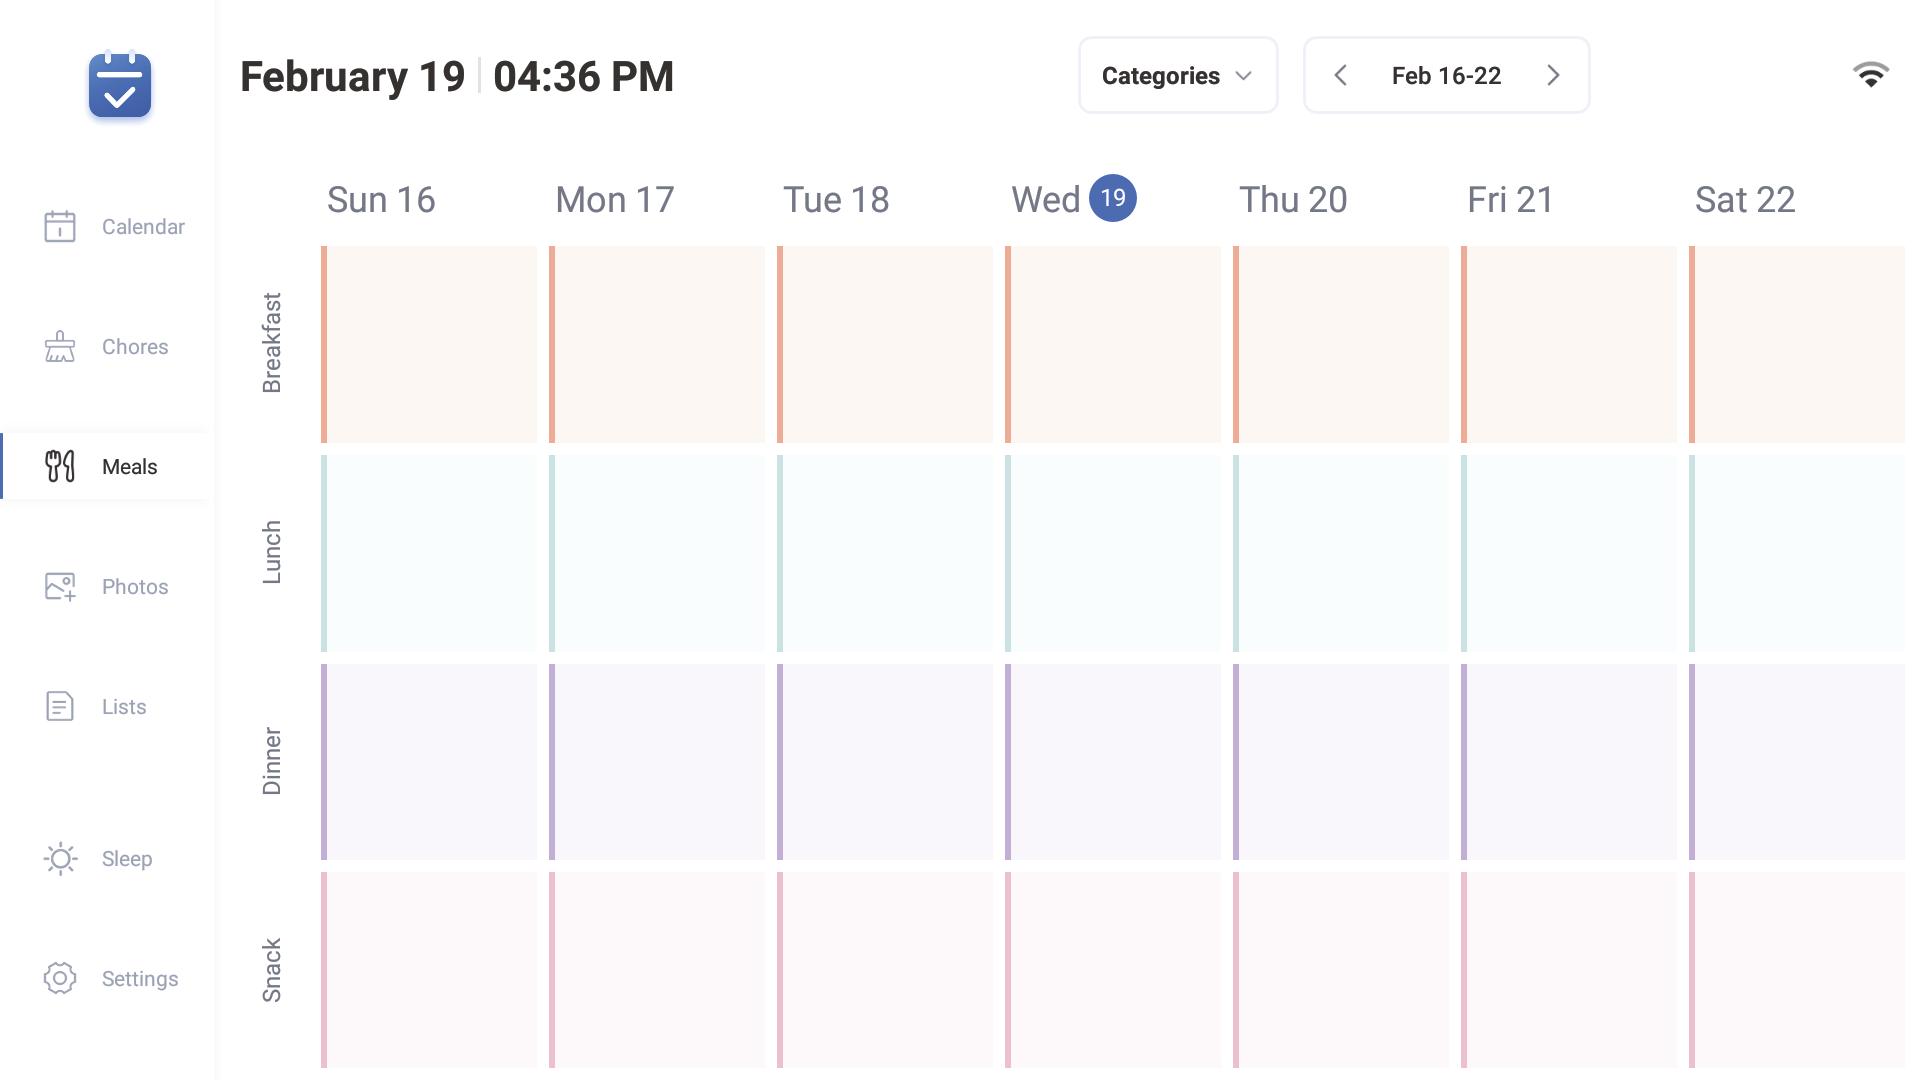
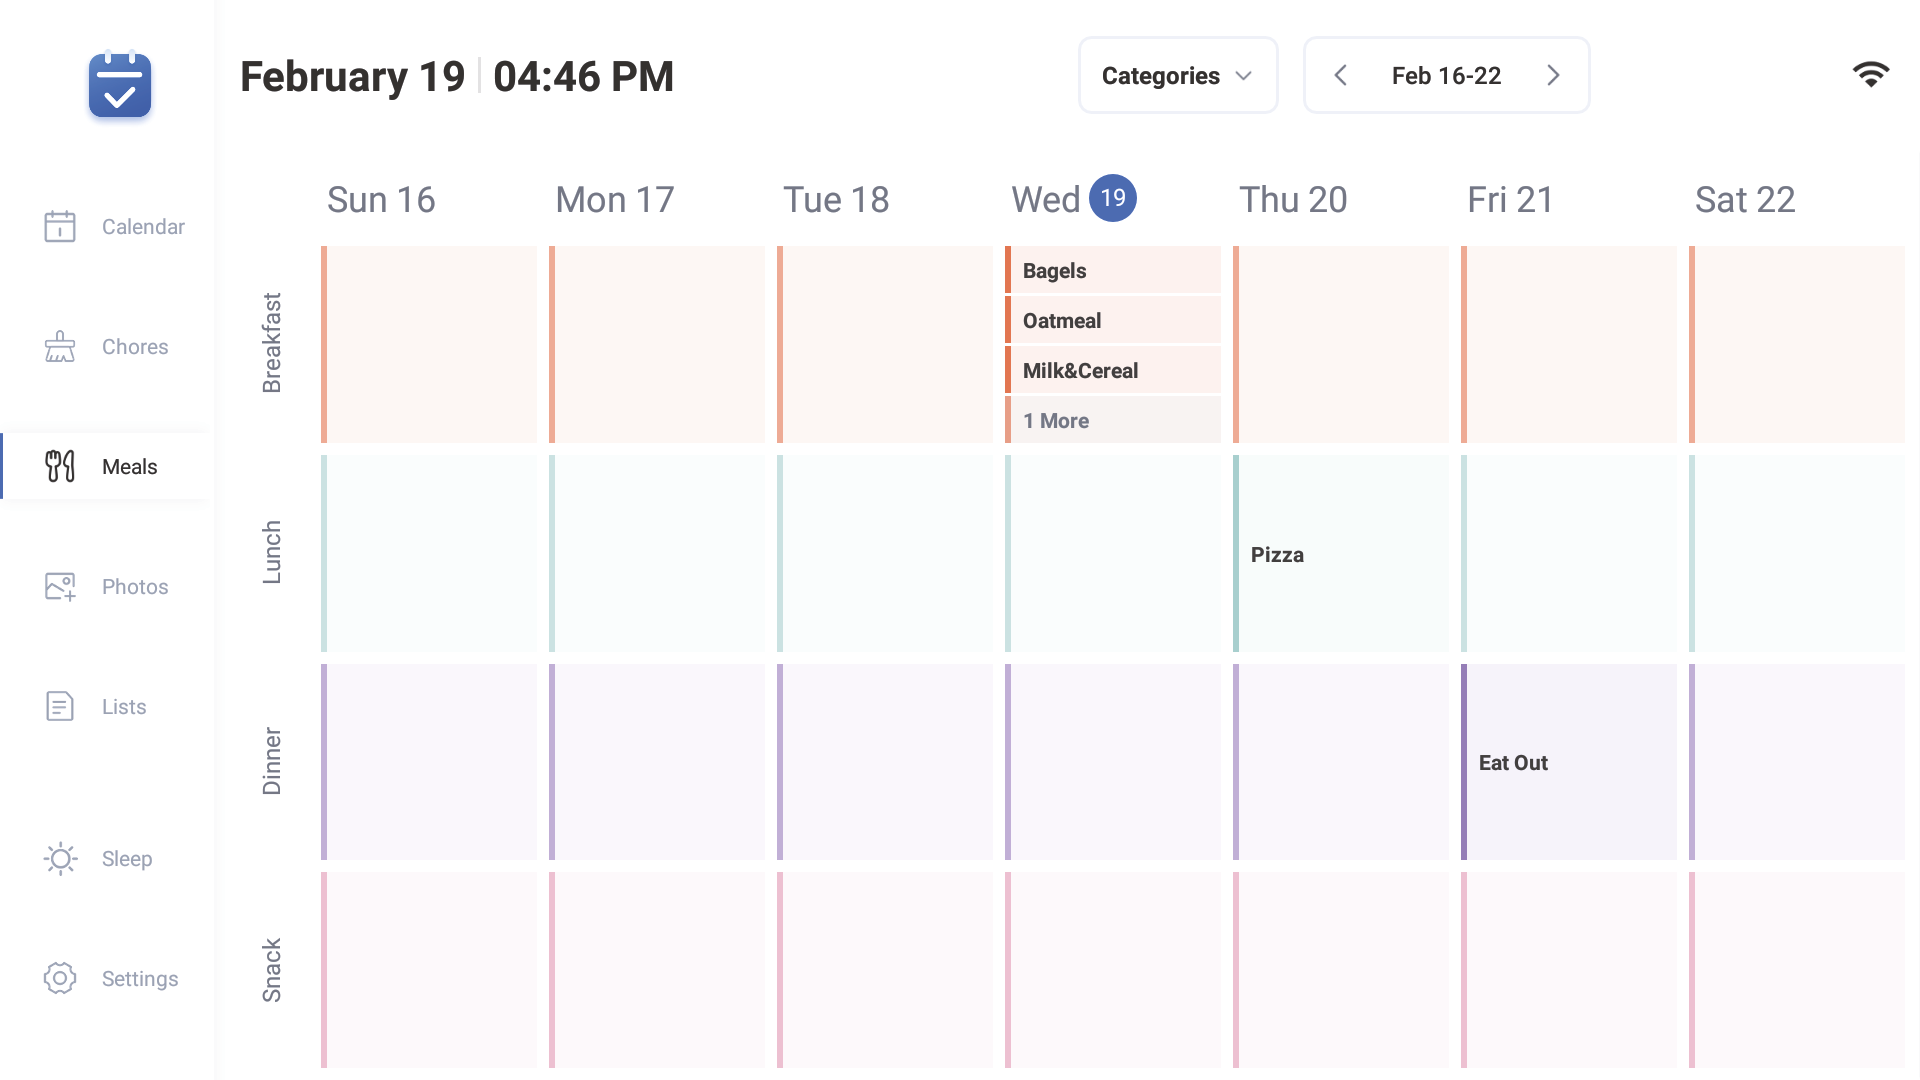
② Click on the breakfast/lunch/dinner/dessert option under the date and select the desired meal.
③ After completing the arrangement, it can be synchronized to the mobile interface.
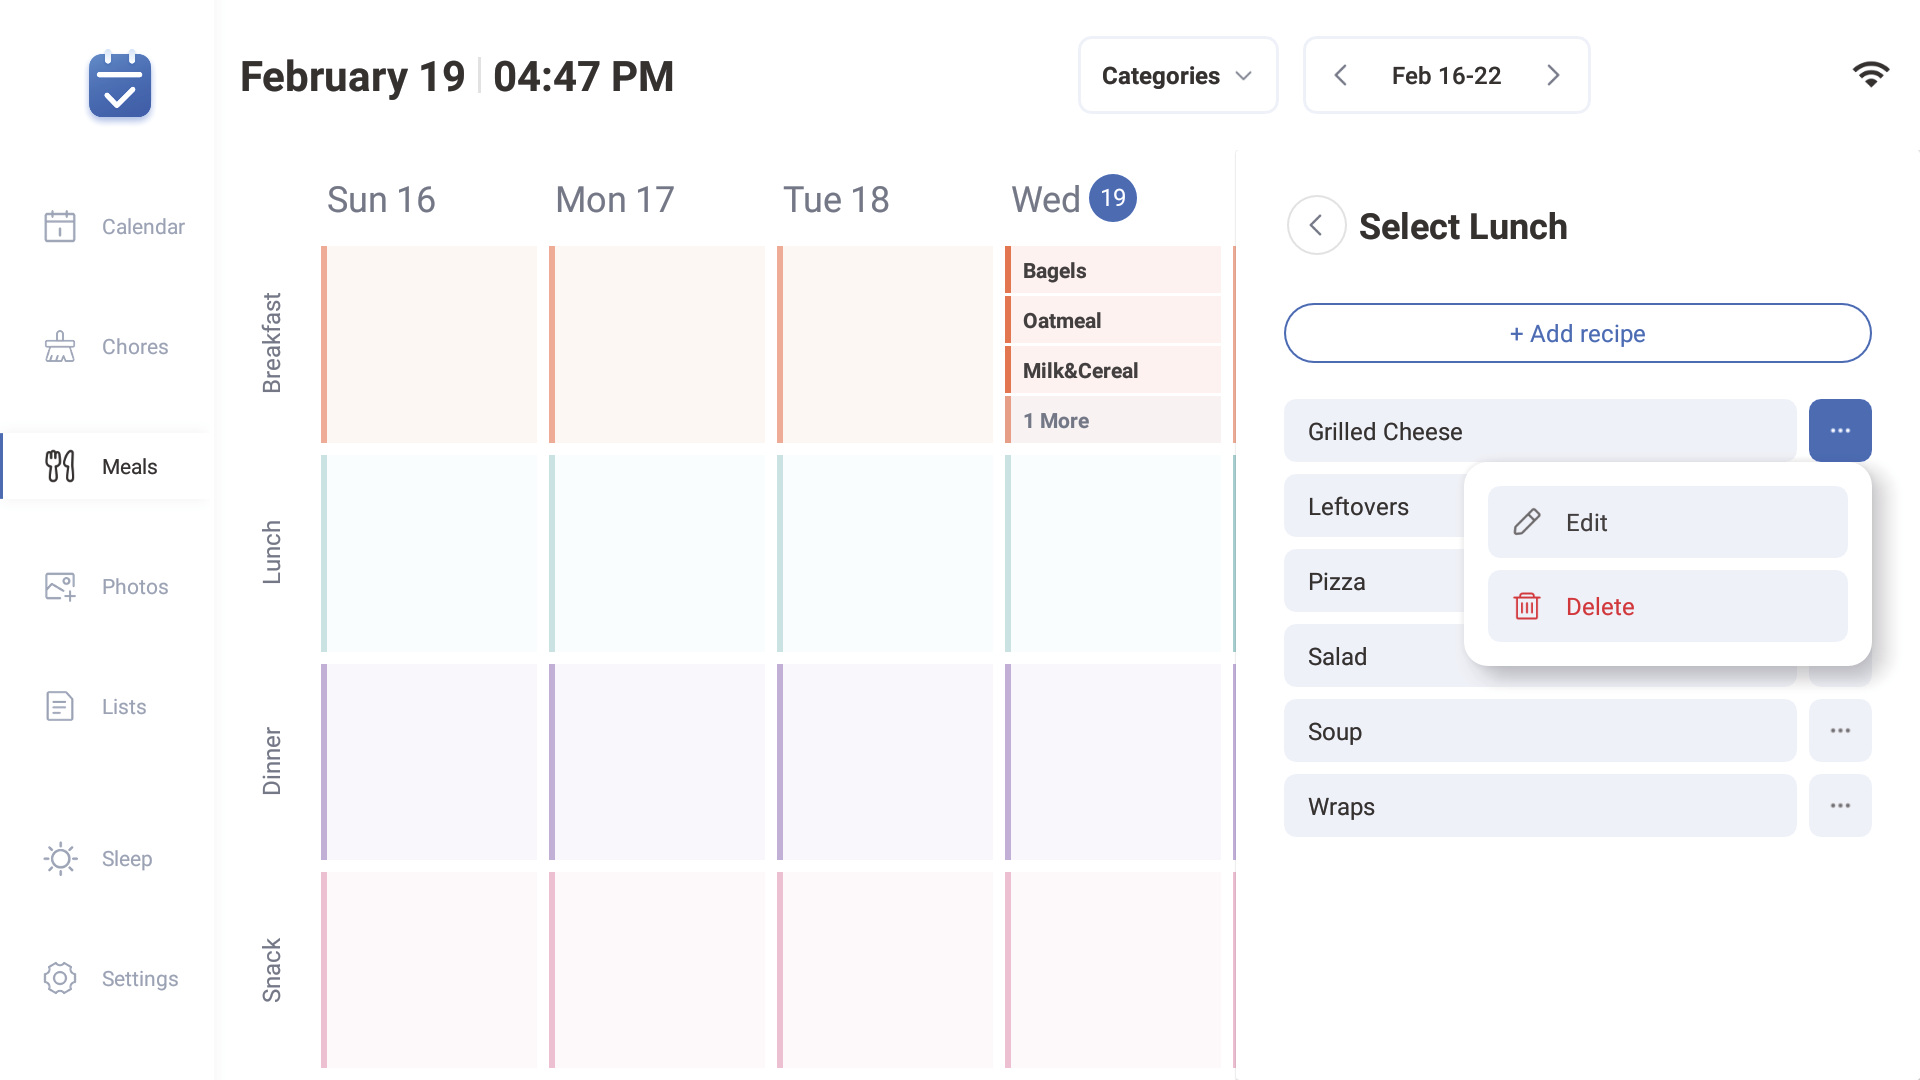
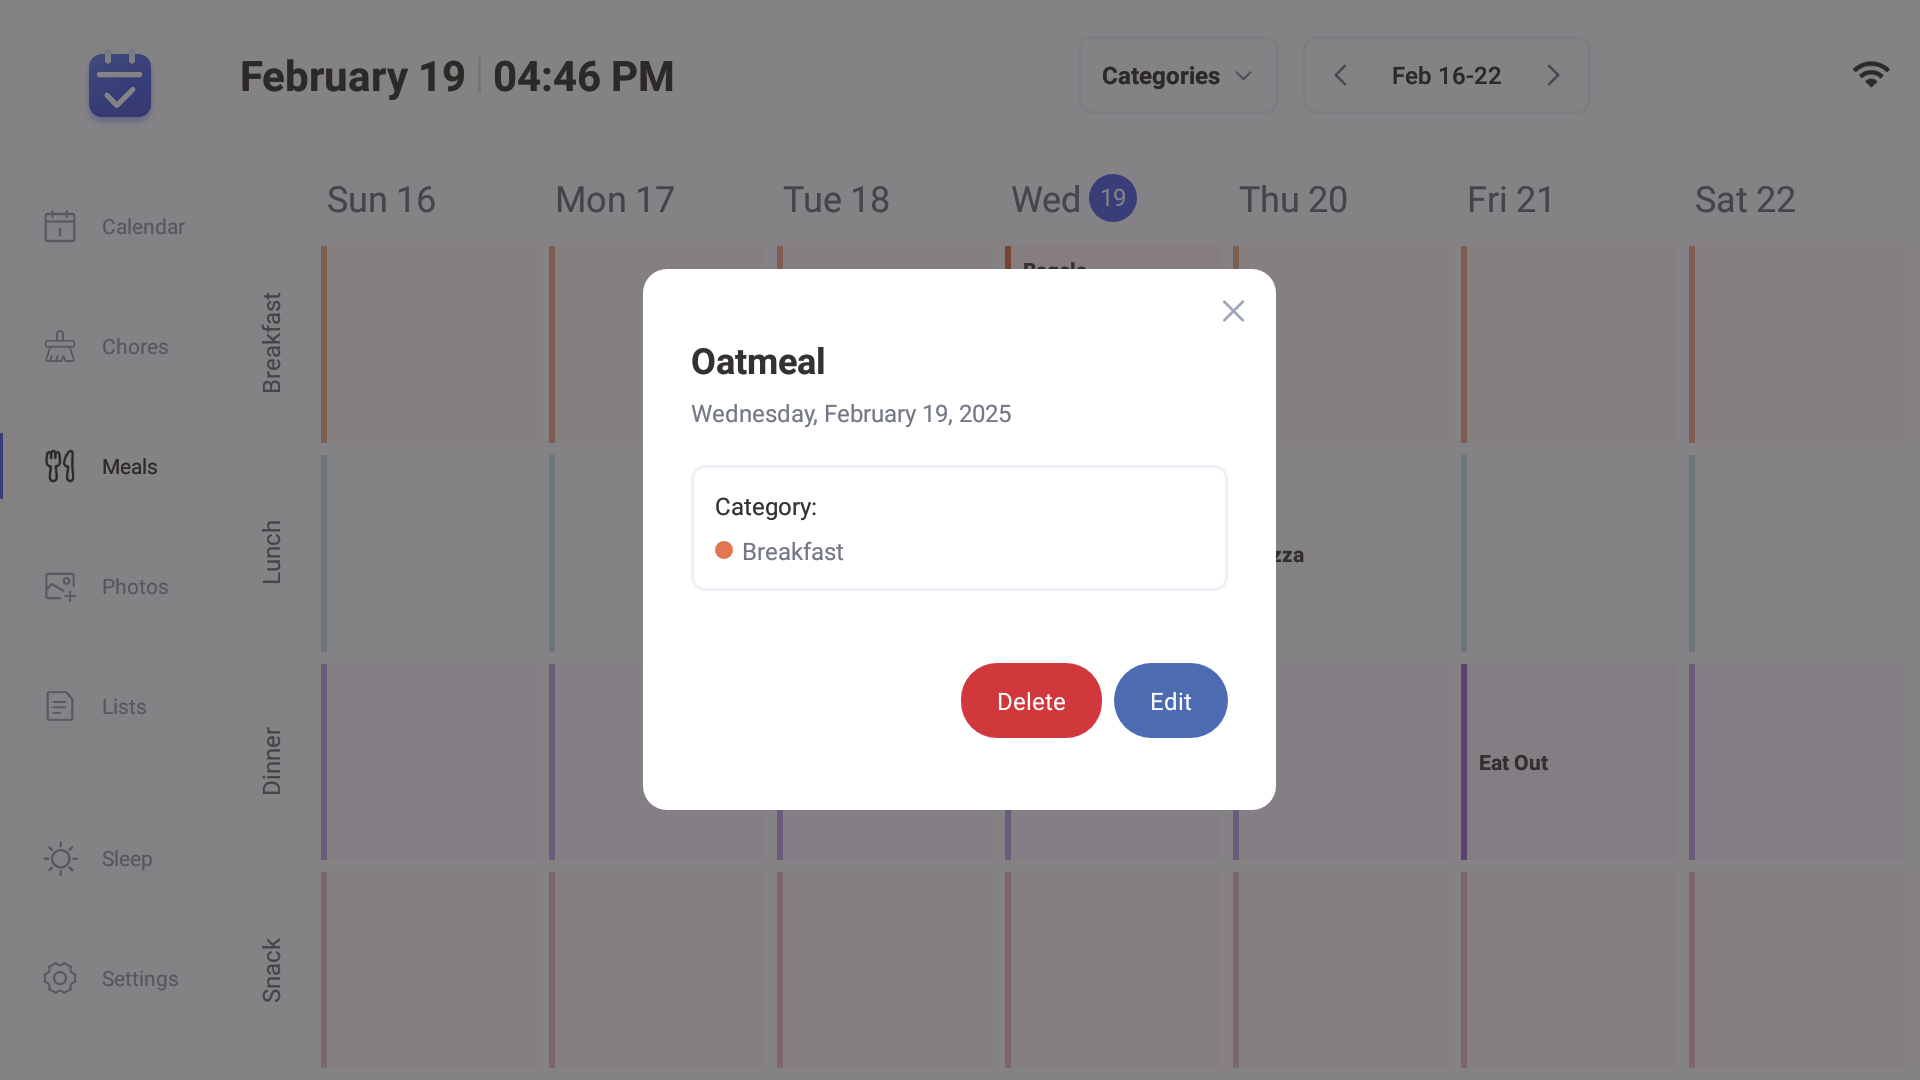
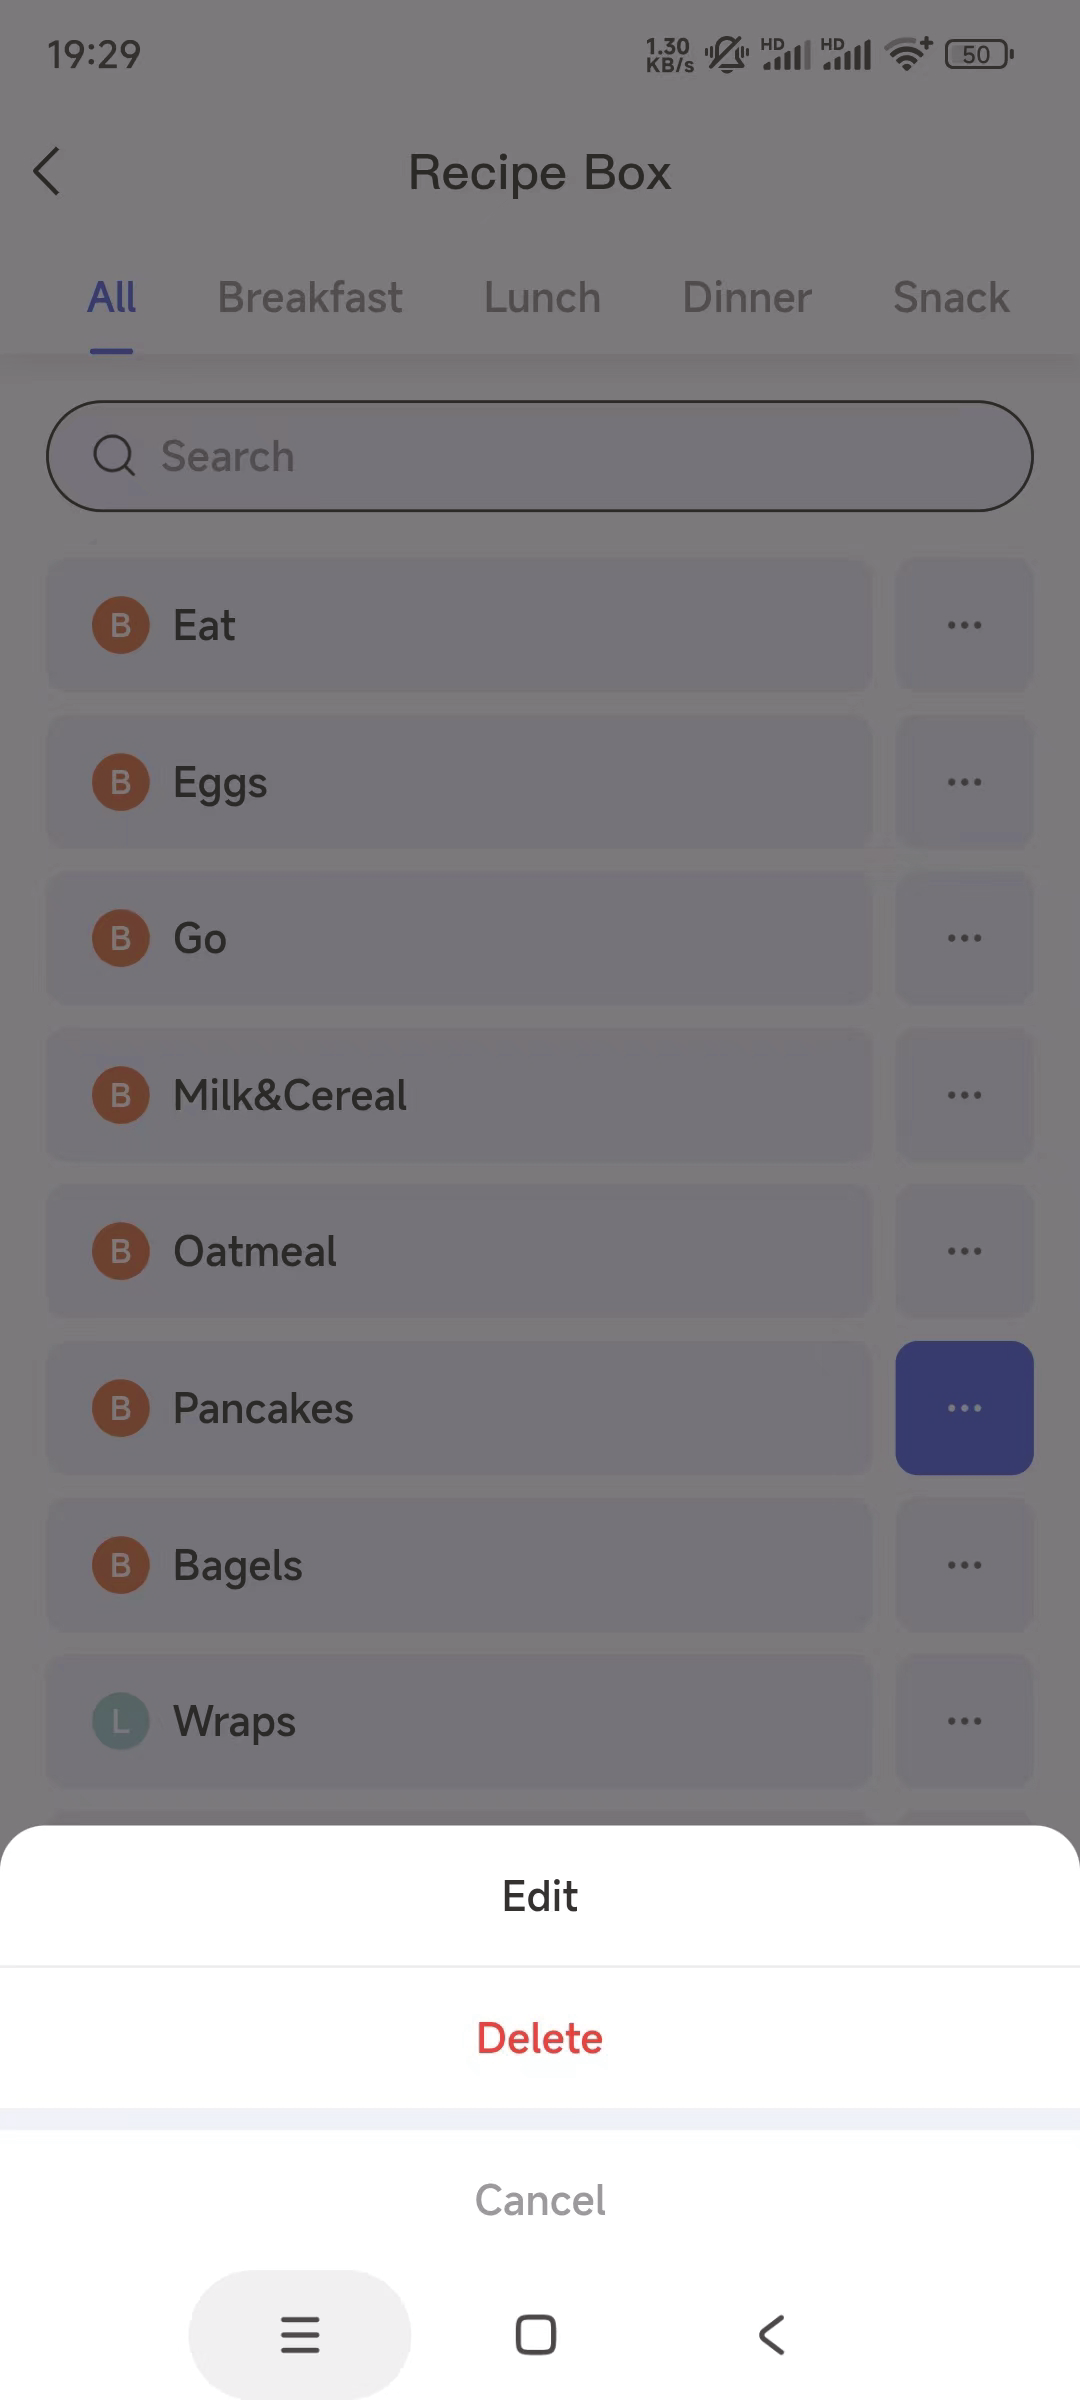
3.3.2 Add/delete/edit dishes/plan on the device
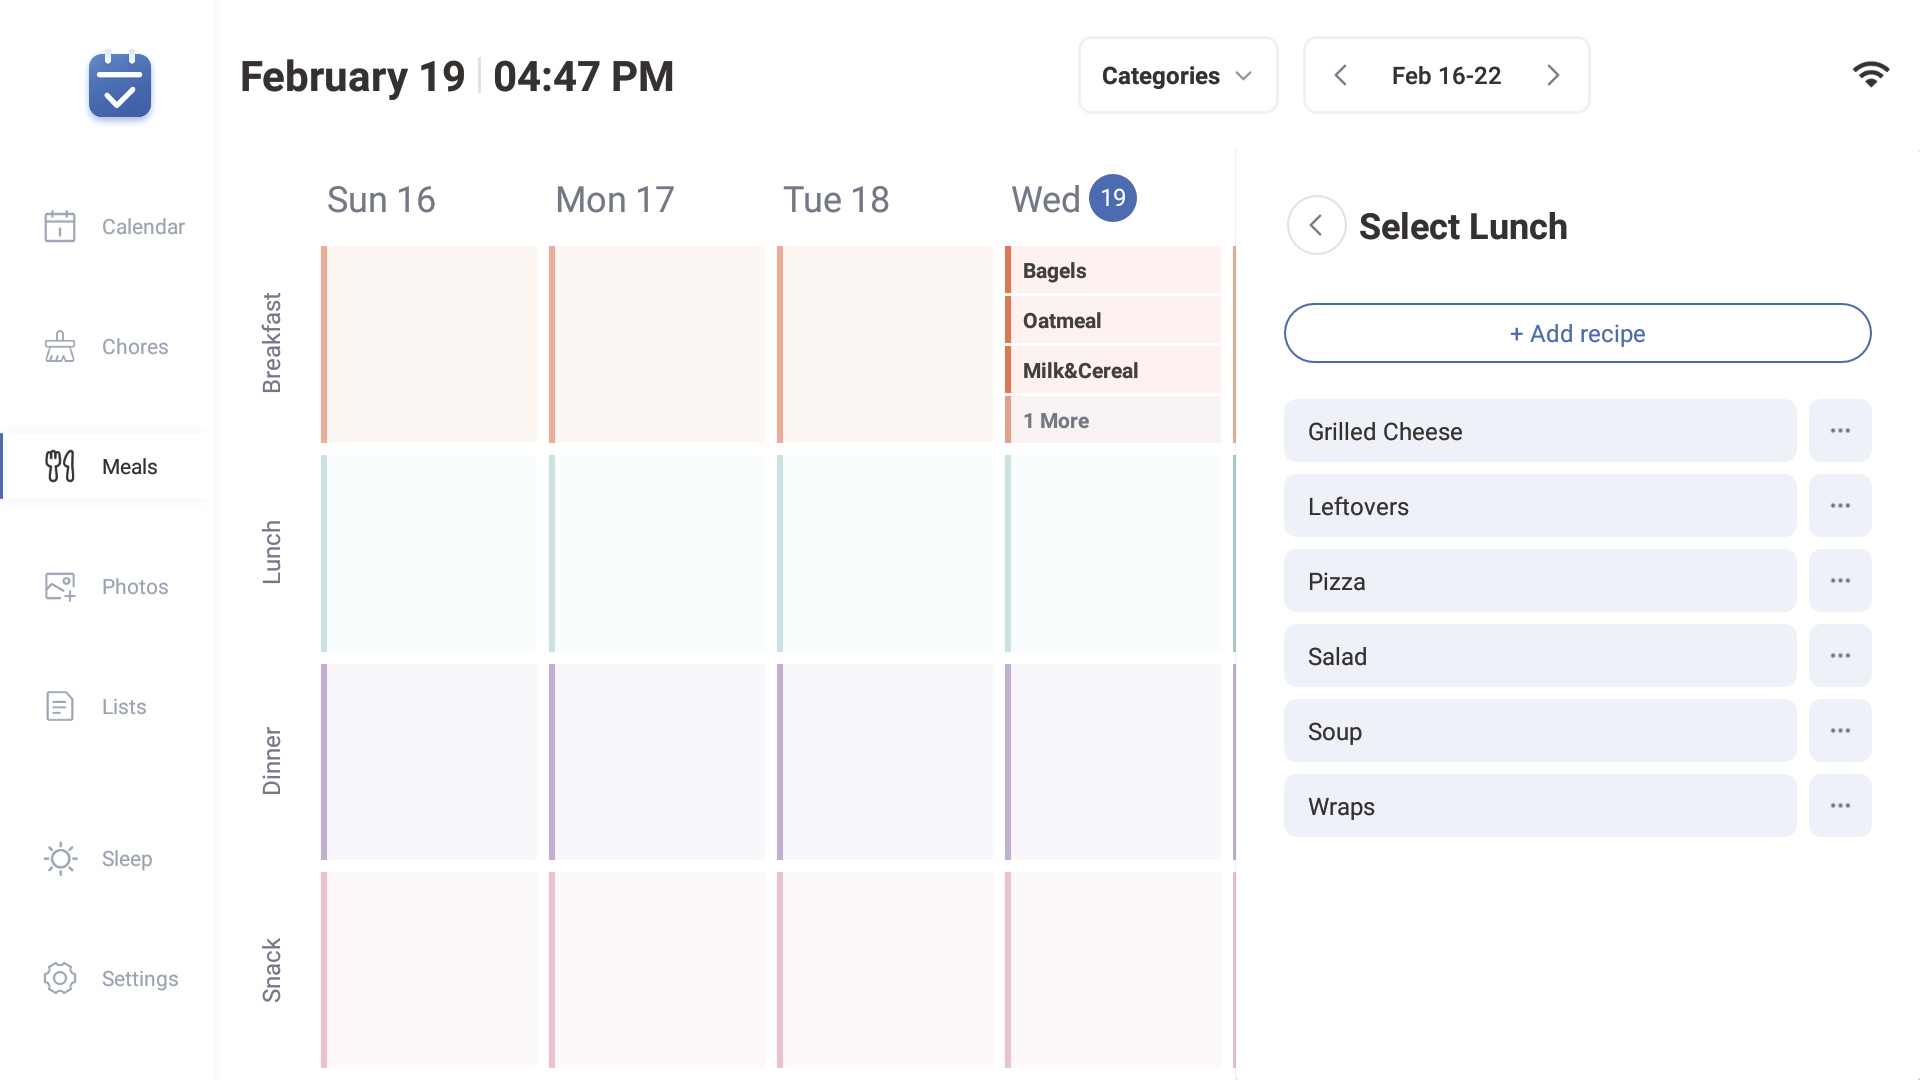
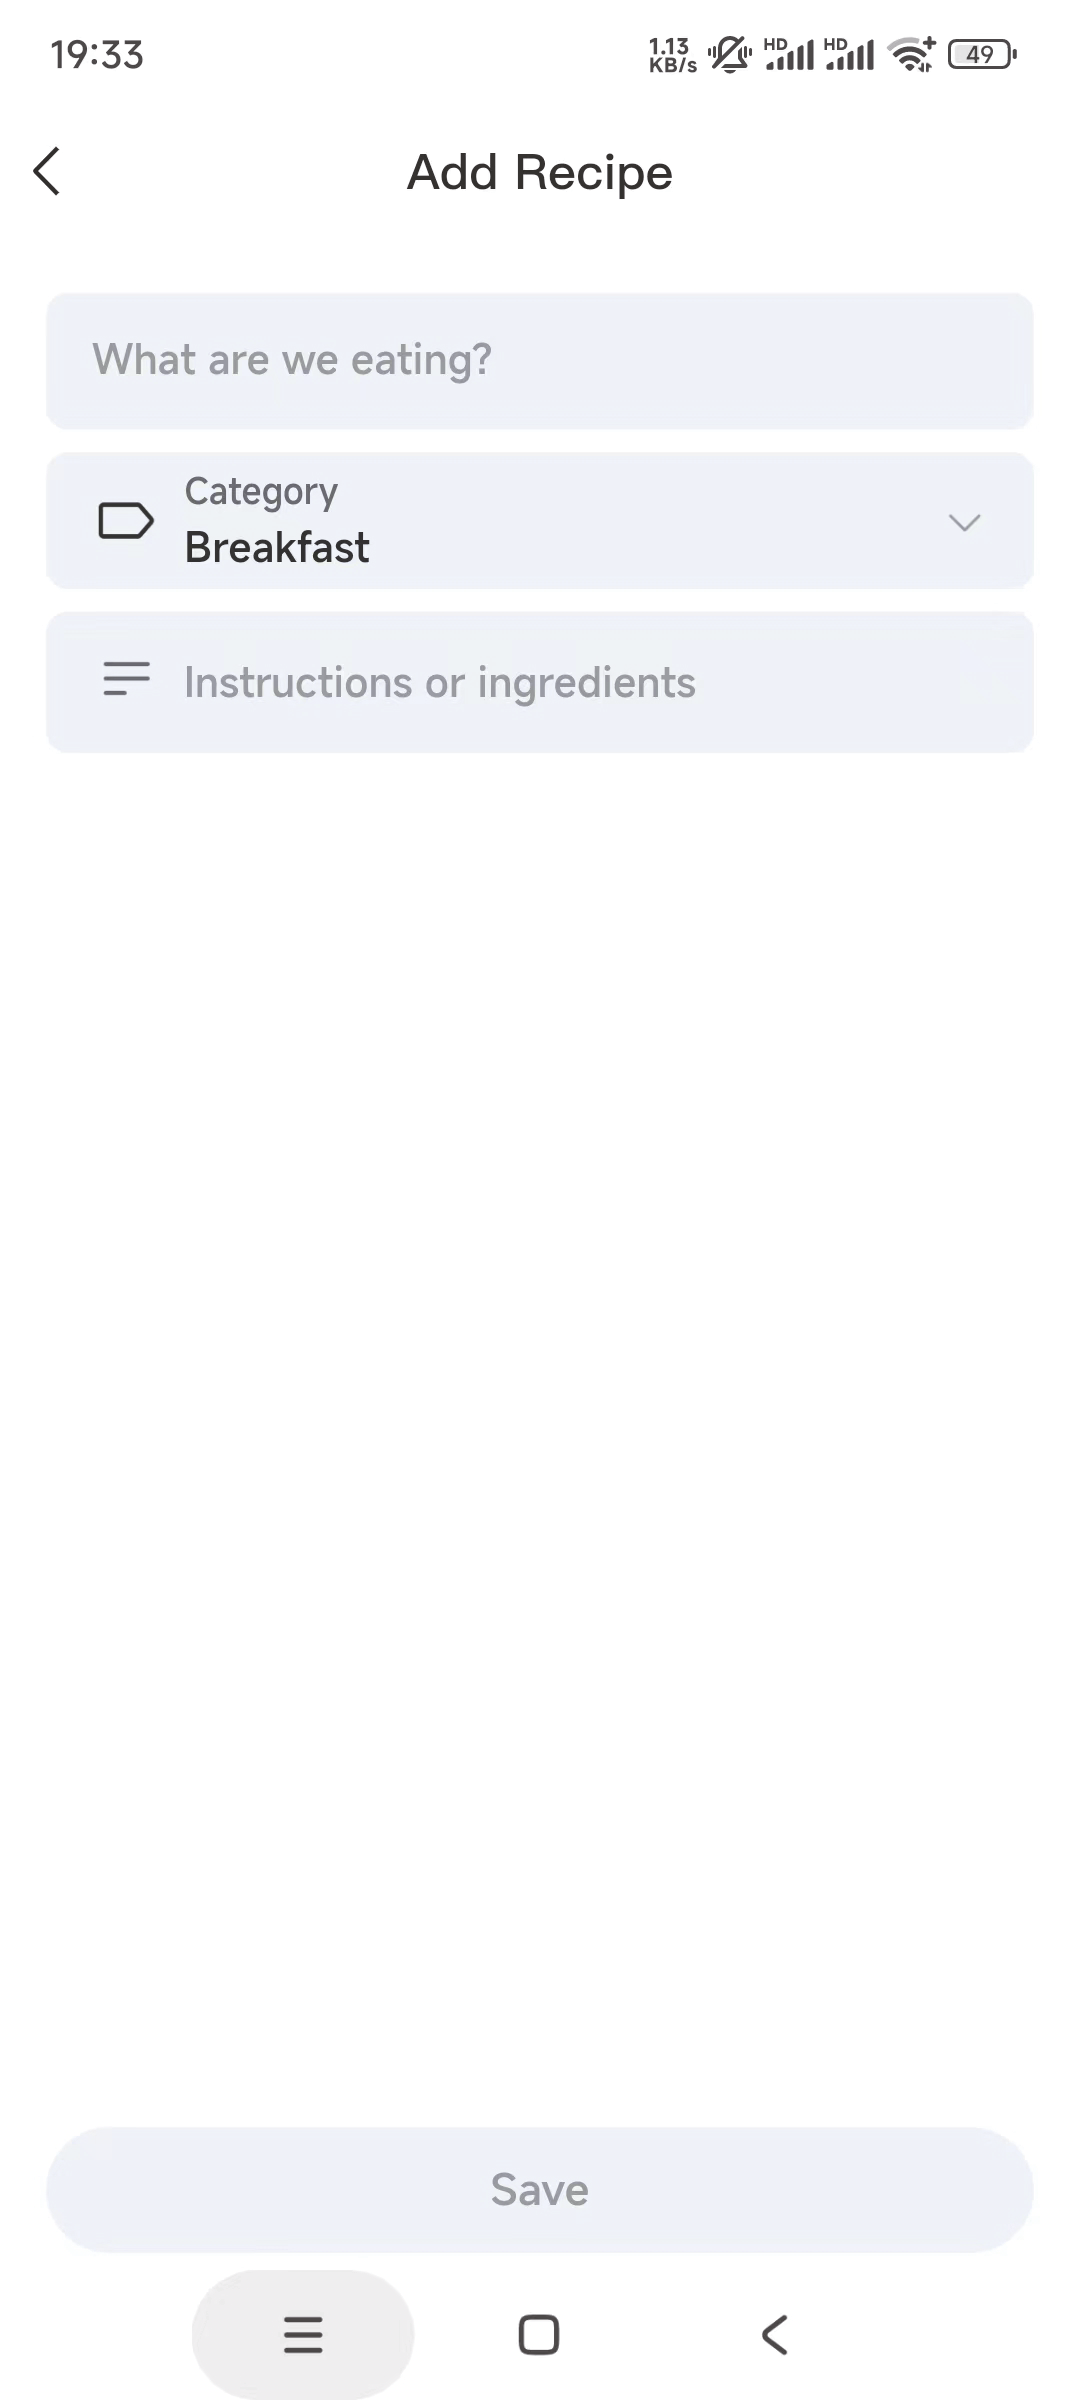
④ Long press on breakfast/lunch/dinner/dessert under date ,then click "add recipe"
⑤ Clicking ... after the dish, can edit dish names, select table of contents, make dish introductions, and save.
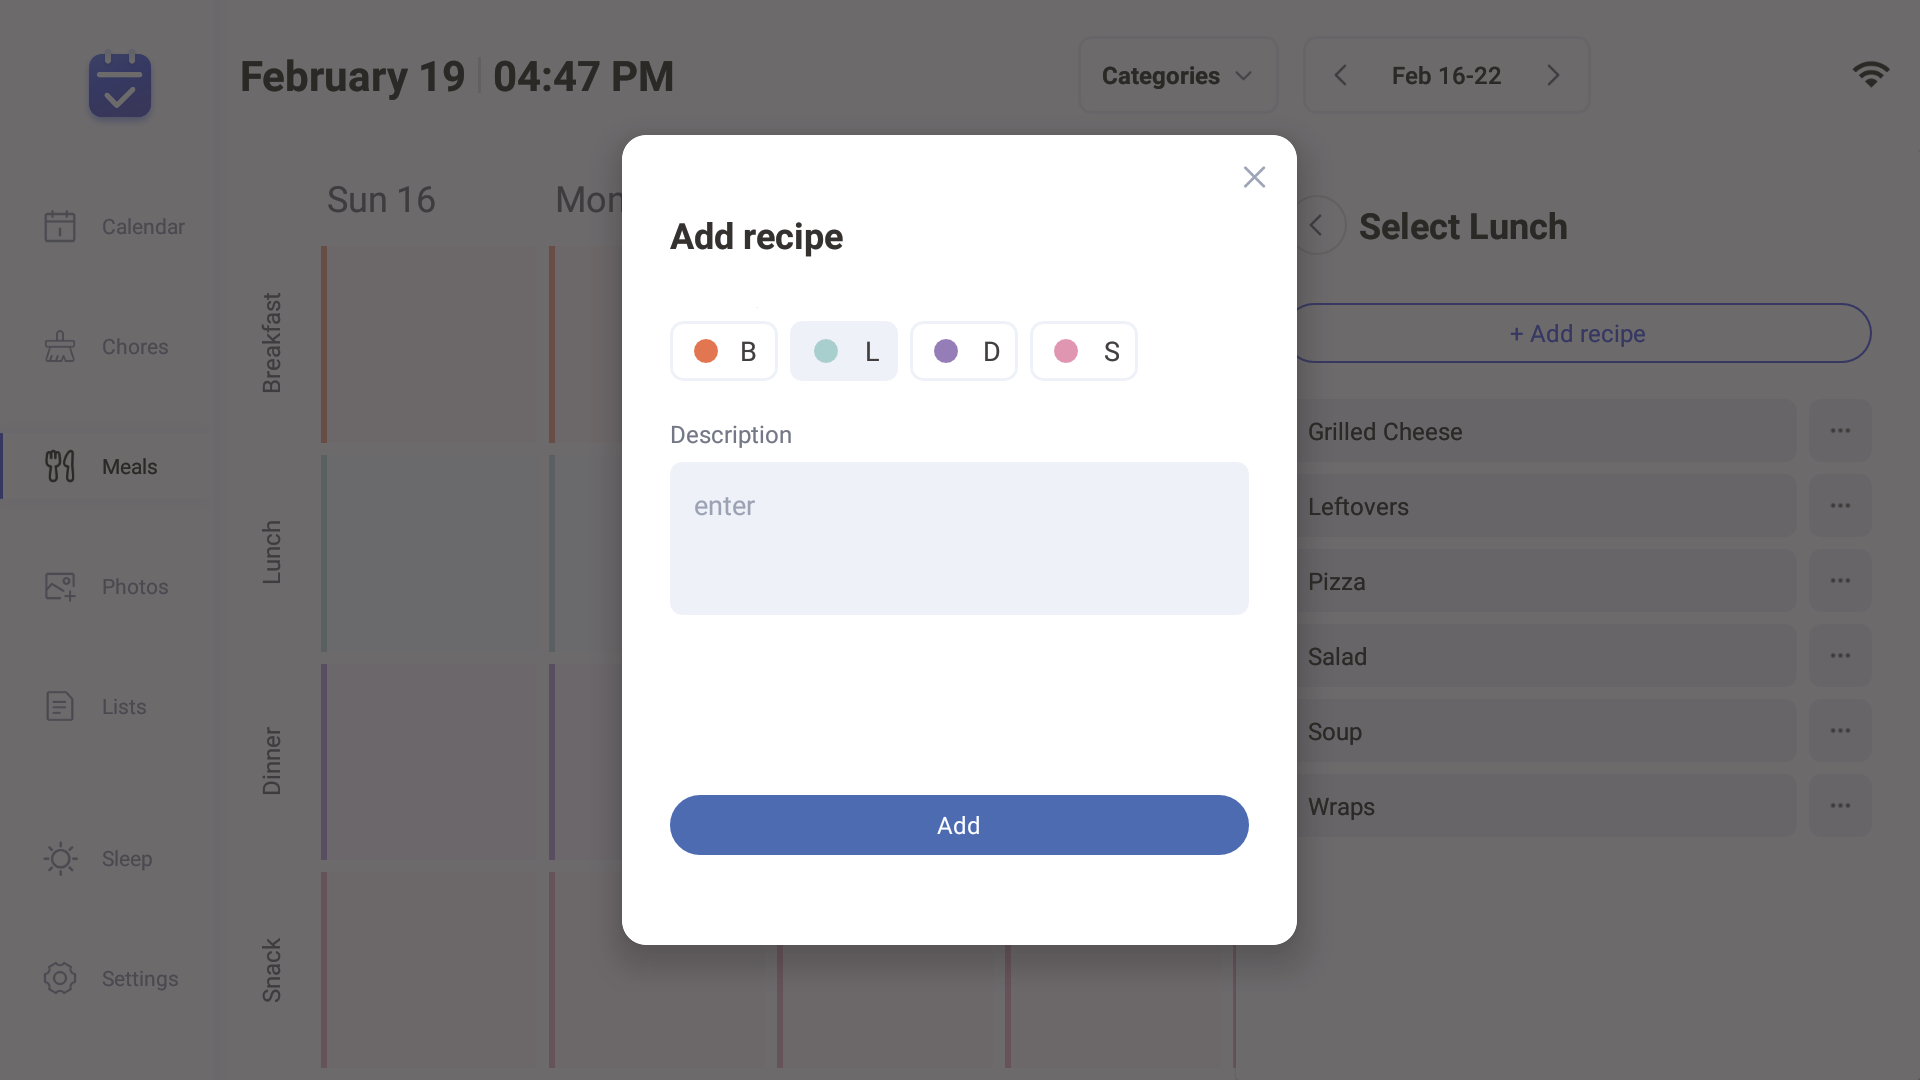


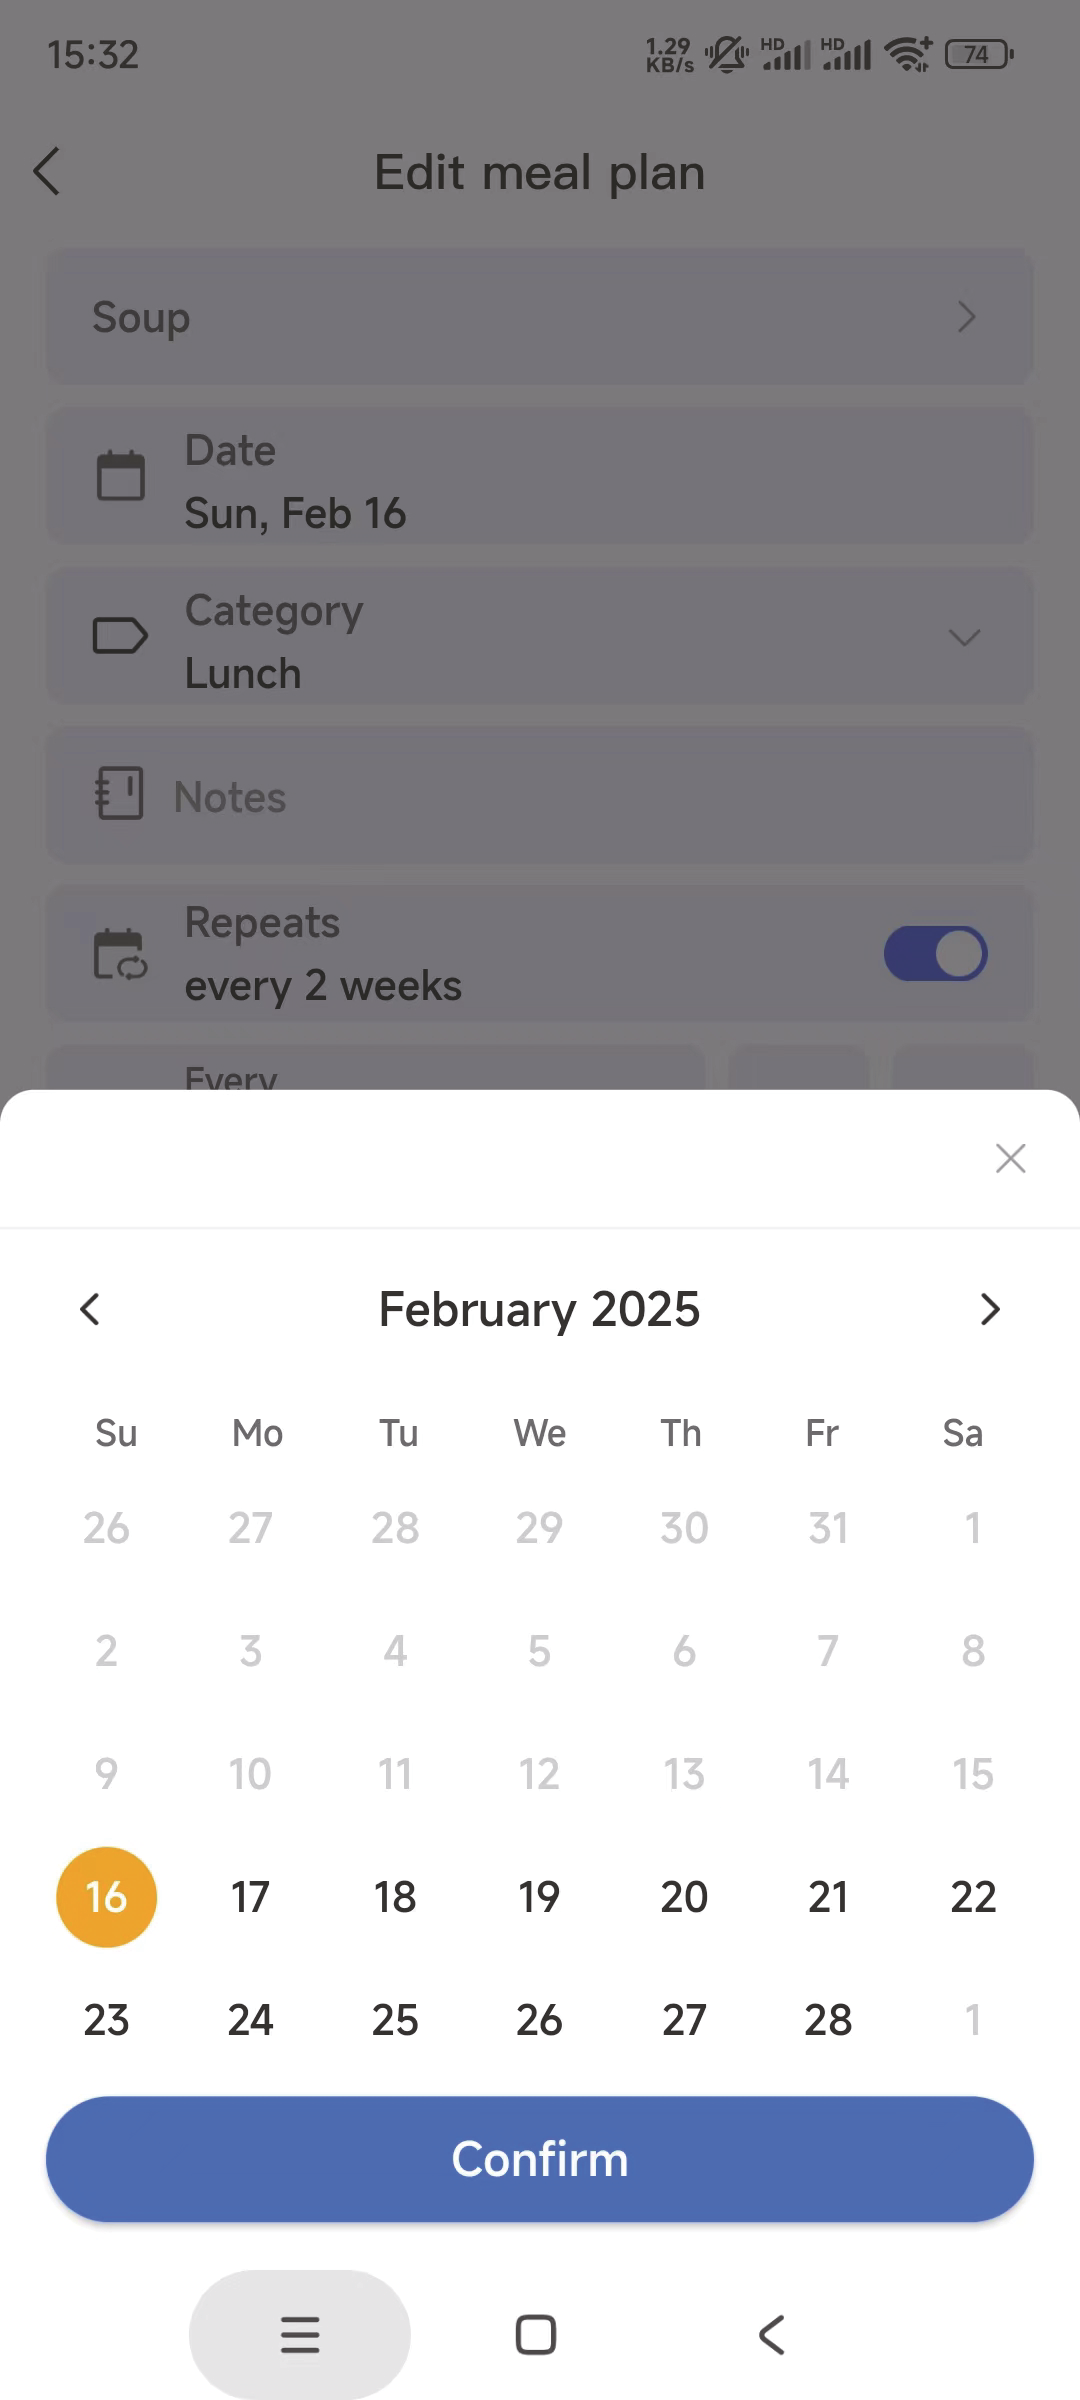
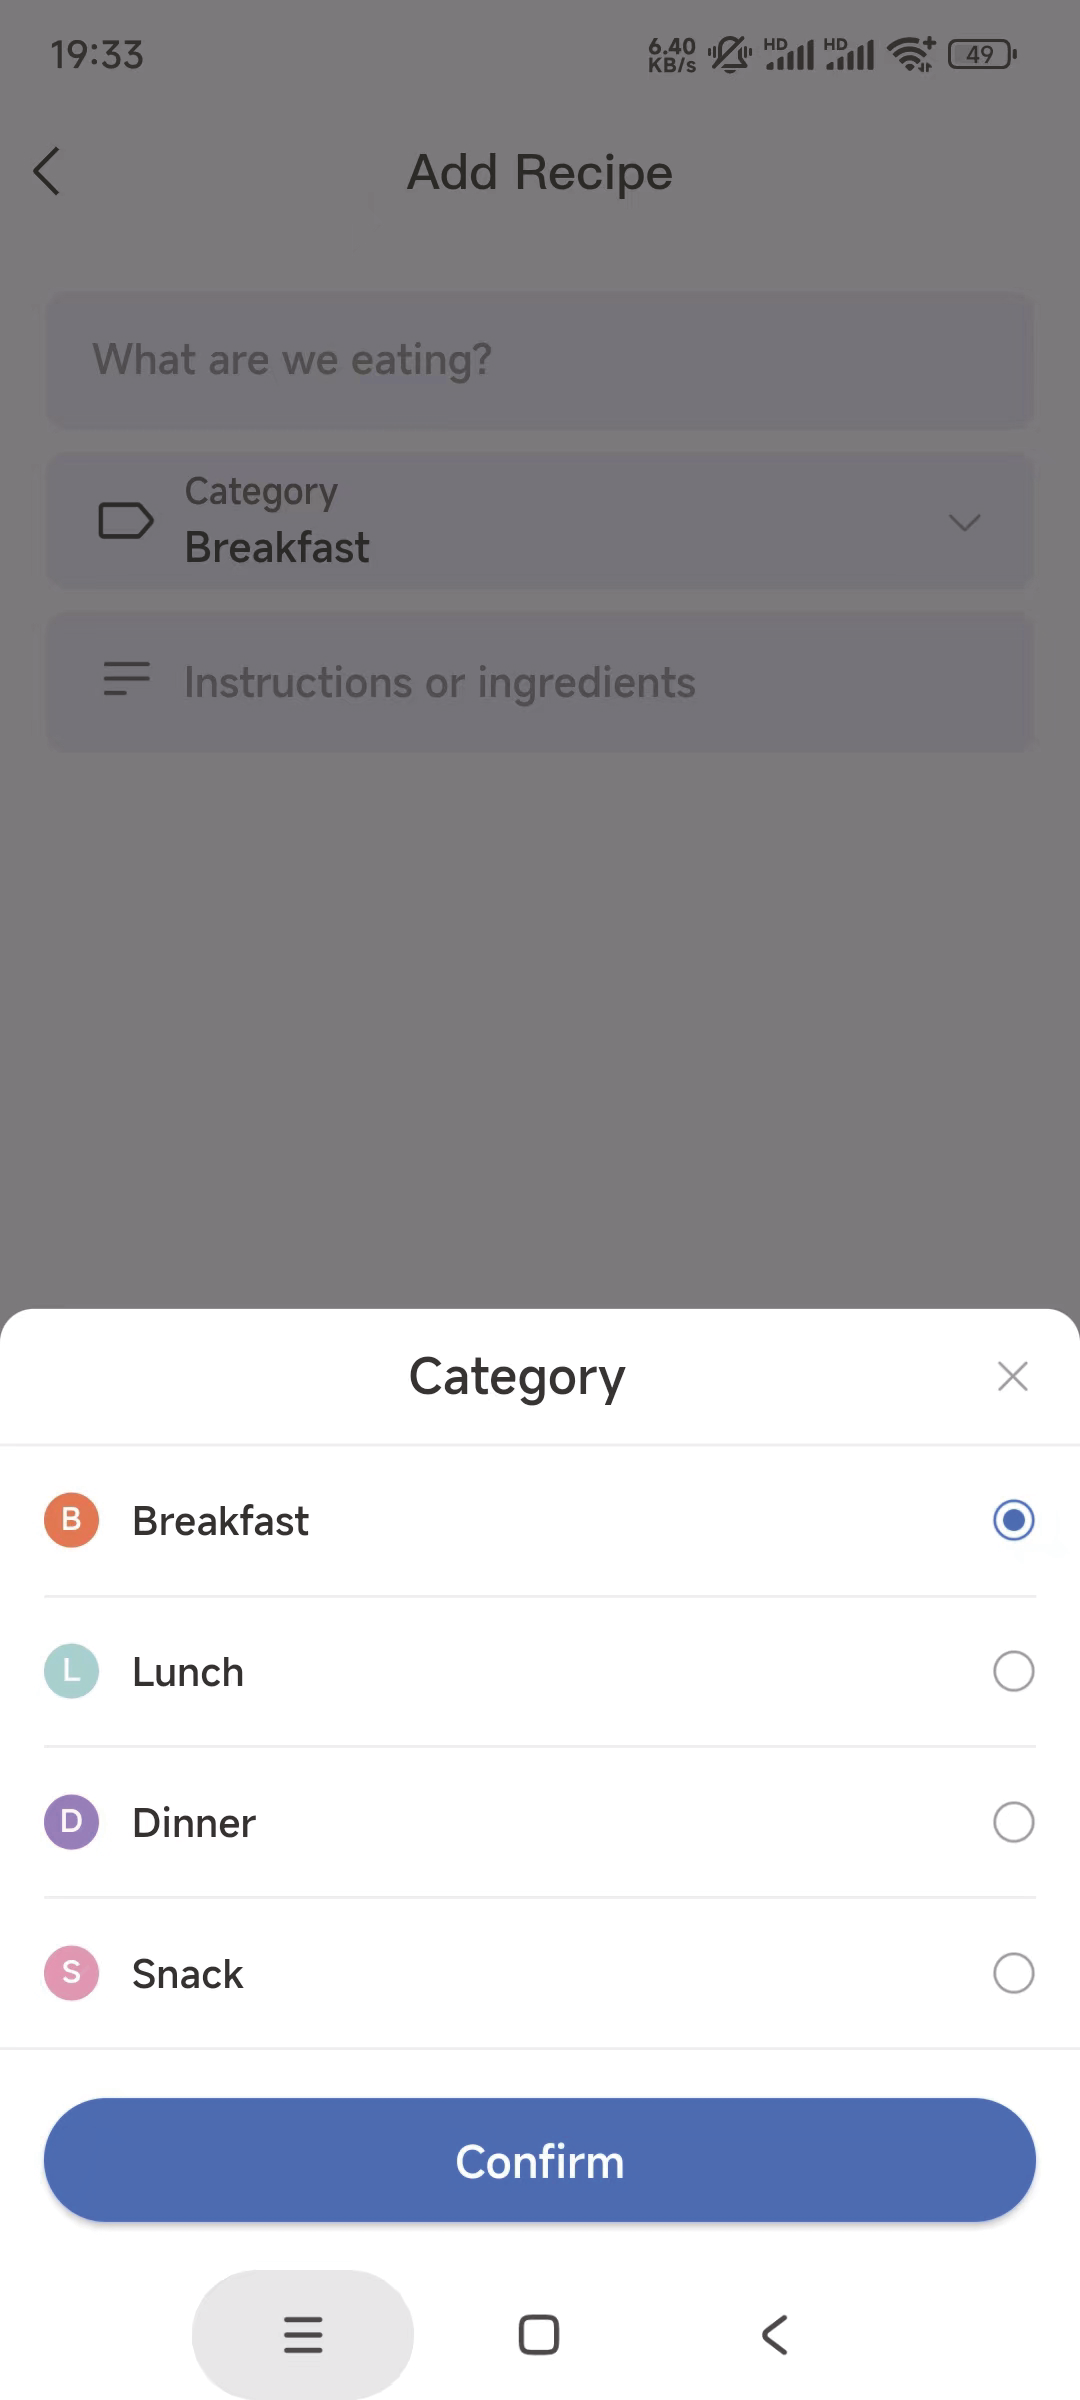
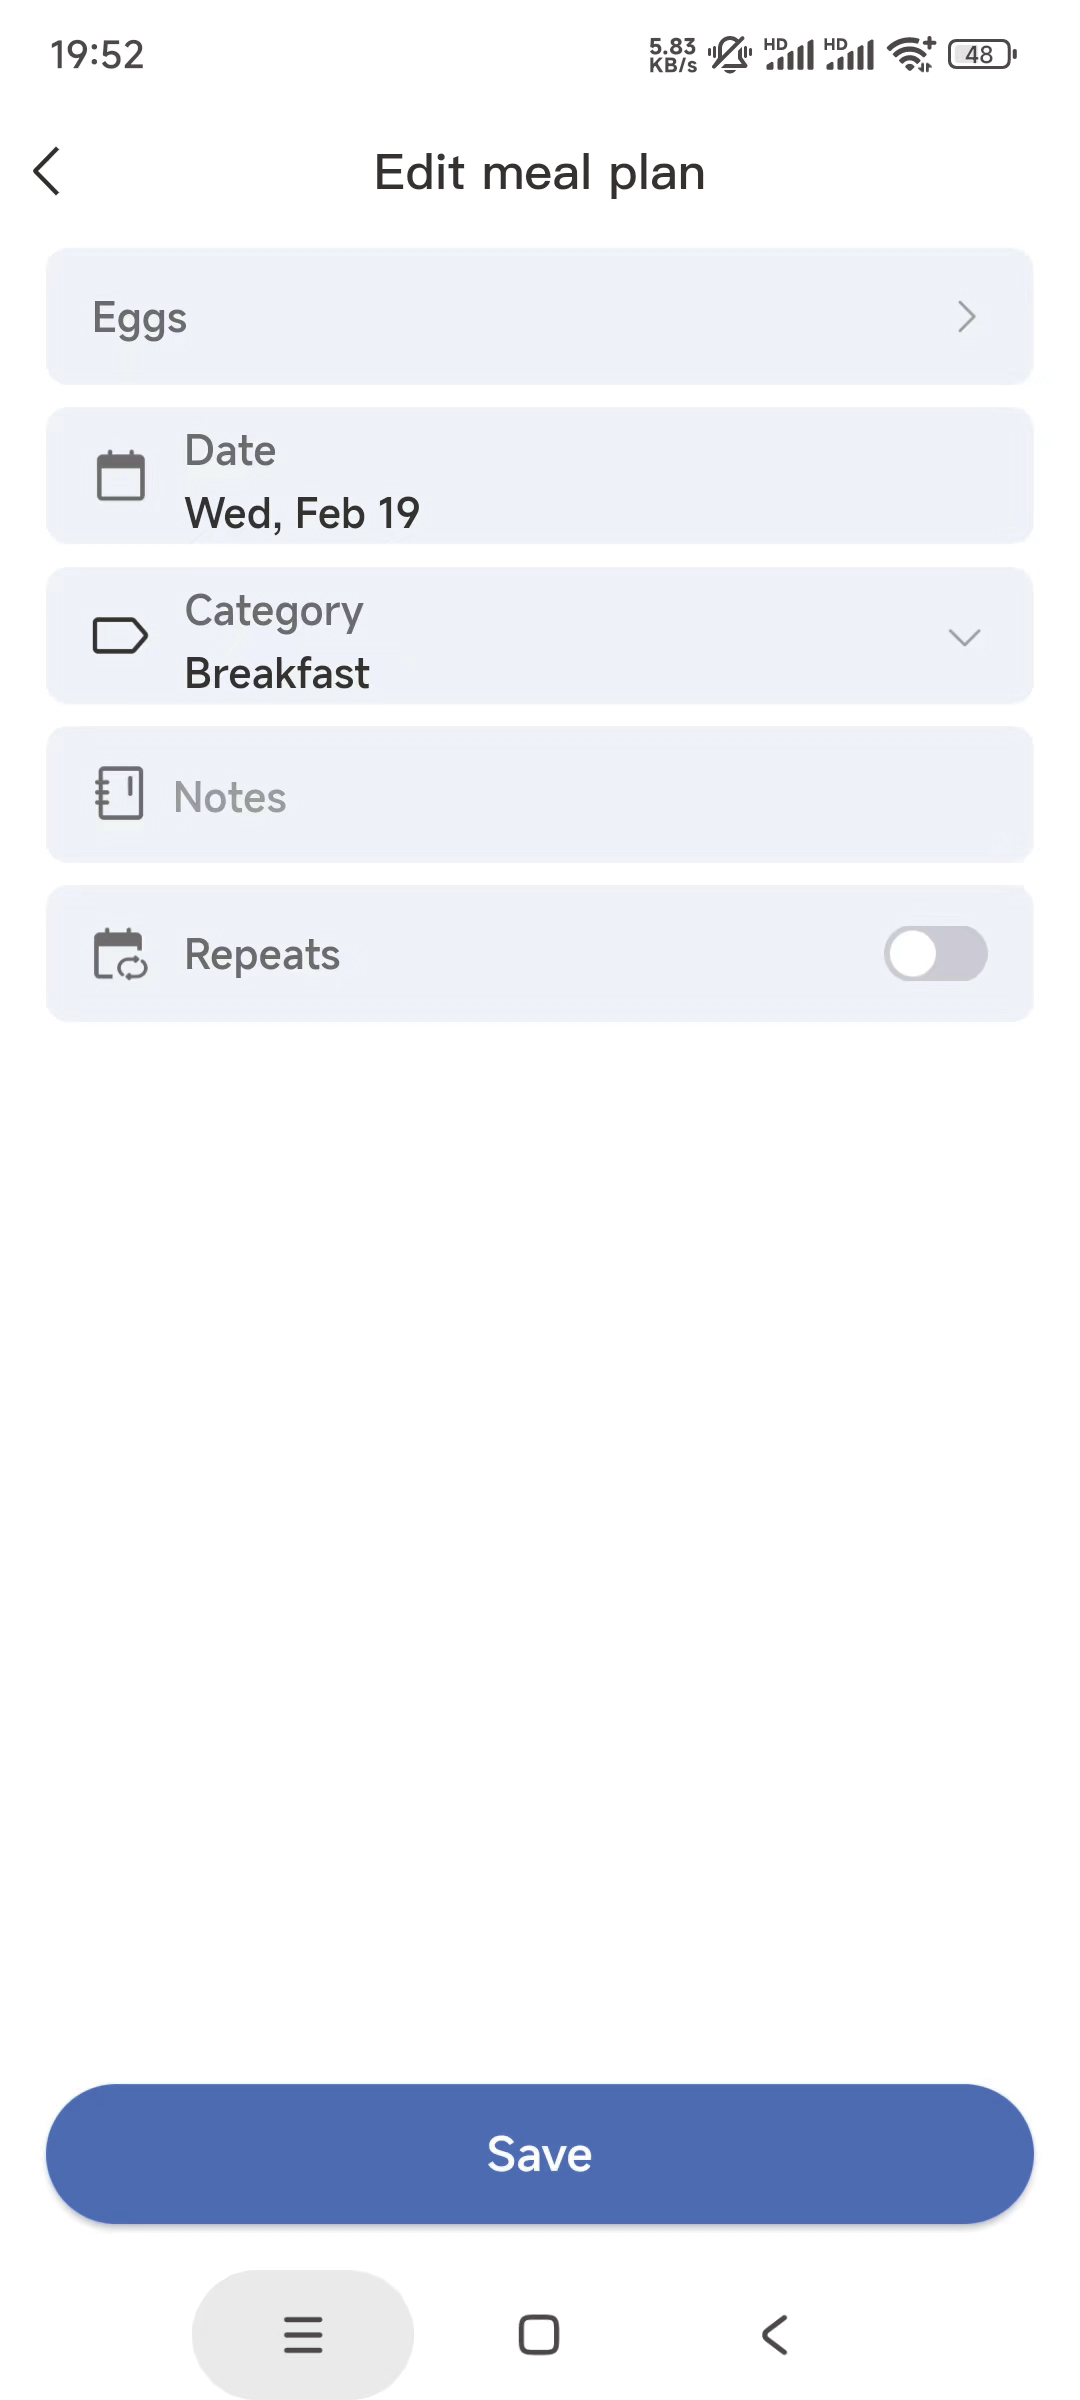
⑥ Type the dishes on what are we eating, select the corresponding breakfast, lunch, dinner, dessert catalogs, and also support provide dish introductions. Open the repeat button, select the number of times and repeat deadline. Click Save to complete dish creation and planning.
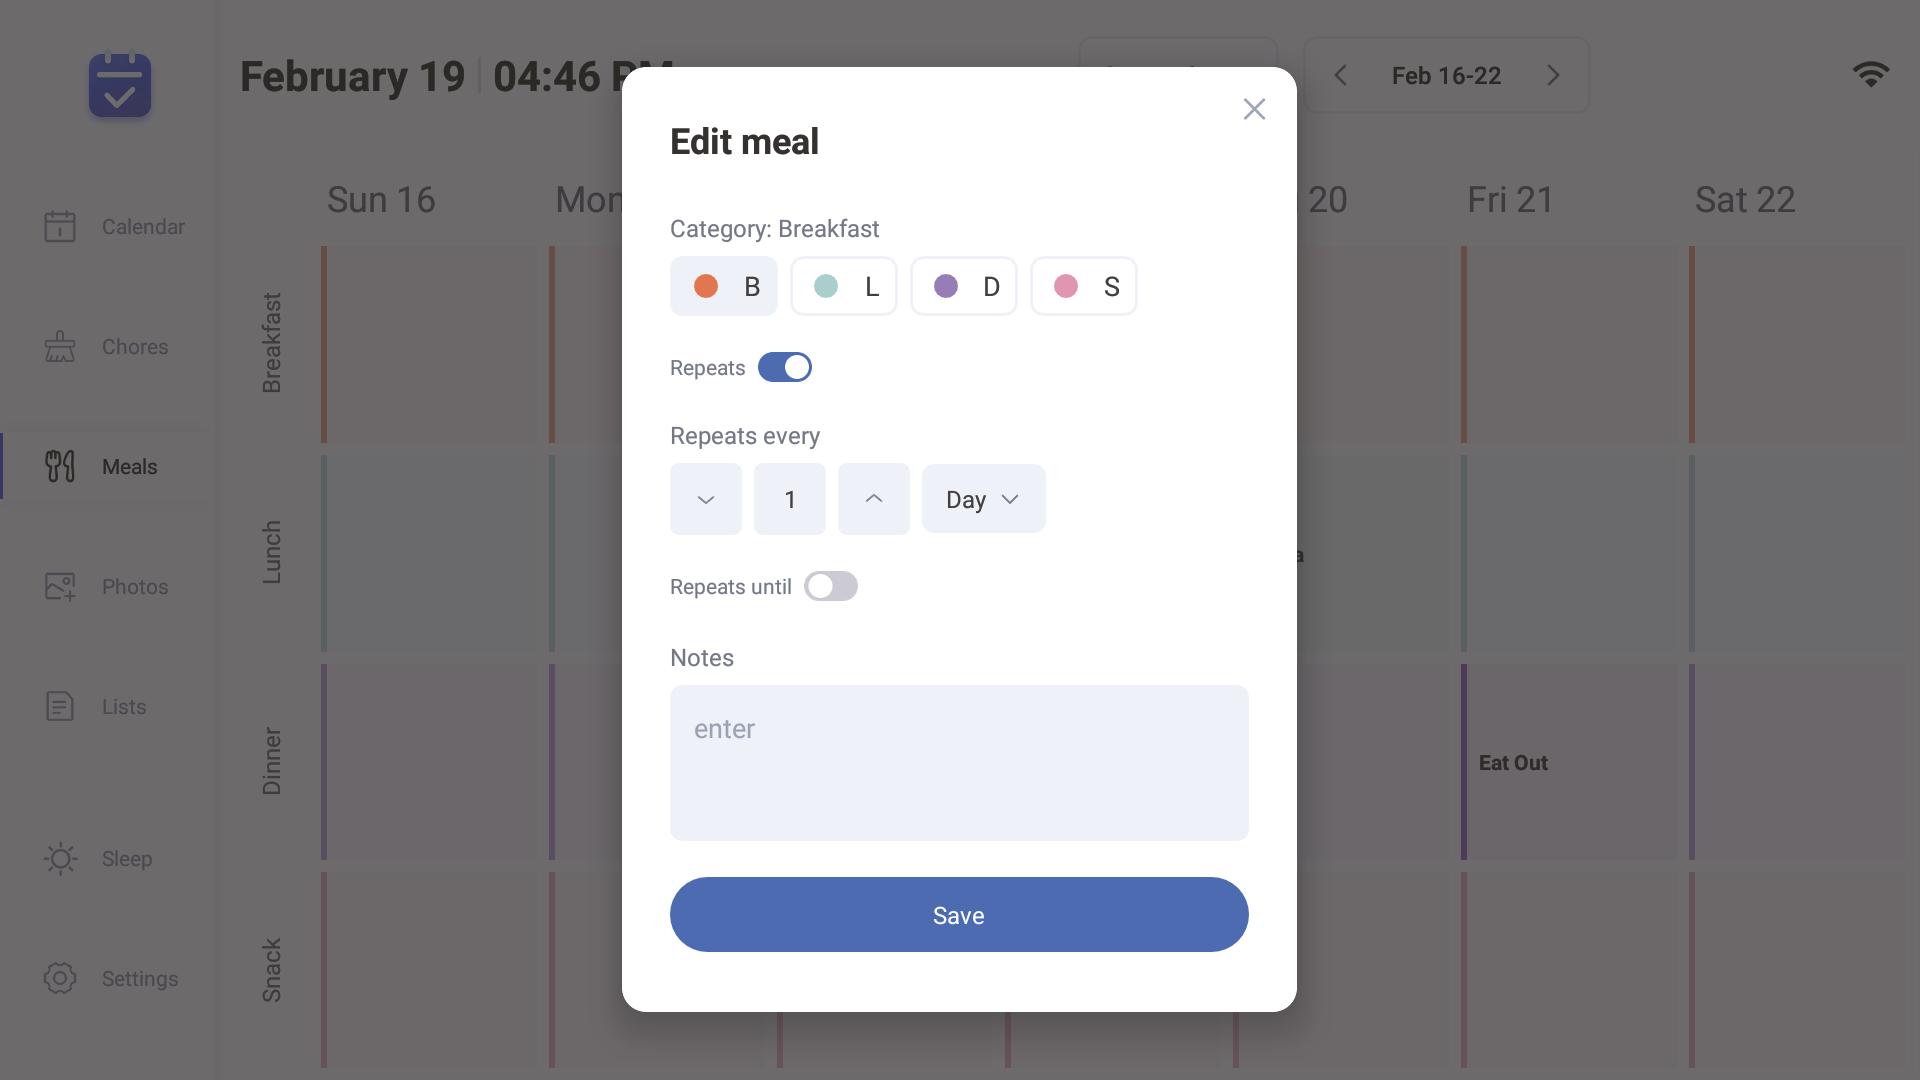
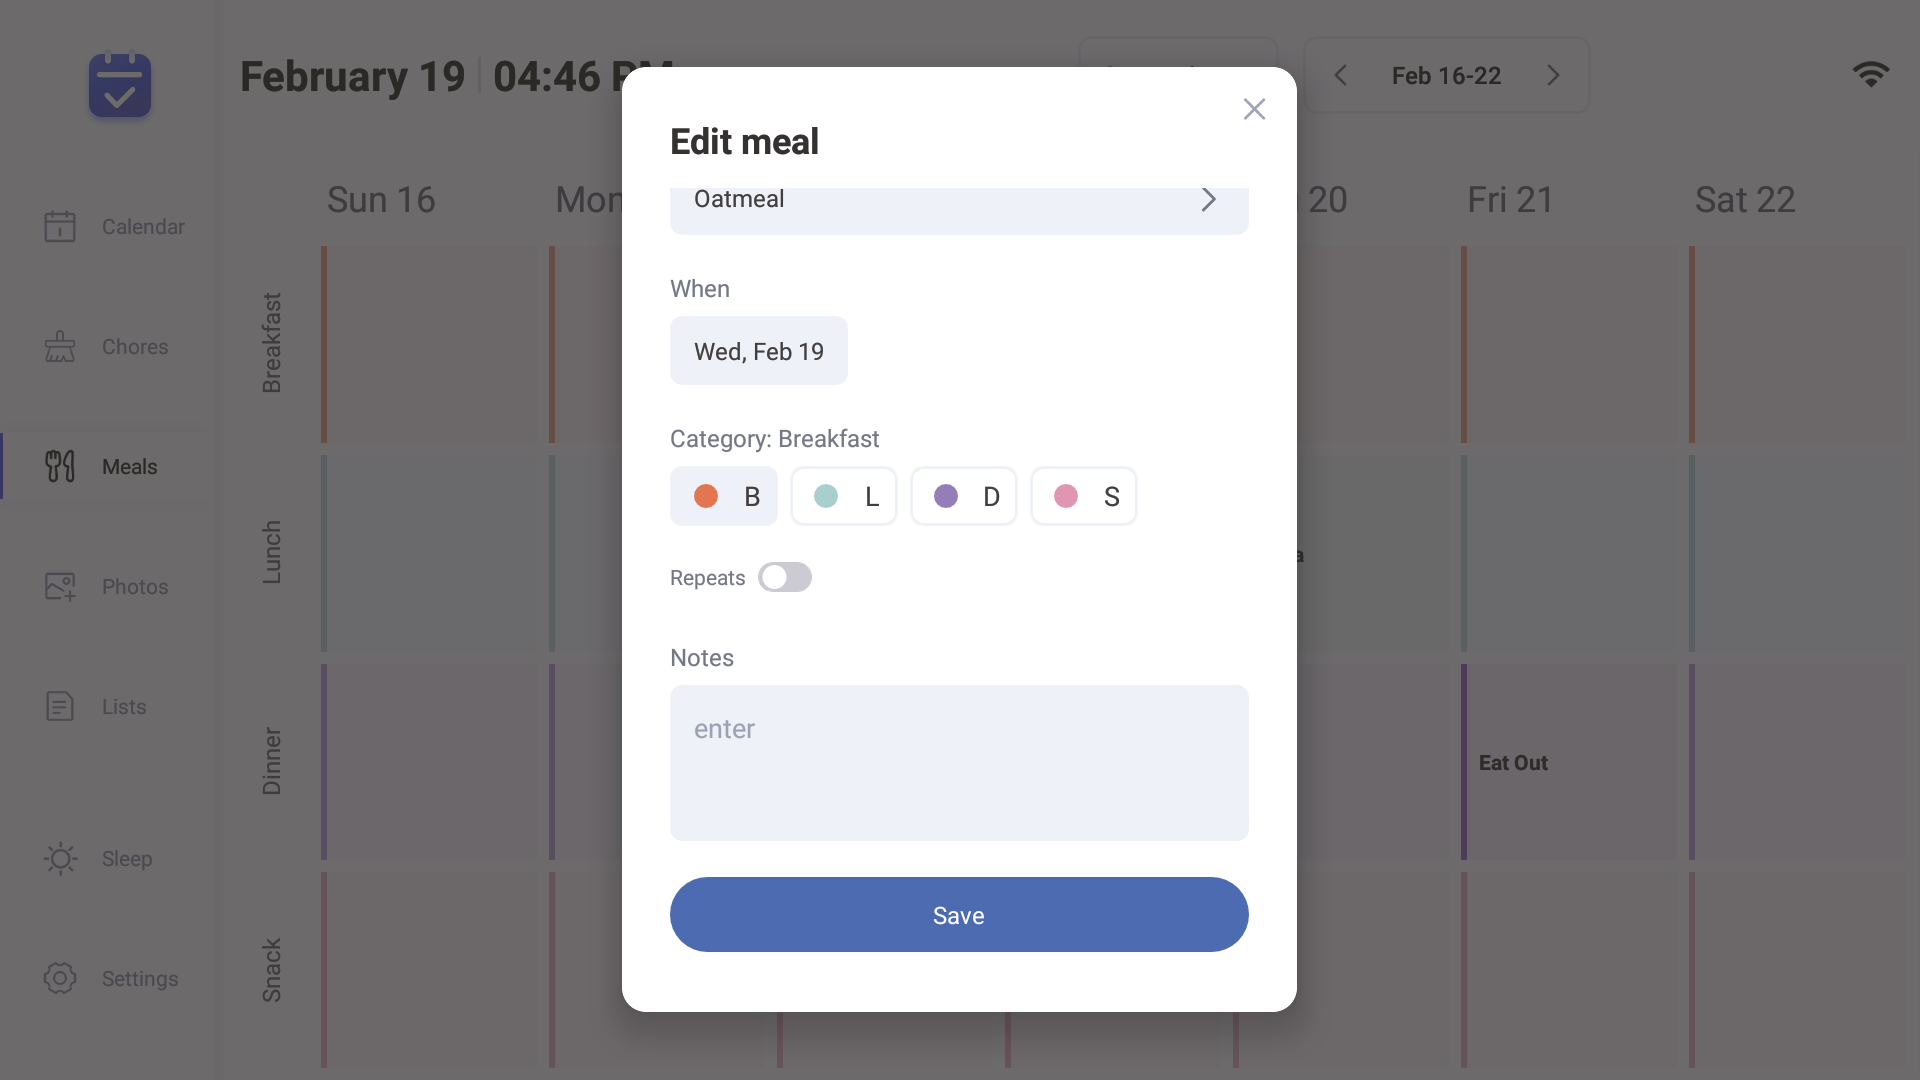
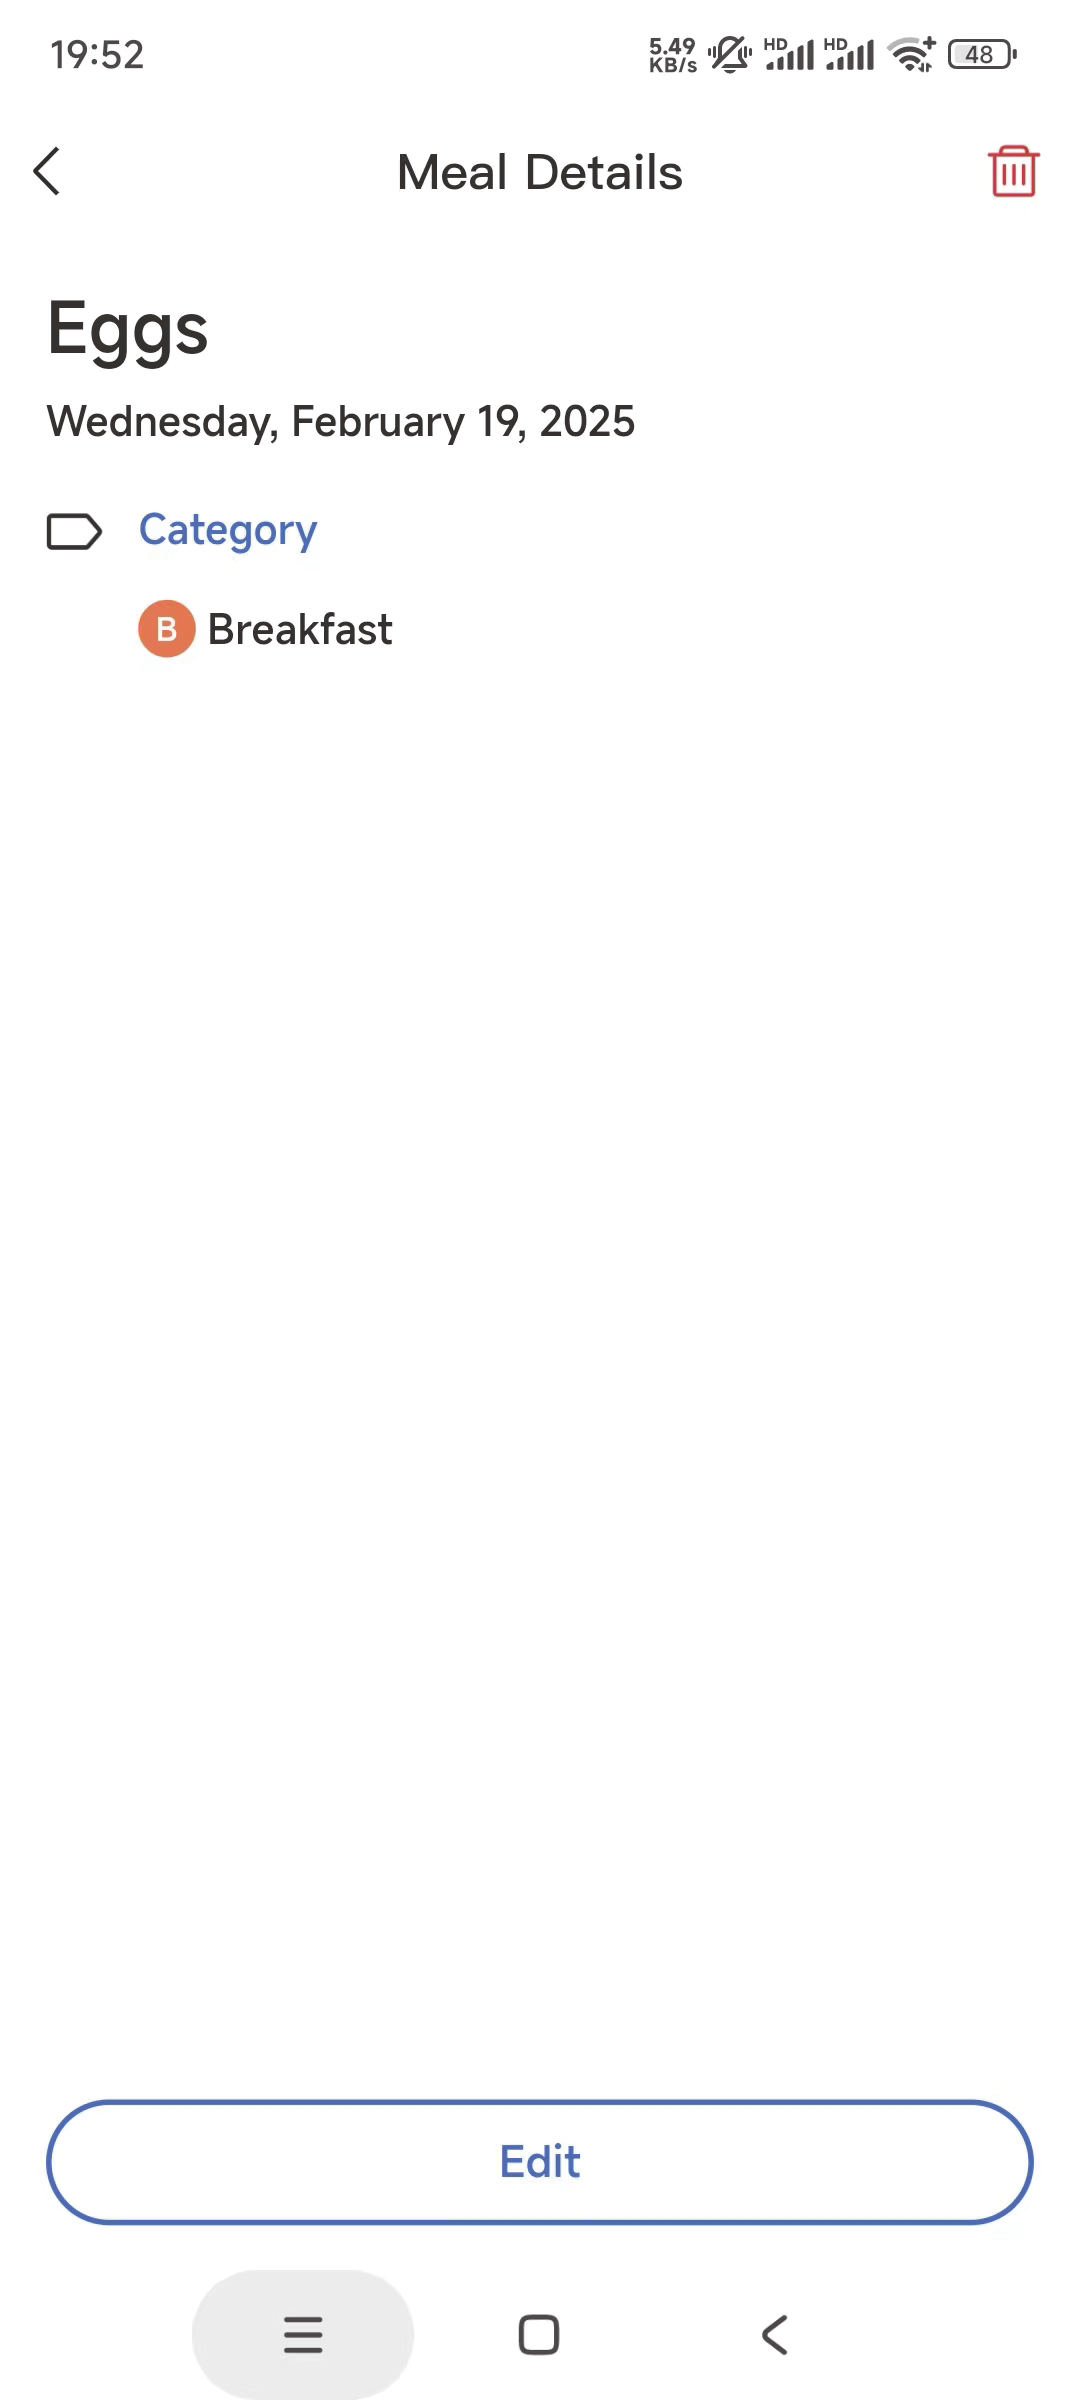
⑦ Tap on the dishes on the pre-set plan to click edit. Edit the dish names to set duplicates, make dish introductions, or click the delete button to delete the plan.
3.3.3 Create new dining plans on app:
① Click on the main interface Meals.
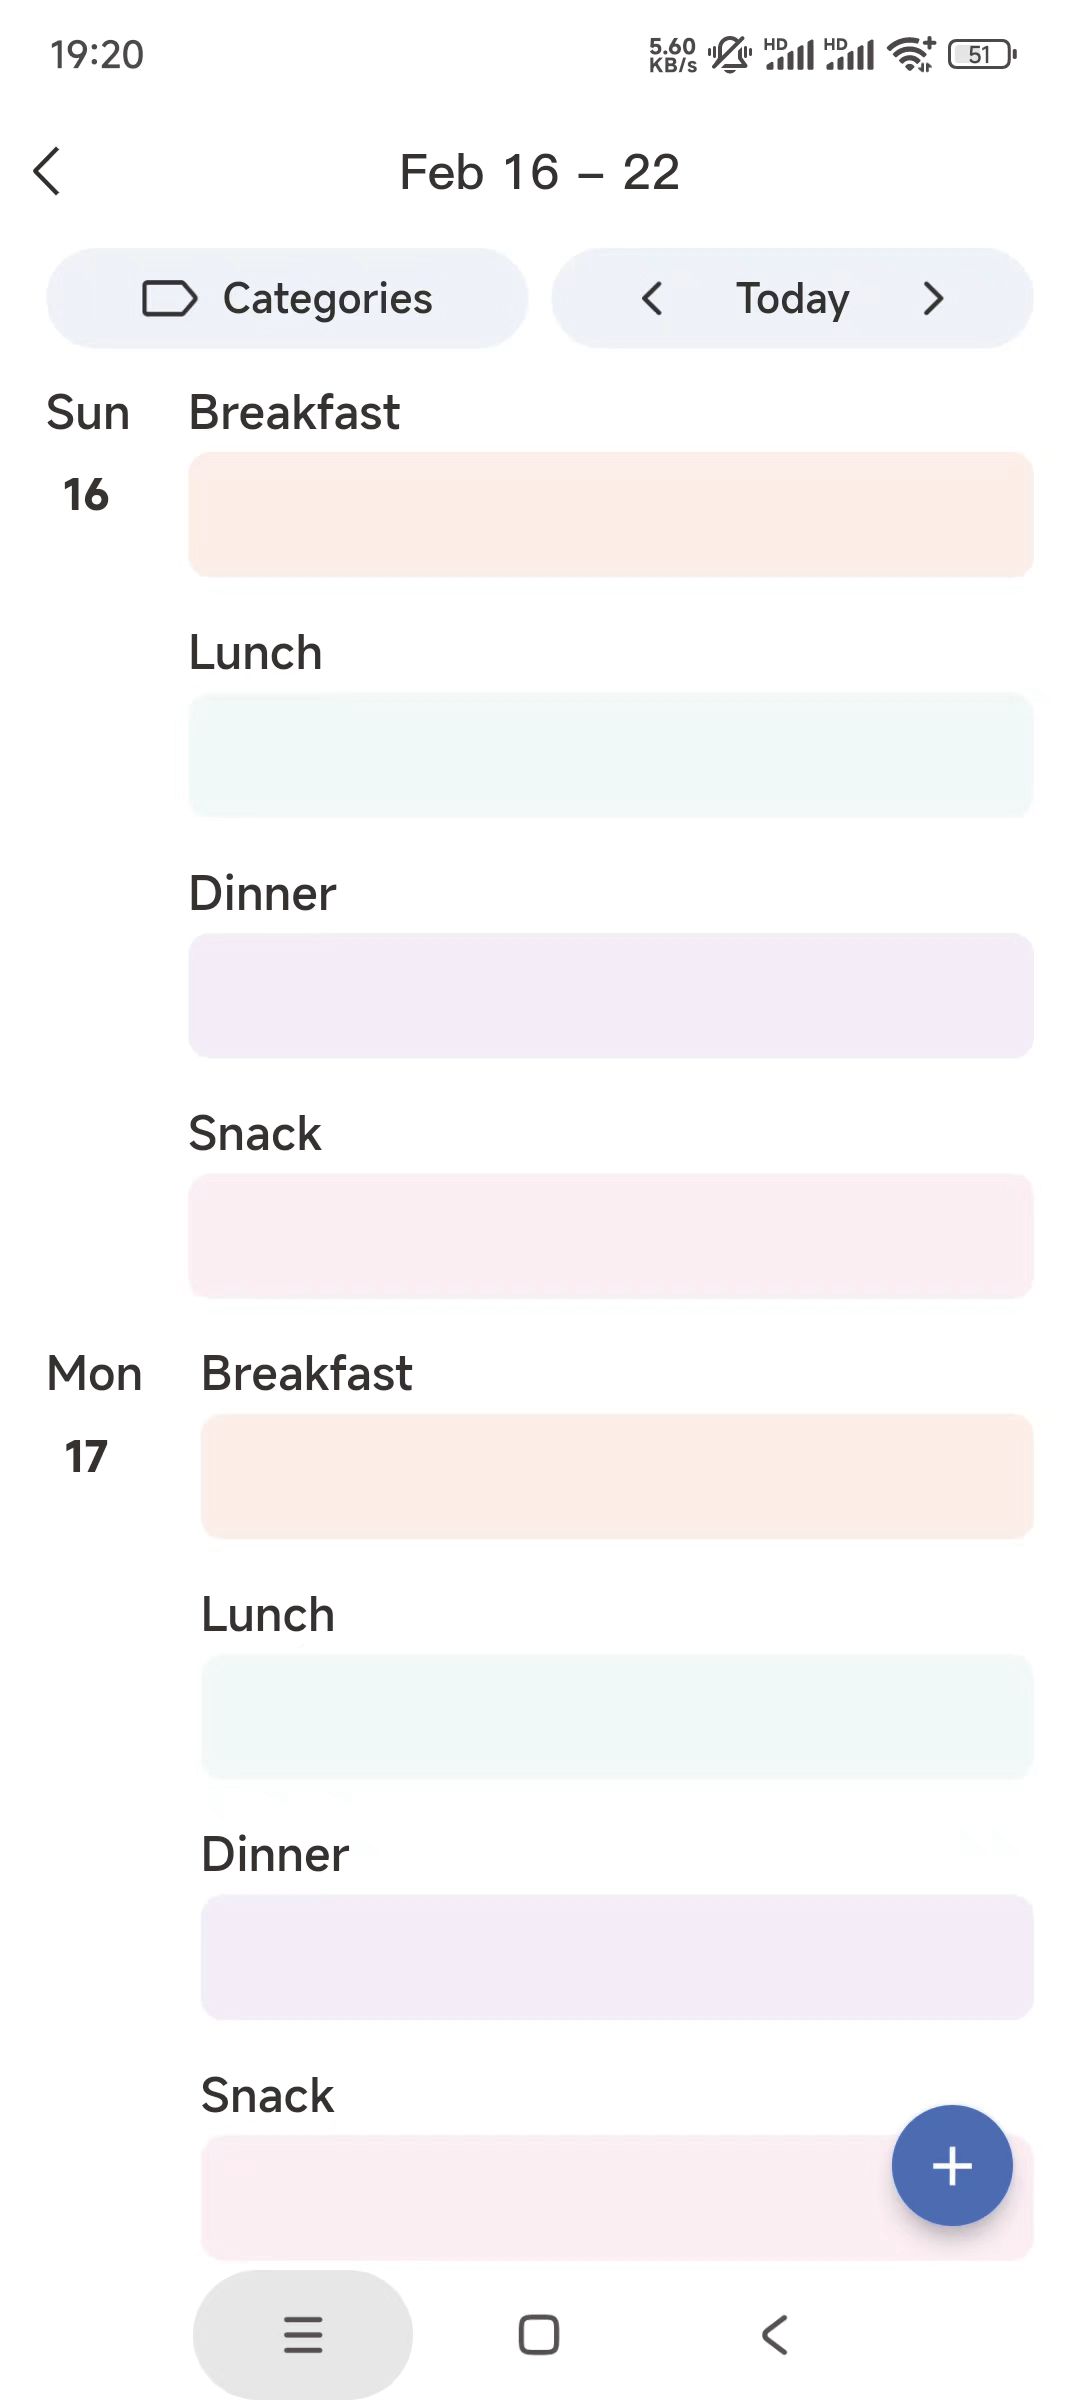
② Long press the breakfast/lunch/dinner/dessert option
③ After completing the arrangement, it can be synchronized under the date and select the desired meal. to the device interface. Click the+ in the bottom right corner.
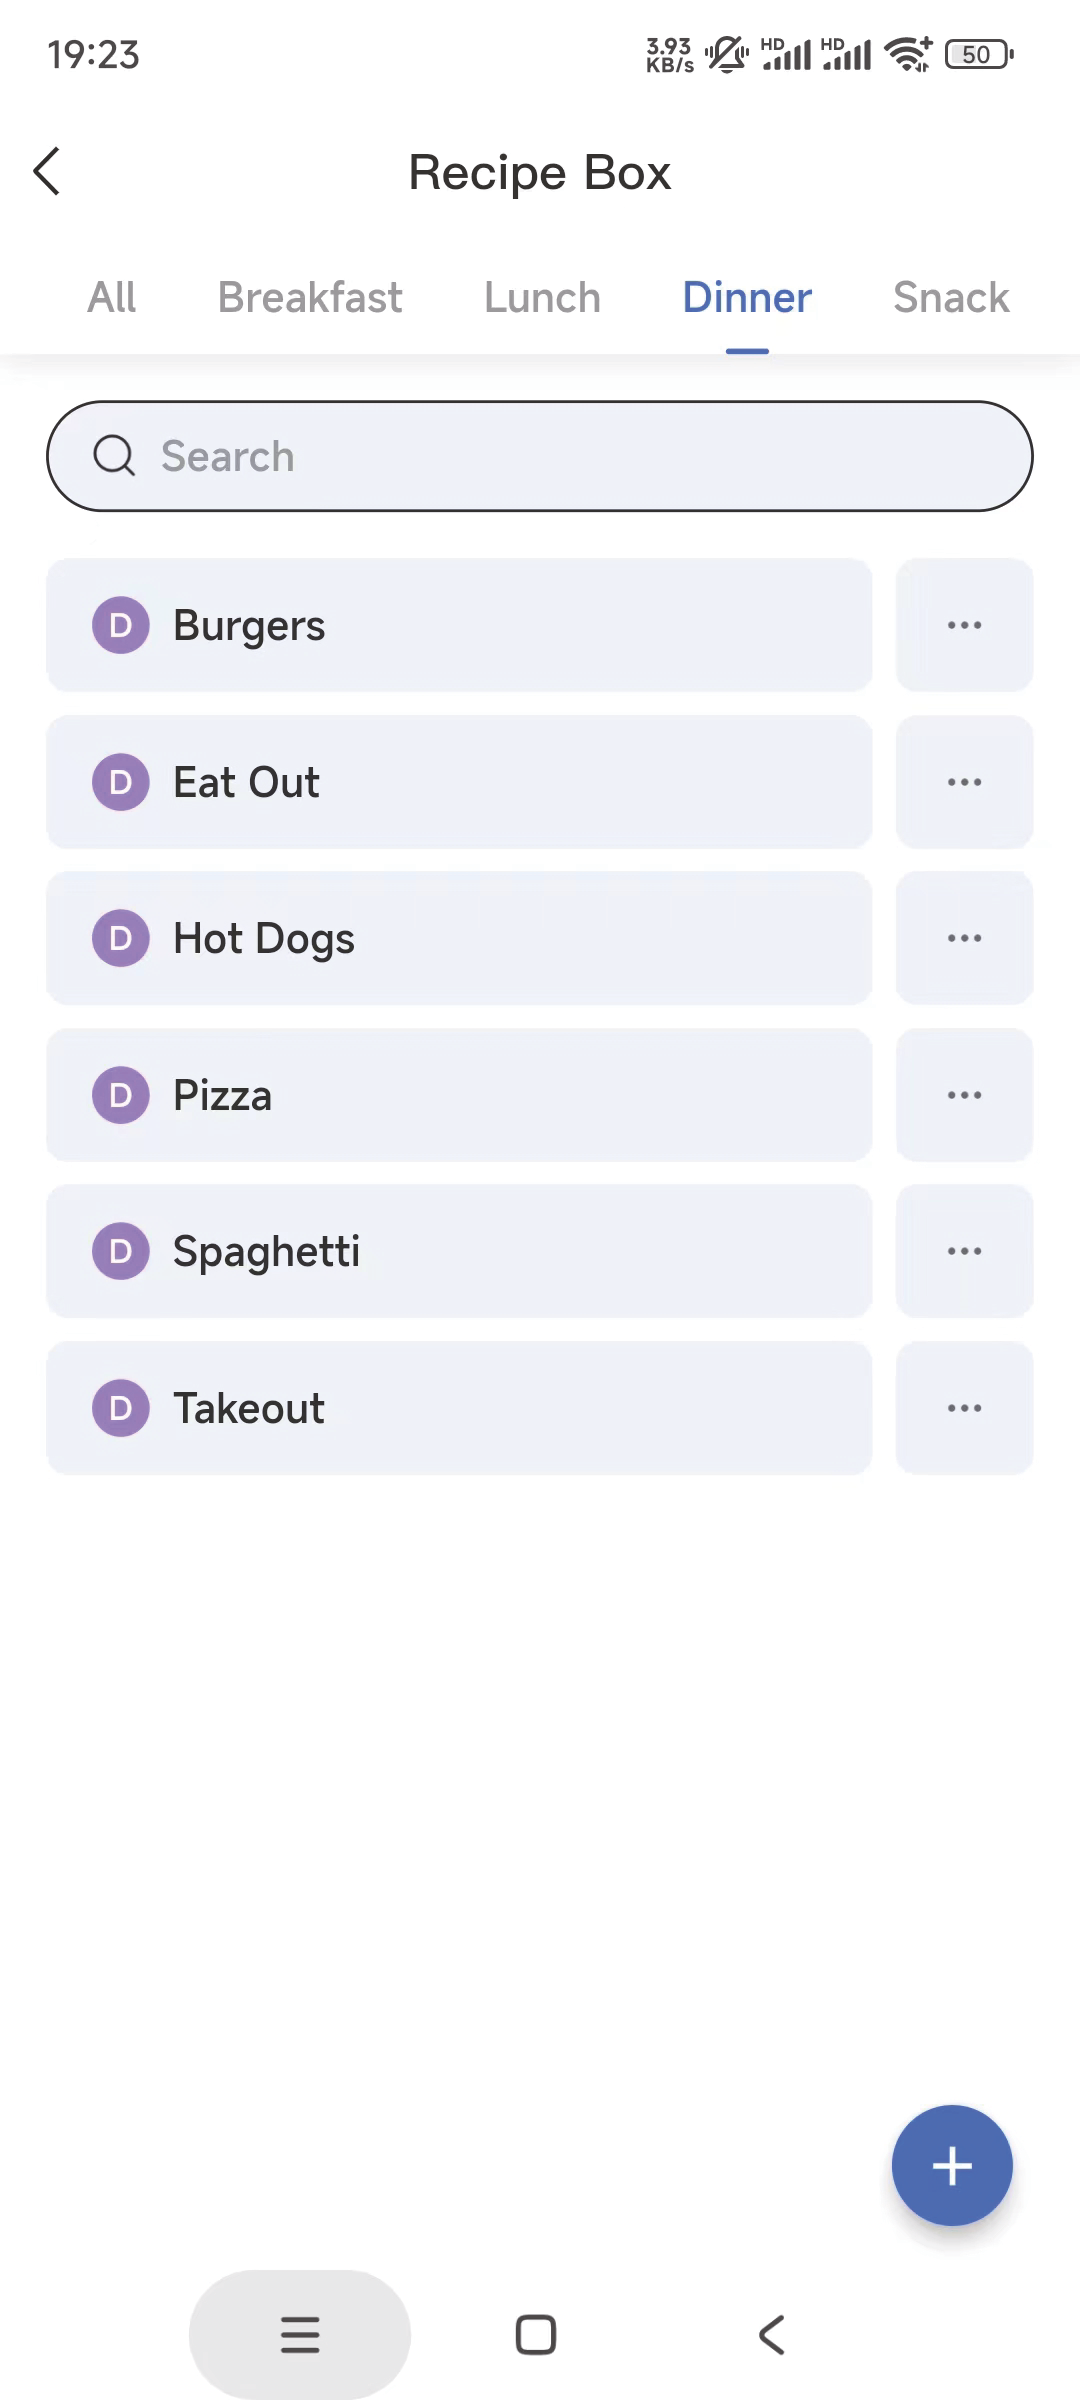
3.3.4 Delete and edit dishes on app
④ Click the+ in the bottom right corner

⑤ Click ...on the right of the created dish to Edit or delete dishes. of the Meals interface to enter the receipt box.
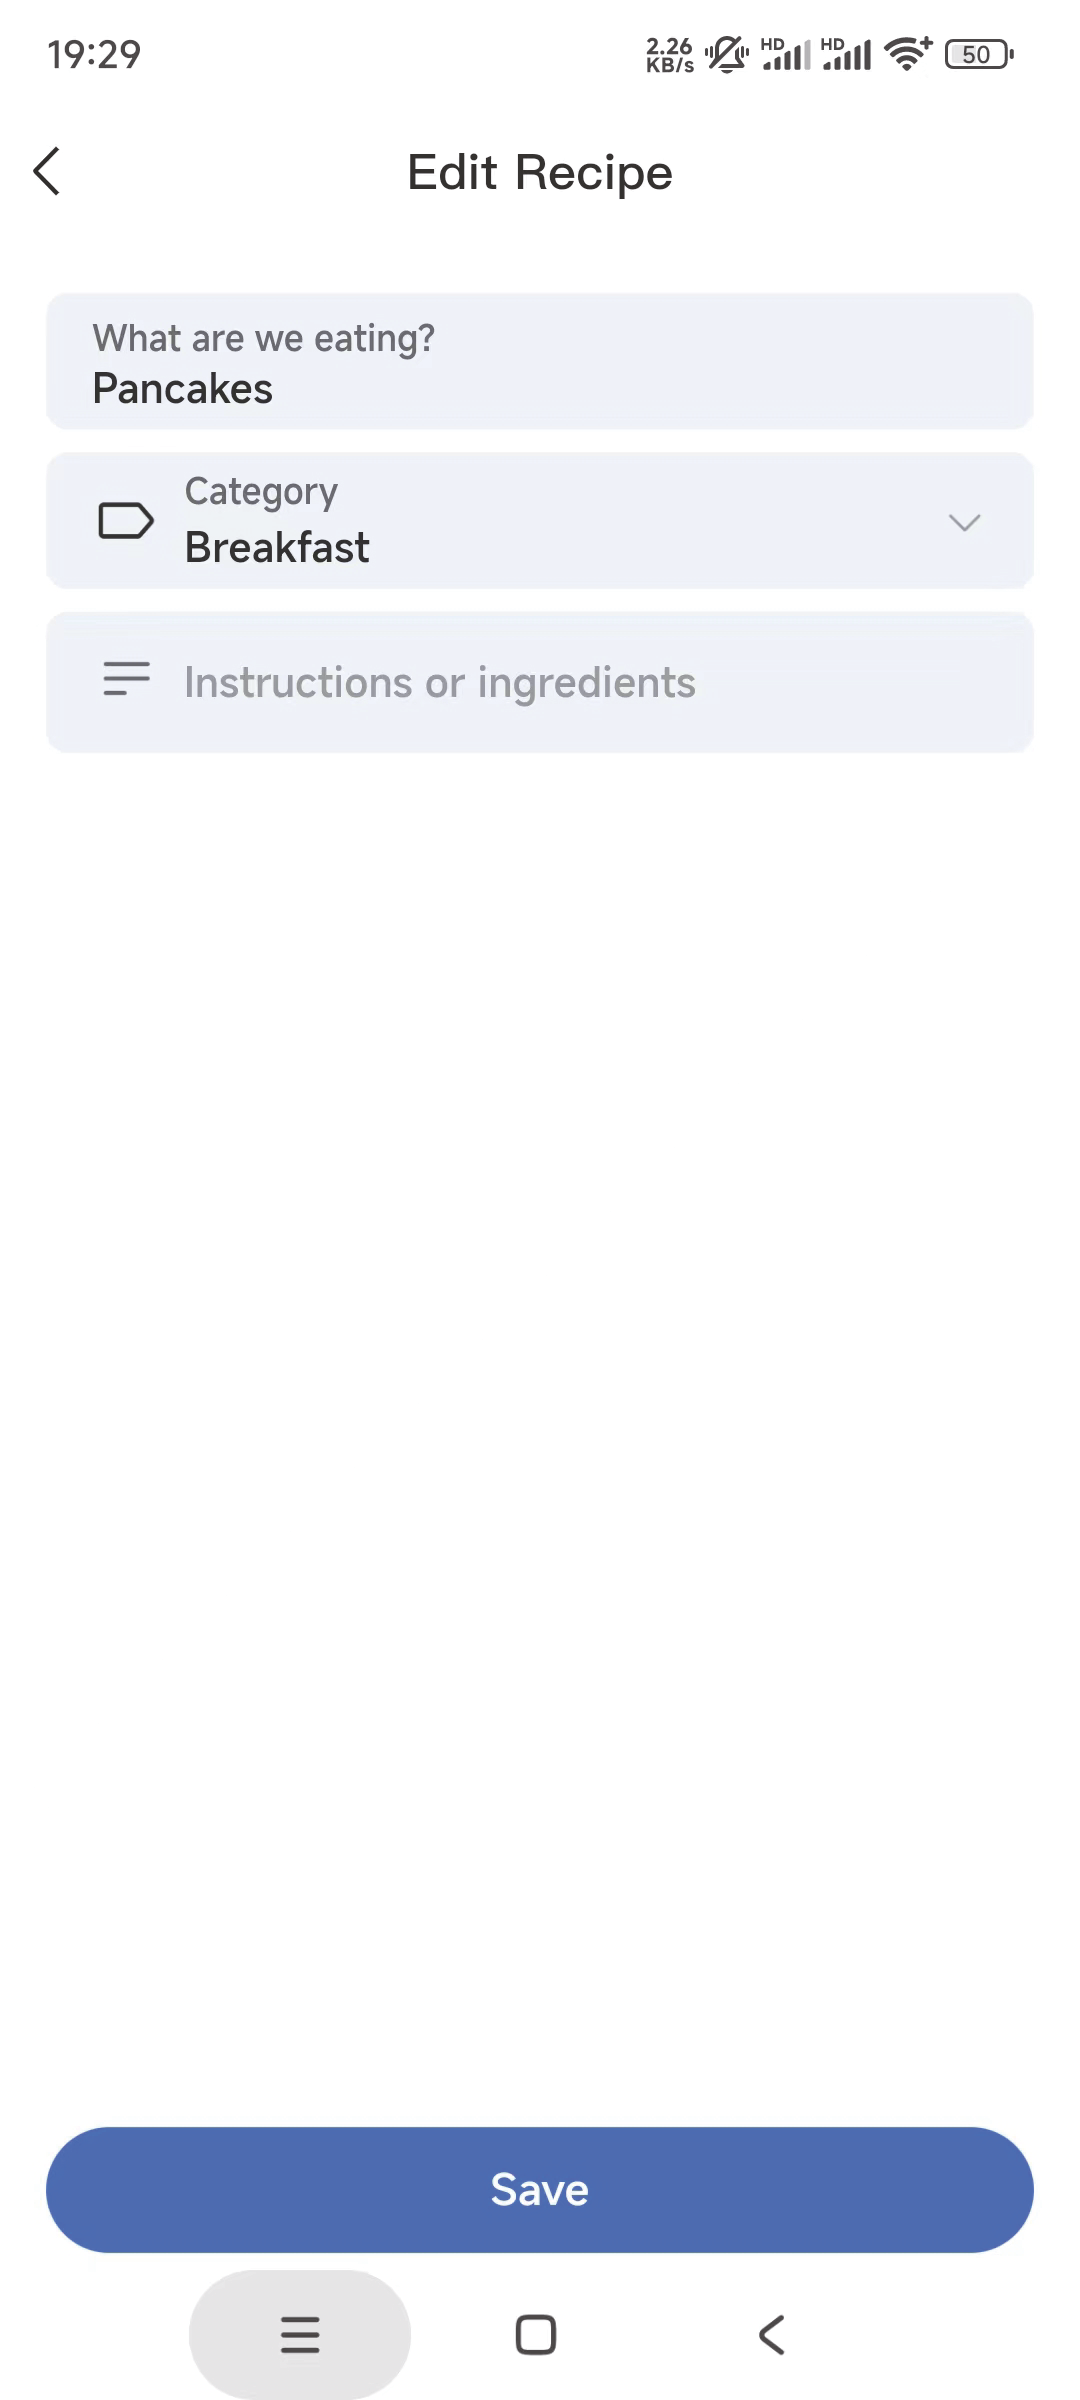
⑥ Click on the bottom right corner and add the desired dish,support to edit the dishes , select the corresponding breakfast, lunch, dinner, dessert category, and also provide dish introductions ,Click "save".
⑦ On the Meals interface, tap on the pre-set dishes and click Edit to edit the dish names, set duplicates, rotate the table of contents, or click the delete button to delete the plan.
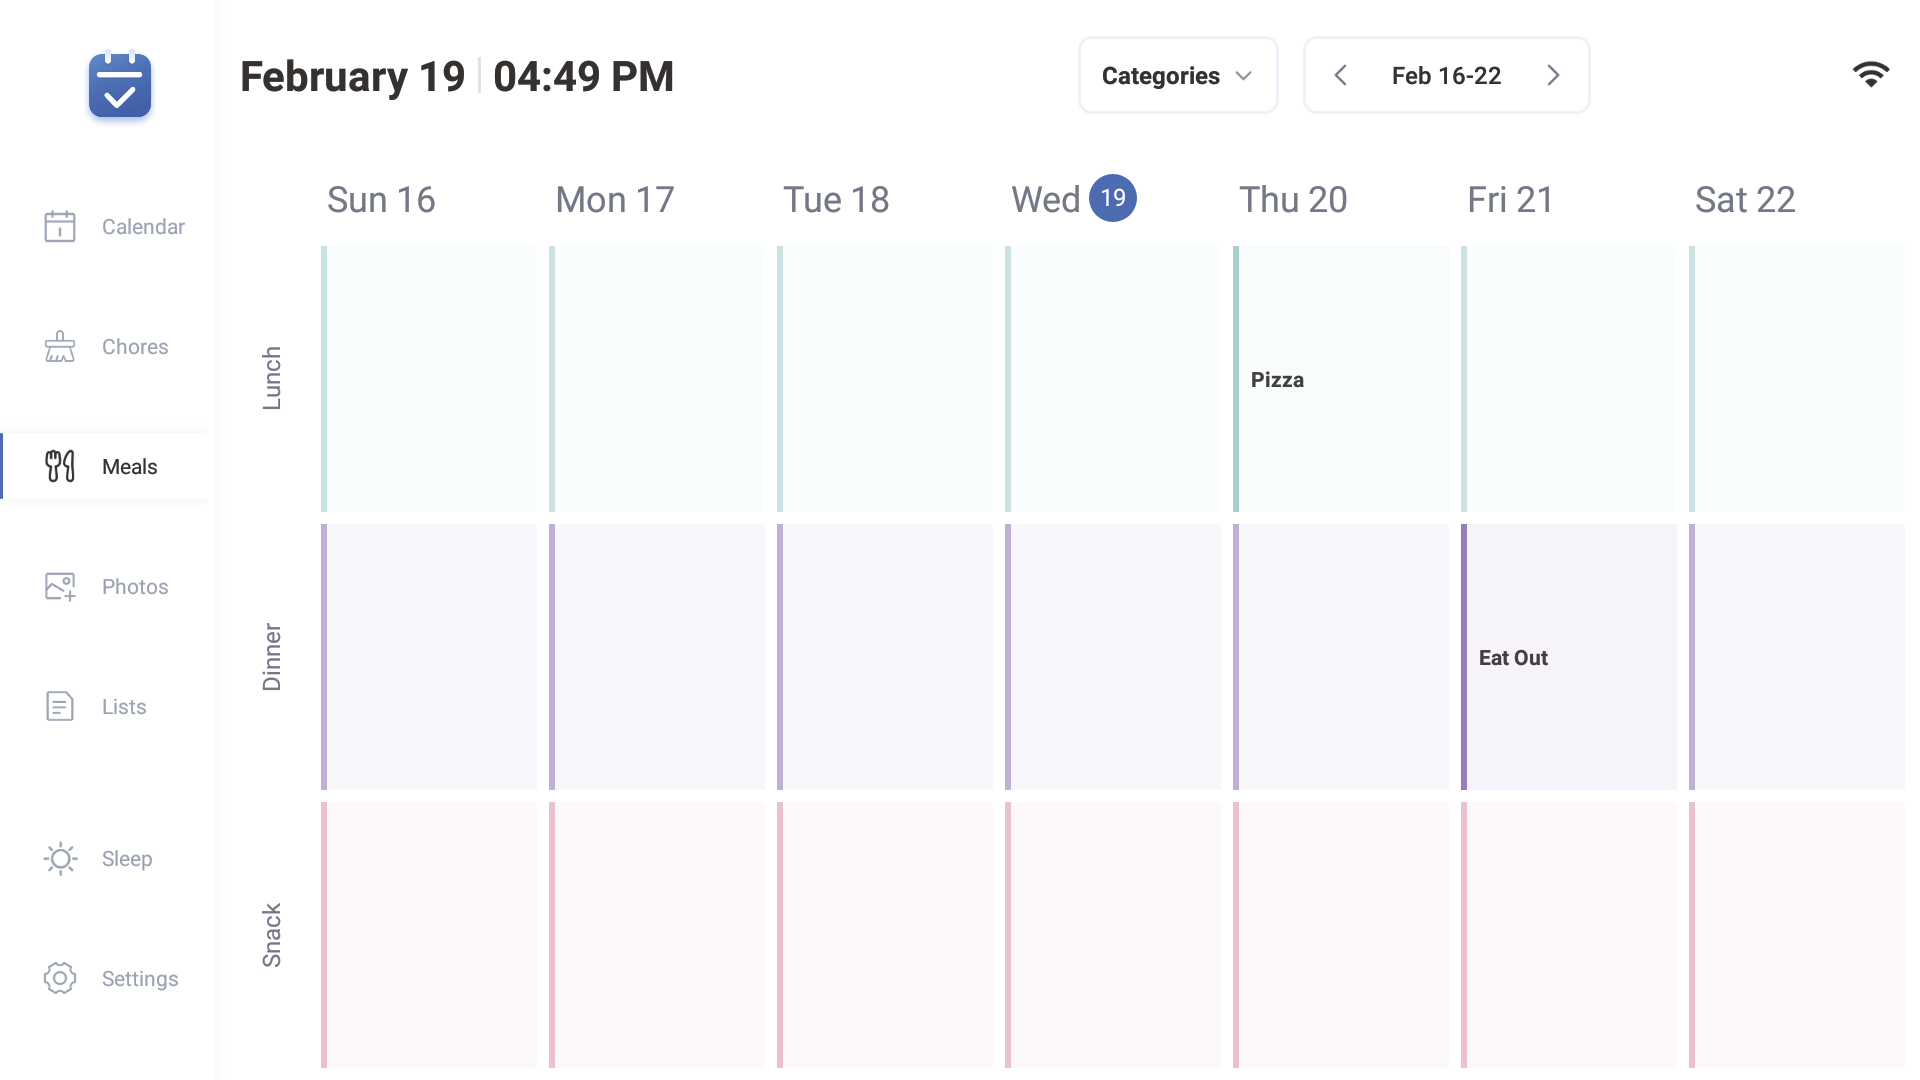
3.3.5 Hiding and editing Category (same operation on mobile and device)
① Click category on Meals.
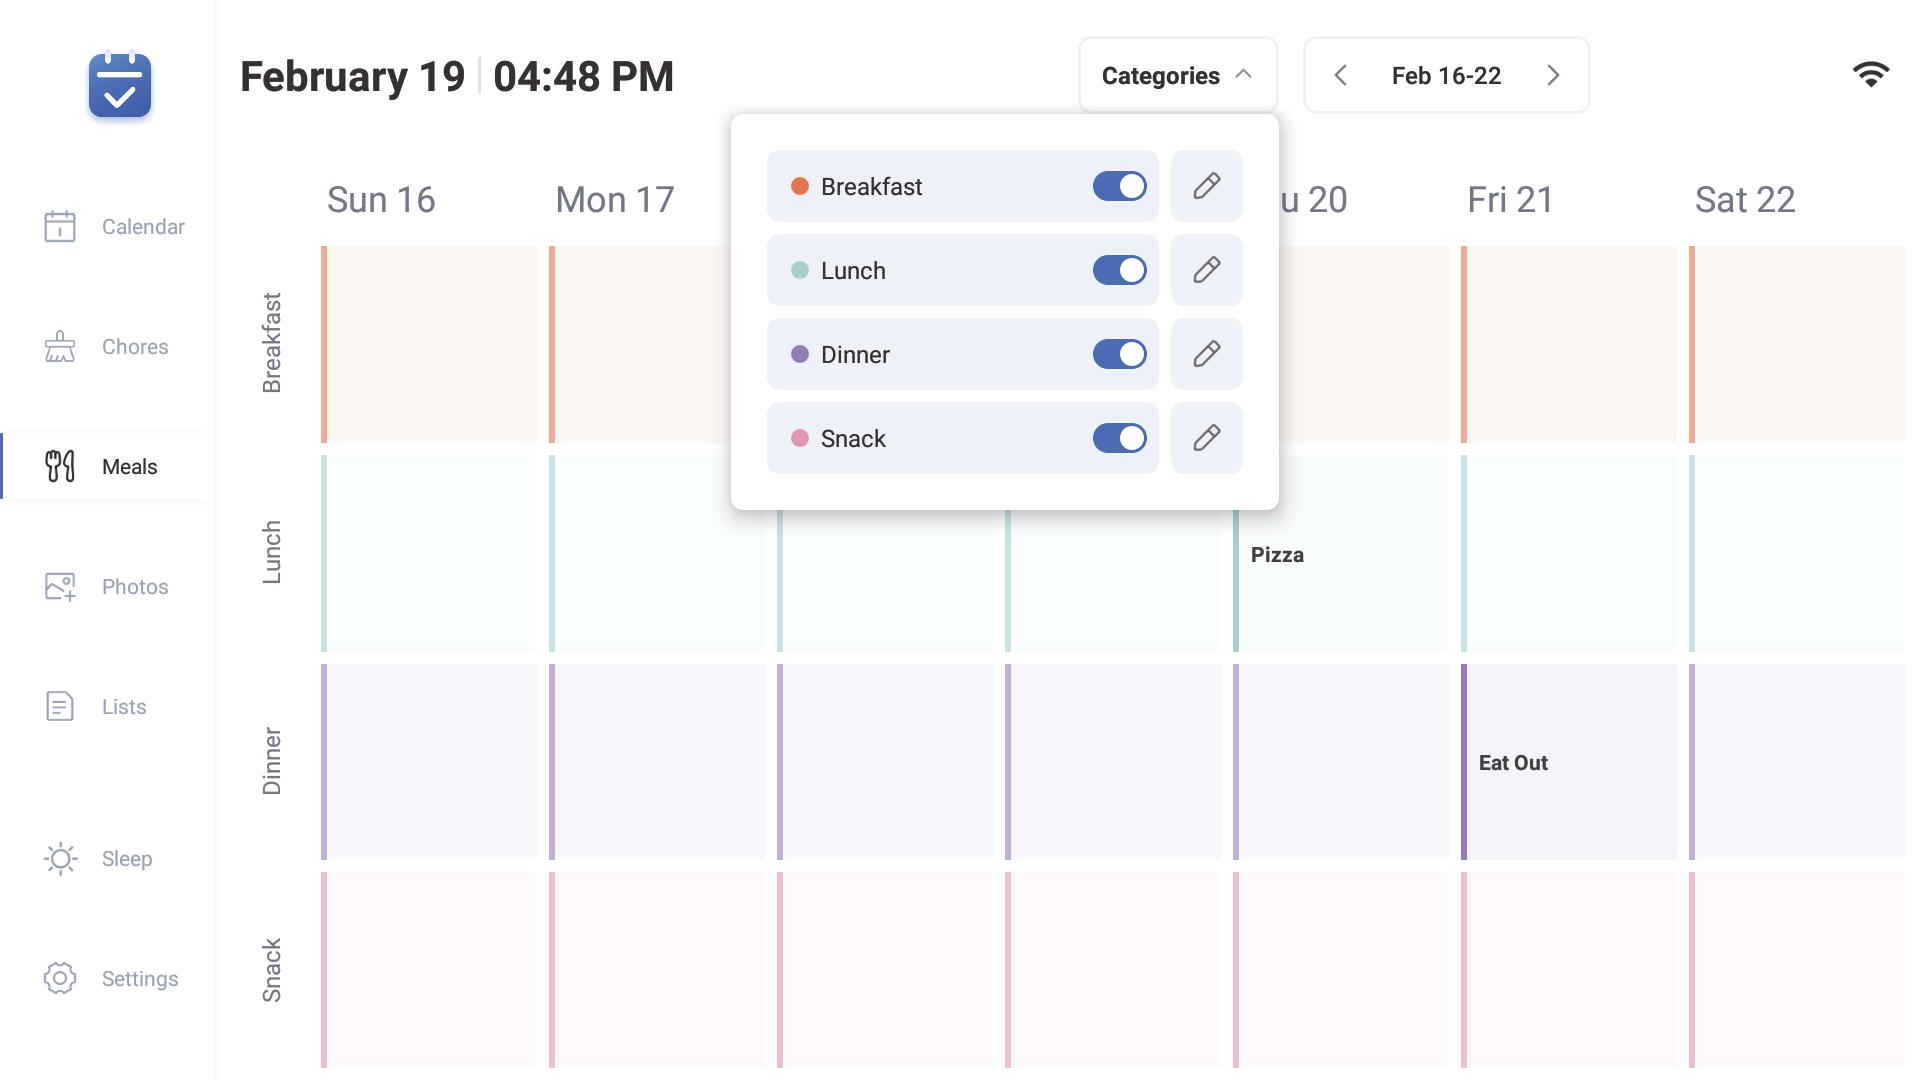
② Click the switch button for breakfast, lunch, dinner dessert to choose whether to display these directories.
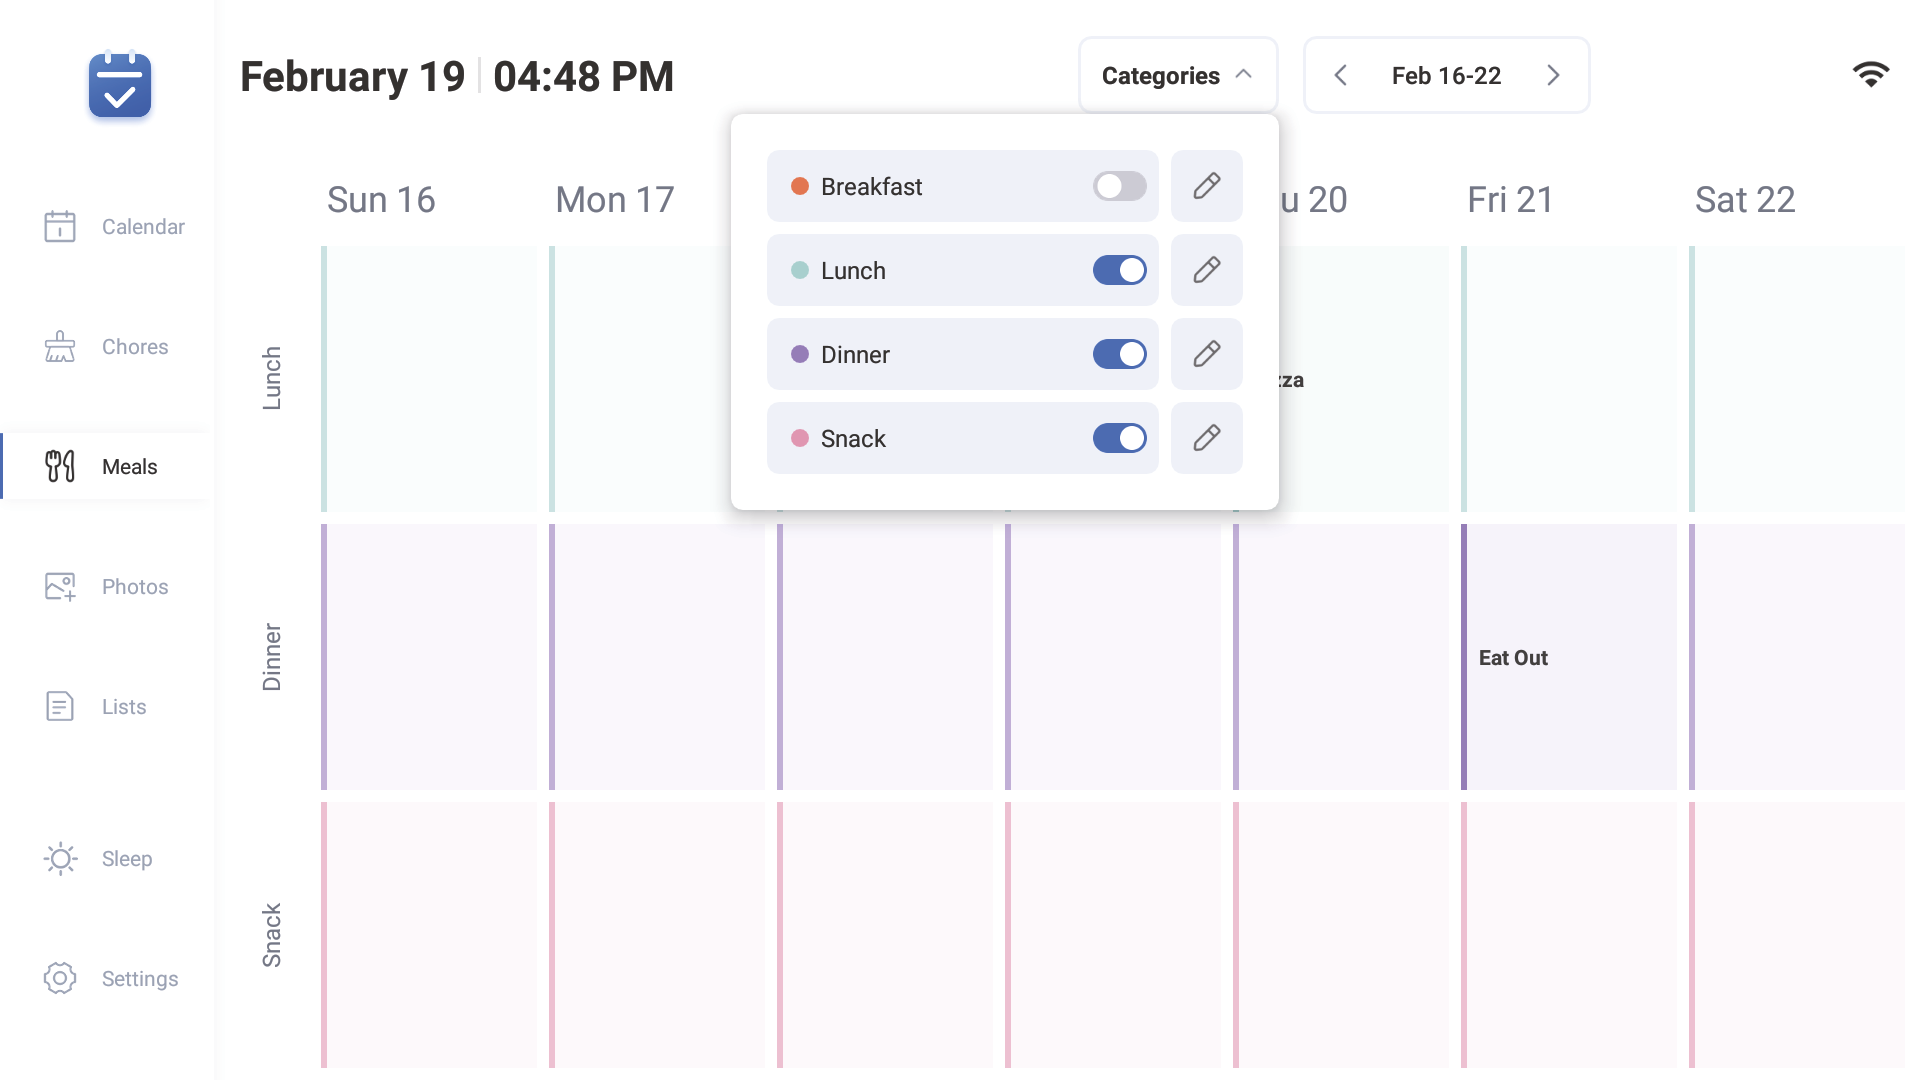
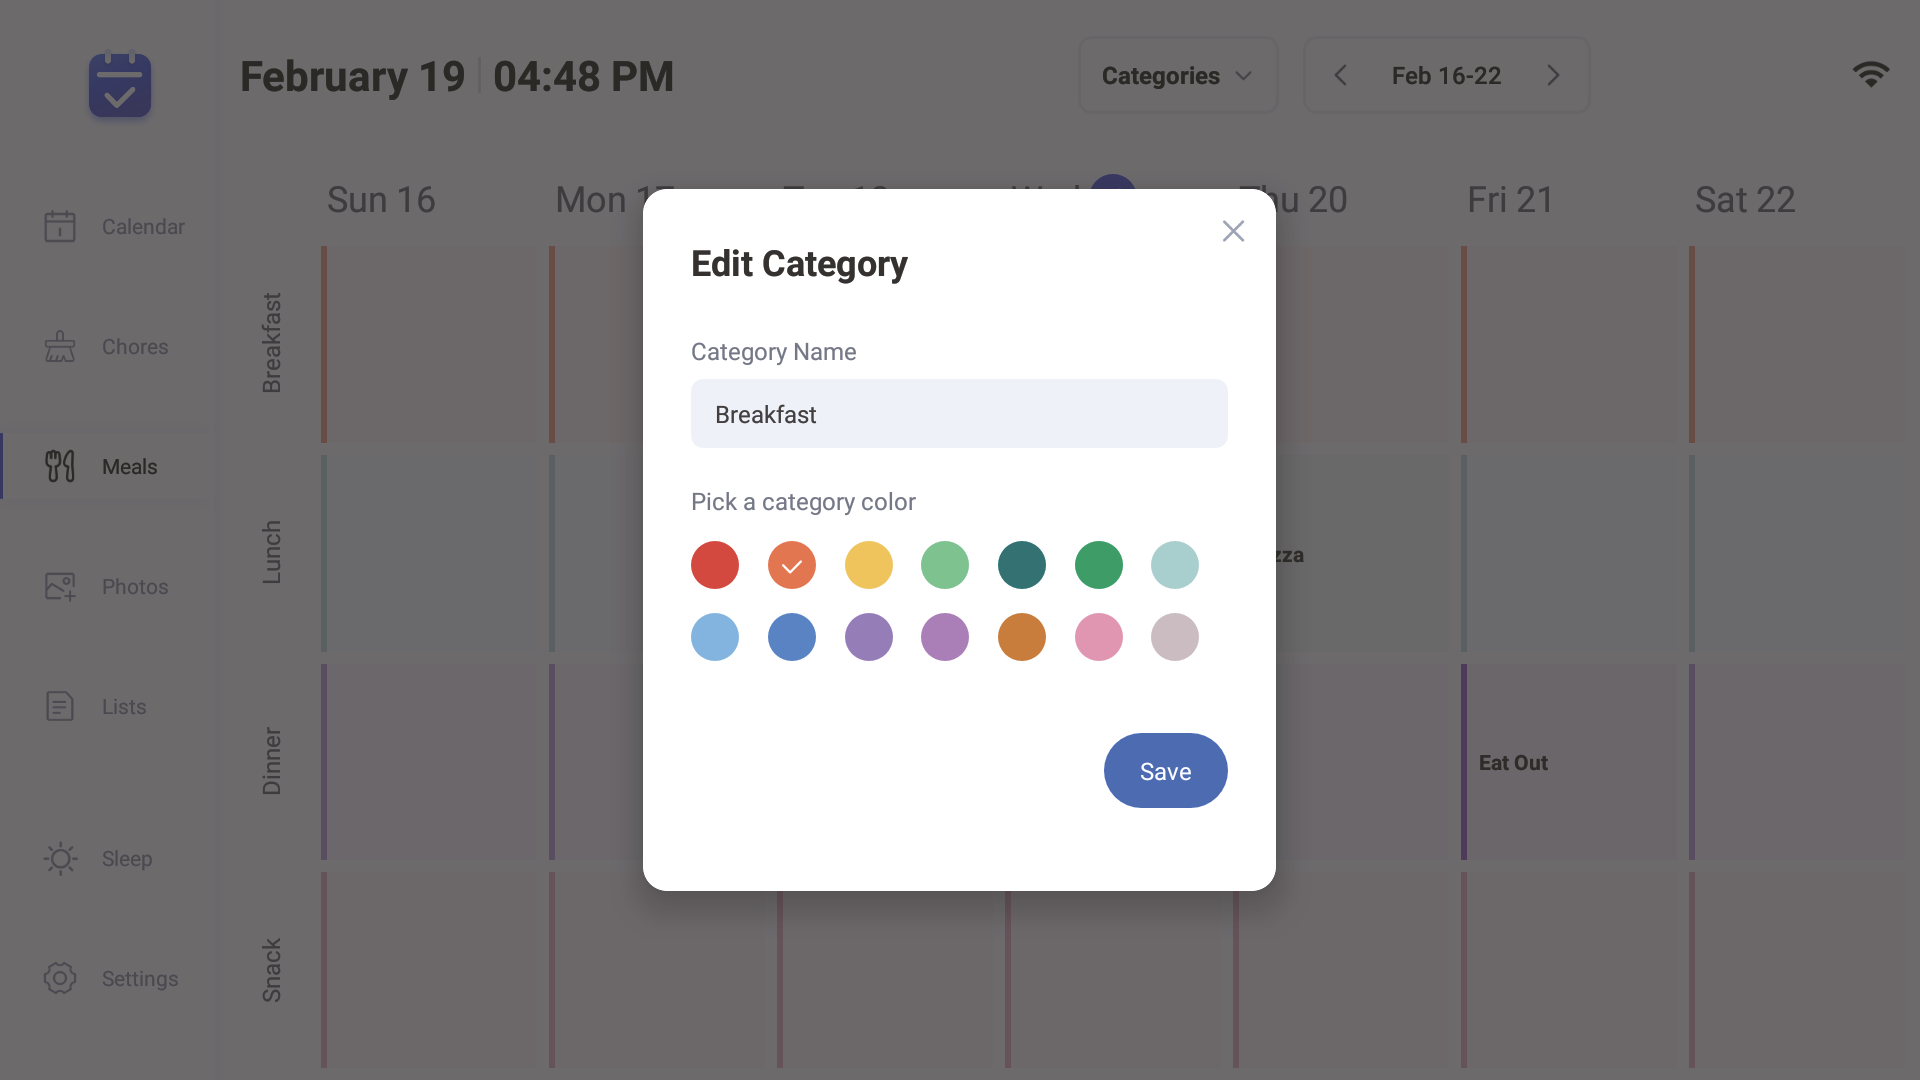
③ Click on the edit icon to edit the category name and select the color ,Click save to finish edit.
3.4 Photo & Video
The photo album supports uploading pictures and videos, and allows multiple people to share.
3.4 Photo & Video-App
You can upload your pictures or videos using the app’s photo gallery function.
1.Press the 'Add People' icon to share pictures or videos with others who use the device.


2.Click the 'Add Image' icon to upload an image or video, or share it with others using the shared device.

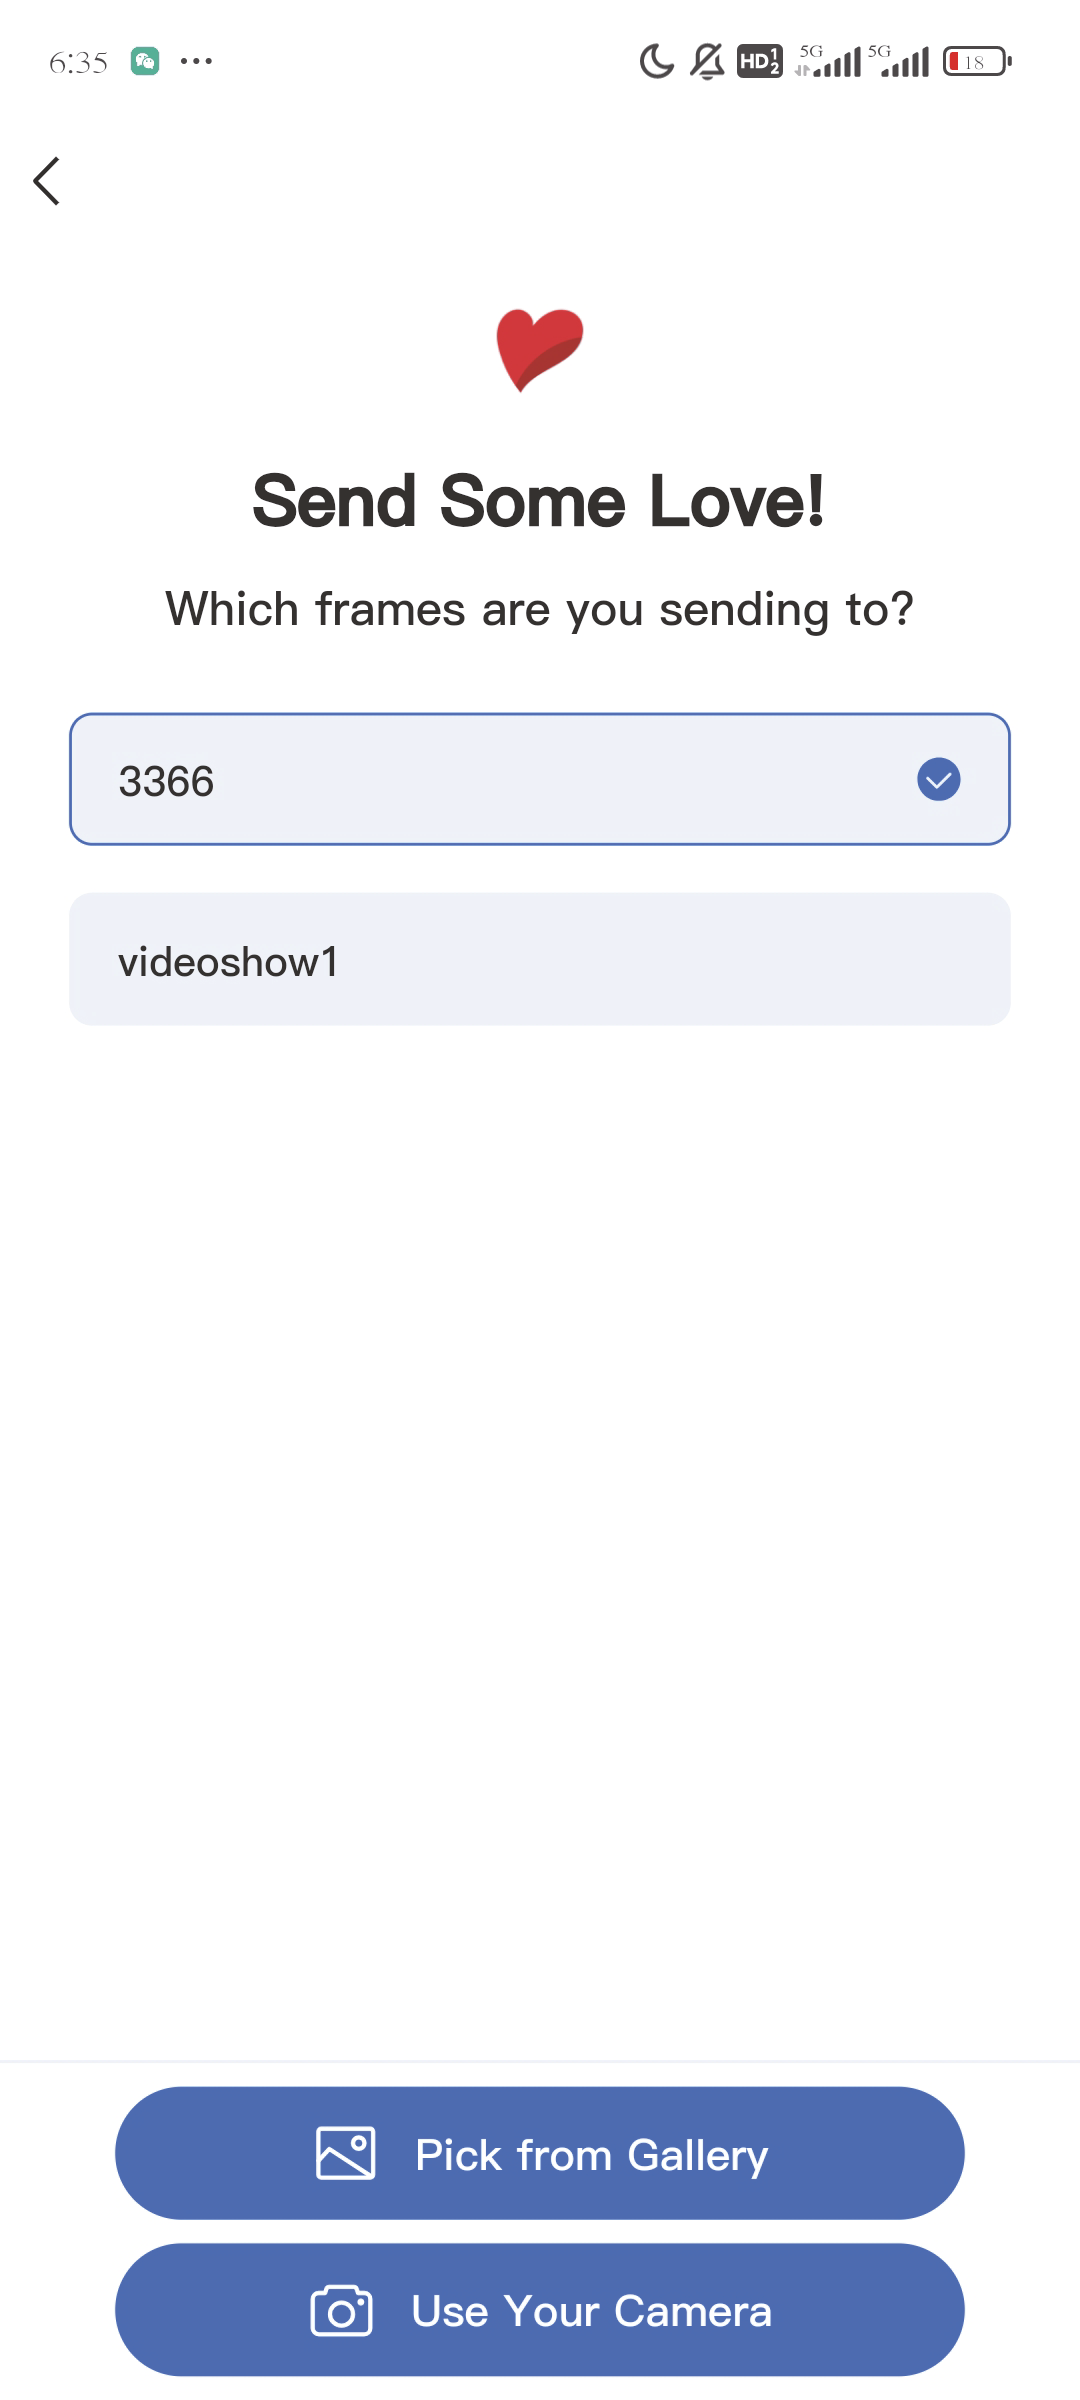
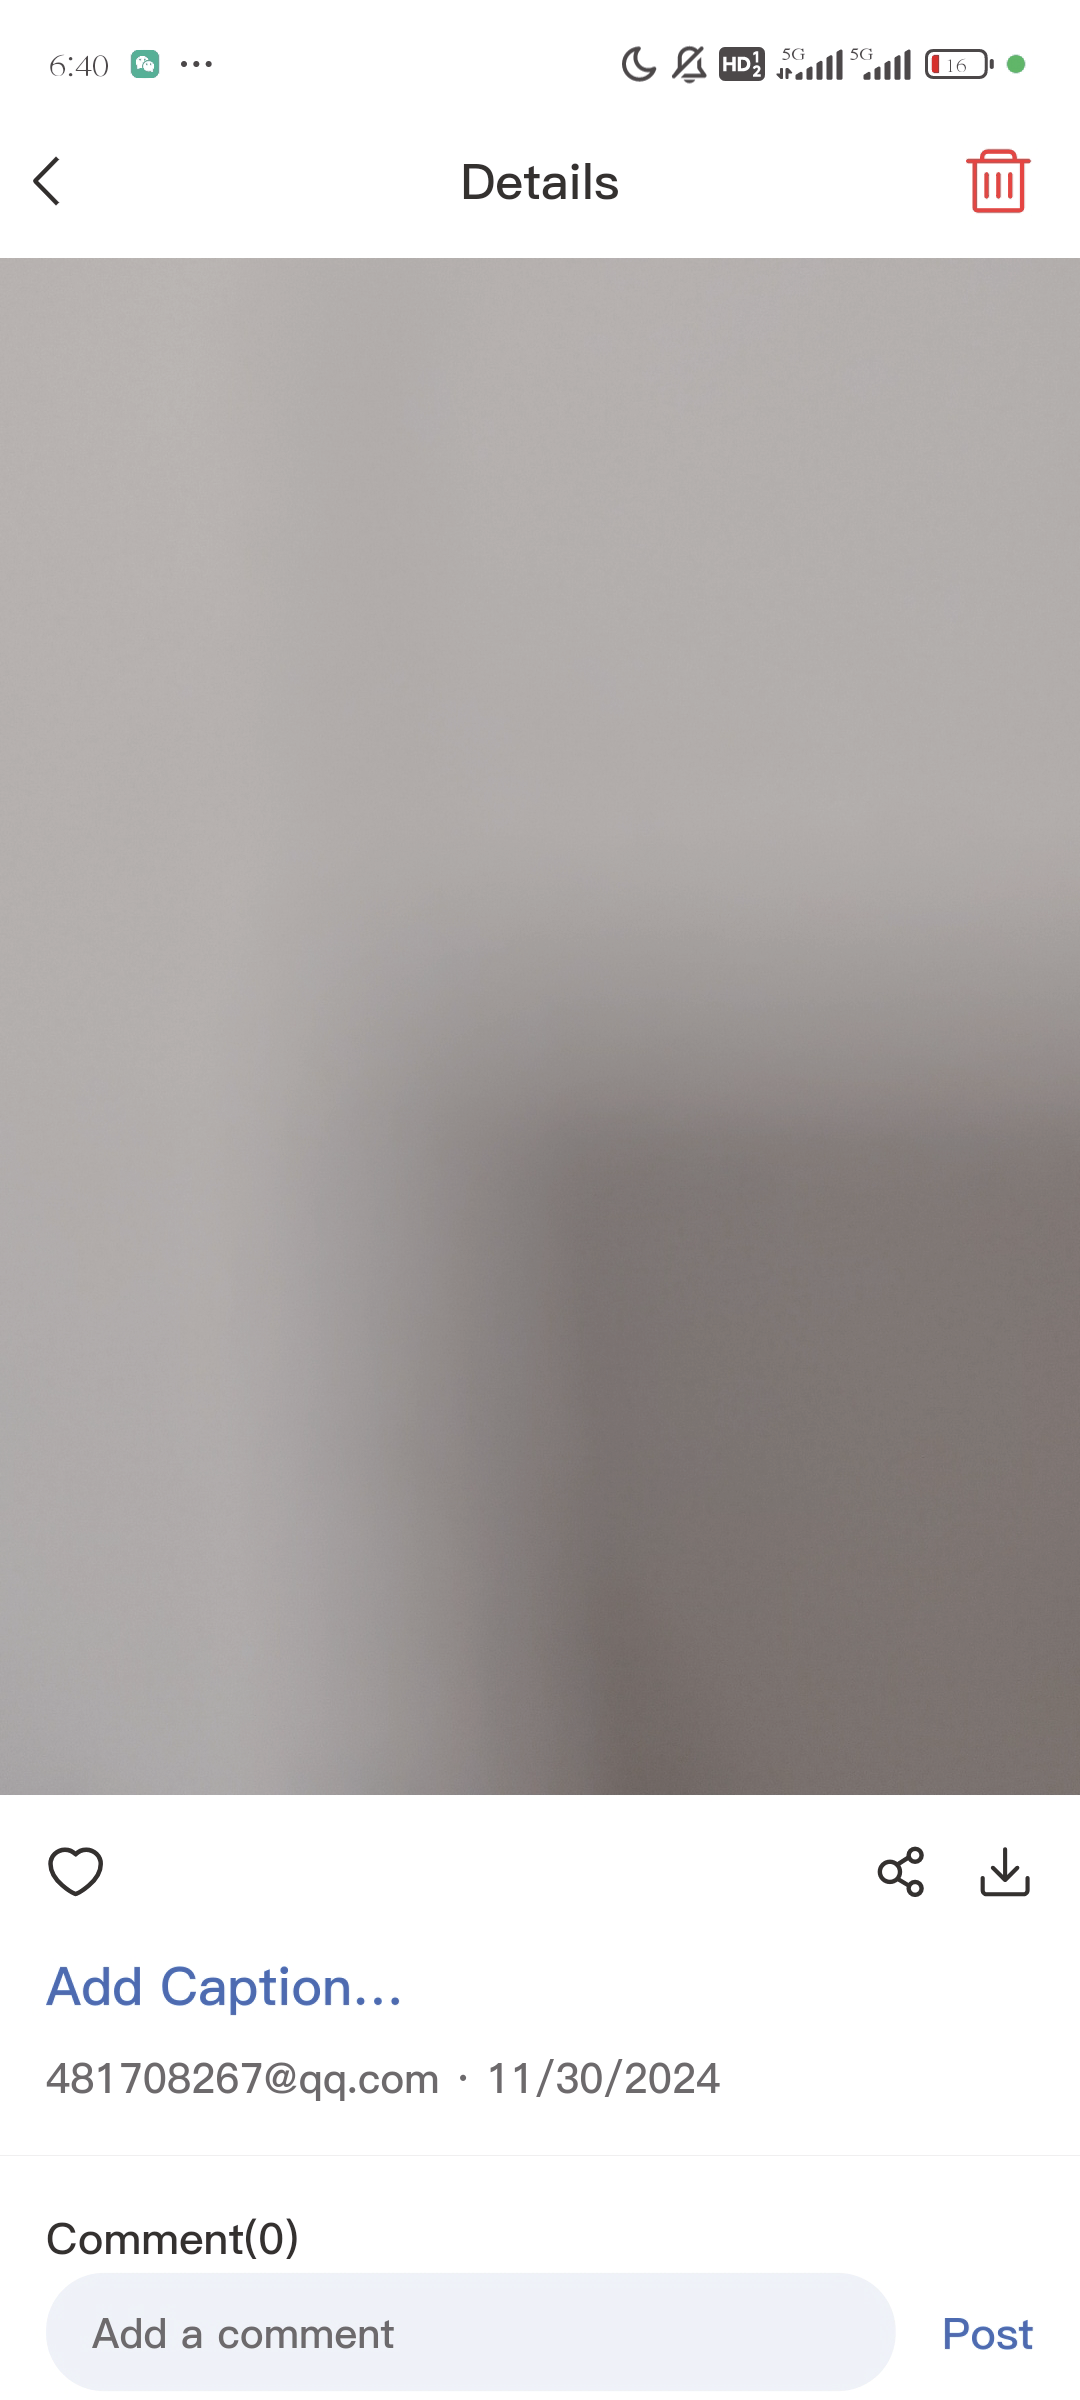
3.Click on the uploaded pictures or videos to add titles and comments.
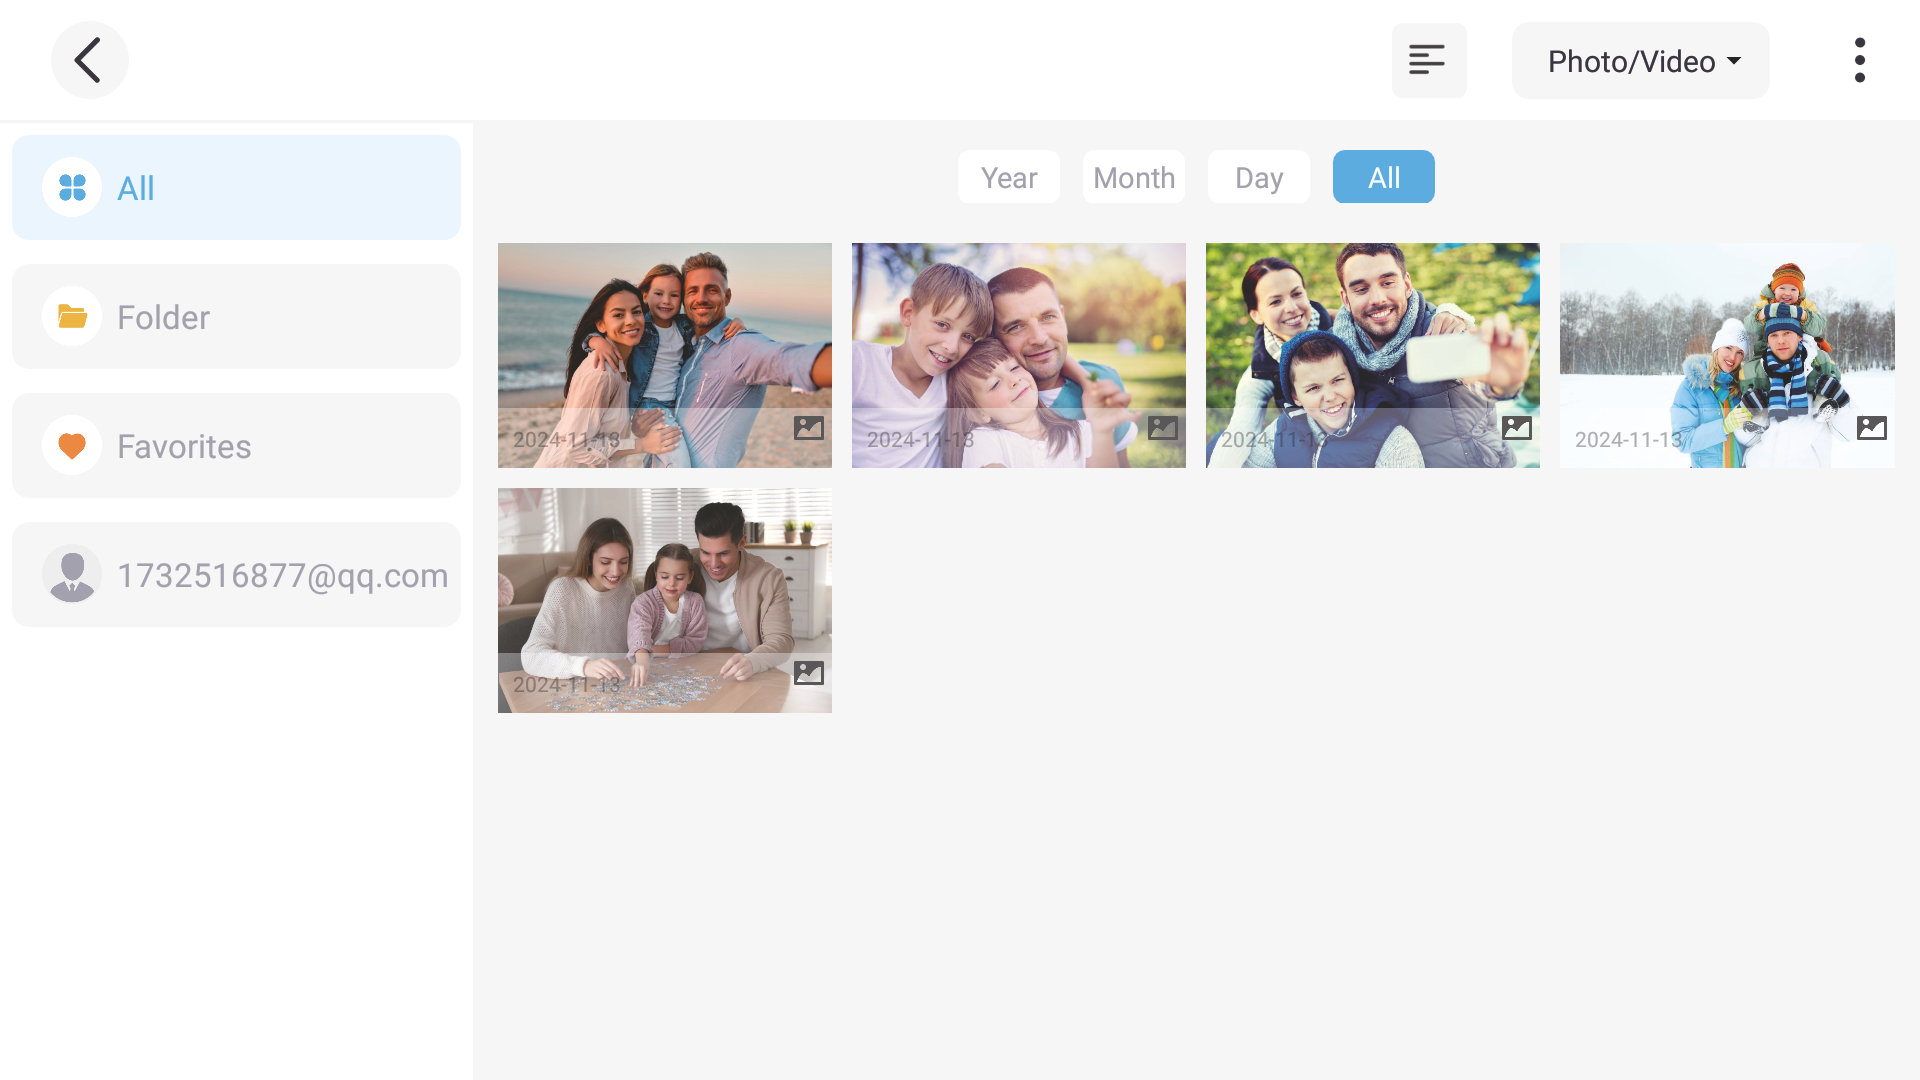
3.4 Photo & Video-Device
- 1.Photo albums can display the pictures or videos uploaded from our phones.
- 2.Create folders and mark pictures or videos as favorites.
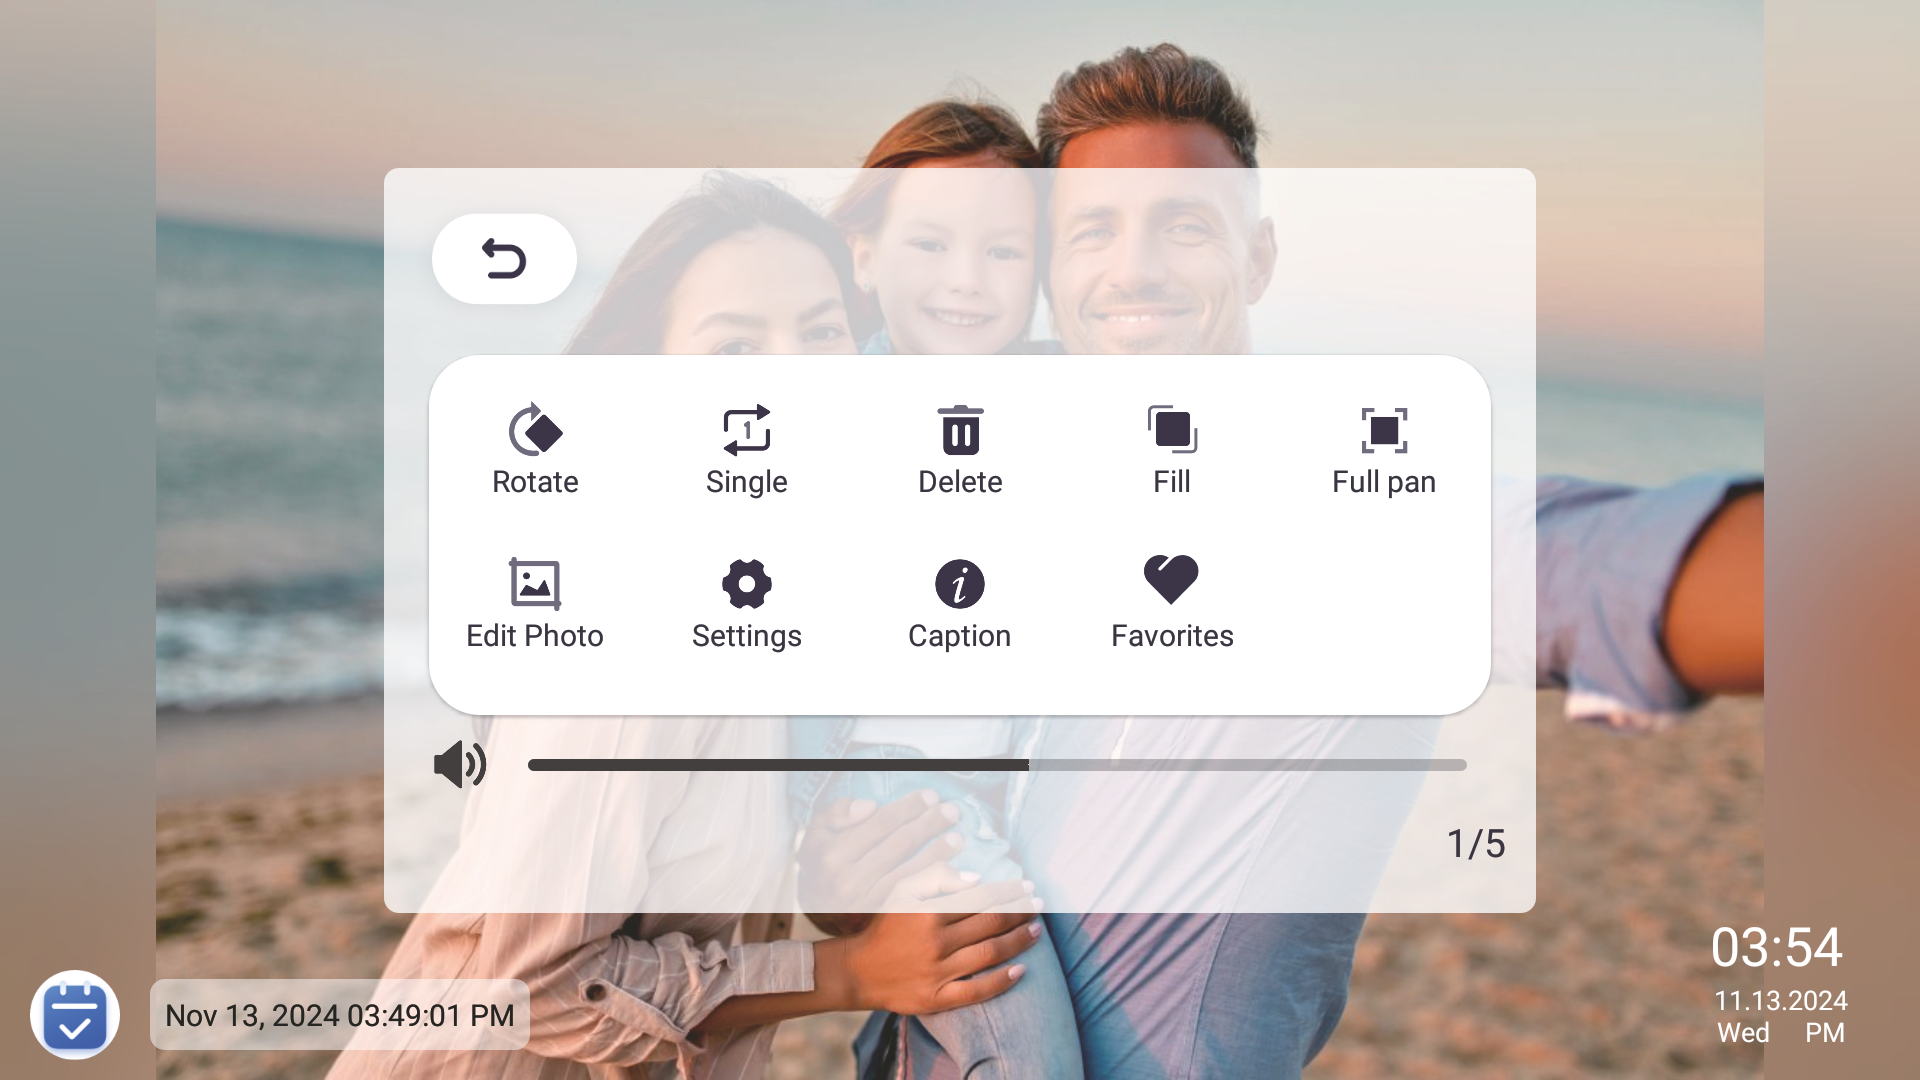
- 3.Click on an uploaded image or video to edit it.
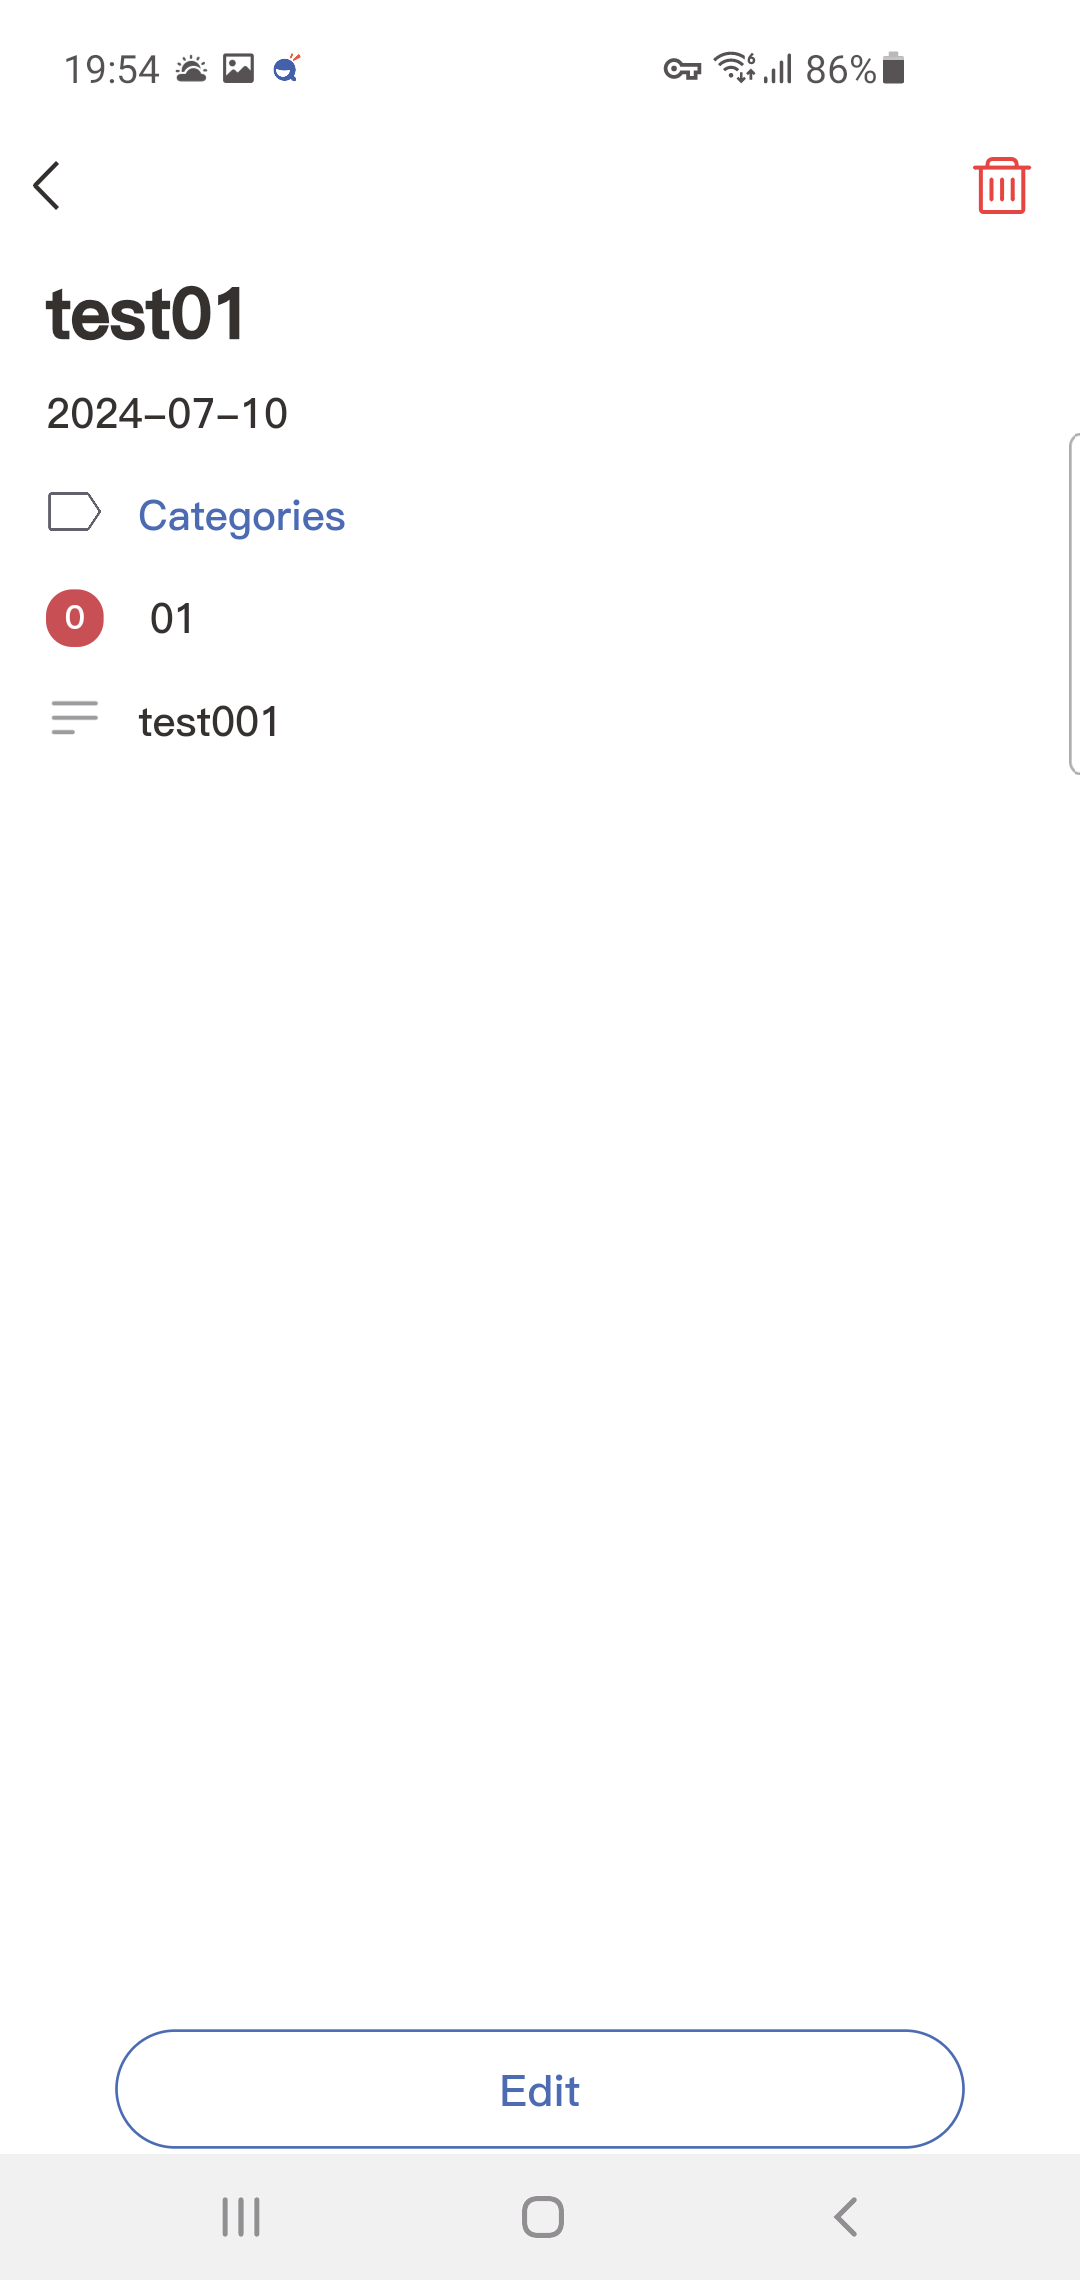
3.5 Lists
The lists sync between your eCalendar and the mobile app, keeping the whole family on the same page. You can create as many lists as you like.
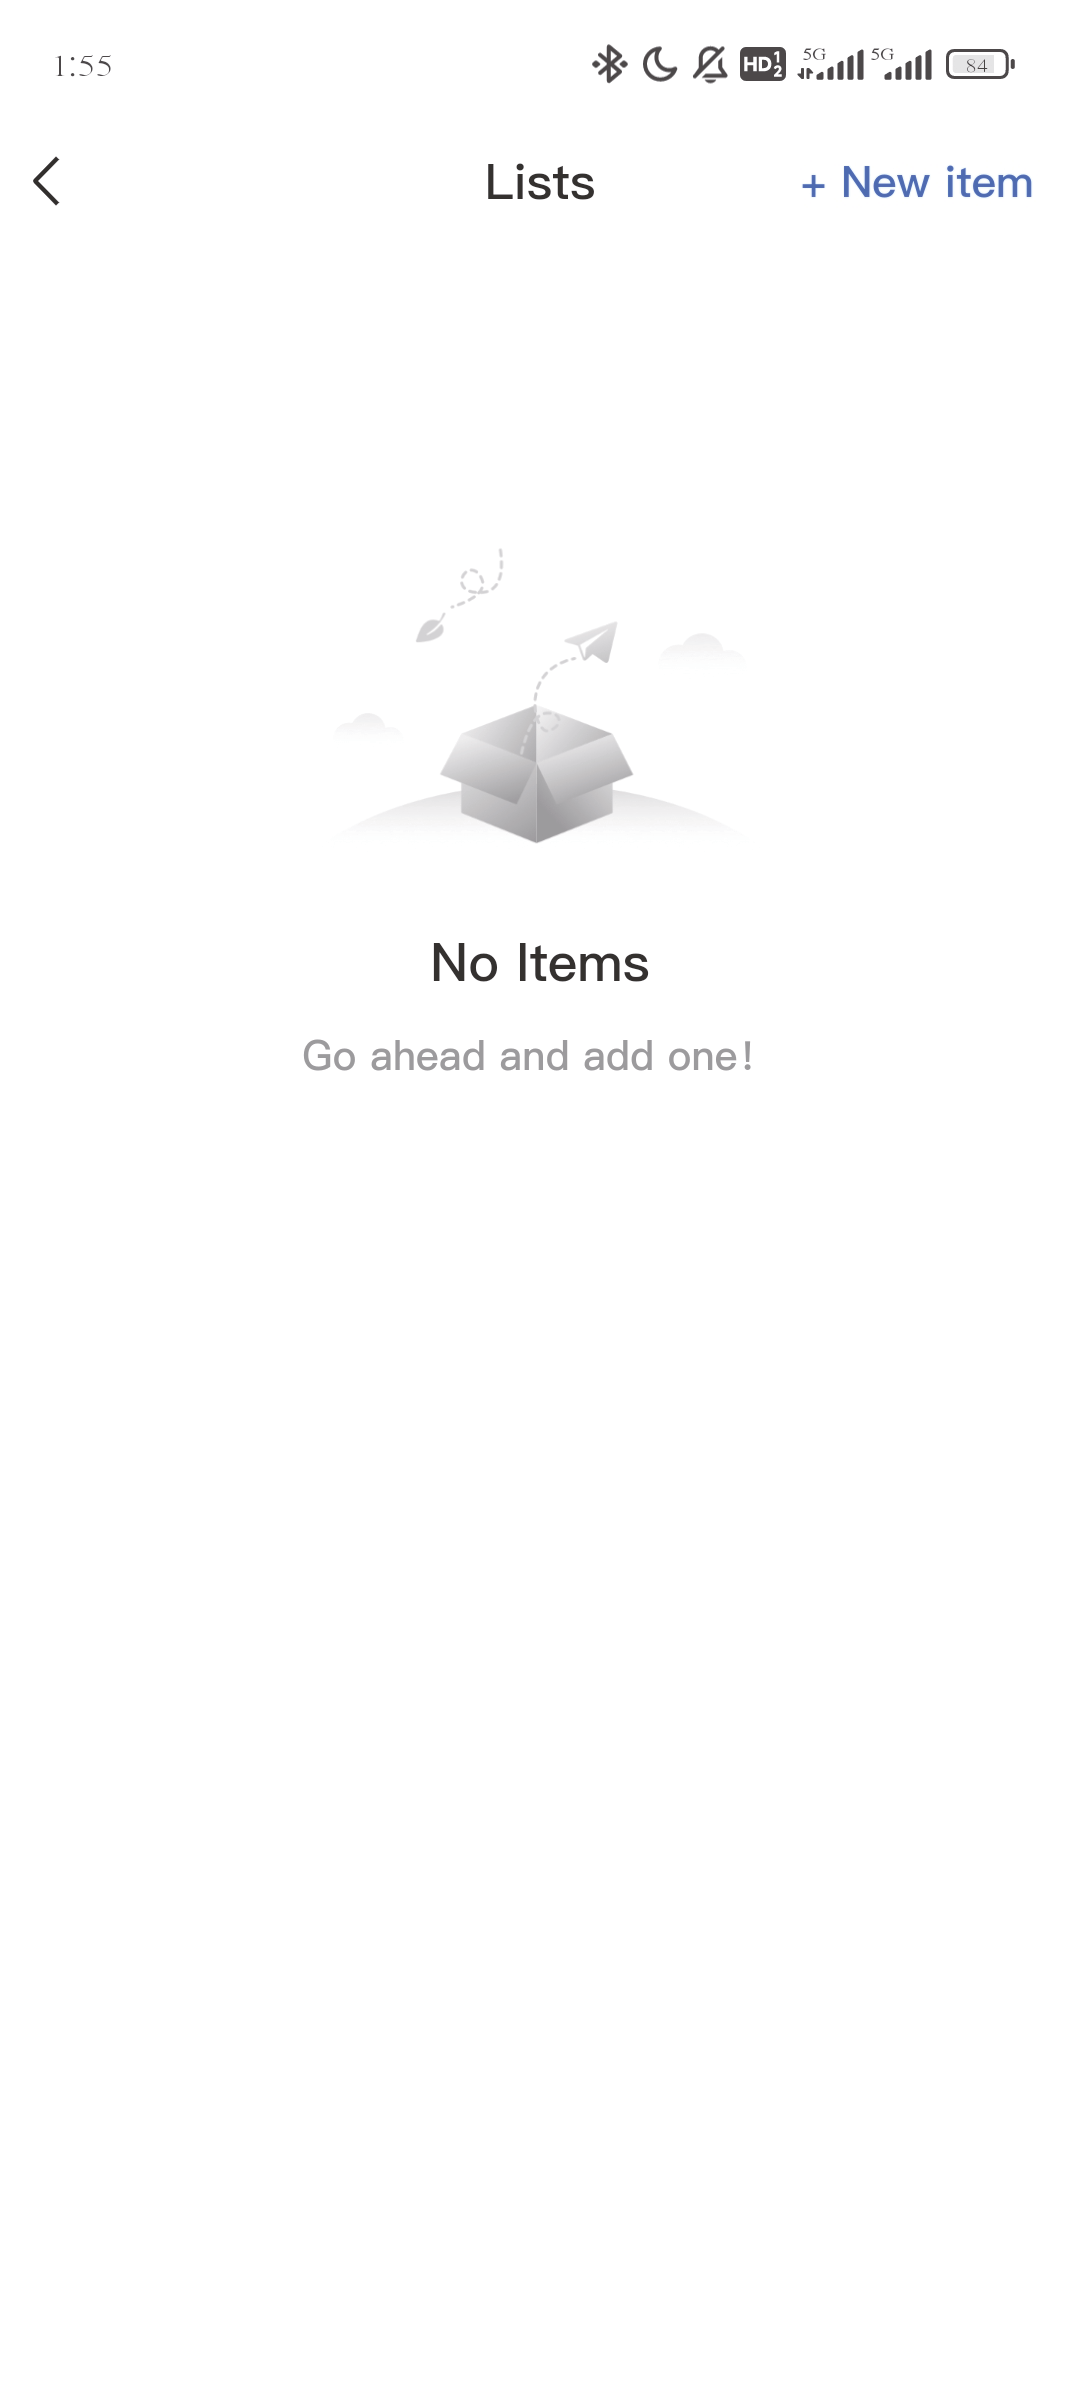
3.5 Lists-App
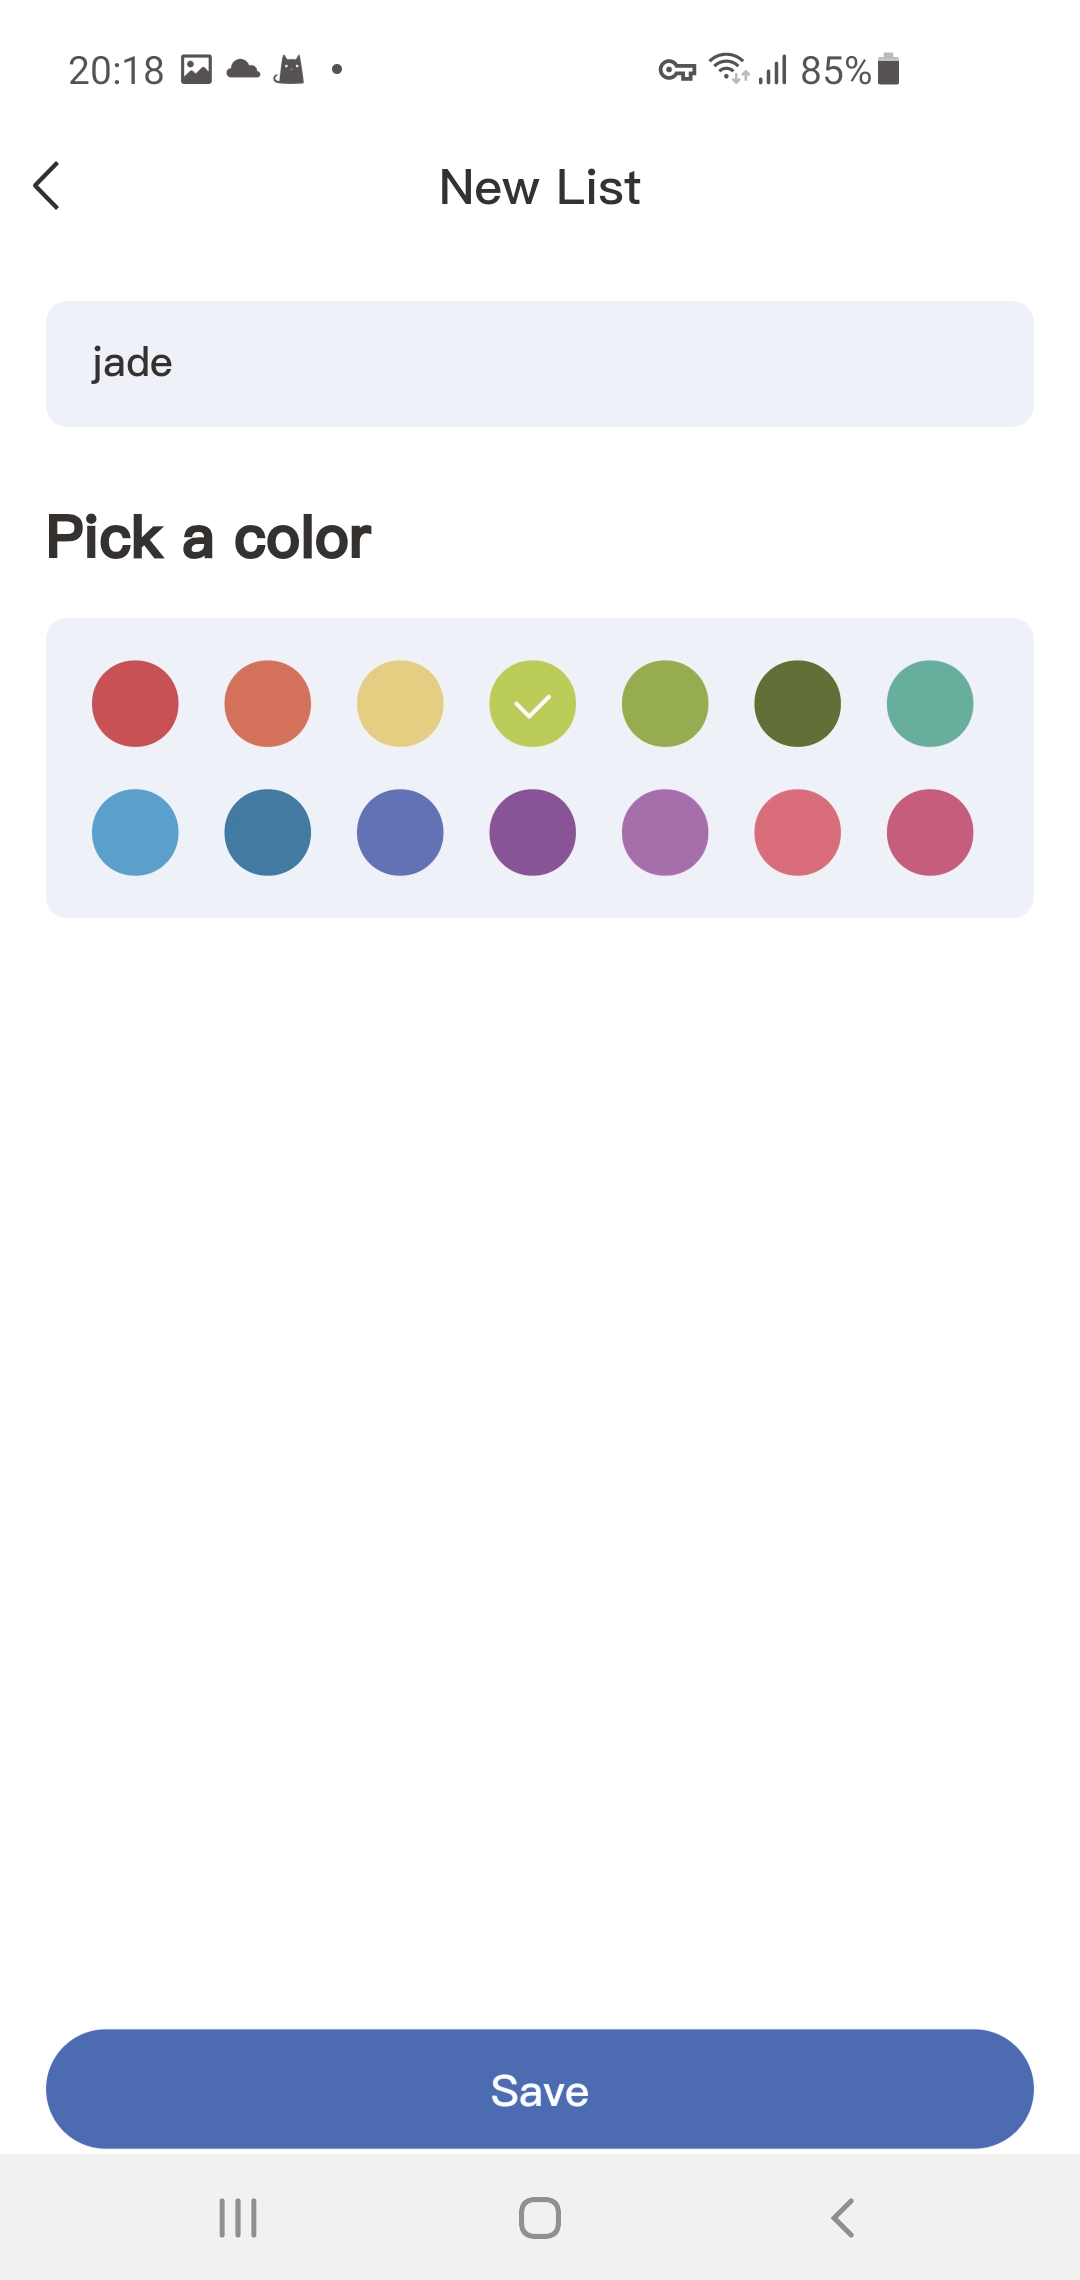
Creating and Editing Lists
- Open the Lists on the calendar home screen.
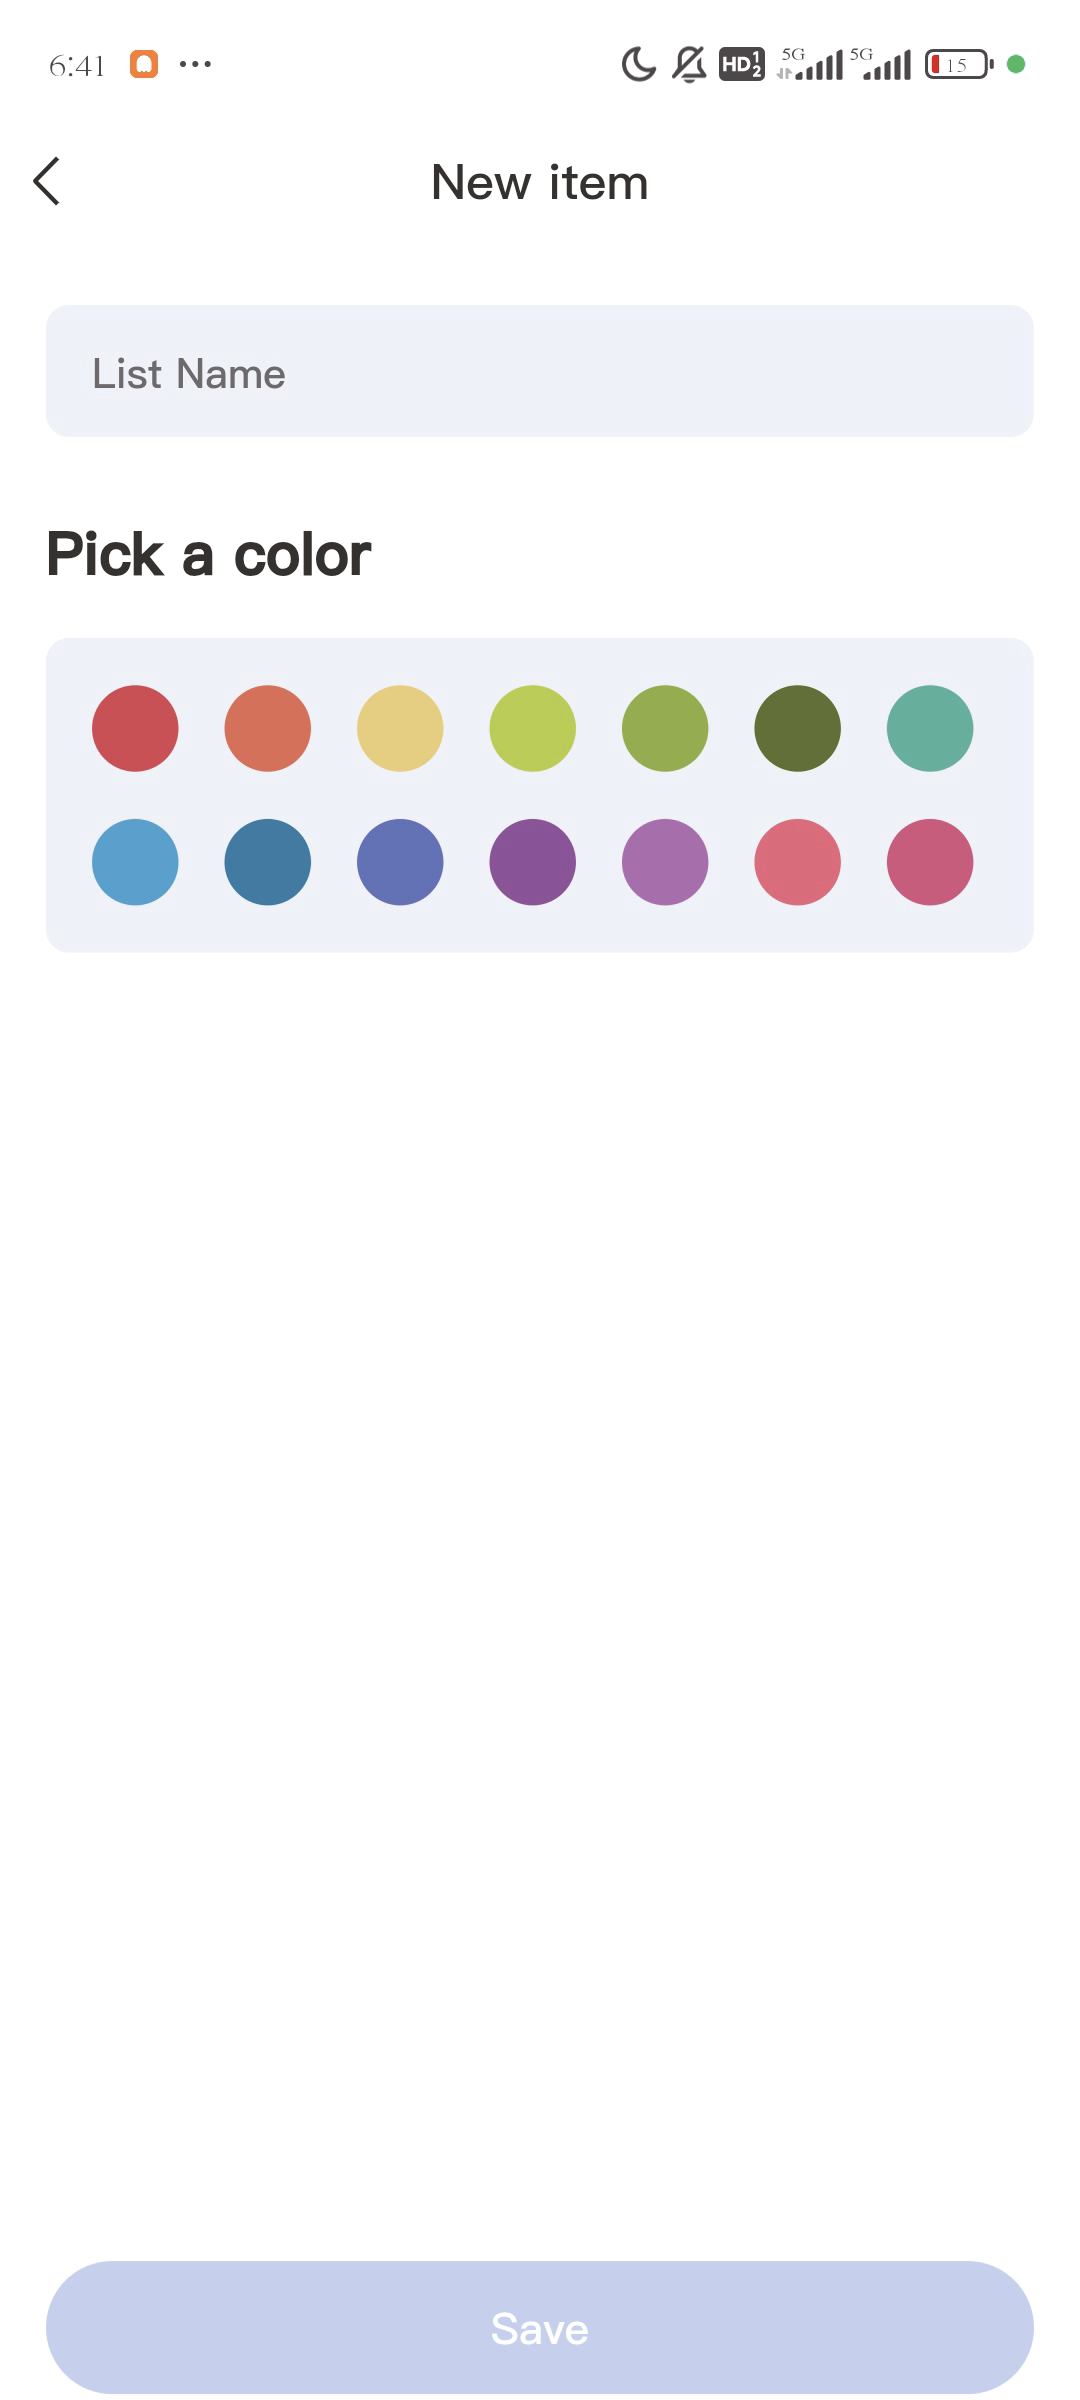
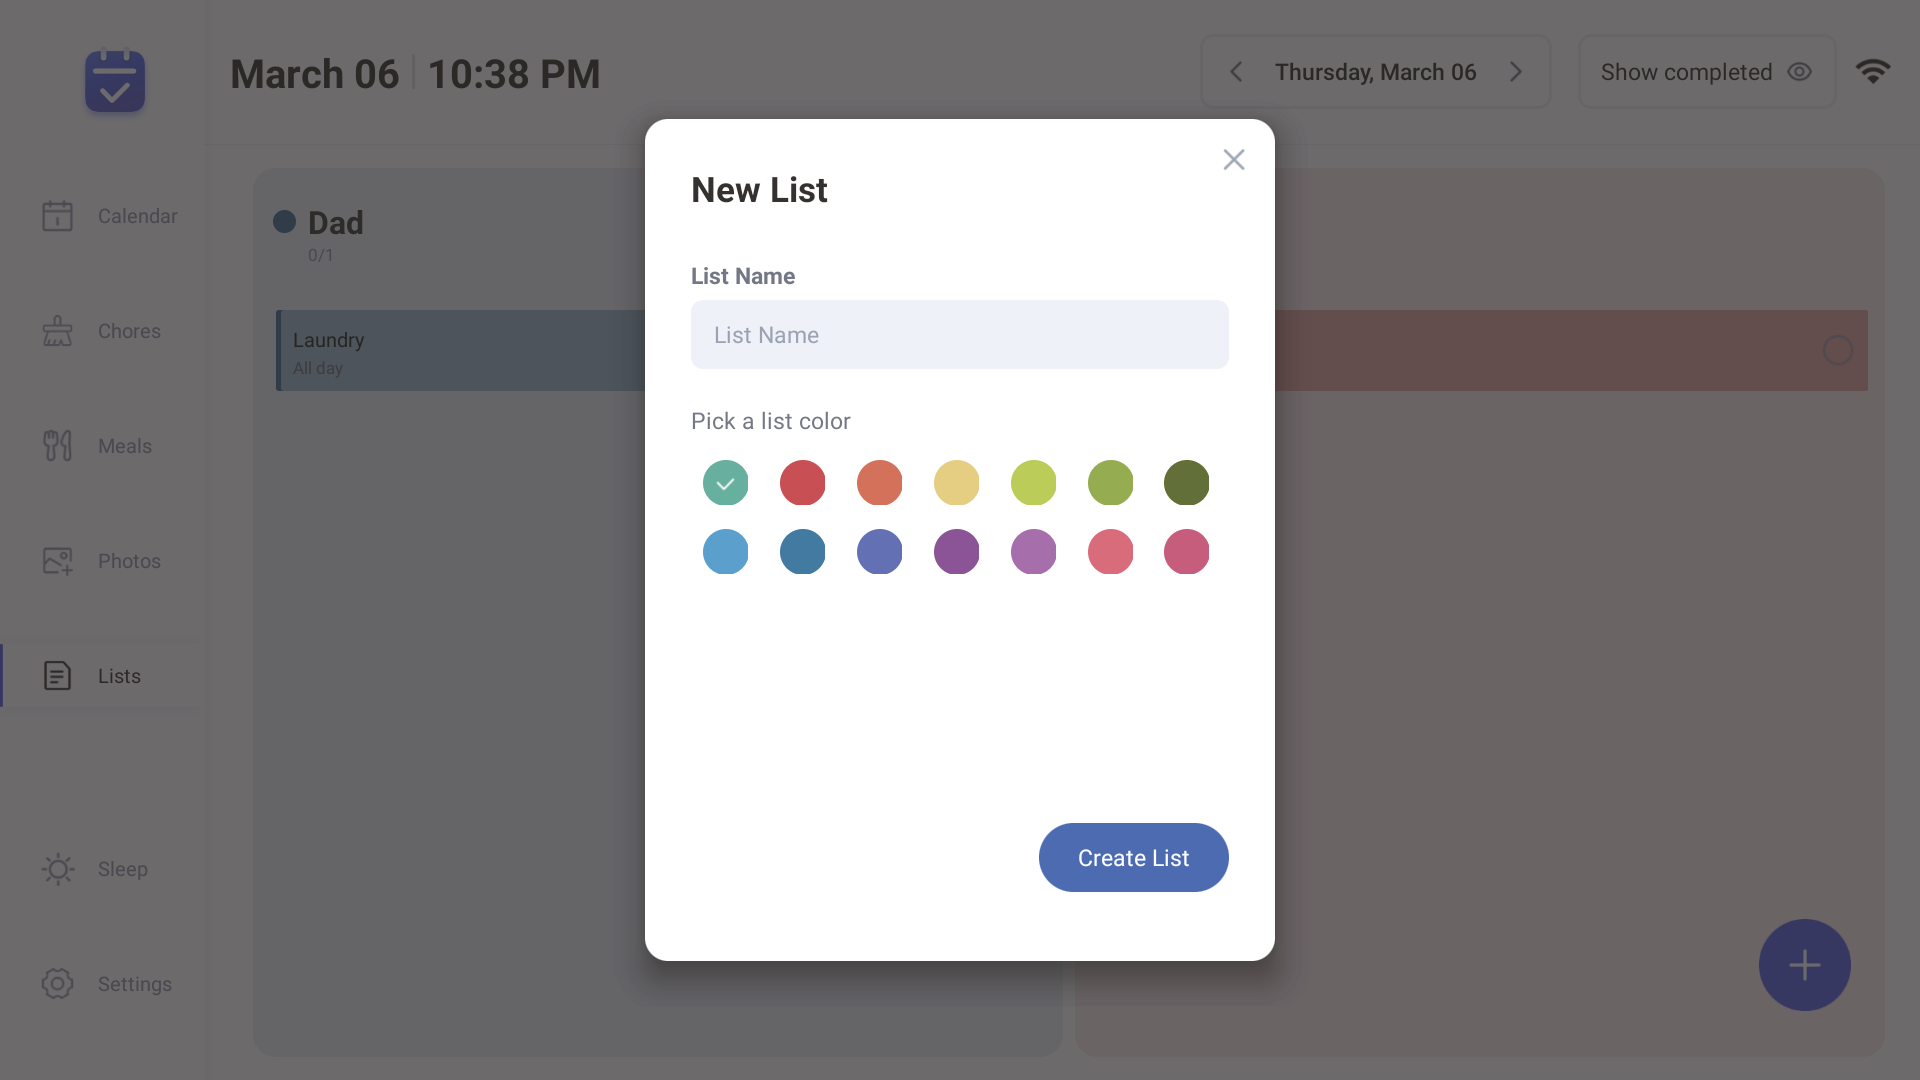
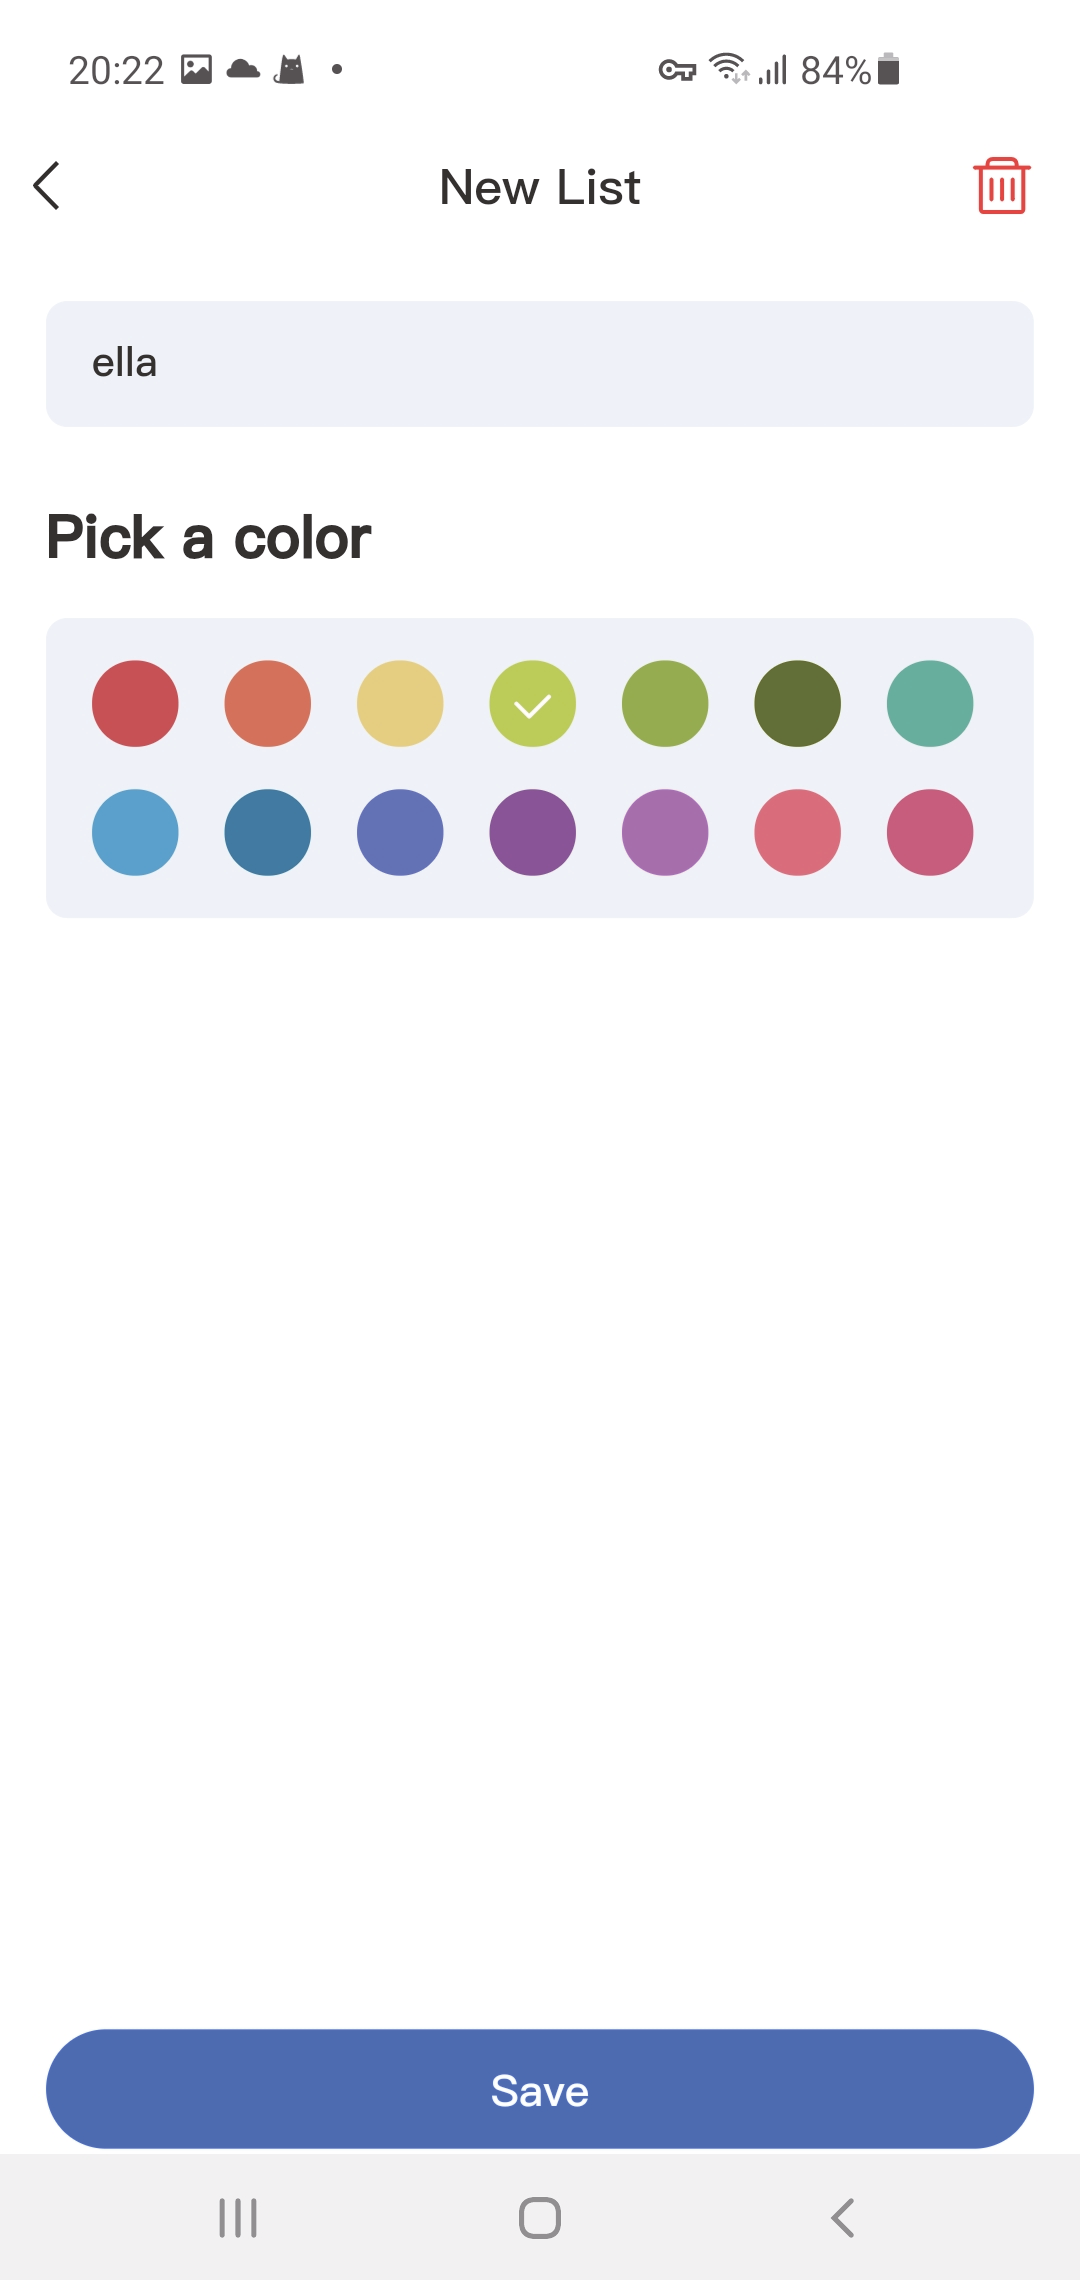
- Press "New List" in the top right corner.
- Name your list, choose a color, then press "Save."
- Your new list is ready.
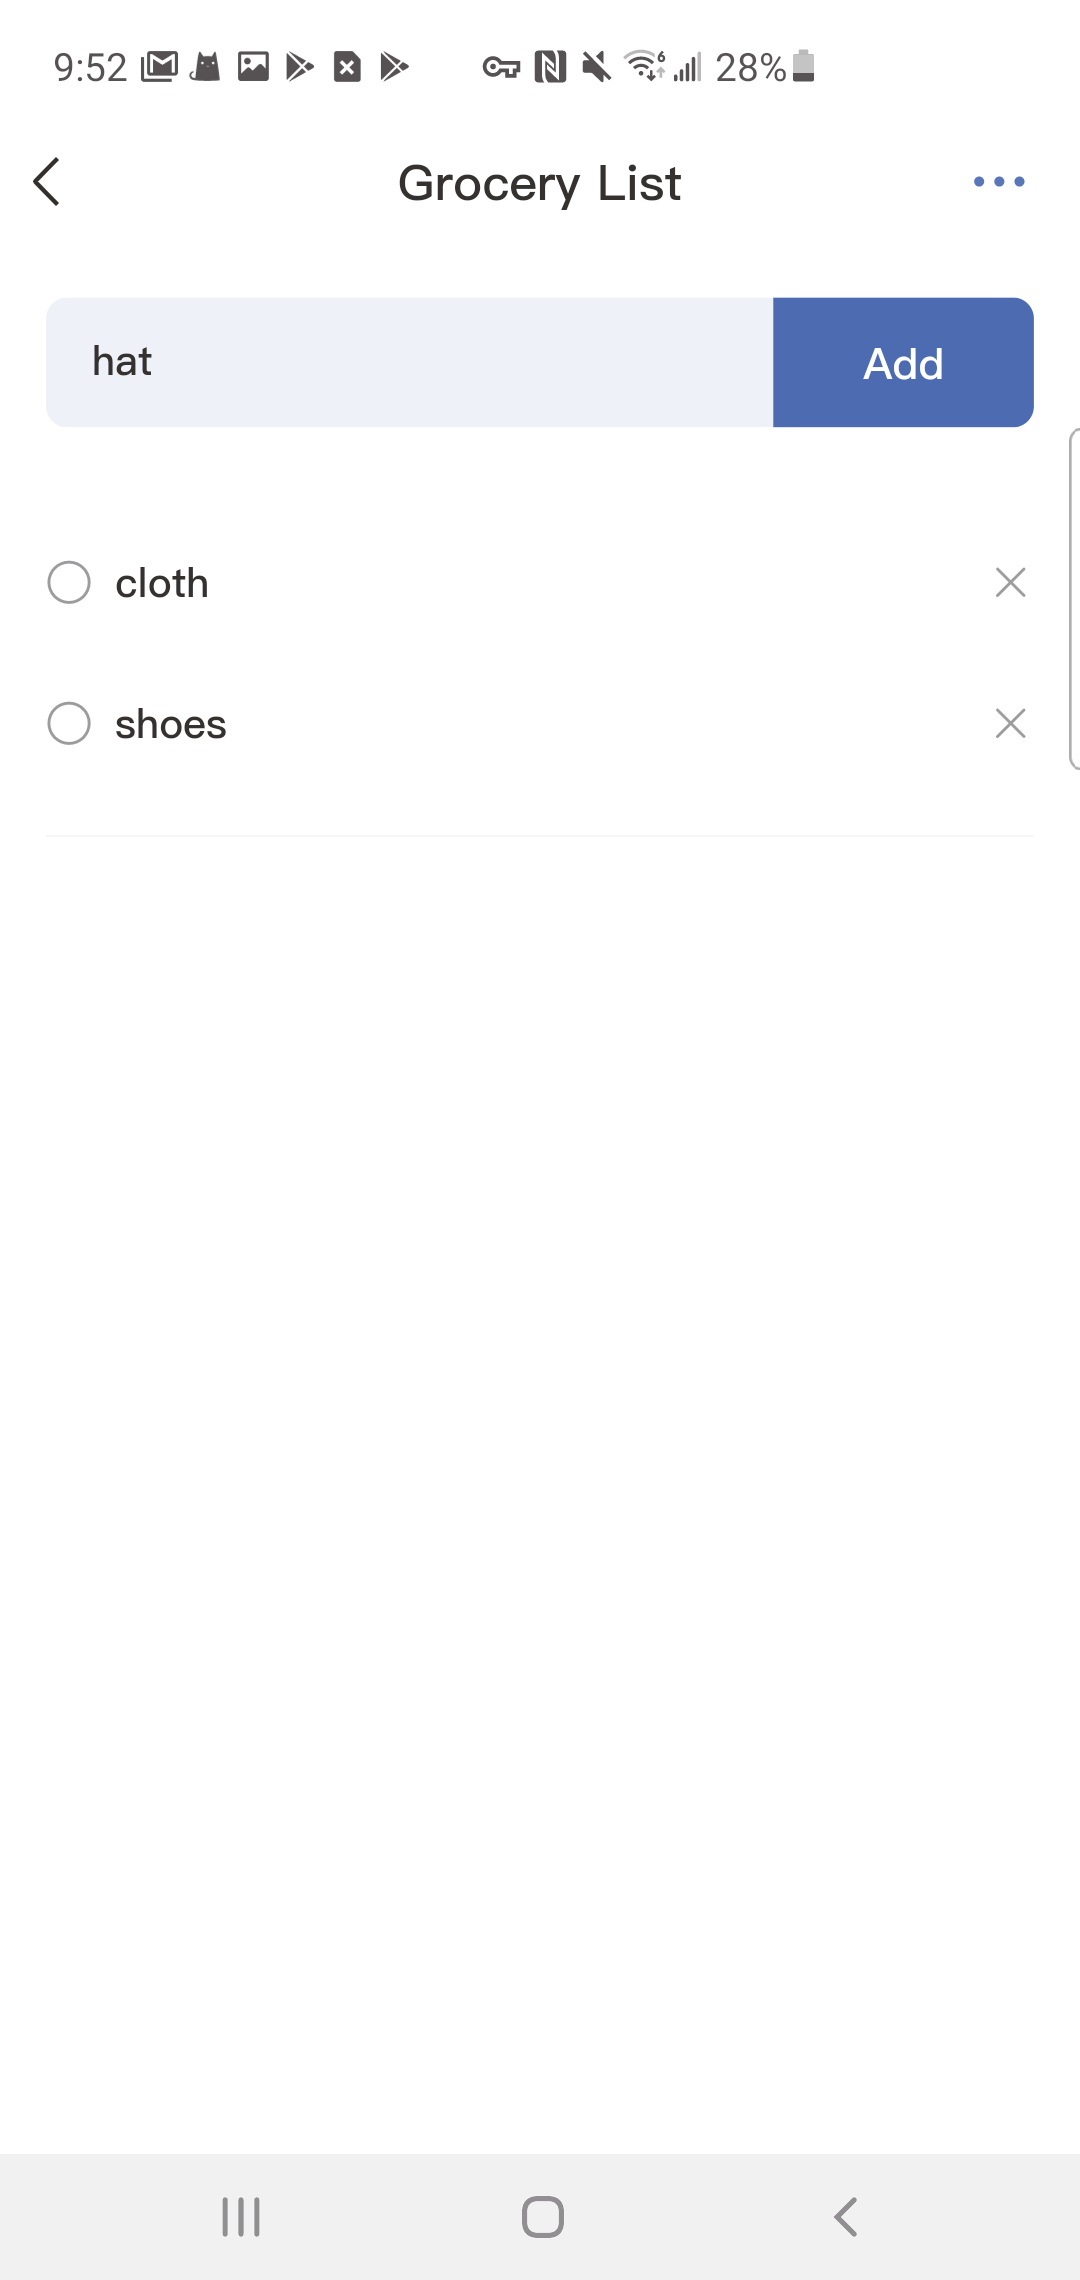
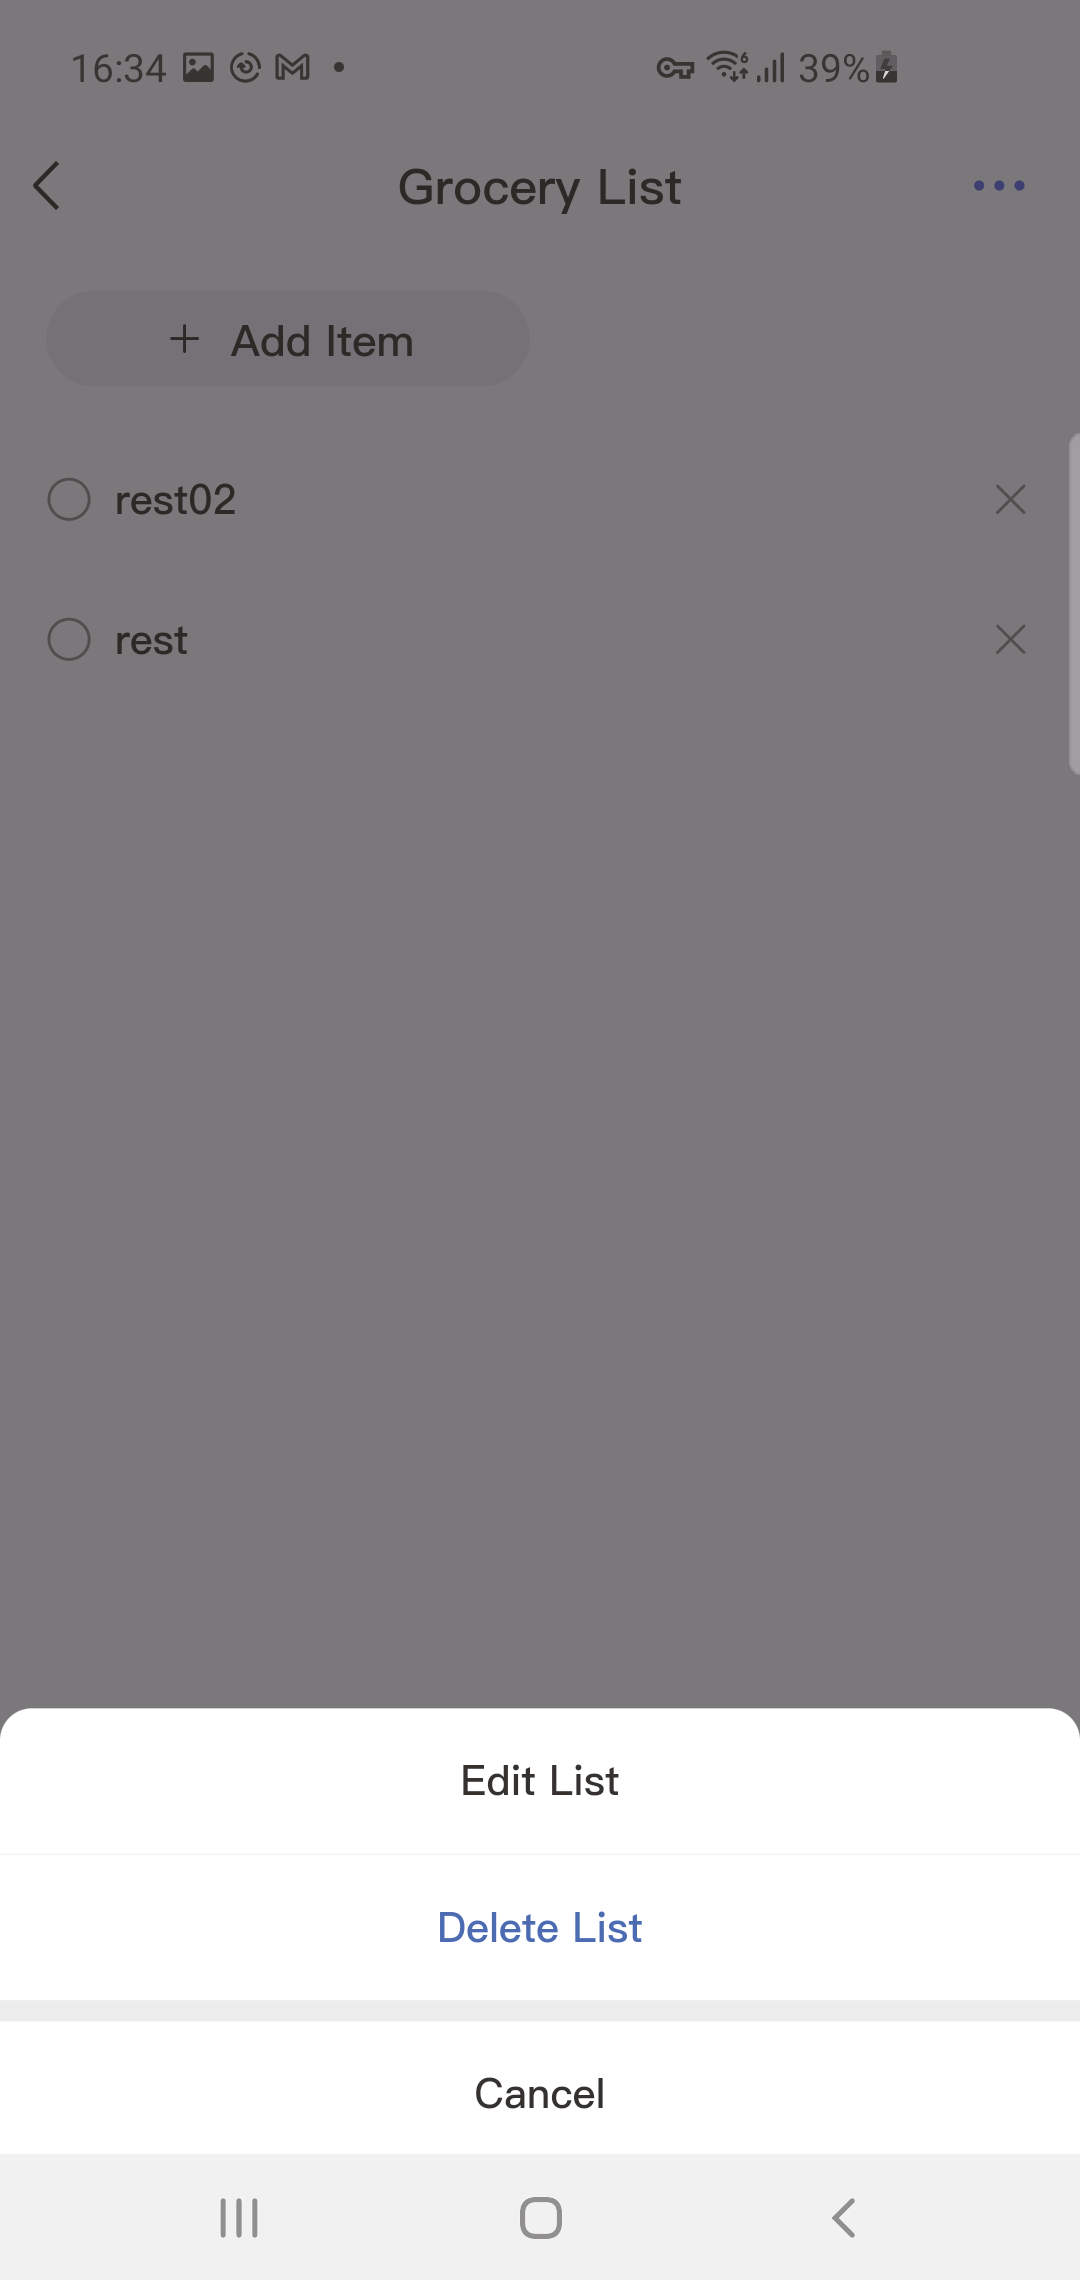
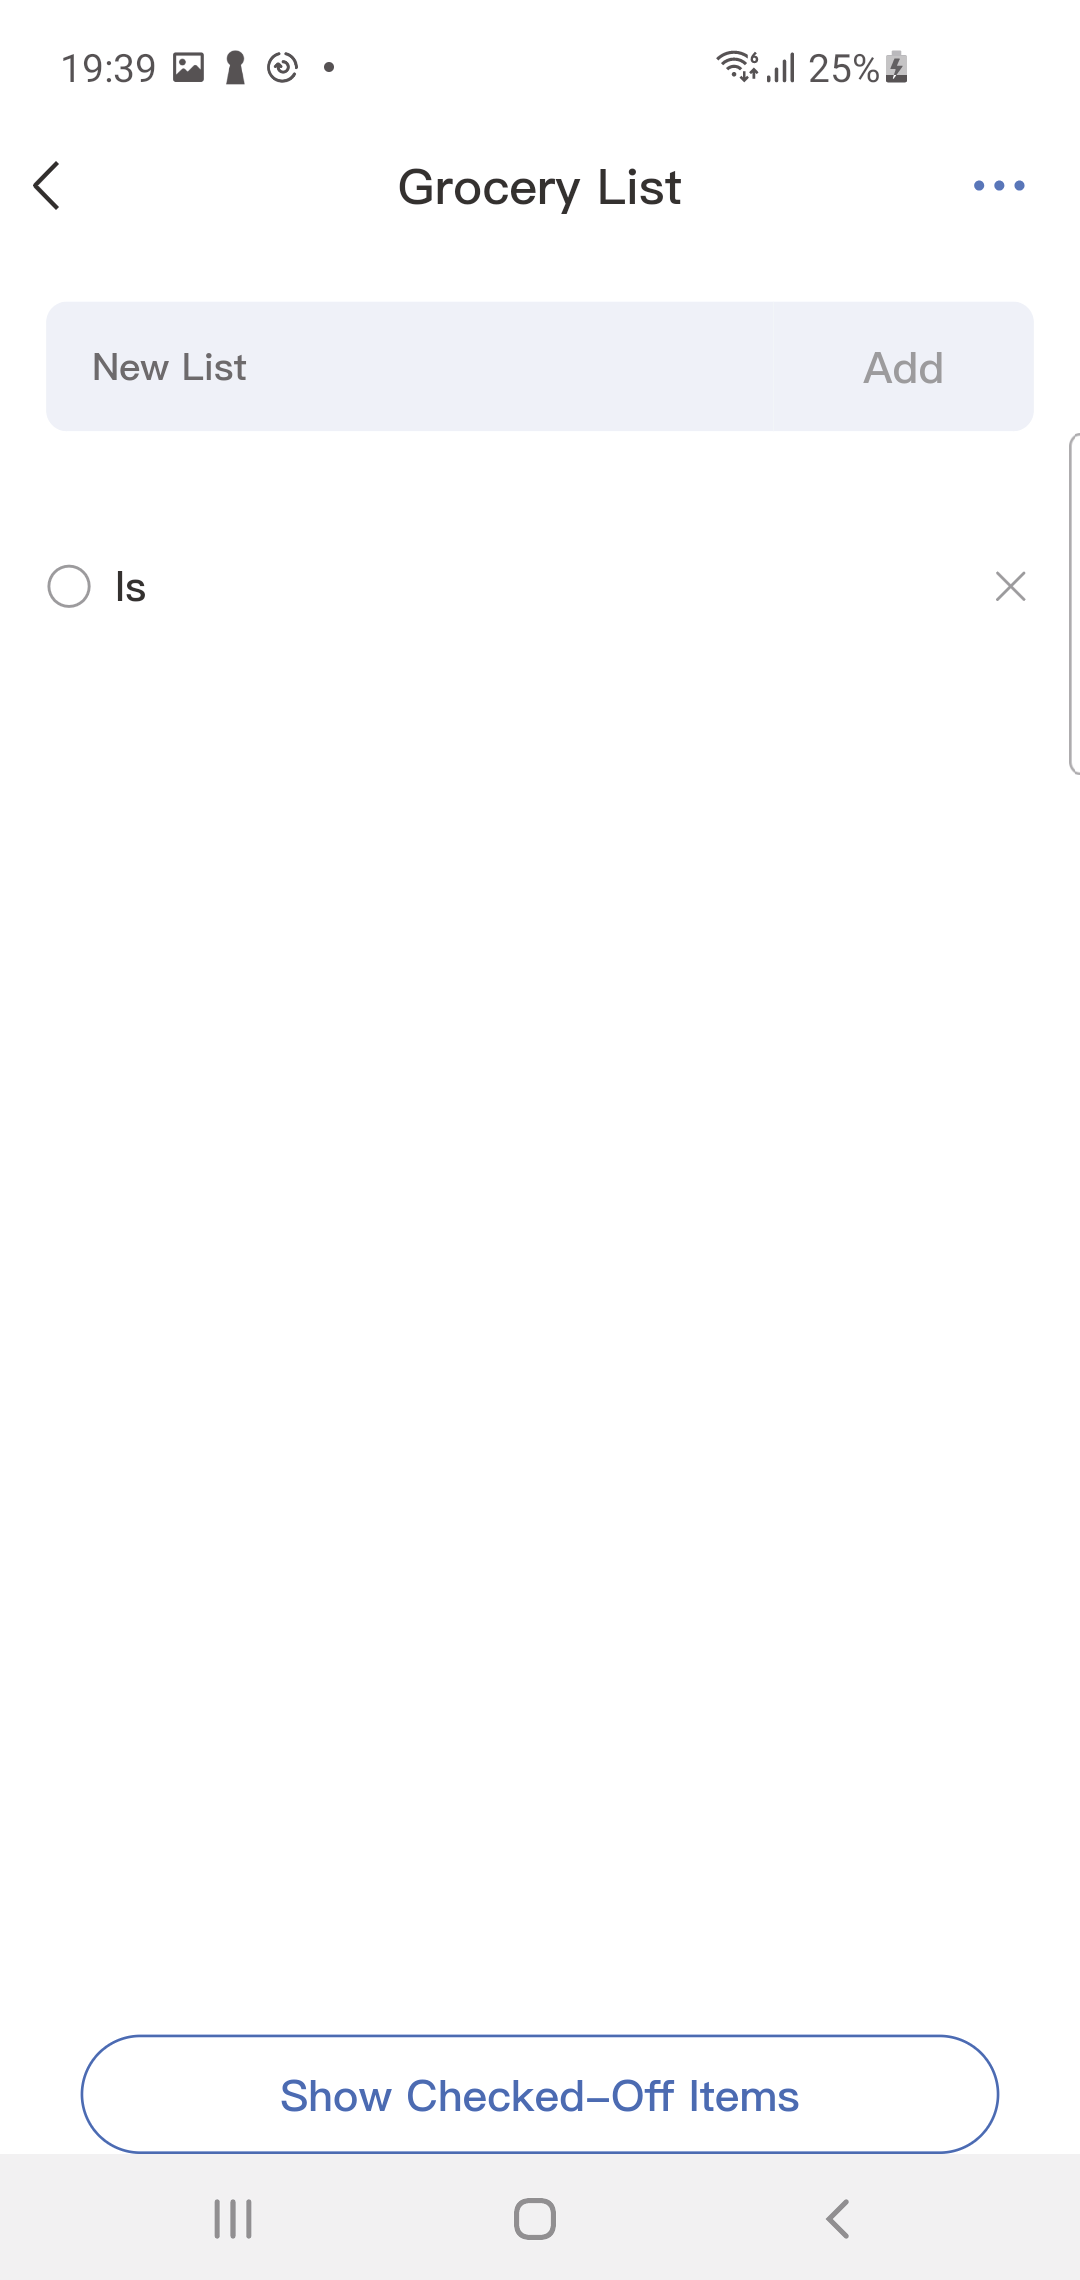
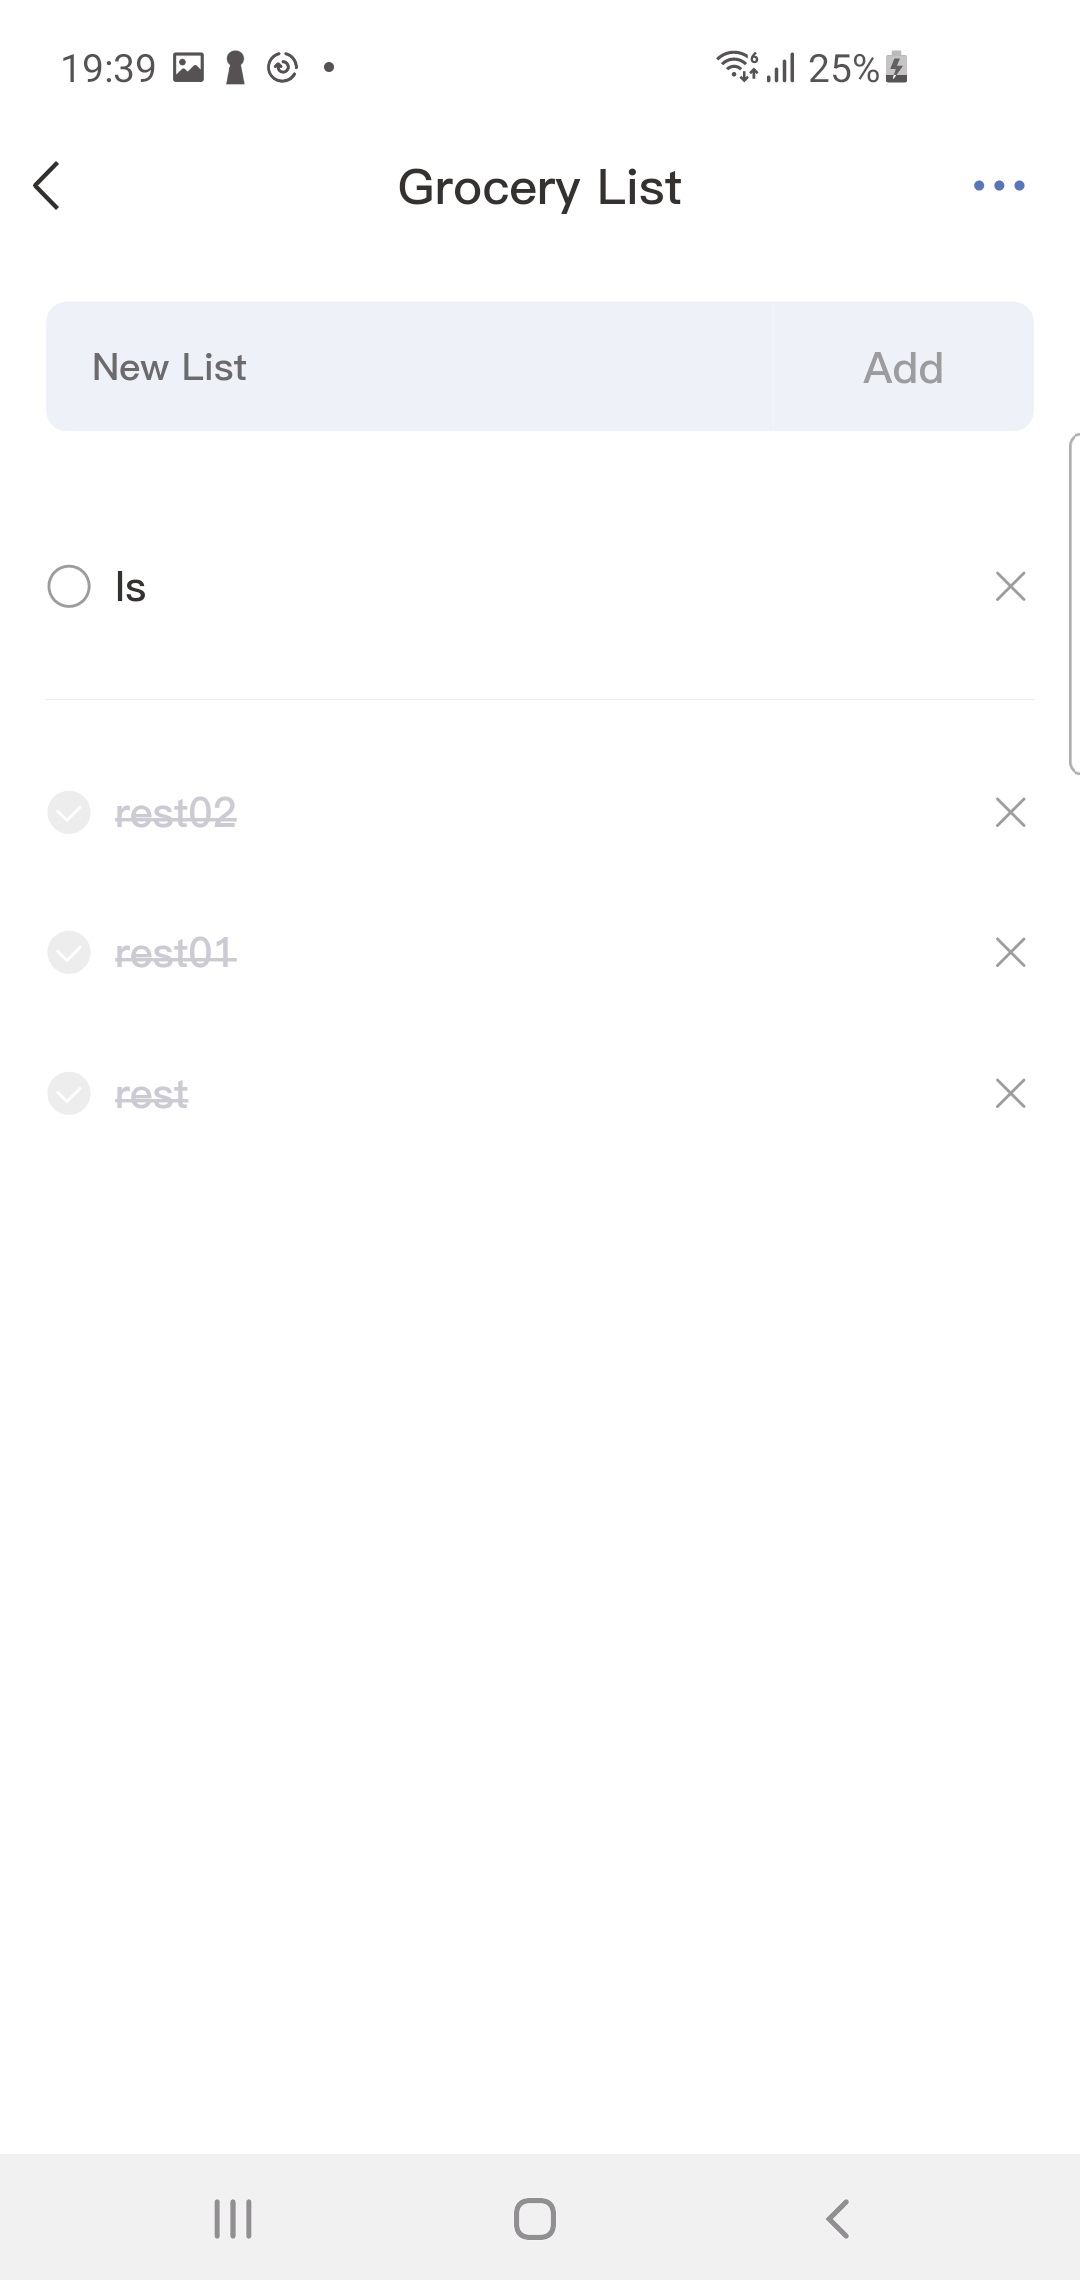
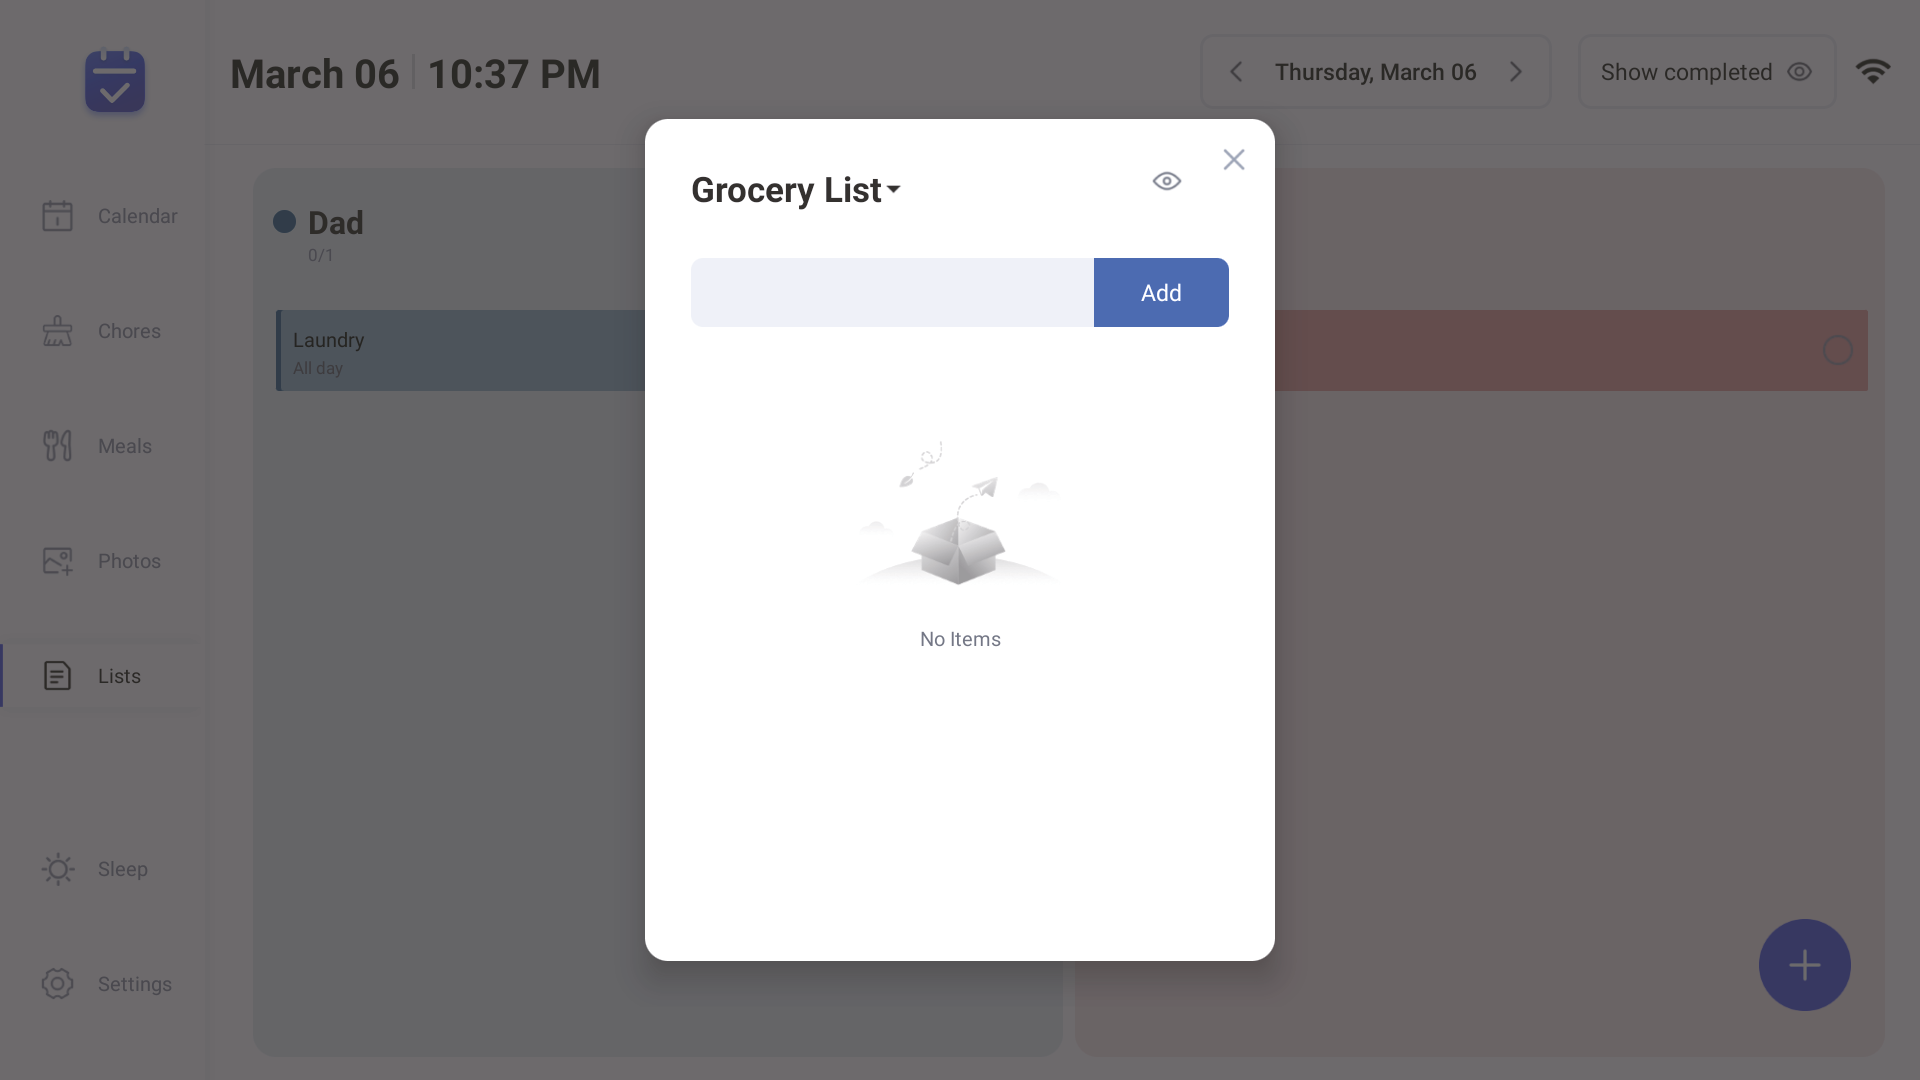
- Tap the list to add items.
- Press the list, then tap the "..." in the upper right corner to edit or delete it.
- Tap the circle next to an item to mark it as completed; the item will then disappear. Tap the "Show completed items" icon at the bottom to view completed items.


3.5 Lists-Device
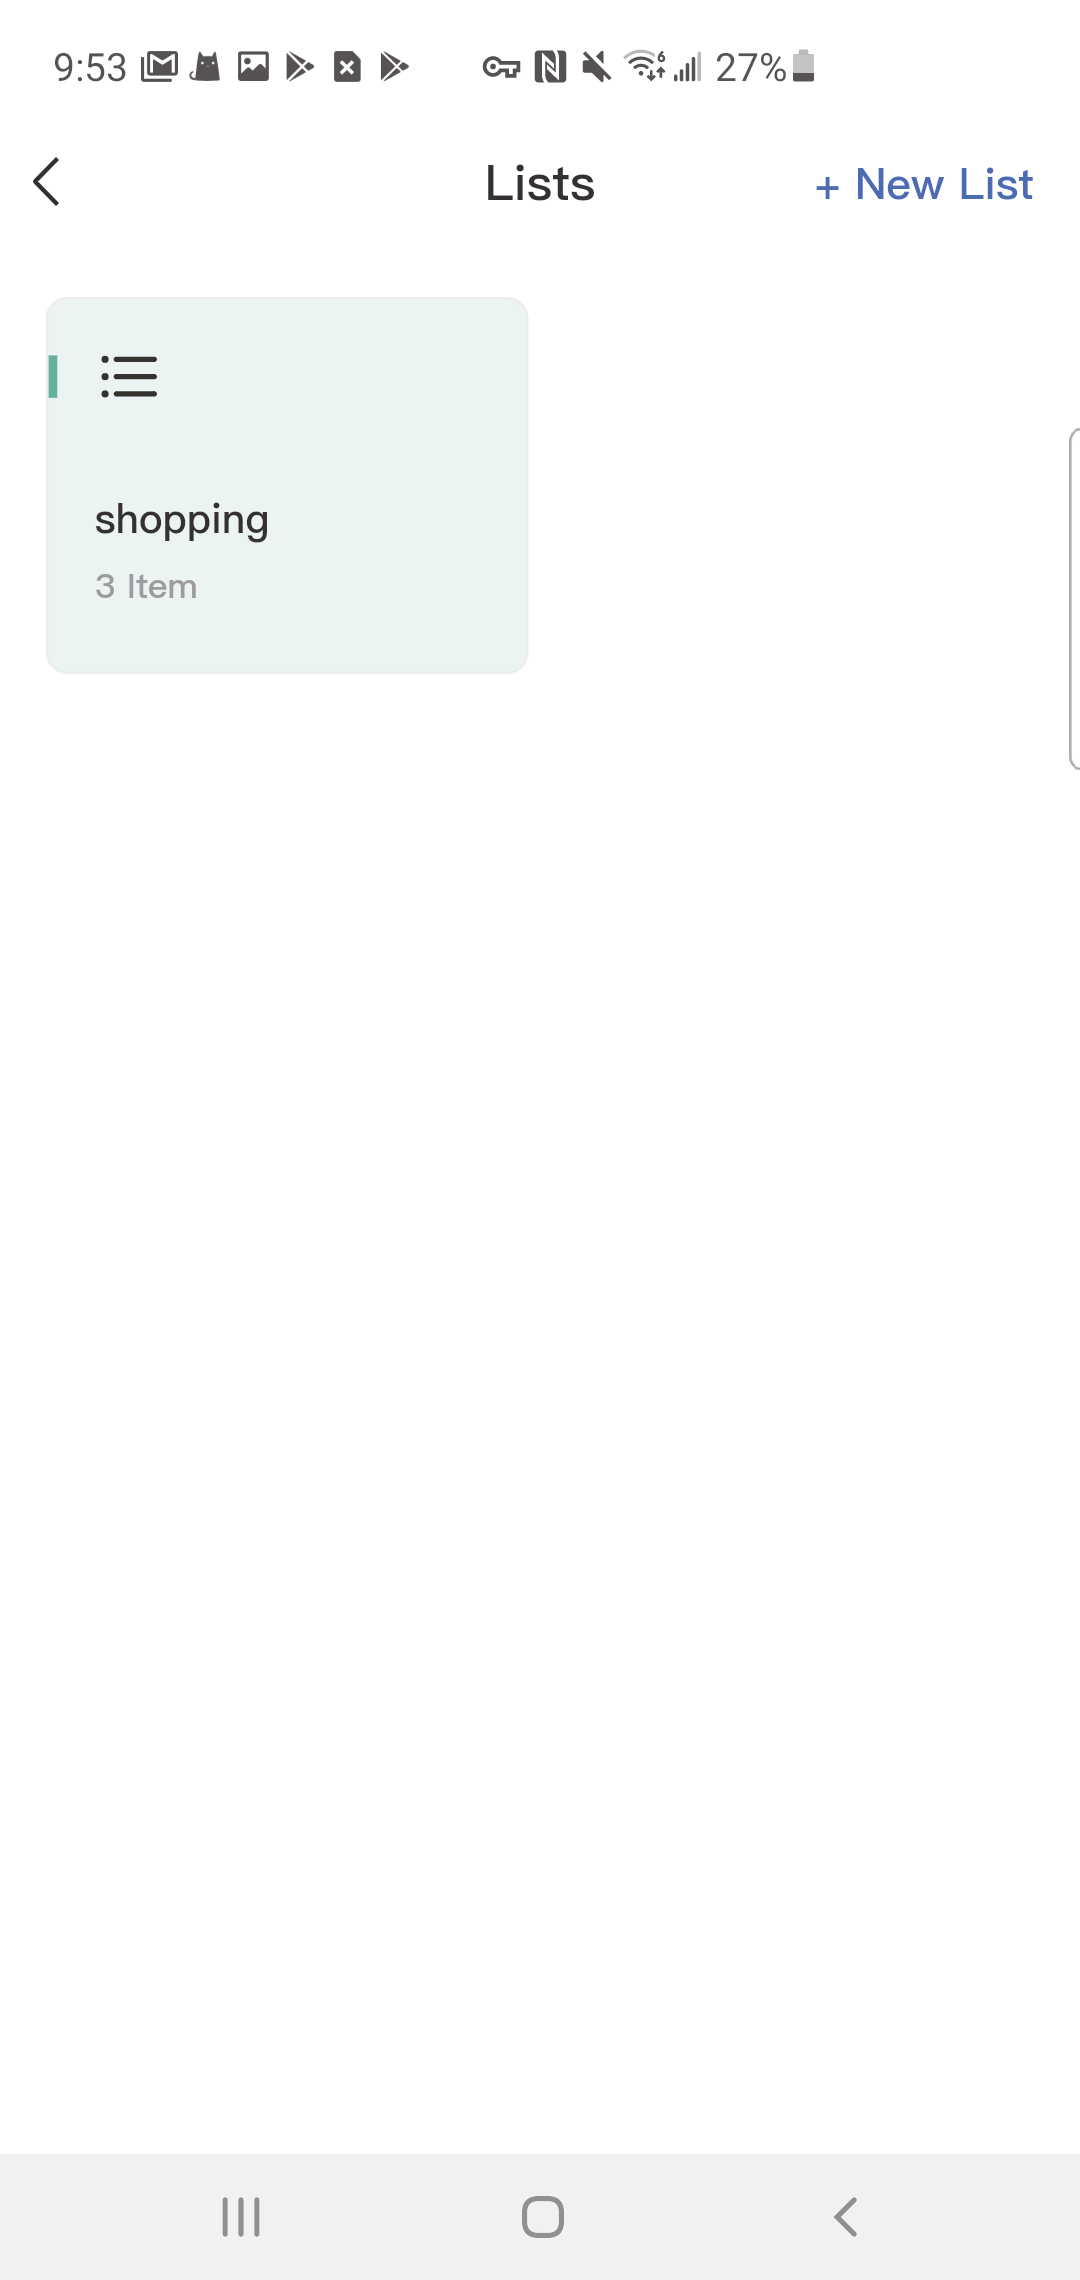
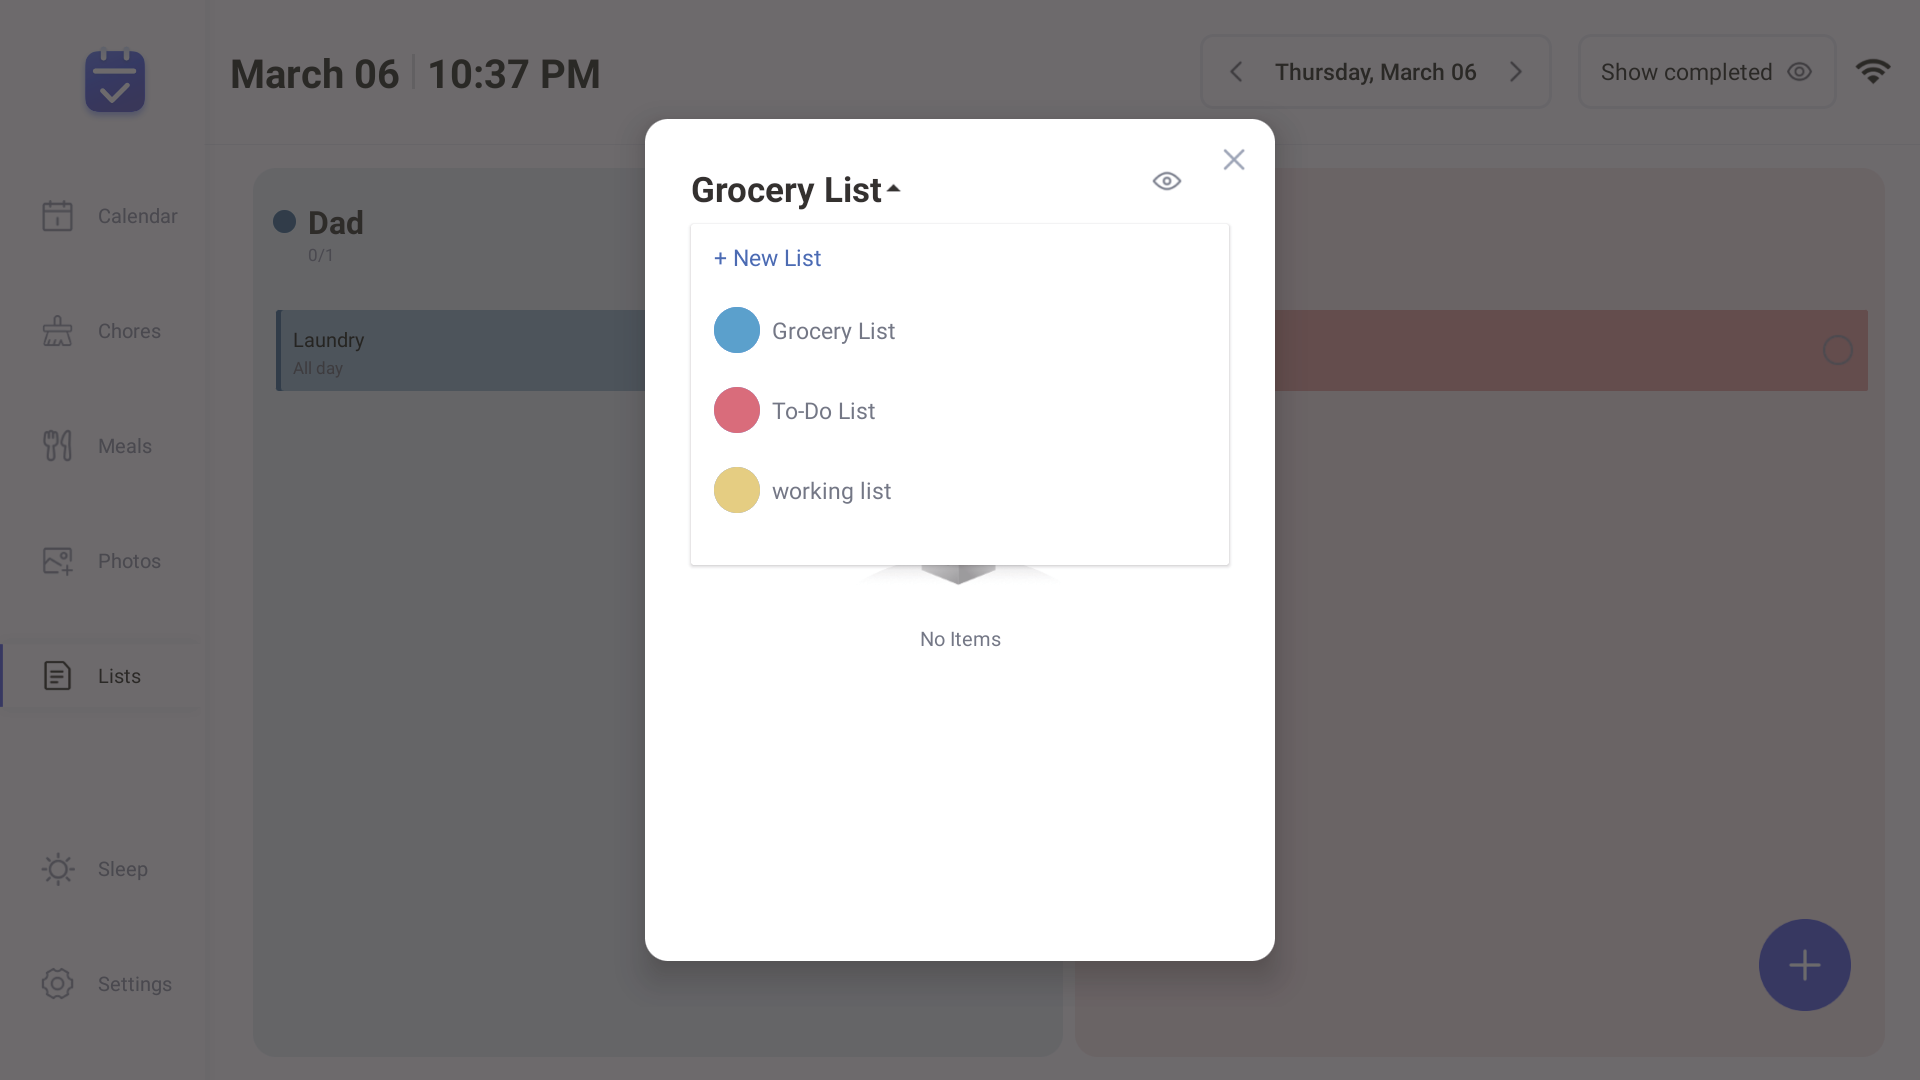
- 1.Tap the Lists icon in the sidebar to open the lists.
- 2.Tap the arrow next to the list name, such as "Shopping List".
- 3.Press "+New List", enter the new list name, choose a color, and select the list type.
- 4.Tap a list to add items.
3.6 Category
Categories can only be created in the mobile app.
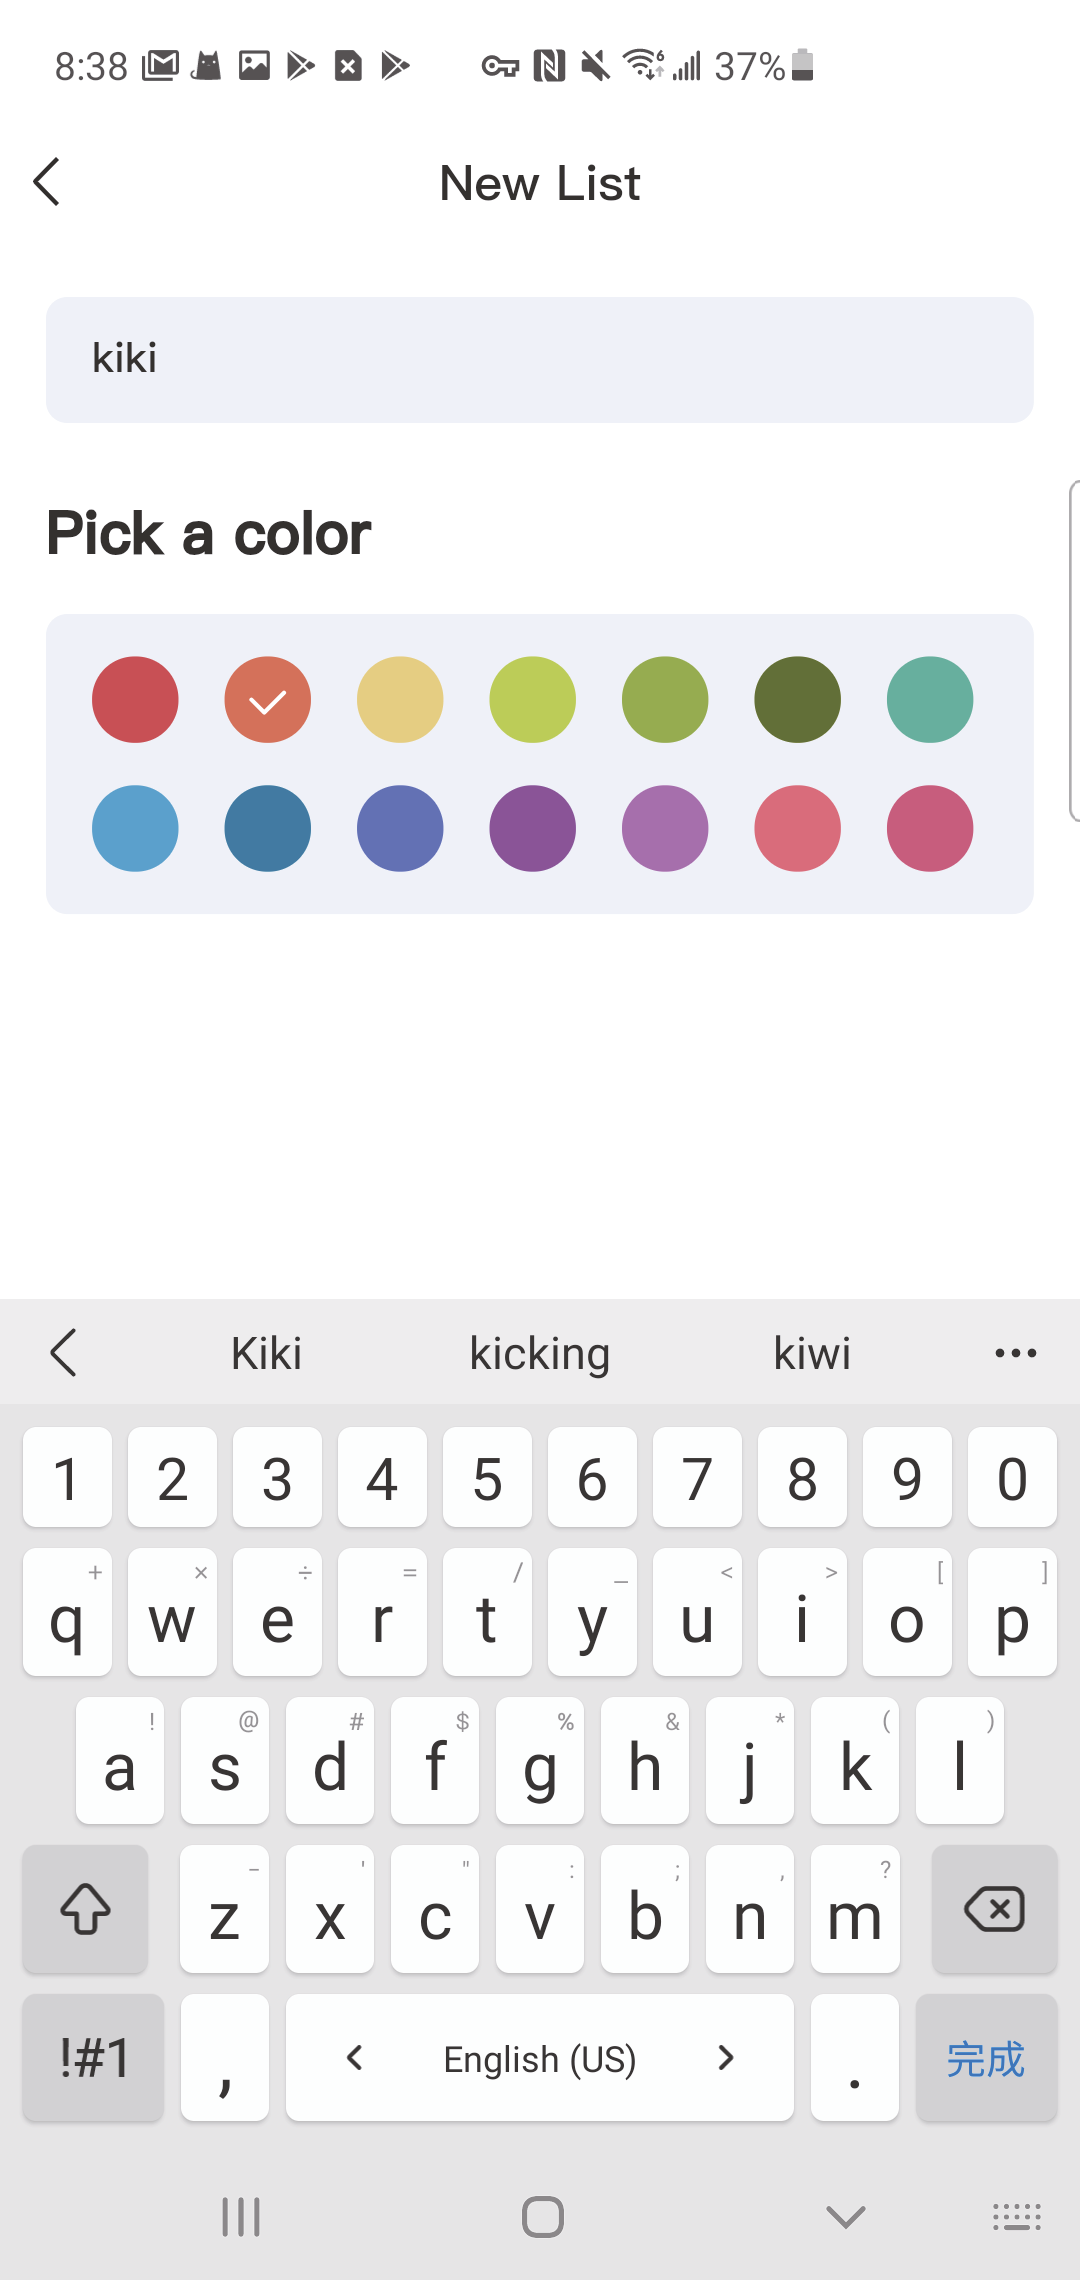
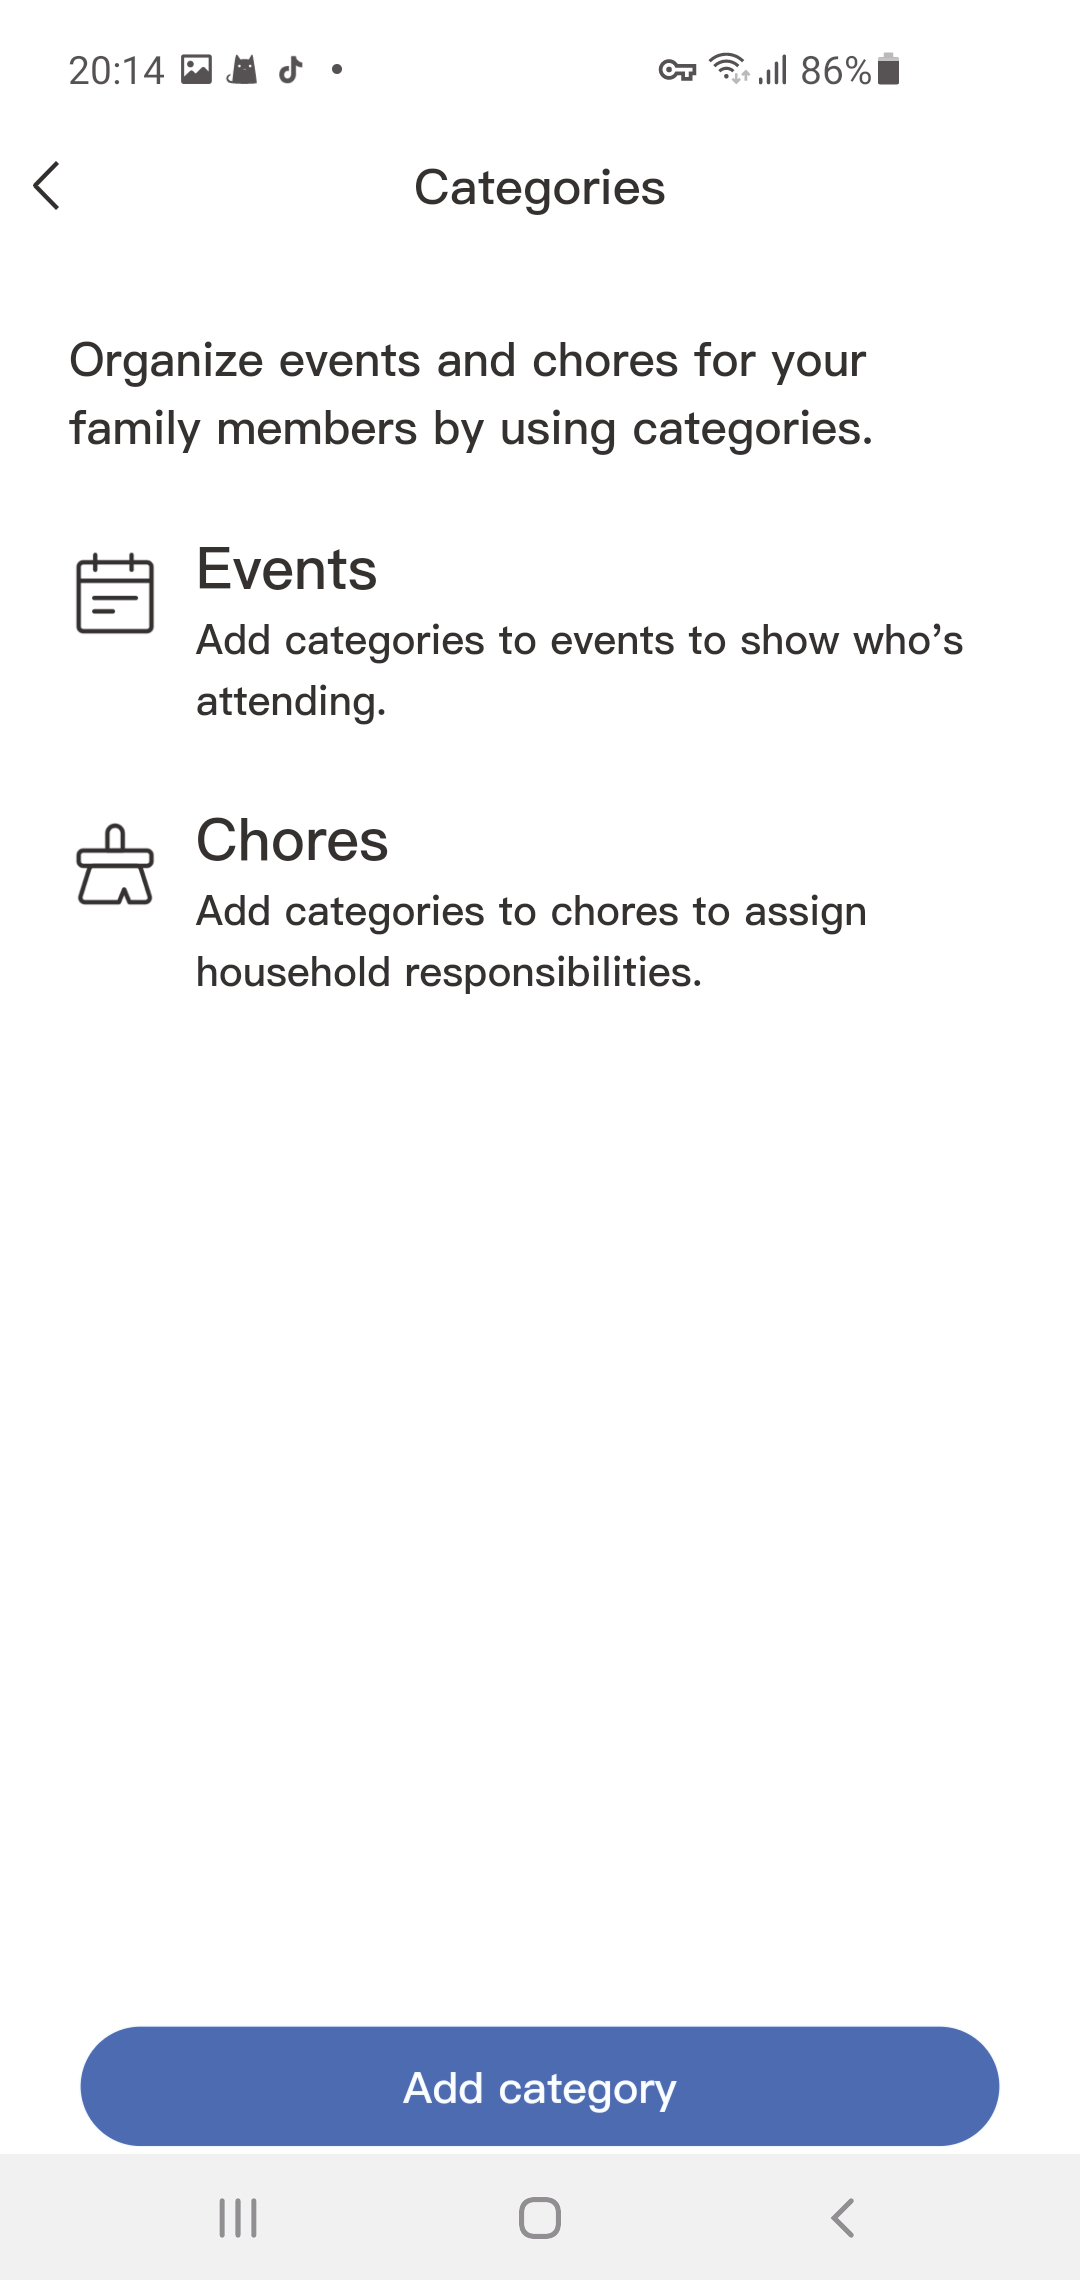
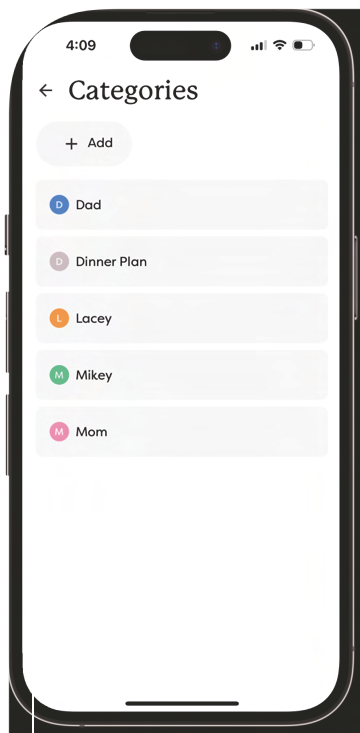
- 1.Press "Categories."
- 2.Press "Add Category."
- 3.Enter a person's name, choose a color, and press "Save."
- Note: Categories can only be created in the mobile app.
- 4.Edit the category details and press "Save."
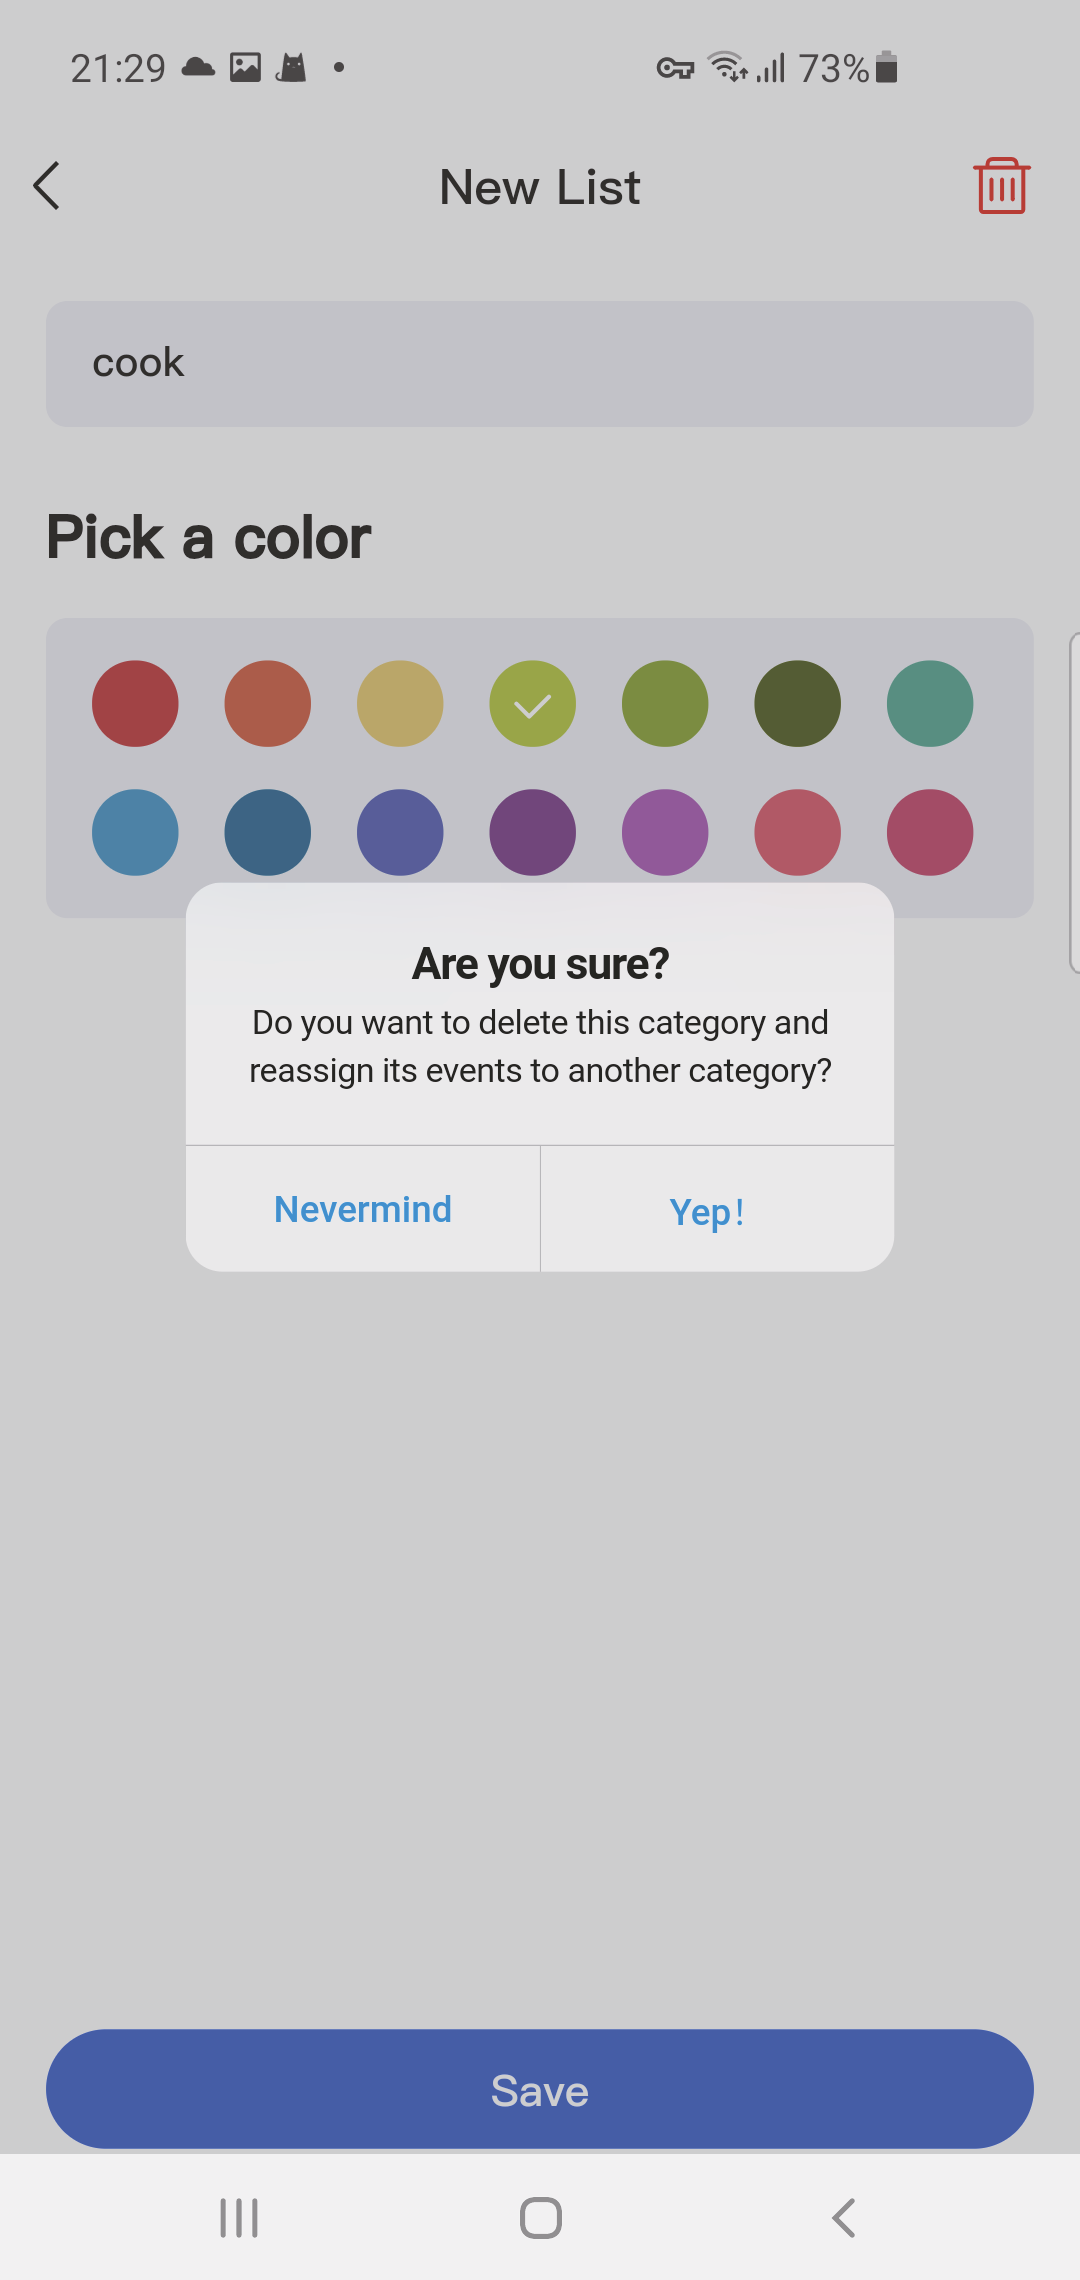
- 5.Press
 to delete a category.
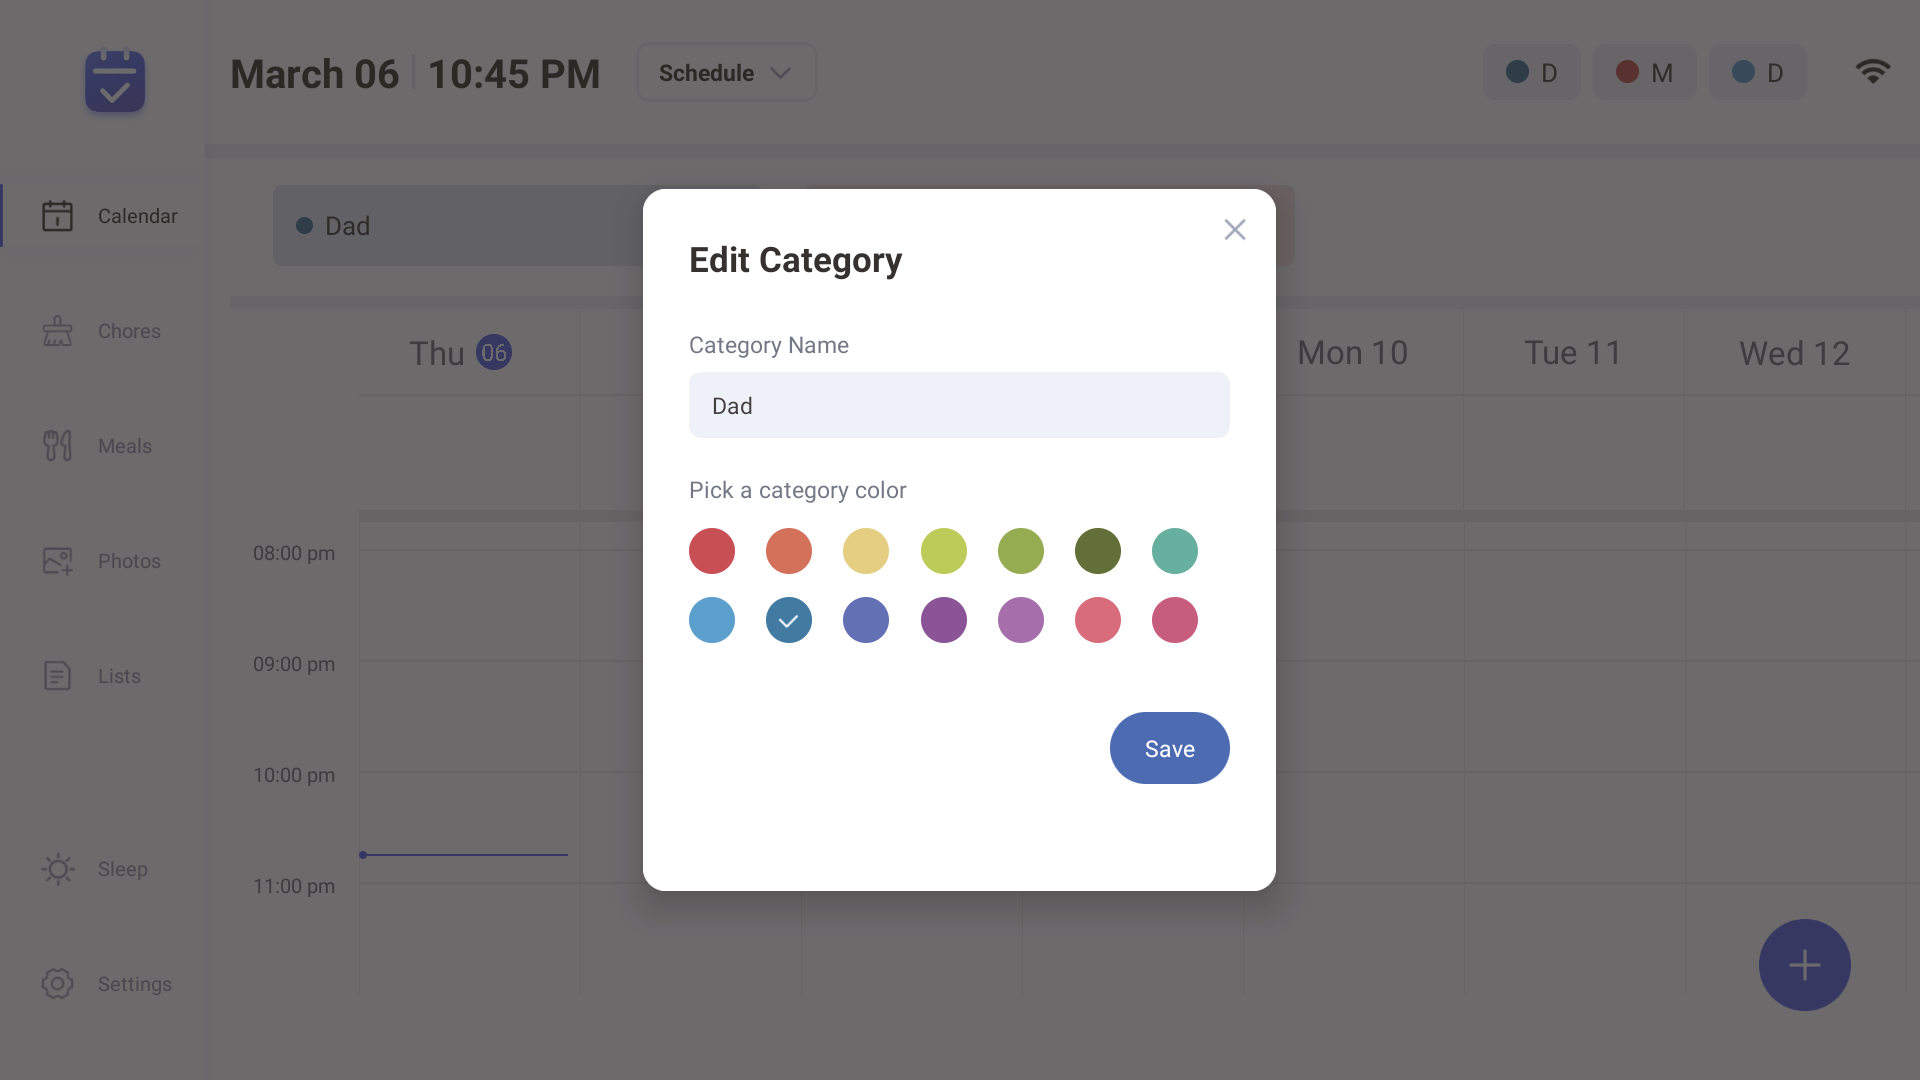
3.6 Category-Device
1.Tap the Category circle in the top right corner and press "Edit Category". You can swipe through this Categories list if needed.
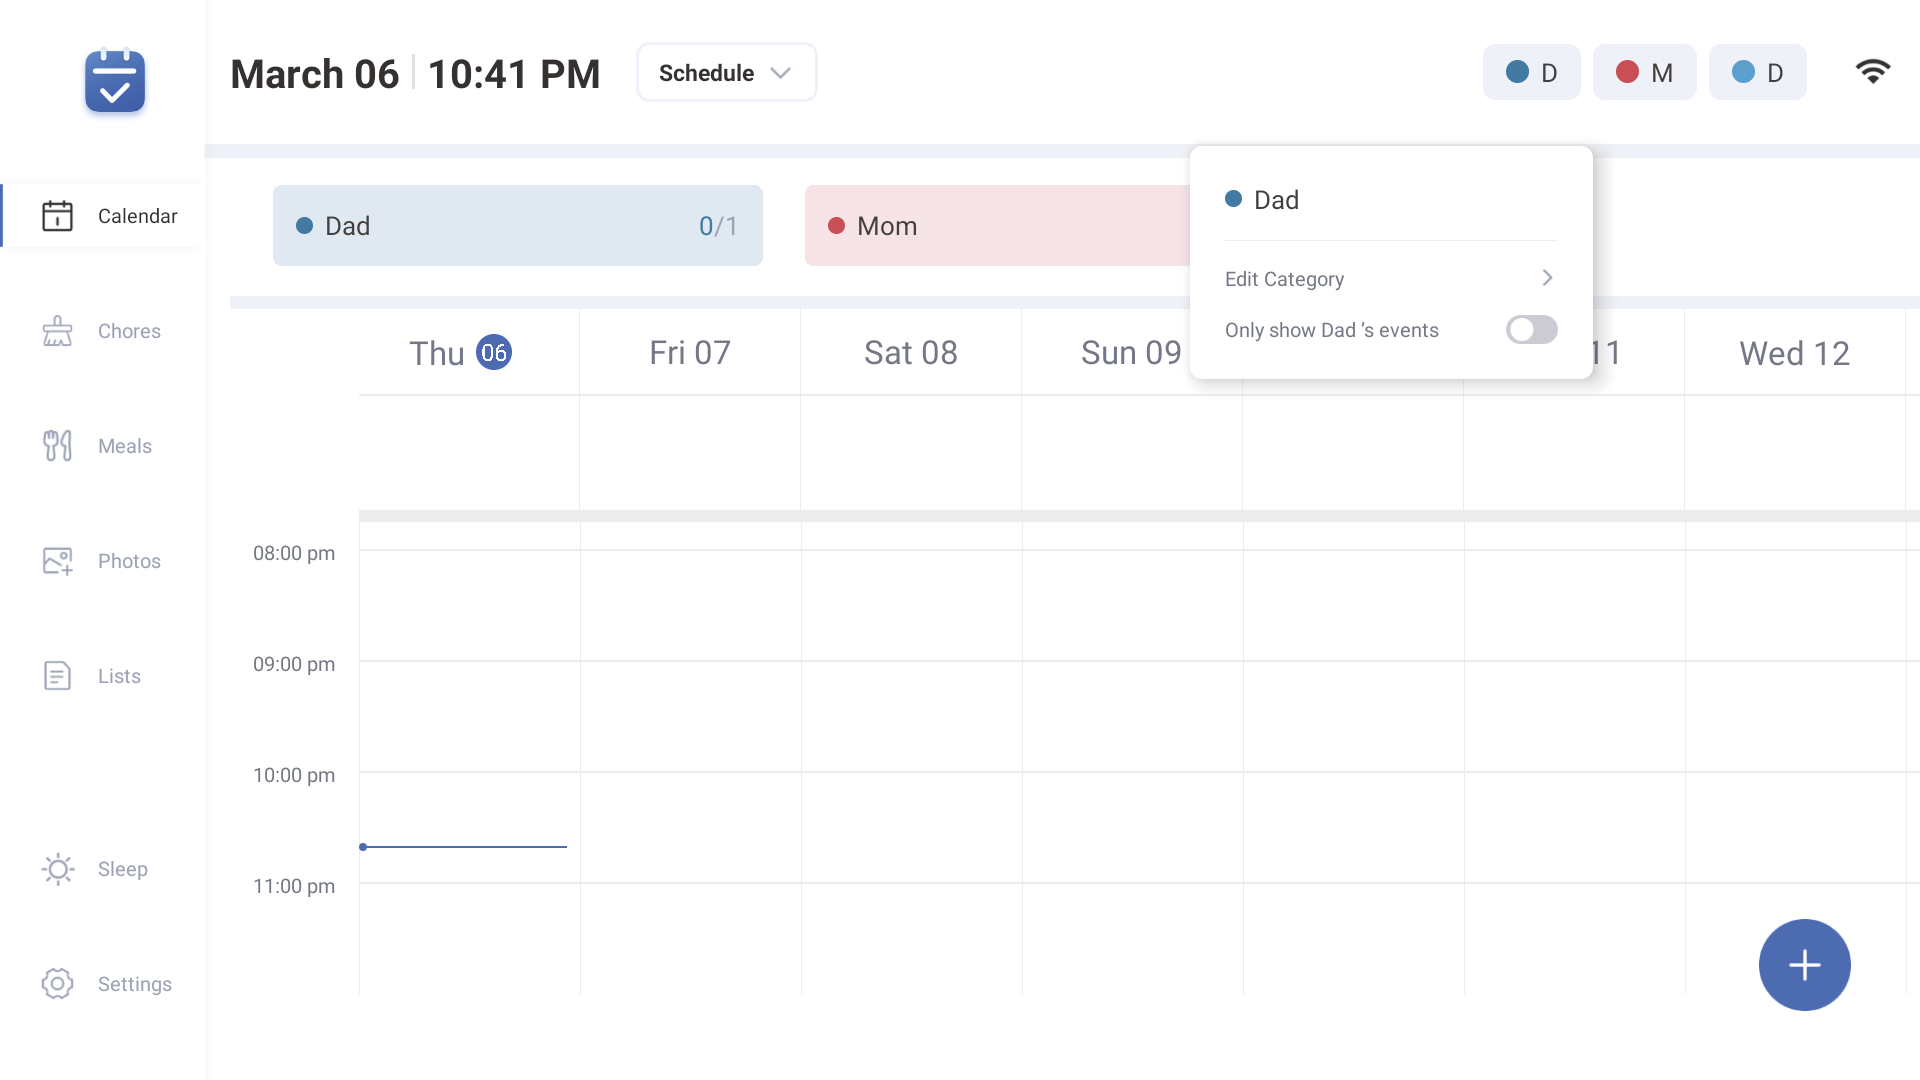
2.Edit the Category Name or category color and press "Save".
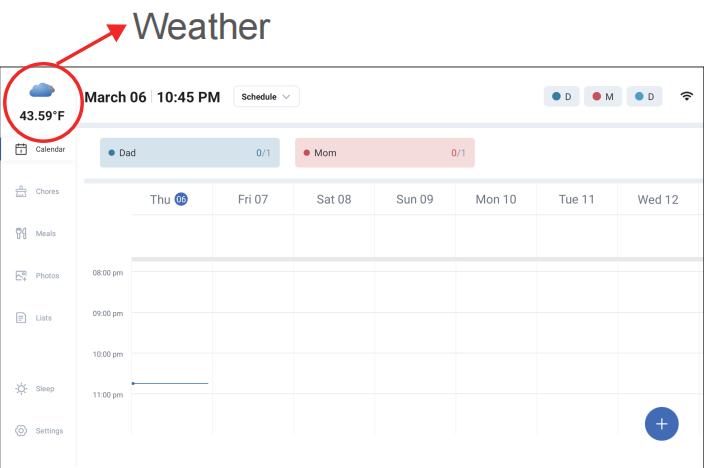
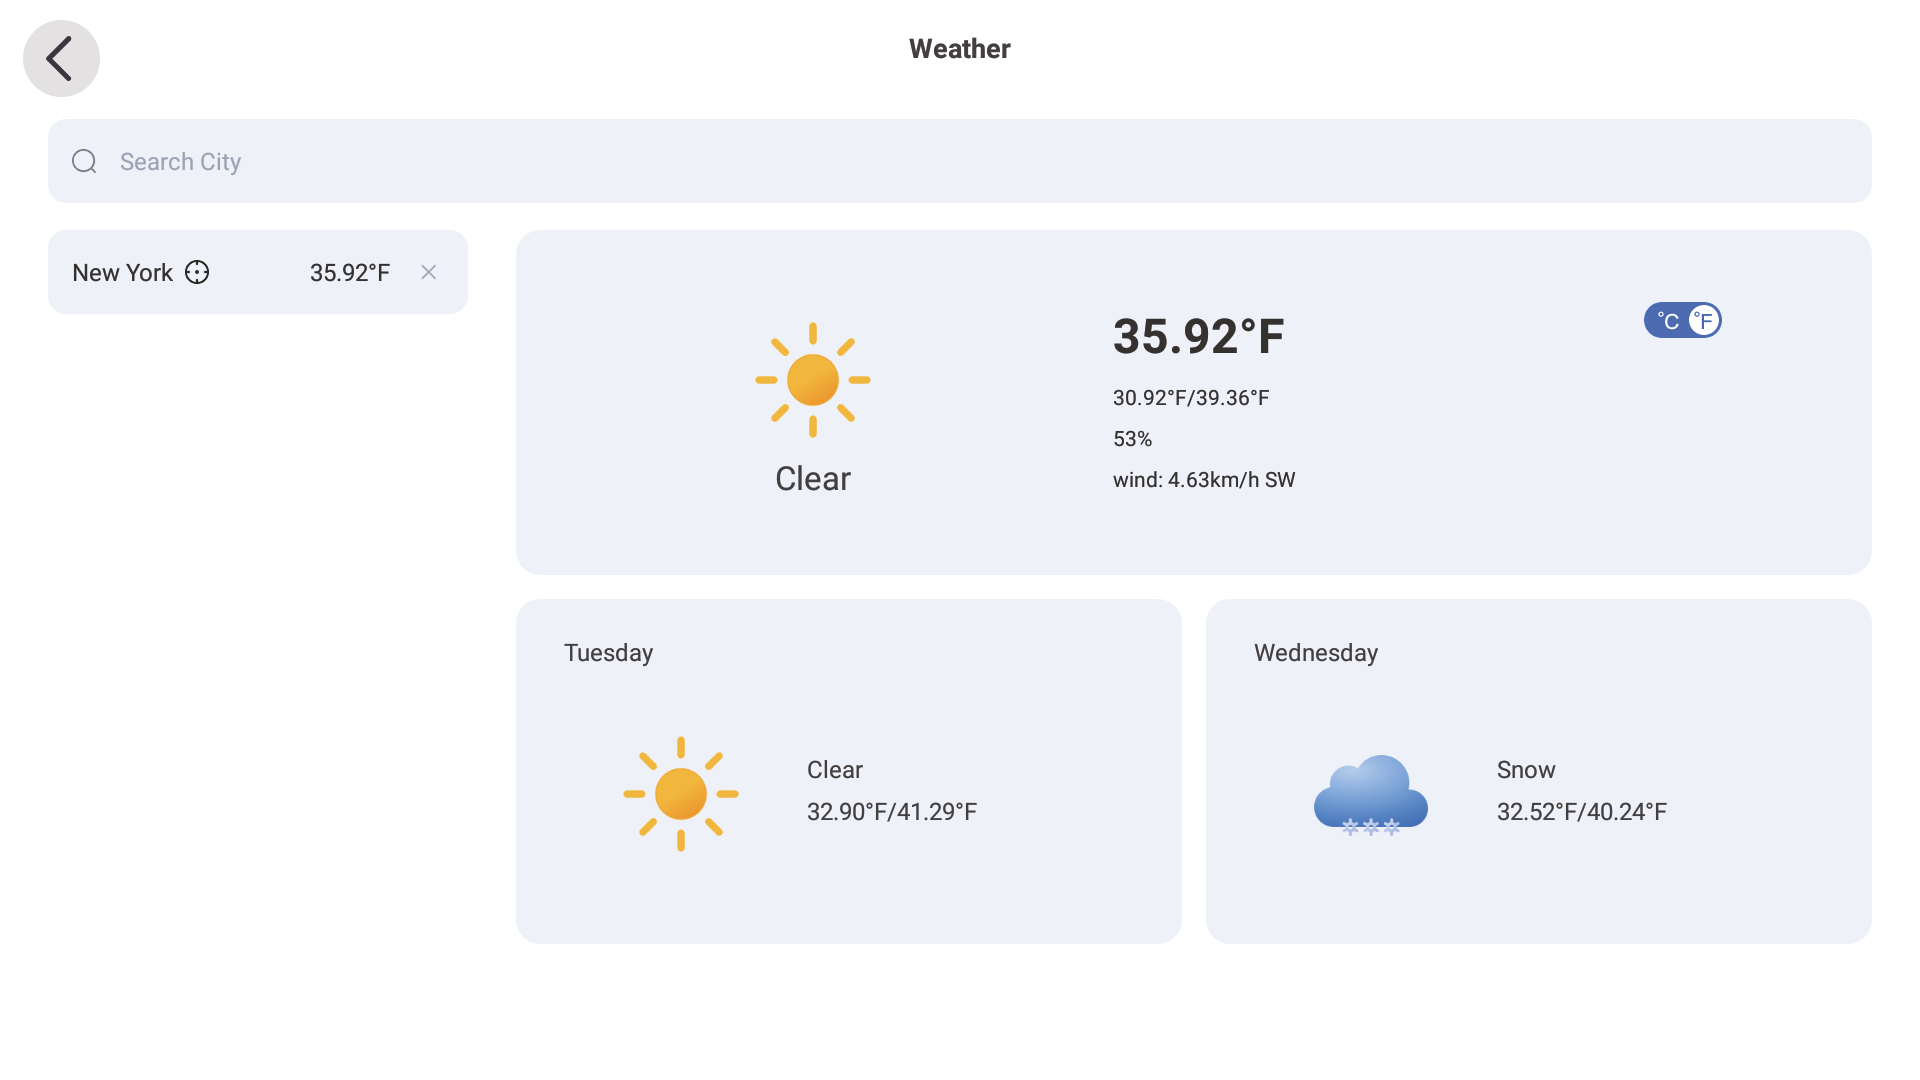
3.7 Weather
- 1.Click the weather icon in the upper left corner of the home page. (You can choose to hide the weather display in the Settings.) Search for the temperature of any city and set it to display on the home page.
- 2.Click the C°F° icon to display the air temperature at "F°" or "C°".
- 3.The weather forecast for the current day and the next day will be displayed in advance.
4. Magic Import
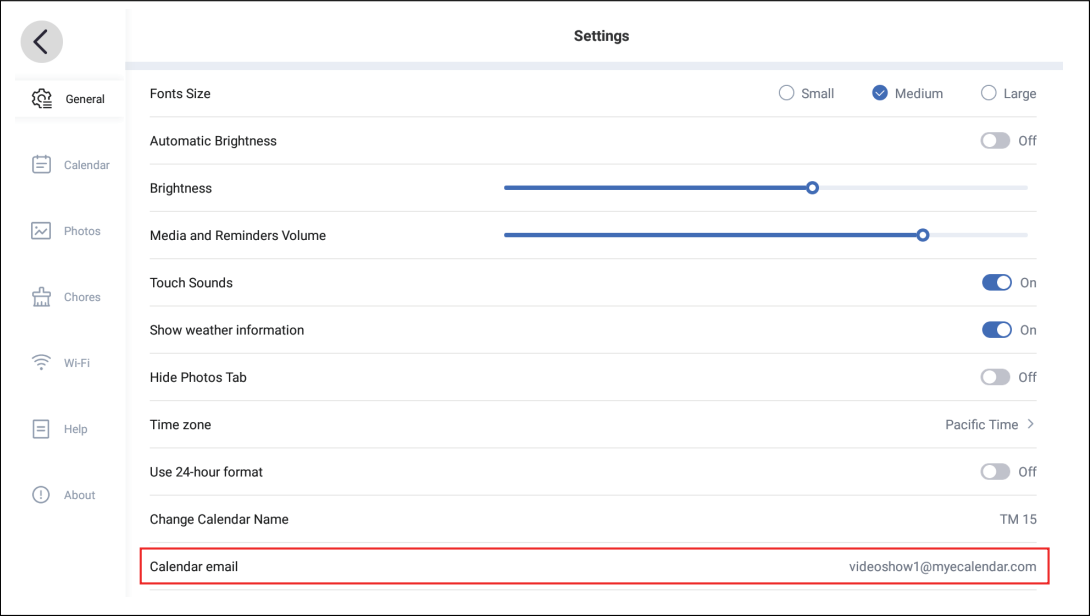
Support for sending video, picture, and files to a virtual calendar email address from third-party email services to import video, picture and files(PDF, Excel, Word, TXT). When the device receives a files, it will automatically parse it as an image or an event. (an item is considered an event if it include a title and a start date.)
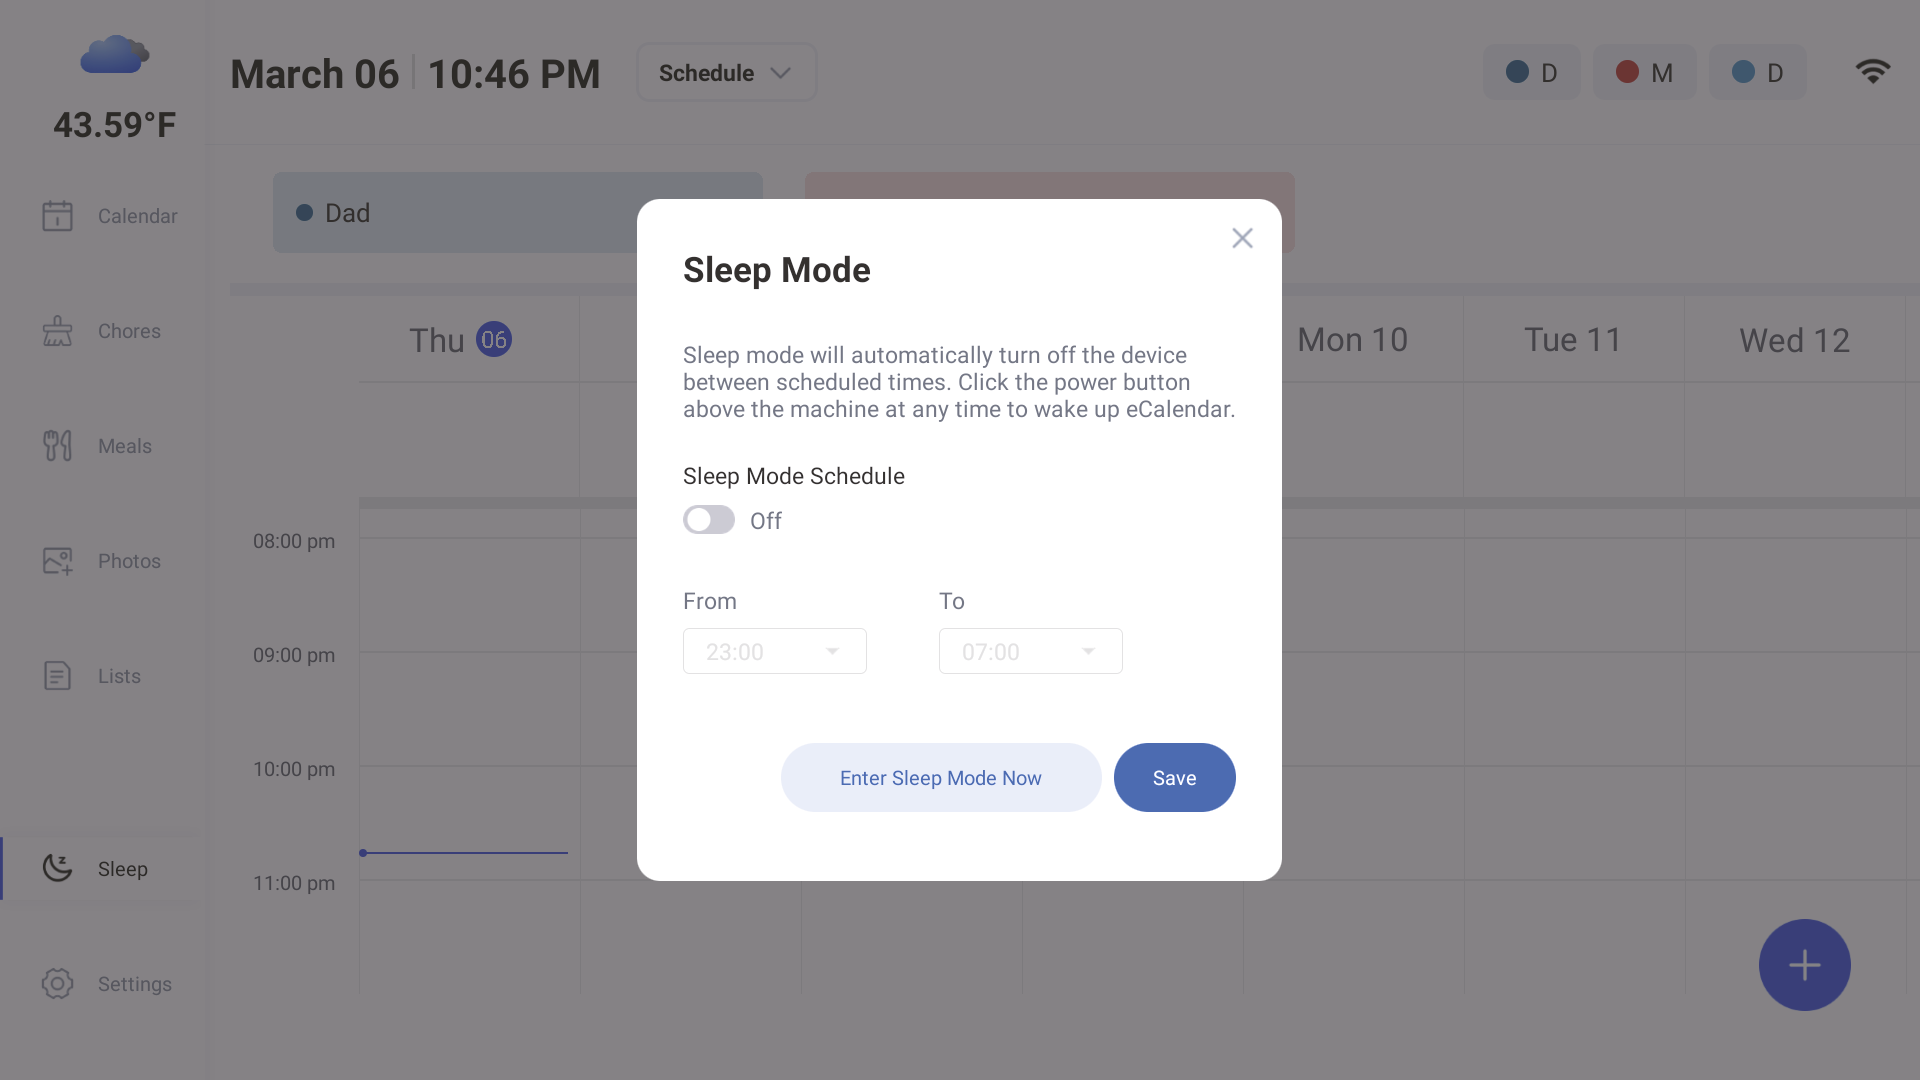
5. Sleep Mode
Sleep Mode turns off your eCalendar's display during scheduled intervals. Make sure your device's time zone is set properly in Settings ->  Configure Time Zone. Sleep Mode can only be configured from the device.
Scheduled Sleep and Instant Sleep
- Tap the moon icon located at the bottom of the sidebar.
- Toggle on "Sleep Mode Schedule" and select the time for your Calendar to go to sleep and wake up. Press "Save" to confirm. When your Calendar is in Sleep Mode, you can press the power button at any time to wake it up.
- Tap "Enter Sleep Mode Now" to turn off the display. Press the power button again to wake up your eCalendar.
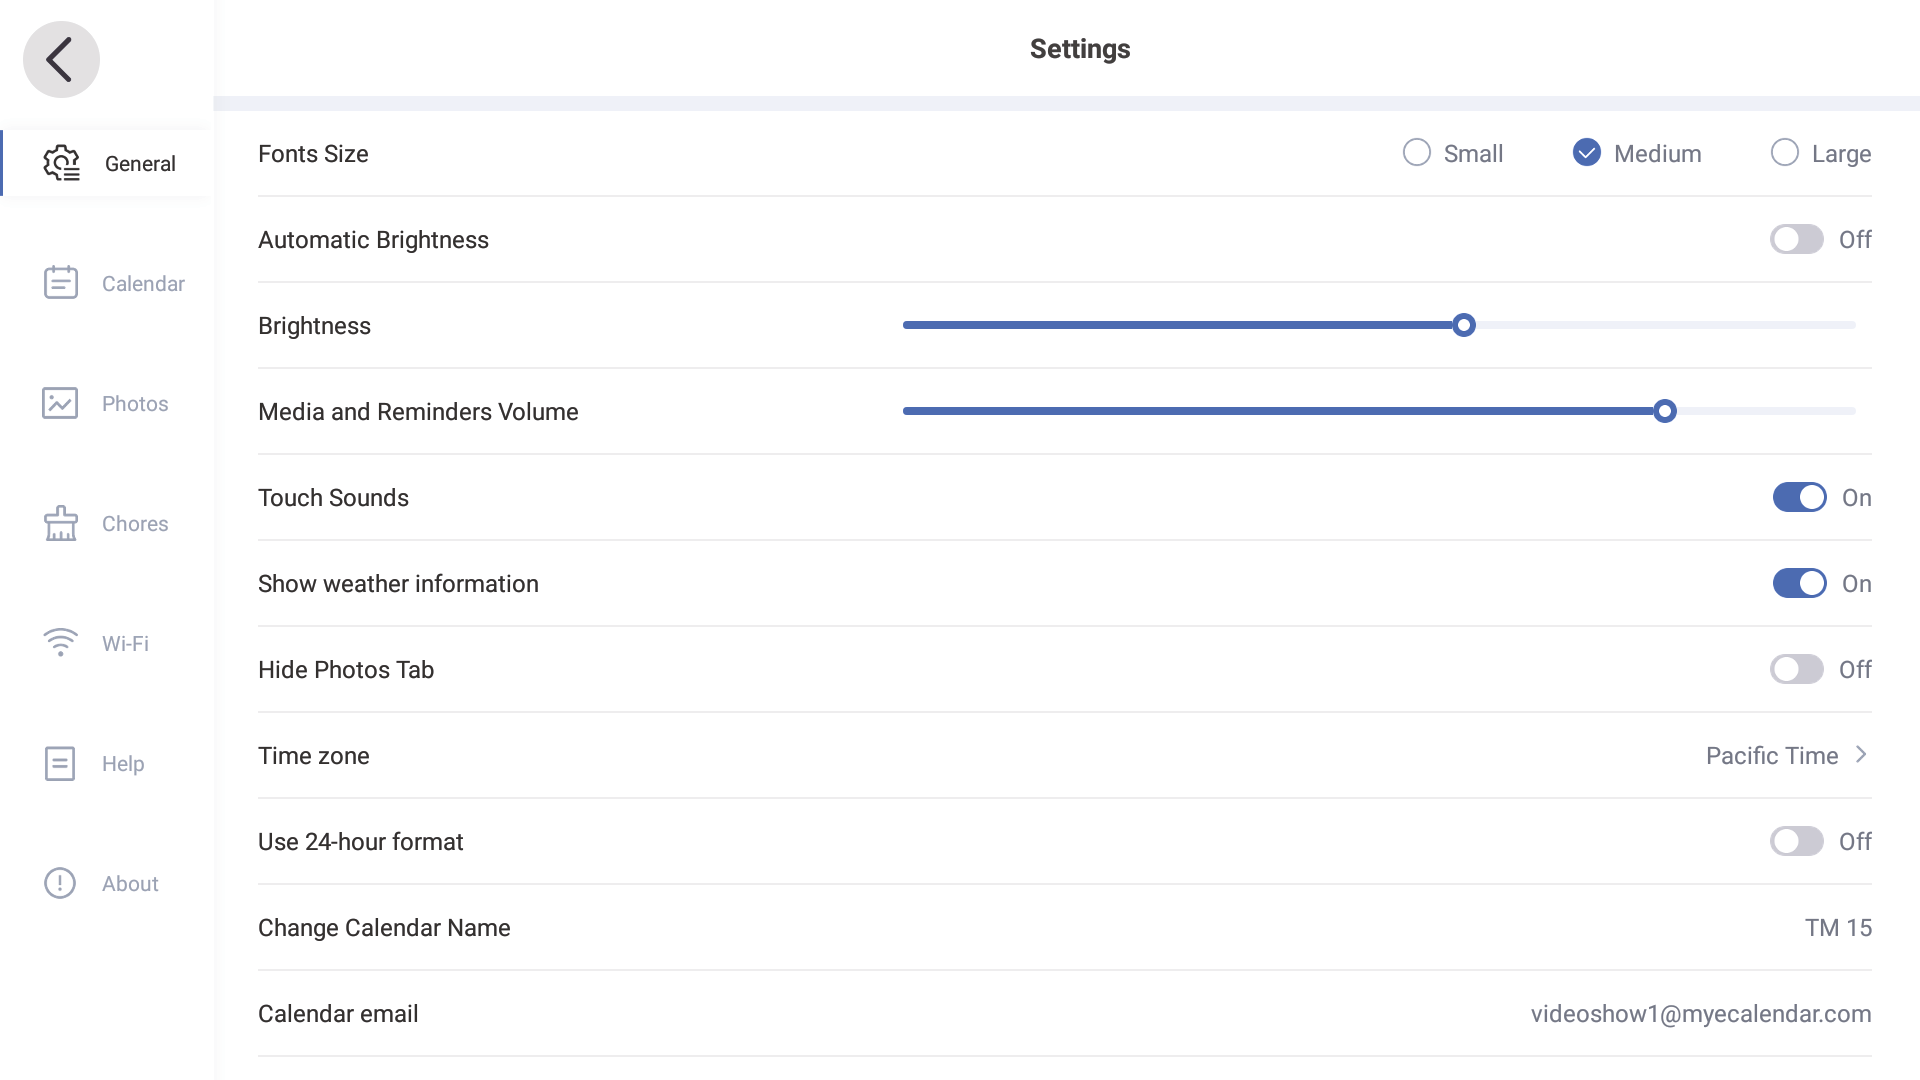
6. Settings
Settings -> General -> Font Size & Time Zone
- Choose from Small, Medium, or Large font sizes in "Settings."
- Change the time zone and language settings.
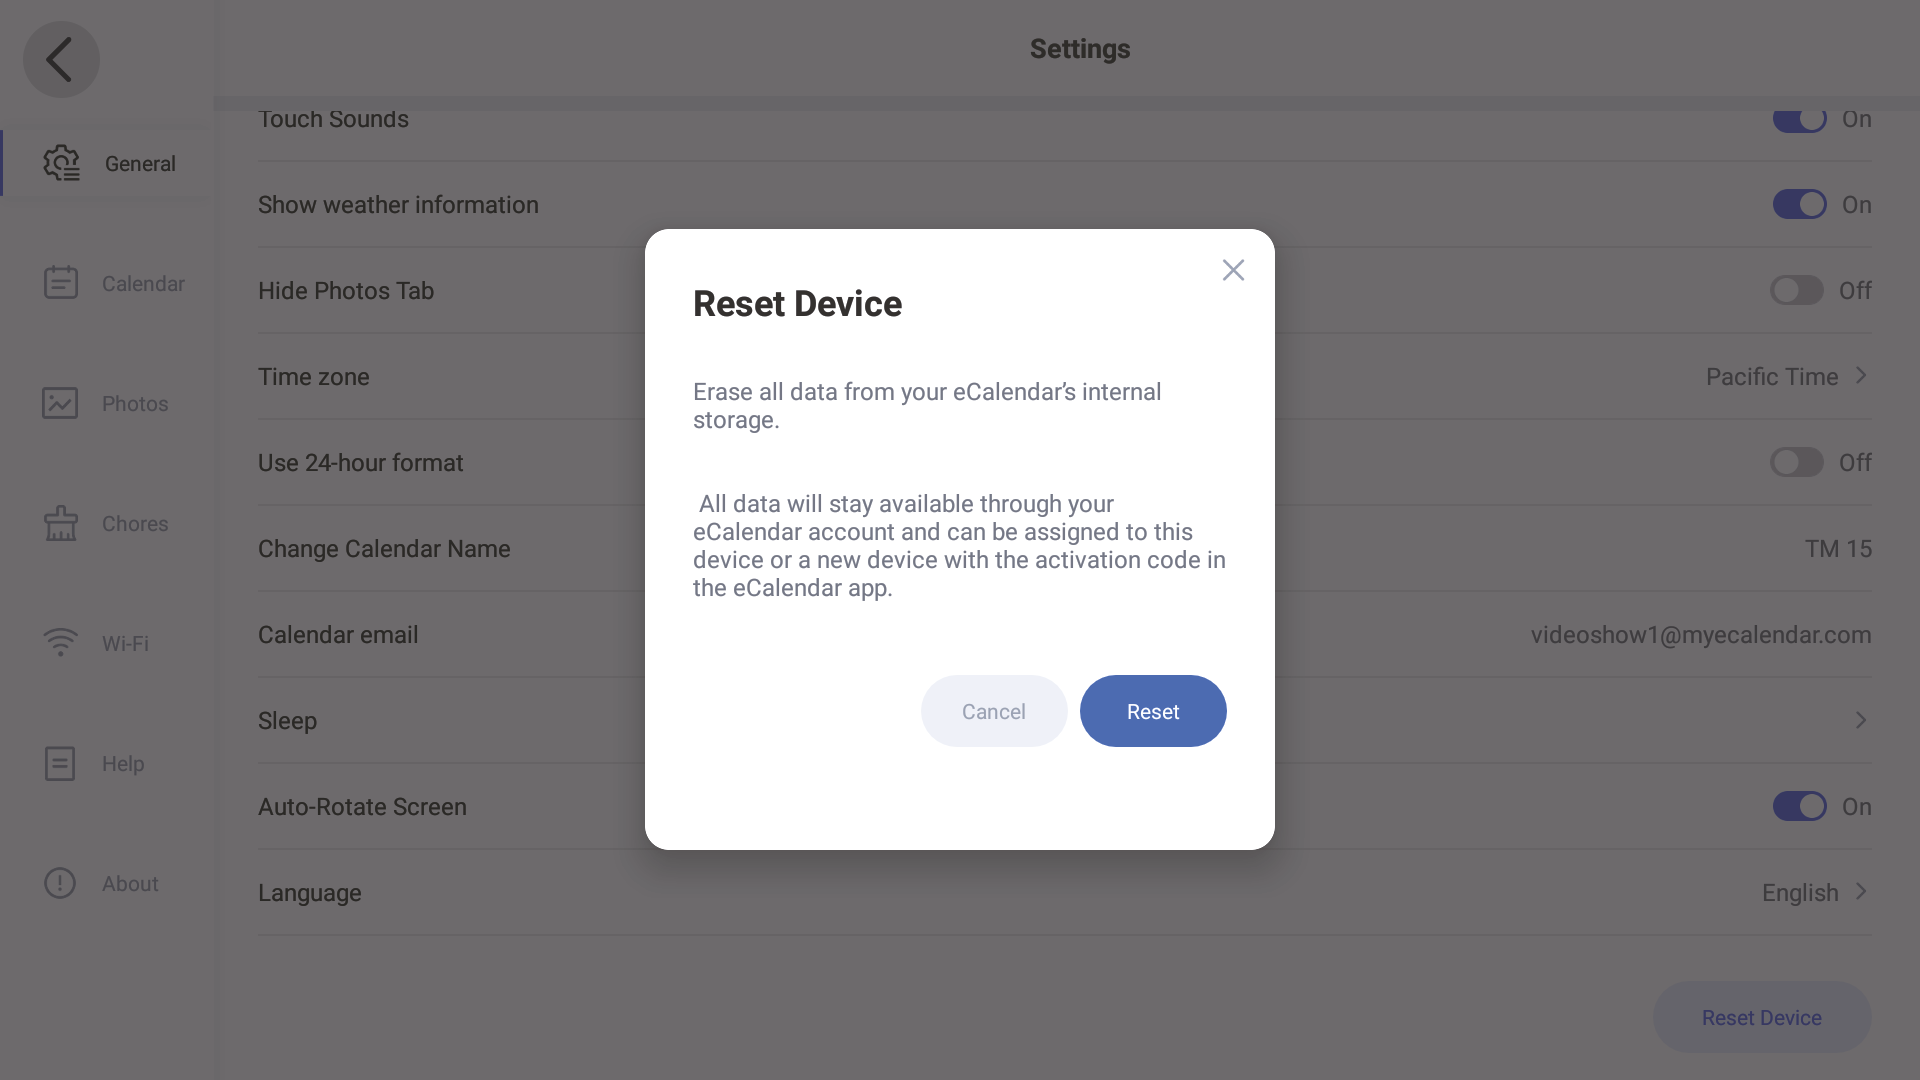
- Tap the "Reset Device" icon to clear all data on the device.
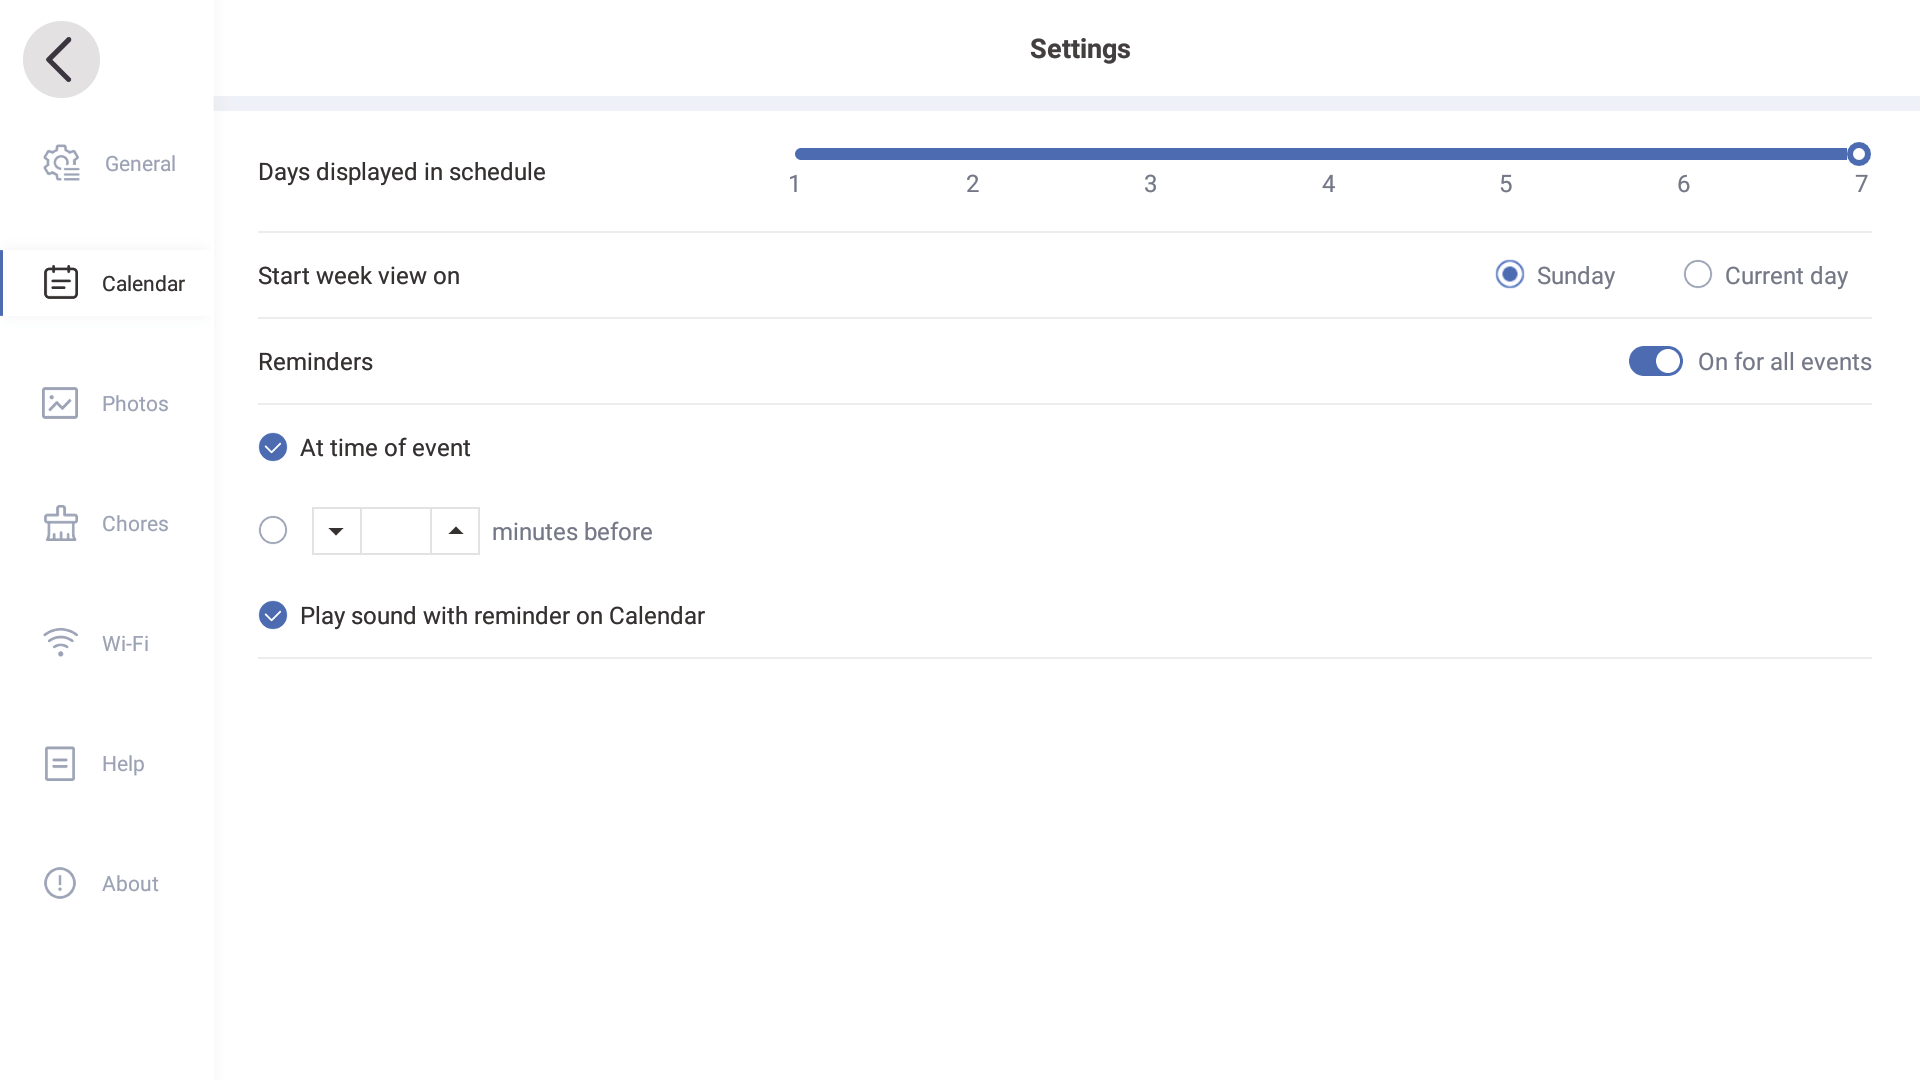
Settings -> Calendar -> Reminder
Reminders
You can enable reminders on your eCalendar to alert you about upcoming events.
(Tip: The reminder sound plays only once, but the reminder pop-up will remain displayed on the screen until dismissed. If previous reminder pop-ups are not dismissed, new ones will stack and display together on the screen.)
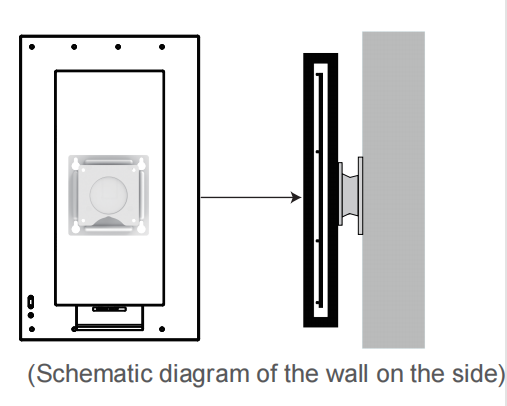
7. Installation Instruction
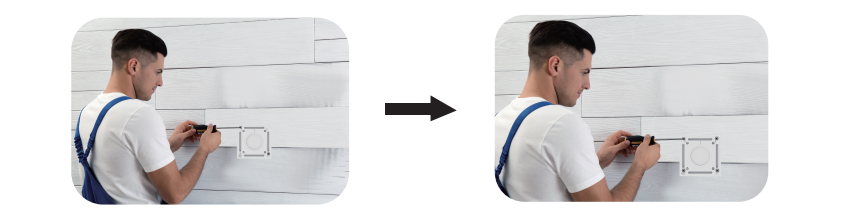
7.1 Position and drill in the screws
- Choose the wall surface to hang the product.
- Place the bracket on the wall to be drilled and align the large curved screw hole position of the bracket (outermost four hole positions) to determine the drilling position.
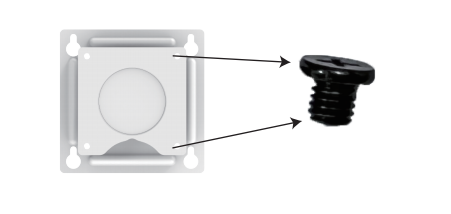
- Secure the four holes with black screws (as shown above), insert the white nail bar (as shown above) into the four drilled holes, and then insert the four black screws.
NOTE: The four screws should not be completely buried in the holes, leave some room for the bracket to hang.


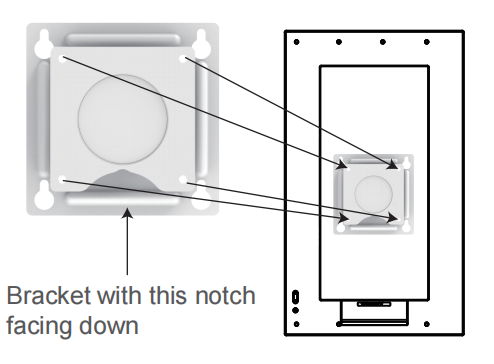
7.2 Lock the bracket with the digital calendar
- Plug in the digital calendar
- Place the side of the bracket with the groove facing downwards, then align the four small round screw holes (the four holes inside) on the bracket with the four holes on the digital calendar.
- Lock the holes aligned in step two one by one with short screws.

7.3 Hang the digital calendar
Hang the digital calendar on the wall by aligning the large curved screw holes (four outermost holes) with the four black screws on the wall.
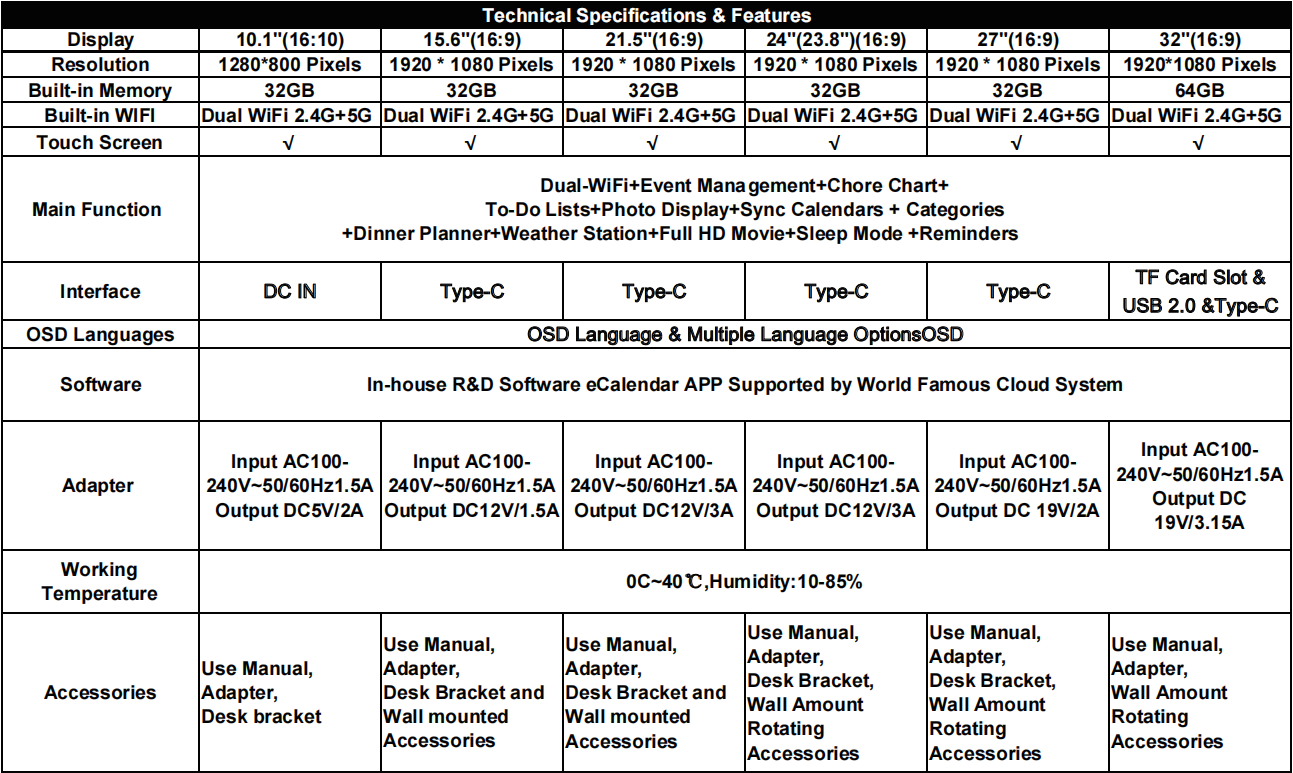
8. Technical Specifications & Features
9. Warranty & Contact Us
Warranty
Our warranty is 12 months from the date of purchase.
This warranty becomes invalid if the factory-supplied serial number or "warranty void" sticker has been removed or altered on the product.
This warranty does not cover:
- Appearance damage or artificial damage.
- Accident, misuse, abuse, negligence or modification of any part of the product
- Damage due to improper operation or maintenance, connection to improper equipment or attempted repair by anyone else, not from us.
Contact Us
For any inquiries and after-sales service requirements, or product user experience feedback, please feel free to contact us.
Visit: https://www.ecalendar.com
Email: support@myecalendar.com
Call: +1(833) 998 9991
Service Time: 9:00 AM - 6:00 PM Eastern Time (ET) USA
10. Troubleshooting Guide
If you come across problems when using the digital calendar, consult the suggested solutions below, and the corresponding sections of this manual. If you need additional assistance, please contact technical support.
1. Device fails to power on
- Check the power connection: Make sure the device is properly connected to the power adapter, the plug is firmly inserted, and the outlet is powered.
- Restart the device: hold down the power button to restart the device.
2. Unable to connect to Wi-Fi
- Check network status: Make sure the router is working properly and connected to the Internet.
- Verify Wi-Fi Password: Ensure that you have entered the correct password.
- Restart your device and router: Try restarting your electronic calendar and router.
- Check the Wi-Fi band: The device may only support 2.4GHz or 5GHz, make sure the router band is compatible.
3. Screen touch is not responsive
- Clean the screen: Wipe the screen with a clean, soft cloth to avoid stains affecting the touch.
- Restart the device: Hold down the power button to shut down the device and restart it.
- Check for system updates: Make sure the system is updated to the latest version.
4. Unable to sync calendar or photos
- Check network connection: Make sure the device is networked and maintains a stable network connection.
- Checking the login account: Ensure that the device login account is the same as the synchronization account.
- Update the app: Make sure you are using the latest version of the app.
- Regrant synchronization permissions: Check and regrant synchronization permissions in Settings.
5. The device responds slowly or stutters
- Clean up storage: Delete unnecessary files, photos, or apps.
- Restart the device: Shut down and restart the device to release the memory.
- Check applications: Close unused background applications.
- Restore Factory Settings (only if necessary): After backing up the data, select Restore factory Settings in the Settings.
6. Unable to play audio or video
- Check volume Settings: Confirm that the device is not silent and adjust the volume to an appropriate level.
- Check file format: Ensure that the file format is compatible with the format supported by the device.
- Restart the device: Try to shut down and restart the device.
7. The device automatically shuts down or restarts
- Check the temperature of the device: The device may automatically shut down due to overheat. Avoid use in high temperature environment.
- Check the battery status: If the battery is low, the device may shut down automatically. Please charge it in time.
- Update system firmware: Ensure that the device is running the latest system version.
8. Unable to update the system or application
- Check the network connection: Ensure that the device is properly connected to the network.
- Check storage space: Ensure that the device has sufficient storage space for updates.
- Try manual update: Go to Setting check and perform system or application updates.
9. Can the video sound be adjusted?
Yes, it can be adjusted.
- Tap Setting on the bottom of left.
- Click General.
- Slide to adjust the sound on Media and Reminder Volume.
10. Can the eCalendar be displayed in both landscape and portrait orientation?
The eCalendar supports both landscape and portrait orientation display.
11. Can the brightness of the eCalendar be adjusted?
Yes. You can adjust it yourself according to your needs. Just turn off the automatic brightness, then you can slide to adjust the brightness.
12. Can you sync one calendar or multiple calendars?
Yes. You can sync as many calendars as you want.
13. Does the eCalendar have a subscription fee?
Yes. But you can choose to pay or not to pay extra depending on your needs.
14. Can I use the eCalendar without connecting to WiFi?
Yes, but the eCalendar cannot be edited, only previewed. If you want to operate an electronic calendar, it needs to be connected to the Internet.
15. How to enable 2-Way-Sync?
- If you've already synced your Google calendar and would like to enable Two-Way Sync, we recommend first deleting the calendar before attempting to sync it again.
- All of your existing Google calendar events will be imported when you re-sync, so there's no risk of losing those events.
- While syncing your Google calendar, you'll need to select "Two-Way Sync" during set up or newly created events will not appear on your Google calendar.
16. How can I ensure that Google Calendar events sync to eCalendar?
- Android Devices: After creating a new event in the Google Calendar app, you need to manually tap the "Refresh" button in the sidebar to sync the event to the eCalendar.
- iPhone: Events created on an iPhone are automatically synced to the eCalendar without additional actions.
17. What types of Google Calendar events are supported by eCalendar?
eCalendar supports syncing event types only. Task types are not supported.
18. How long does it take to sync events from third-party calendars to eCalendar?
- Google Calendar and Outlook: Syncing takes approximately 1 minute.
- iCloud, Yahoo, and Cozi: Syncing takes between 1 and 30 minutes, with a minimum of 1 minute and a maximum of 30 minutes.
19. Can the digital calendar be used on battery power?
No, the digital calendar is powered by a direct AC adapter and does not have a built-in battery.
11. Firmware Upgrade Instructions
Mobile App Update
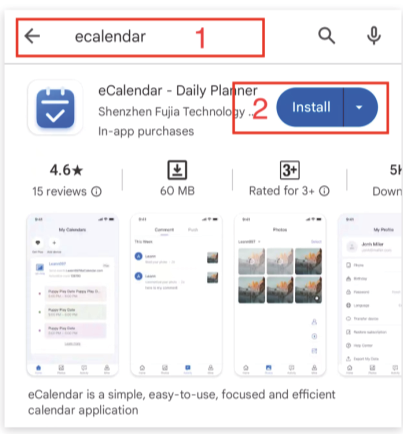
(1) Android OS: Download the latest version from Google Play
- ① Open Google Play on your phone.
- ② Tap the search bar, enter "eCalendar" and search.
- ③ Tap the Download or Update button.
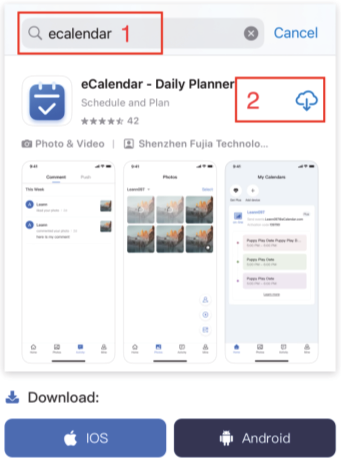
(2) iOS OS: Download the latest version from Apple Store
- ① Open Apple Store on your phone.
- ② Tap the search bar, enter "eCalendar" and search.
- ③ Tap the Download or Update button.
Screenshots for Upgrade Steps:
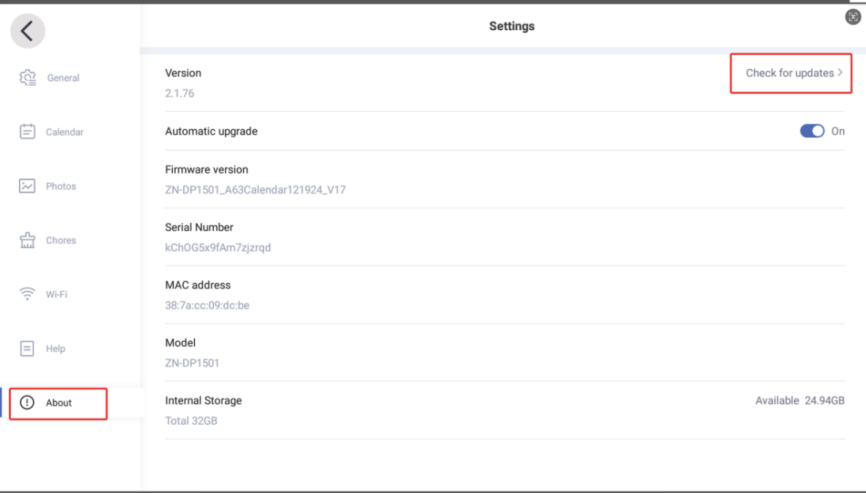
Please check the calendar version number on the about page of the settings.
(1) Version 1.4.13 and Earlier: Manually click check for updates to upgrade as follow:
(2) Version 1.4.13 and Later and version 2.1.45 Earlier:
Upgrade pop-up reminder display when restart, click Upgrade immediately to update, if you click x, Upgrade pop-up reminder display again when restart.

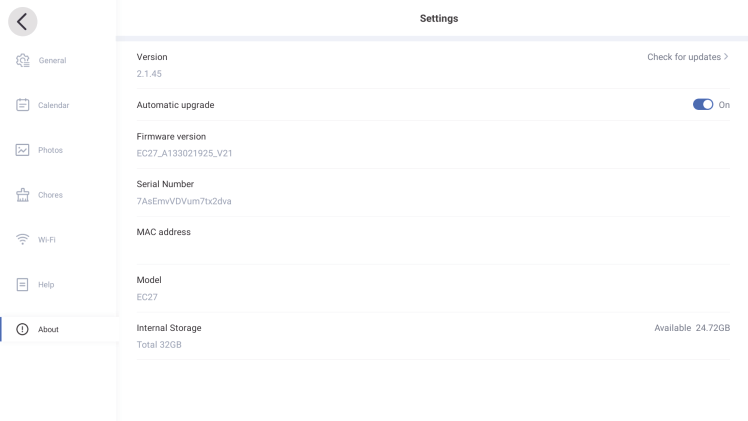
(3) Version 2.1.45 and Later:
① An upgrade pop-up prompt will appear (you can choose to turn off or automatically upgrade) if you turn off the Automatic upgrade button in About page.

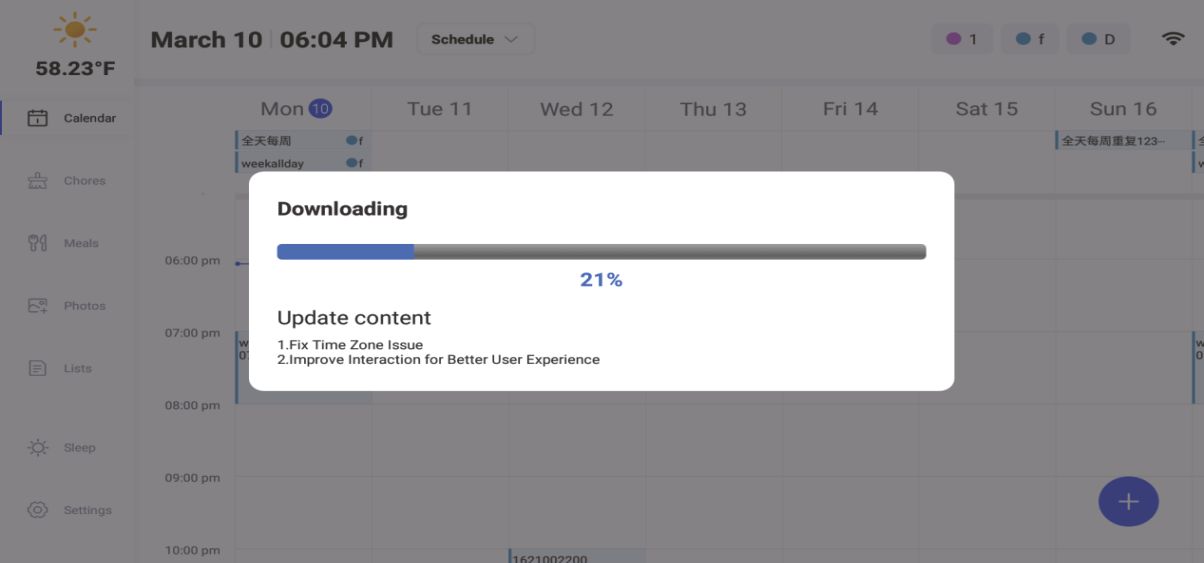
② When you enable the Automatic upgrade button in version 2.1.45 and Later, the device will auto upgrade when turned on the device. Pop-up window showing downloading upgrade.
eCalendar
Privacy & Terms
Privacy Policy
GDPR Compliance Statement
Contact Us
Email:support@myecalendar.com


Download on the App Store


Get it on Google Play
深圳市福驾科技有限公司 @ 版权所有All rights reserved.粤ICP备18097481号-5